A Little Tipsy

Creative Tips & Ideas

  • home
  • About Me
  • the tipsy top
  • press
  • projects
  • contact me
[print_thumbnail_slider]

Lightning McQueen Shirt

February 13, 2013 By Michelle Barneck 1 Comment

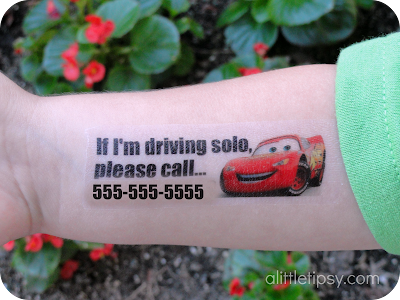
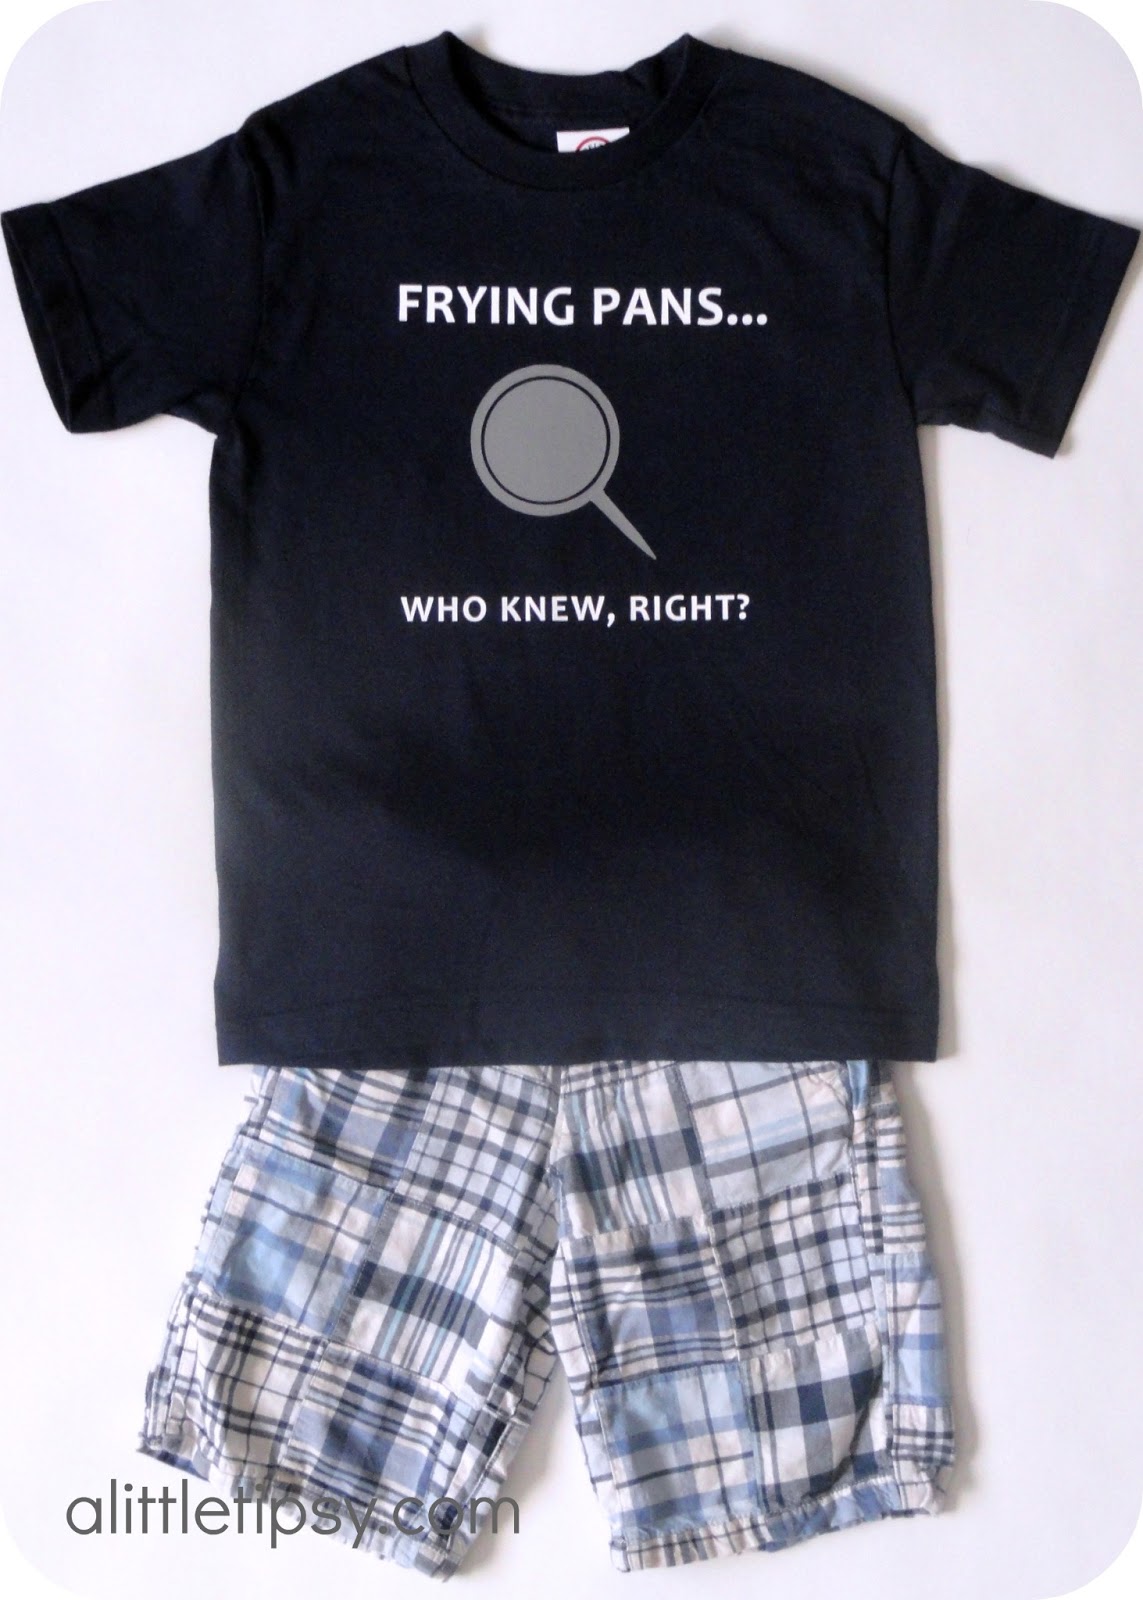
Here’s an easy boy version of a Disney themed (without being overly themey) shirt. Lightning McQueen is cool especially to be donning at Cars Land, but that doesn’t mean you have to go cartoony with your kiddos wardrobe.
I got the original idea for the car track t-shirt here, but they used a large toy truck which in our house did not have tread on their tires. Pull out the good ol’ ab wheel. It was feeling neglected anyway. Also, they used fabric paint which I’ve found fades quickly and feels rough so I chose to use fabric ink.
SUPPLIES:

  • Shirt 
  • Cardboard
  • Black Fabric Ink 
  • Ab Wheel 
  • Craft Cutting Machine 
  • Stencil Vinyl or Contact Paper 
  • Foam Brush
DIRECTIONS:
1. Wash shirt to remove any shrinkage. Place cardboard in shirt so the ink won’t seep through to the other side.
2. Spread the wheels on the ab wheel to the width you would like your tire tracks. Brush them all around with fabric ink. Practice on some cardboard or paper. Roll on your shirt to make the tracks. Let it dry.
3. In your craft cutter software, find a lightning bolt image and add the number 95 on top of it to look like Lightning McQueen. 
4. Cut the image in to stencil vinyl or contact paper to use as a stencil. Be sure to leave 1-2 inches around the entire image when cutting it out so it gives you some wiggle room while inking. Weed the vinyl taking out the pieces where you want the ink to go. (I tried weeding a couple of ways to see how I would like it.)
5. Transfer the image to the arm of your shirt using transfer tape. Remove the tape and make sure all edges of the stencil are secure.
6. Using a foam brush dab the stencil with fabric ink. Let it dry, then remove the stencil.
7. Follow directions on your ink to heat set the ink. Most likely you will be ironing.
I love how the ink is so versatile. It gives the tracks an authentic grungy look, but then with a stencil it looks screen printed. So cool!
I love how the Lightning McQueen shirt turned out! Want to know the really sad part? We lost them before the kids even got to wear them! They were in the bottom of the stroller to wear when it got cold, but got lost somewhere between Disneyland and the hotel. Sad right? My little guy would have looked so cute in this outfit.

Guess I’ll have to make more.
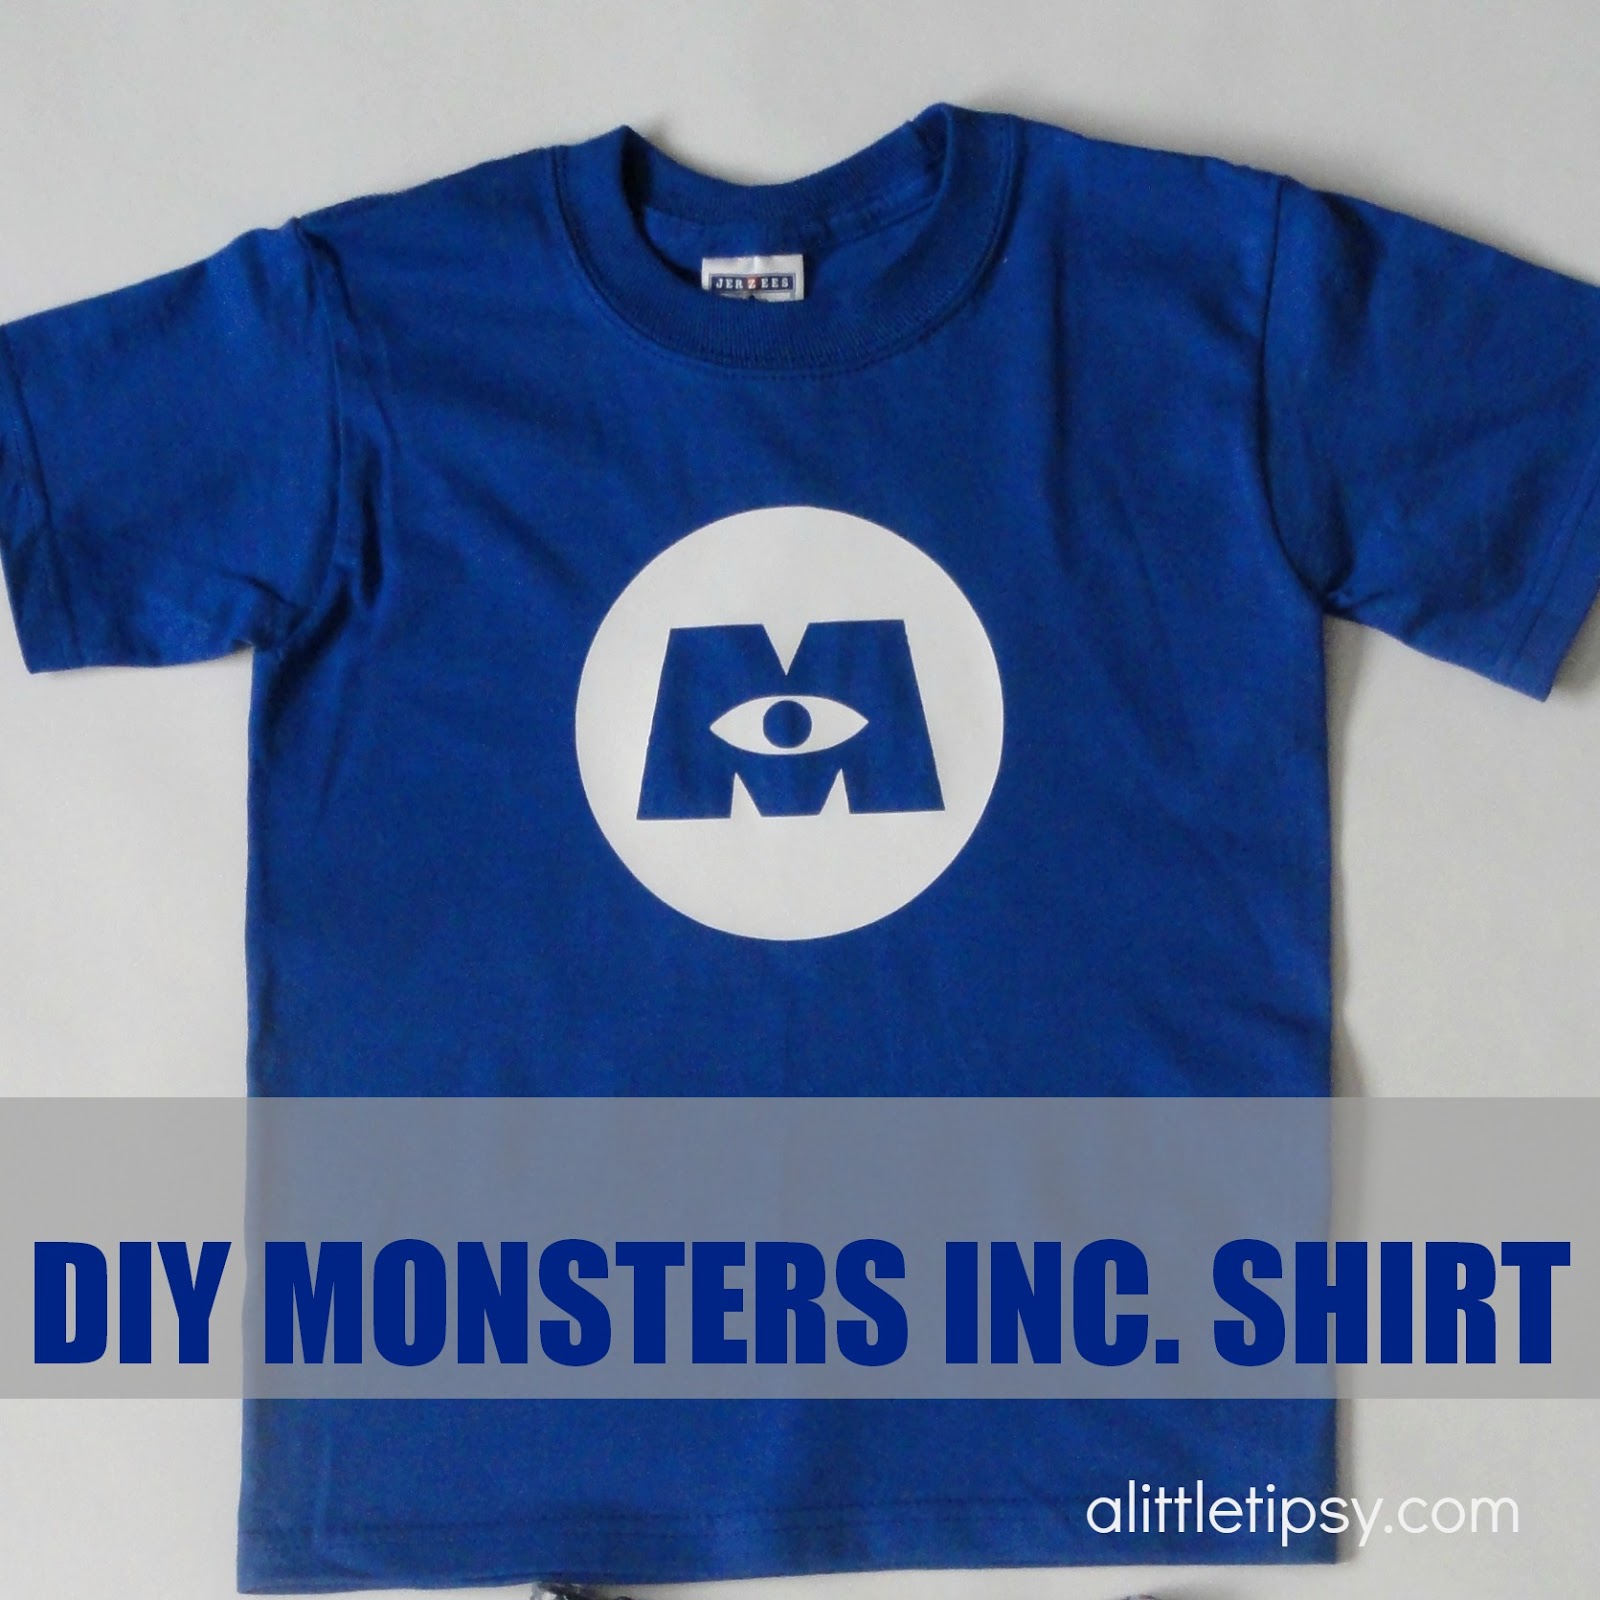
If you like this project, you may also like our Monsters Inc. Shirt, 20 Tips for Disneyland with Kids, or Flynn Rider Wanted Poster Shirt.
We have decided to truncate our feed to help protect against stolen content. I apologize for any inconvenience. Please love us anyway. 🙂

DIY Monsters Inc. Shirt

February 6, 2013 By Michelle Barneck 1 Comment

Anyone else excited for Monsters University to come out in June?! We are HUGE Monsters Inc. fans and we can’t wait for the sequel. We’ve got a fun way to count down the days. How about making a Monsters Inc. shirt? It is so, so easy!
SUPPLIES:
  • t-shirt
  • white heat transfer
  • silhouette (or some patience to trace and cut on your own with an xacto)

Just find an image of the Monsters Inc. logo online and follow this tutorial to trace and cut the heat transfer. My little dude showed his off at California Adventureland. I’d say he fit in quite nicely.
We went on the Monsters Inc. ride like three times in a row, but why not? We were dressed for the occasion. I only wish we had run in to Mike or Sulley during our trip.
If you like this project you may also like our Mike Wazowski Shirt, Tangled Frying Pan Shirt, or Disney Countdown.
We have decided to truncate our feed to help protect against stolen content. I apologize for any inconvenience. Please love us anyway. 🙂

20 Tips for Disneyland with Kids

January 23, 2013 By Michelle Barneck 12 Comments

Post may contain affiliate links.

  1. Pack with entire outfits in gallon ziploc bags from shirts to socks and accessories. Then kids can pull out the bag for that day and get dressed. No searching around for rogue items.
  2. Take or rent a stroller. We take our double stroller so both kids can ride. They will get tired and you won’t want to carry them (plus it will carry all your stuff). Mark it well with a tag with your name and phone number. All the strollers start to look the same after a while.
  3. Bring ponchos (2 for $1 at Dollar Tree) and flip flops for the water rides. People may look at you funny, but better for wearing a poncho than for walking like a sore cowboy because your shorts are chafing and your shoes squelch.
  4. Have a large back pack to hold everything (jackets, camera, hats, sunscreen, etc) that will still fit in the bottom of the stroller. You will have to take it out and fold the stroller if you take a shuttle to Disney. I can’t tell you how many things we lost on the way to and from Disney that we would still have had we put everything in the bag.
  5. Carry an extra pair of clothes and a sweatshirt for the kids. They are bound to spill, get wet, or get sick and you’ll be glad you had them. As for the jacket, it can be chilly in the morning and evening or after water rides.
  6. Put everyone’s shoes in the same place every time you walk in to the hotel. That way you won’t have to search them out every time you want to leave.
  7. Pack anything non-perishable in to the stroller the night before. That way you can get to the park bright and early without feeling in a rush. The first hour the park is sooo much less busy and you can get a lot of rides in before the crowds.
  8. Staying in a hotel with a good breakfast is a huge plus. You never have to discuss where to go or have an extra stop before the park. You can even eat in your pjs.
  9. Each morning take a picture so you can remember what everyone is wearing, but also if someone gets lost you have a picture of exactly what they look like that day.
  10. Make personalized Disney tattoos with your phone number on them for little kids to wear in case they get lost. Teach them how to spot a cast member to help them.
  11. Take food for snacks in a soft sided cooler. Snacks throughout the day will keep kiddos in good spirits and stretch time between stops for meals. You may also consider packing young kids lunch. If they are picky it will save you from wasting an expensive park meal.
  12. Take a water bottle for each person with their name on it. Staying hydrated is imperative and take a refillable bottle will save you a ton of money. Bottles with straws are great because it is proven that kids drink more from a straw. Attach them all to the stroller with a big carabiner.
  13. Go home for a nap in the afternoon. It will save you from fighting with cranky kids when everyone is overtired. It’s also great to have a break from the sun in the heat of the day.
  14. Use the parent pass system! If you have kids that are too small for the ride, you can send one parent through and get a parent pass from a cast member for the other parent to come back through the fastpass, wheelchair line or sometimes even the exit (depending on the ride). It’s nice because at most of the big rides there is a little kid ride nearby so it is easy to take the toddler on a ride then swap.
  15. Make use of the fastpass system. Collect your fastpass near the attraction using your park ticket at the kiosk. The fast pass will give you a time to return and go through an expedited line to experience the ride. Another Fastpass ticket can be obtained either at the start of the current Fastpass ticket’s return time or after two hours, whichever is earlier.
  16. Use the parent passes and fast passes in conjunction in your favor if you have an odd number with a small child. Example: We had two parents and five year old and a two year old. We paid for three tickets which means we could get three fast passes. So we would send one parent with our older child using two fast passes, but getting a parent pass. Then, the second parent would go with our oldest using the parent pass. Then, one parent would go again with our oldest using the last fastpass. Just tell the cast member you only have one and ask if you can take your child anyway. They always let us. This meant my son got to ride four times for the wait time of one!
  17. If you have impatient toddlers in tow and don’t mind splitting up have one parent take the kids on a short ride while the other parent waits in a long ride or character greeting line. The kids get more rides and you get less frustration. The cast members don’t mind you joining your family in line as long as someone is saving your spot.
  18. Along the same lines take little activities, books, phone apps, or toys to entertain kids in long lines. Think up silly Disney trivia questions or make up stories.
  19. At the ice cream shop on main street you can save money by buying the biggest waffle cone and purchasing additional ice creamless sugar cones. Then just scoop some from the huge cone in to the little ones for small kids.
  20. If you want your child chosen for Jedi training in tomorrowland get there about 20-30 minutes early and once they start choosing have your kid jump up and down and clearly shout to the Jedi master what they are wearing. When we were there they chose by describing what they are wearing over the mic.

My bonus tip is book through Get Away Today. They always have deals like free nights, free parking etc. and as a bonus if you give them the code Tipsy14 and you’ll get $10 off! That’ll buy you a turkey leg at Disneyland people!

Wednesdays through January

Tangled Frying Pan Shirt

January 16, 2013 By Michelle Barneck 9 Comments

This was by far the most popular shirt I have ever made. Everyone at Disneyland raved about it: the guests, hotel staff, cast members, and of course Rapunzel herself. We got comment after comment on it and it was one of the easiest shirts to make.
All you need is a t-shirt, white and gray heat transfer, and a silhouette.

I used the frying pan image here and using the silhouette software altered it slightly to have more space between the circles and then used the Candara font bolded for the words.
If you have never used heat transfer just follow the directions on the box or there is a great tutorial here on Homemade by Jill. Just basically remember to reverse the image before you cut. Also, I found the gray heat transfer to be a bit more temperamental than the white so it may take a little longer to adhere with your iron.
It really was so simple and I still love it every time he puts it on.

 Even Rapunzel herself thought the frying pan shirt was great and we couldn’t help but take a picture with her pan hung on the wall.

Wednesdays through January
If you liked this shirt you might also like our Flynn Rider Wanted Poster shirt, Mickey Shirt, or Make a Disney Water Bottle.

P.S. Don’t forget to sign up for free Tipsy updates via RSS or email.

We have decided to truncate our feed to help protect against stolen content. I apologize for any inconvenience. Please love us anyway. 🙂
« Previous Page
Next Page »

  • Bloglovin
  • Facebook
  • Google+
  • Instagram
  • Pinterest
  • RSS
  • Twitter

Hi there! I'm Michelle. Mother of three little boys and one little princess. Welcome to A Little Tipsy, a place for exploring creativity and sharing inspiration.

Follow on Bloglovin


Visit Michelle Barneck {A Little Tipsy}'s profile on Pinterest.

Tutorials by Category


15 Family Reunion Games

Family Reunion Games Collage

15 Sprinkle Party Ideas

Sprinkle Birthday Party
Creative Commons License

© Copyright 2014 A Little Tipsy · Site Designed by The Fairy Blogmother · Web Hosting by RFE Hosting

This website uses cookies to improve your experience. We'll assume you're ok with this, but you can opt-out if you wish.Accept Read More
Privacy & Cookies Policy