A Little Tipsy

Creative Tips & Ideas

  • home
  • About Me
  • the tipsy top
  • press
  • projects
  • contact me
[print_thumbnail_slider]

Archives for February 2013

Shamrock Banner

February 22, 2013 By Michelle Barneck 8 Comments

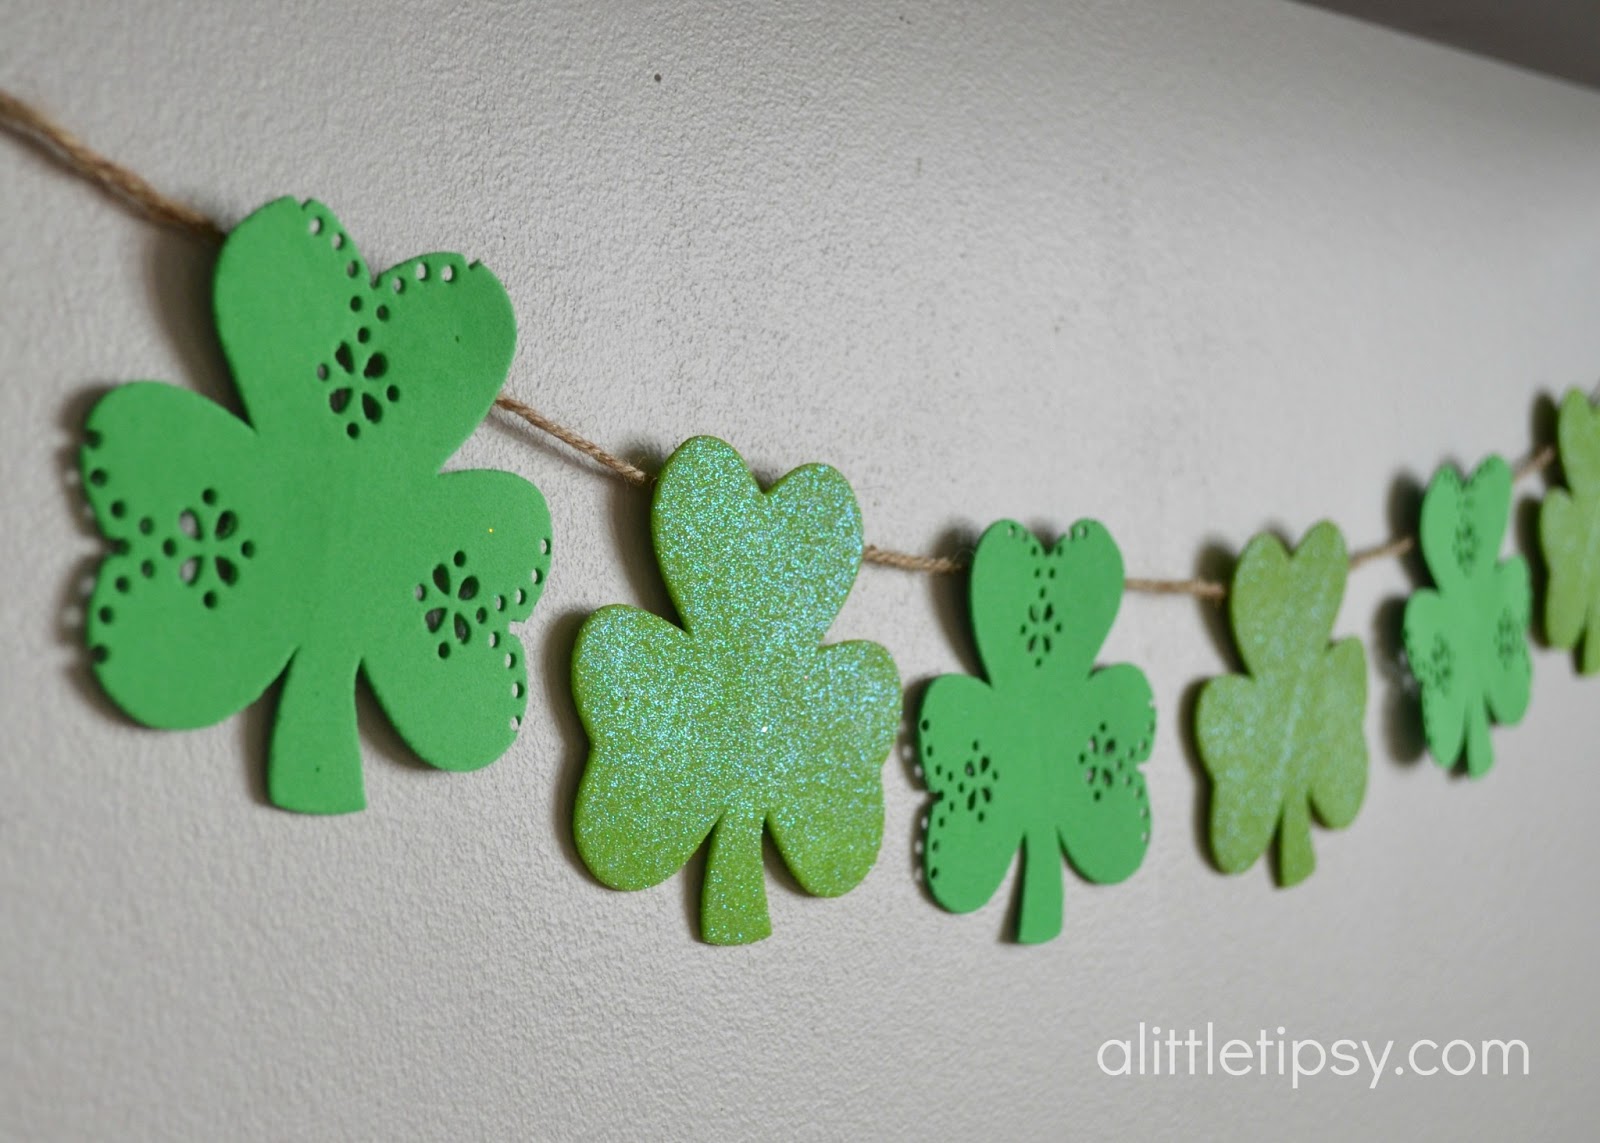
Valentine’s is past and I’m feeling the green! I love St. Patrick’s Day not only because it is super fun decor, but because my ancestor had a part in it. No really, he was the guy who kidnapped St. Patrick. Pretty funny right? Anyhow I wanted a project I could do with my 5 year old and this shamrock banner was just the ticket. It has got to be the easiest St. Patrick Craft ever! You need only four supplies.
washi tape candle, Oh so Lucky printable

SUPPLIES:
  • Foam Shamrocks (Dollar Tree)
  • Martha Stewart Crafts Circle Edge Punch Starter Set(Michaels, Jo-Anns, Amazon)
  • Glue Dots
  • Jute
The Martha Stewart Circle Edge Punch is meant to make decorative circles like these, which are awesome and versatile which I love. But, I like to think out of the box and see what else it might be able to do besides paper circles.
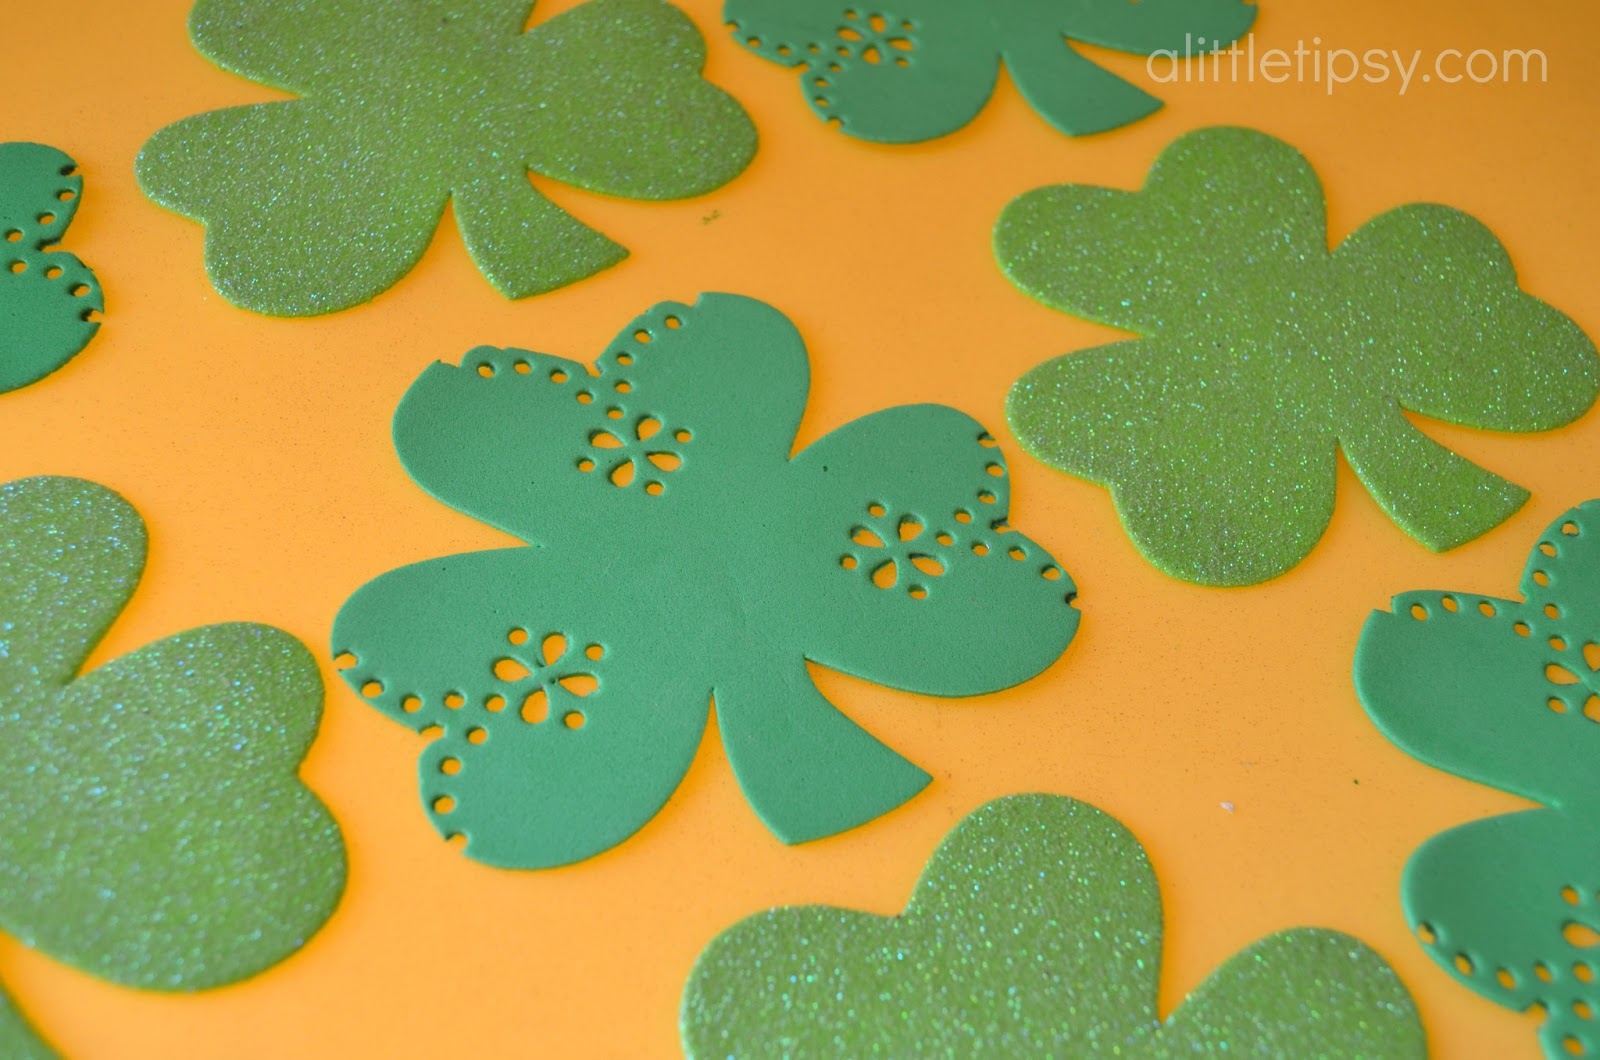
I discovered that the punch lines up perfectly with the curves of the shamrock. Tra la, what a day!
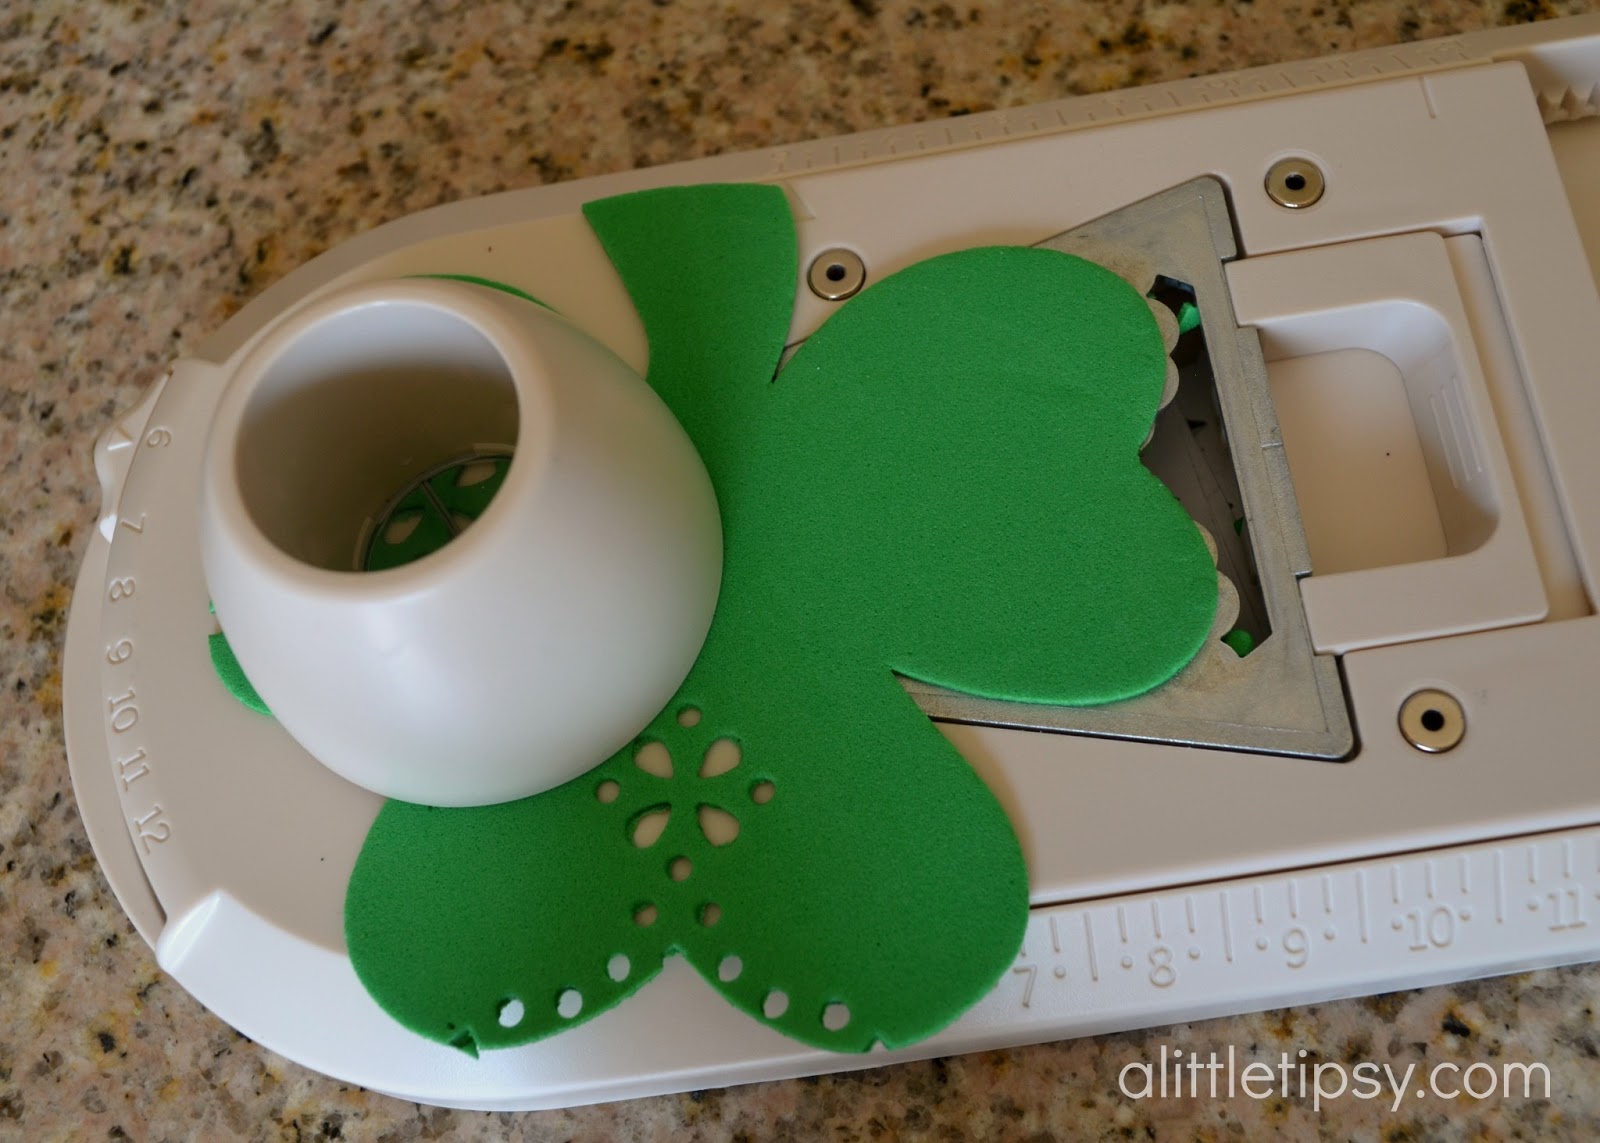
I got to work punching the edges of all the plain green shamrocks. I figured the glitter ones were enough on their own.
I adore how the punch adds a more Celtic feel!
Next just get your glue dots and glue the shamrocks to the jute alternating punched and glittered. Be sure to use a few glue dots, or the shamrocks will fall off.

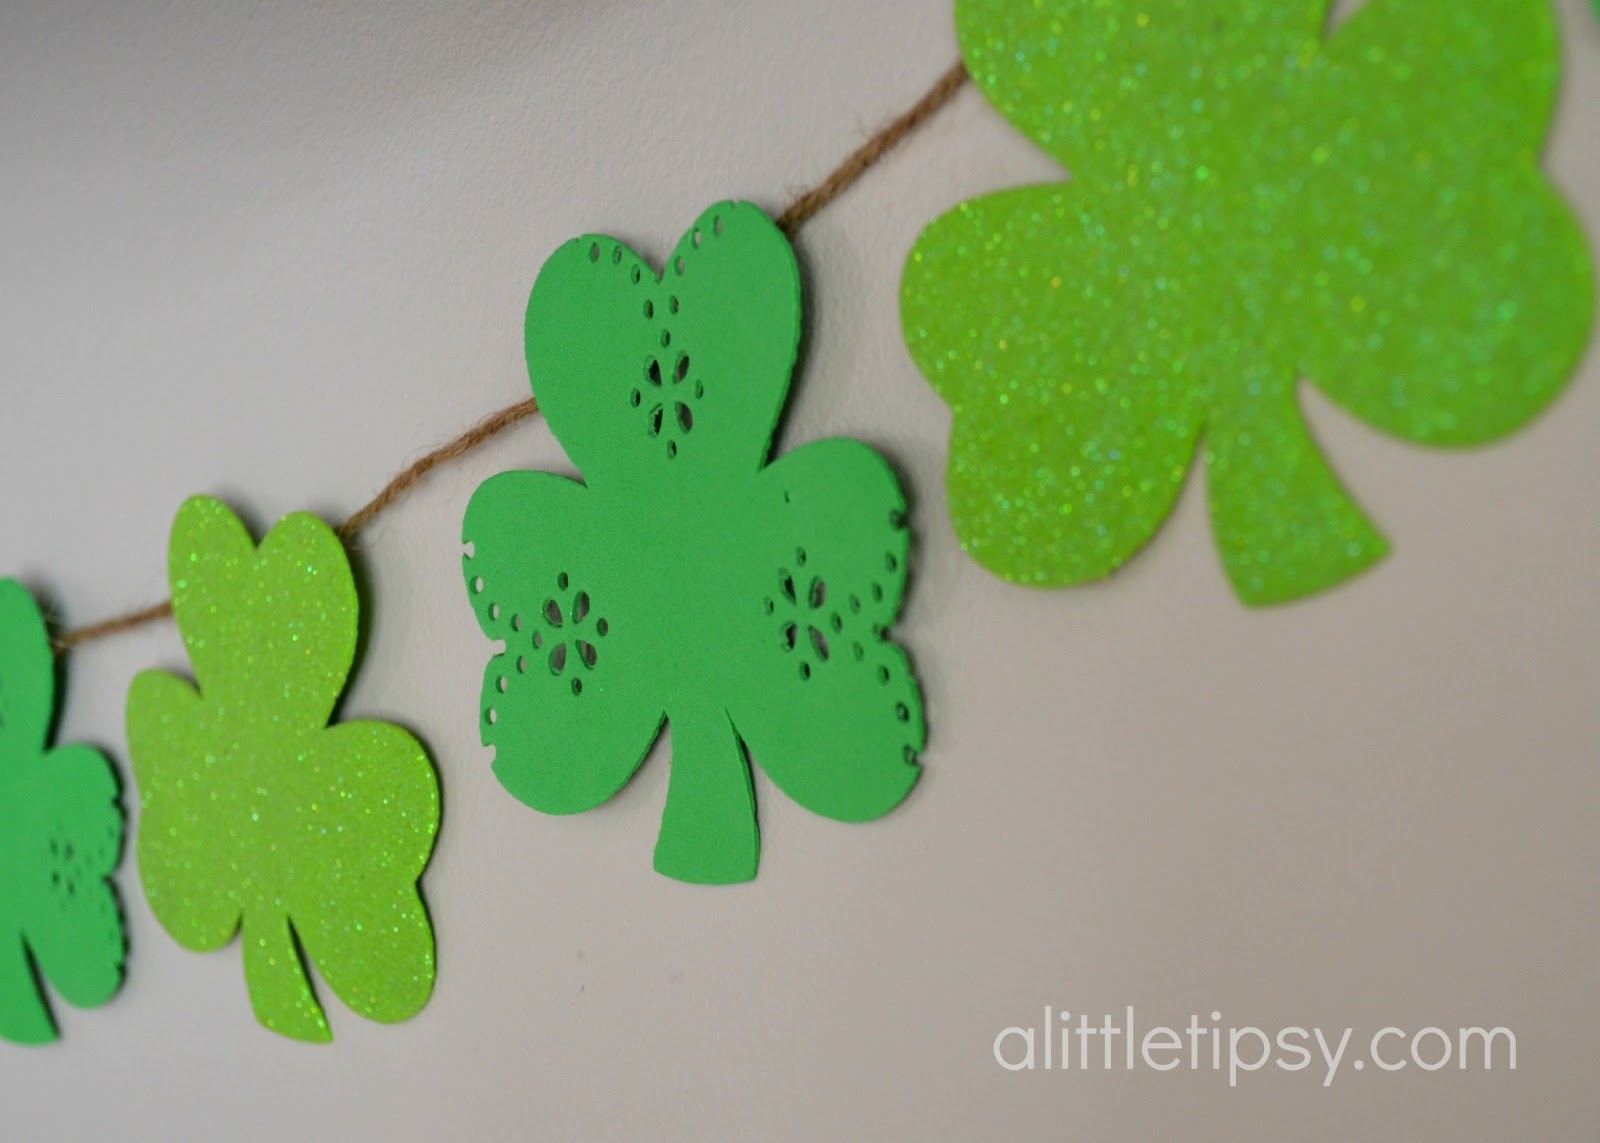
Now just find the perfect place to hang it, below a shelf, on a mantle, on a railing, you decide.
Disclosure: I was provided product from Martha Stewart Crafts as a part of 12 Months of Martha. All opinions and ideas are my own. I am an Amazon affiliate.
We have decided to truncate our feed to help protect against stolen content. I apologize for any inconvenience. Please love us anyway. 🙂

These are a Few of My Favorite Things Giveaway

February 20, 2013 By Michelle Barneck 179 Comments

It’s my blogiversary today and you know what that means?! Time to party. Since you won’t all fit in my house to celebrate for real, let’s celebrate with a humongo door prize! I thought it would be so awesome if I could gather together all of my favorite brand and share with you my favorite craft and decor products that I use here all the time. And guess what, they all came through big time. 

Anyone interested in over $600 in prizes?


So now you’ve seen a glimpse of the prizes, let me tell you why each one made my favorites list!

It’s no secret that I am a big fan of Cricut. I love my Cricut Mini and also love the people over there. Seriously awesome people. The CEO even hugged me at the end of an event I helped them plan?! So of course they had to be included at the top of my list of my favorite things. They, like me, want you to have a Cricut Mini ($130 value) too! It cuts cardstock like a charm, but I have also used it for magnet material, fabric, heat transfer and of course vinyl. Oh, and did you know their image downloads start at just 99 cents? Rock on Cricut!

I love easy and that is what Elmer’s and X-acto make many of my projects. I have used their products to bring countless ideas (3ft present, puppet playhouse, etc) to fruition. When they asked what my favorite things were to include in the prize package I listed like 10 things (no joke). Well, they ran with it and came up with a fabulous prize package worth $100 including: 
·         X-ACTO 12” X 12” Designer Series Self-Healing Mat
·         X-ACTO Designer Series Gripster Craft Knife
·         X-ACTO Designer Series Corner Rounder Punch
·         X-ACTO Designer Series Decorative Shapes Templates
·         X-ACTO Designer Series 8” Scissors
·         X-ACTO Designer Series 12” Rotary Paper Cutter
·         Elmer’s CraftBOND All Purpose Glue Stick
·         Elmer’s CraftBOND Permanent Dot Runner
·         Elmer’s CraftBOND Foam Mounting Tape
·         Elmer’s CraftBOND Glue Spots
·         Elmer’s Mini Bi-Fold Foam Board
·         Painters Sherbet Swirl
·         Painters Metallics


Rod Works is one of those places where you walk in and want to buy everything in the display. They have unique home decor to suit every taste and a walk through the store will give you so many ideas on how to group items or use pieces in different ways. You can see just a few of the items from my wish list above. They want to give you a good start on your wishlist so they are giving away TWO $50 gift cards!


My most recent favorite tool as seen used on my upholstered headboard are stencils and Cutting Edge Stencils has so many beautiful patterns! I love how you can get them BIG so it make large scale projects so much faster. With a little spray adhesive and their simple how-to videos you won’t believe how easy it is to get a crisp eye popping pattern! Don’t believe me? Try it for yourself. Cutting Edge is giving away TWO $50 gift certificates!


I was recently introduced to Catching Fireflies and love the whimsical and fun things they have to offer. From inspirational home decor to original gift ideas they have a great assortment to make even the pickiest smile. Some of my favorites are pictures above and they want you to choose your favorites with a $53 gift card!


Martha Stewart Crafts is no question one of my favorite brands. If I listed all the projects I have made with her paint, punches, glitter and brushes it would take up this whole post. I recently did a really fun glitter nail post which inspired this prize. I am so excited to be able to give away the Punch All Over Pattern Heartbeat and a 24 pack of glitter!


Pick Your Plum is not only one of my favorites because of the fun crafty and decor swag they have, but because it is a new great deal every day! I love popping in to see what the deal of the day is from burlap baskets to scarves to twine. It’s always exciting to see what the new deal is, but even more exciting to have the chance to win a $50 box of swag!

Raise your hand if you love washi tape? I finally got in on the trend just before Christmas and it is awesome. Such a fabulous way to add color and pattern to just about anything. So, the favorites I’ve found come from Downtown Tape and they are giving away 10 rolls of tape and 25 tags for you to fancy up. Awesomesauce!


So now that I’ve shared my favorites, 
who wants to win them?!


a Rafflecopter giveaway

We have decided to truncate our feed to help protect against stolen content. I apologize for any inconvenience. Please love us anyway. 🙂

Tie Party Games and Take Homes

February 18, 2013 By Michelle Barneck 2 Comments

I realized that I had never posted the second half of our Little Guy in a Tie Party. It’s been a while so please forgive any less than optimal pictures. I’ve learned a lot since then. I just thought the ideas were too fun not to share. We had a green, black and white theme to go along with all things tie.

We decorated the take home table with a Tiepography ABC print and a picture of our boys in ties. Each guest got to take home some disguise glasses and a little guy in a tie Oreo pop. They also got to fill a little tuxedo box with green, white and black candy from the candy buffet.

Since it was a one year old party with lots of family and friends we just had a few games, but we made them span all ages. We started with pin the tie on the birthday boy. Your local print shop can print a photo poster size in black and white using a blueprint printer for about $4.

We also had guests wear ties and had an ugly tie contest. Boy we had some doozies.
Then, all the guys lined up for a Tie tying contest. It was great to watch and cheer them on.
We closed out the party with Camouflage (green, brown, and white cake) cupcakes with Candy Tie Cupcake Toppers. I got a green candy writer melted it down and went to town drawing ties. Once they dry you just carefully place them on top of the frosted cupcakes. We served them with mint chip and vanilla ice cream.
Our birthday boy had no hesitation with his cupcake. Gotta love a good cake smash!
Want to see more of the party? We had a fun DIY photo booth, Tie Banner, and Green, Black and White themed luncheon (which contained a surprising amount of options). See the part 1 post of the Tie Party here.
Speaking of parties, we have a big one coming up on Wednesday! It is our blogiversary and we’re celebrating with an over $500 giveaway! Don’t miss it!
We have decided to truncate our feed to help protect against stolen content. I apologize for any inconvenience. Please love us anyway. 🙂

Lightning McQueen Shirt

February 13, 2013 By Michelle Barneck 1 Comment

Here’s an easy boy version of a Disney themed (without being overly themey) shirt. Lightning McQueen is cool especially to be donning at Cars Land, but that doesn’t mean you have to go cartoony with your kiddos wardrobe.
I got the original idea for the car track t-shirt here, but they used a large toy truck which in our house did not have tread on their tires. Pull out the good ol’ ab wheel. It was feeling neglected anyway. Also, they used fabric paint which I’ve found fades quickly and feels rough so I chose to use fabric ink.
SUPPLIES:

  • Shirt 
  • Cardboard
  • Black Fabric Ink 
  • Ab Wheel 
  • Craft Cutting Machine 
  • Stencil Vinyl or Contact Paper 
  • Foam Brush
DIRECTIONS:
1. Wash shirt to remove any shrinkage. Place cardboard in shirt so the ink won’t seep through to the other side.
2. Spread the wheels on the ab wheel to the width you would like your tire tracks. Brush them all around with fabric ink. Practice on some cardboard or paper. Roll on your shirt to make the tracks. Let it dry.
3. In your craft cutter software, find a lightning bolt image and add the number 95 on top of it to look like Lightning McQueen. 
4. Cut the image in to stencil vinyl or contact paper to use as a stencil. Be sure to leave 1-2 inches around the entire image when cutting it out so it gives you some wiggle room while inking. Weed the vinyl taking out the pieces where you want the ink to go. (I tried weeding a couple of ways to see how I would like it.)
5. Transfer the image to the arm of your shirt using transfer tape. Remove the tape and make sure all edges of the stencil are secure.
6. Using a foam brush dab the stencil with fabric ink. Let it dry, then remove the stencil.
7. Follow directions on your ink to heat set the ink. Most likely you will be ironing.
I love how the ink is so versatile. It gives the tracks an authentic grungy look, but then with a stencil it looks screen printed. So cool!
I love how the Lightning McQueen shirt turned out! Want to know the really sad part? We lost them before the kids even got to wear them! They were in the bottom of the stroller to wear when it got cold, but got lost somewhere between Disneyland and the hotel. Sad right? My little guy would have looked so cute in this outfit.

Guess I’ll have to make more.
If you like this project, you may also like our Monsters Inc. Shirt, 20 Tips for Disneyland with Kids, or Flynn Rider Wanted Poster Shirt.
We have decided to truncate our feed to help protect against stolen content. I apologize for any inconvenience. Please love us anyway. 🙂
« Previous Page
Next Page »

  • Bloglovin
  • Facebook
  • Google+
  • Instagram
  • Pinterest
  • RSS
  • Twitter

Hi there! I'm Michelle. Mother of three little boys and one little princess. Welcome to A Little Tipsy, a place for exploring creativity and sharing inspiration.

Follow on Bloglovin


Visit Michelle Barneck {A Little Tipsy}'s profile on Pinterest.

Tutorials by Category


15 Family Reunion Games

Family Reunion Games Collage

15 Sprinkle Party Ideas

Sprinkle Birthday Party
Creative Commons License

© Copyright 2014 A Little Tipsy · Site Designed by The Fairy Blogmother · Web Hosting by RFE Hosting

This website uses cookies to improve your experience. We'll assume you're ok with this, but you can opt-out if you wish.Accept Read More
Privacy & Cookies Policy