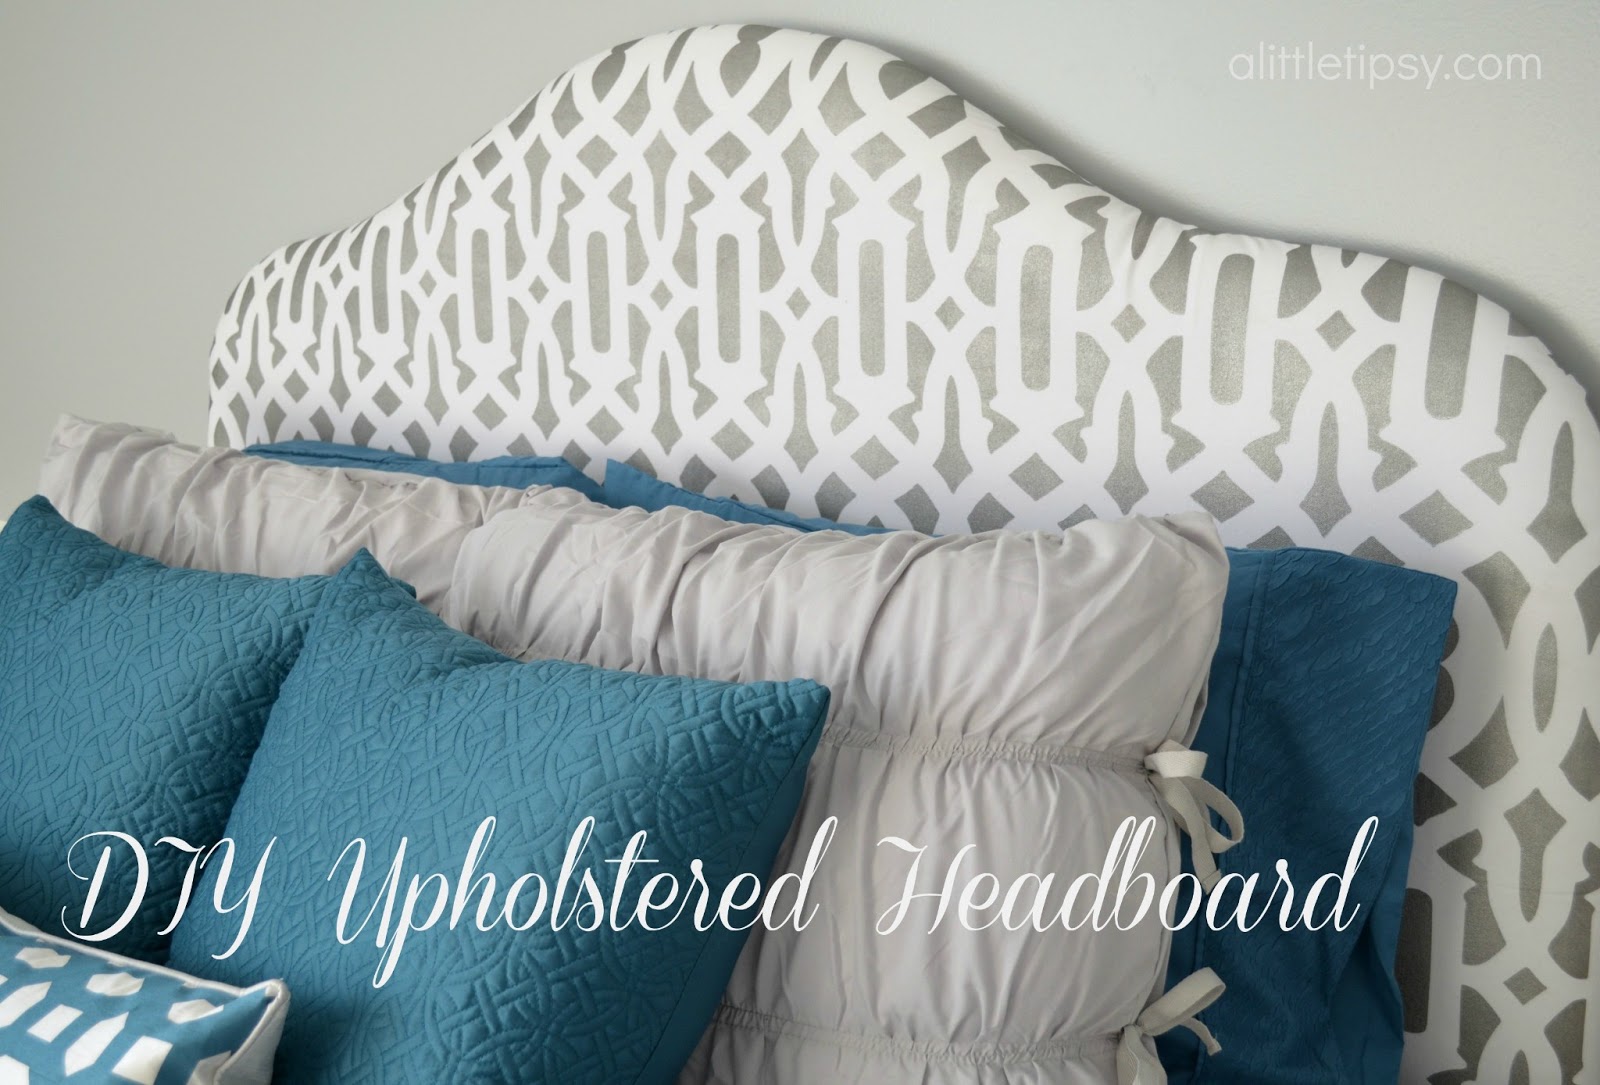
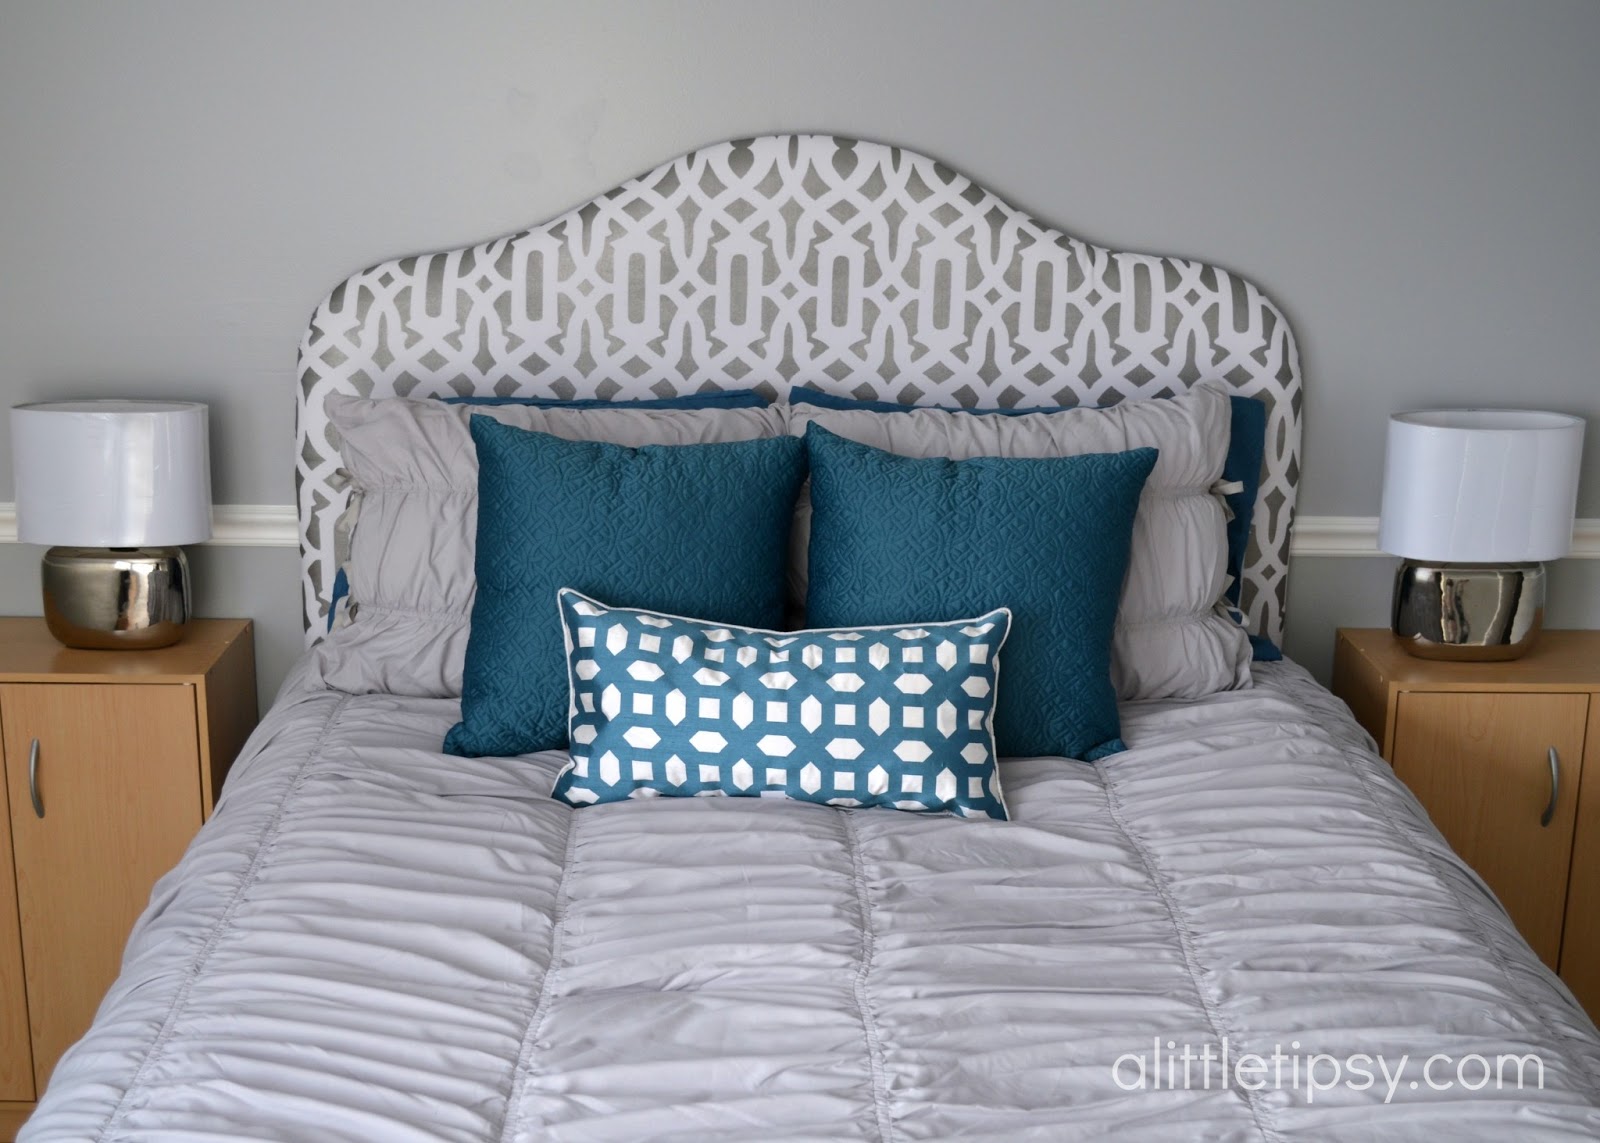
I am super excited to finally share with you the how-to on my DIY headboard. Being my first upholstery project I was unsure how it would turn out, but I am in love!! I am so proud that I built it and find it romantic that My husband and I finished it together. It is a constant reminder that we work well together!

SUPPLIES
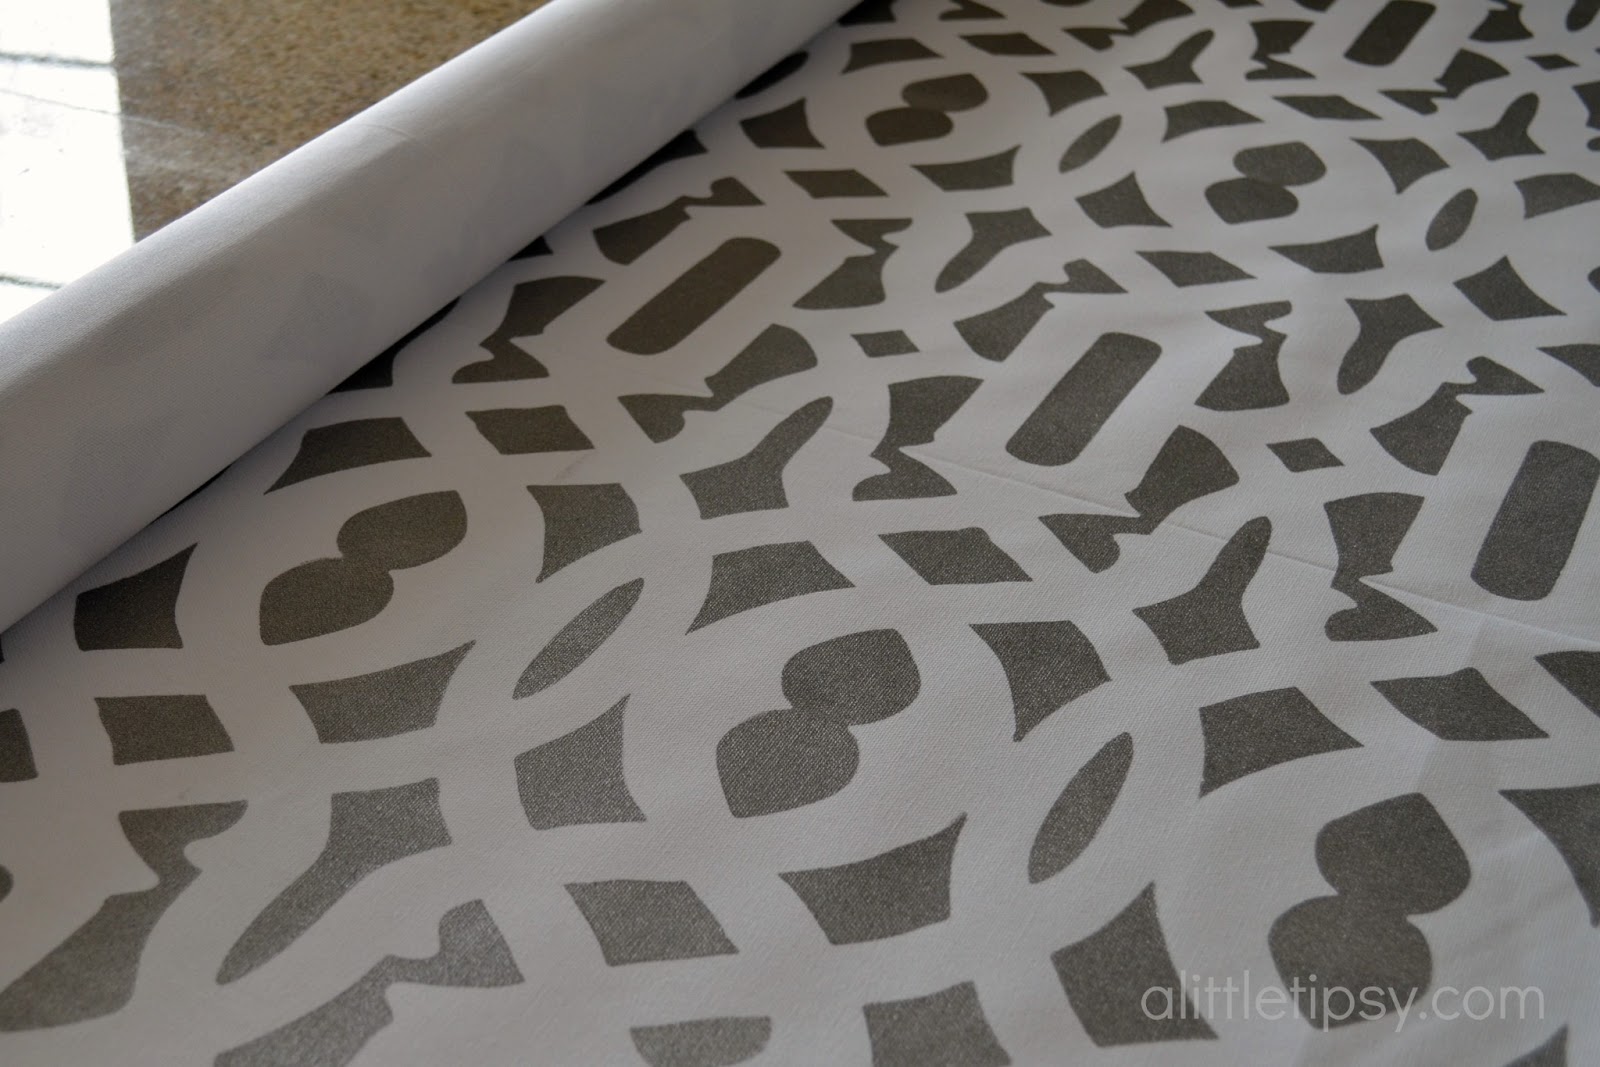
- White canvas aka duck cloth (2 1/3 yard x 56”)
- Iron
- Trellis allover stencil
- Repositionable Spray Adhesive
- Yudu fabric ink in silver and gunmetal bronze
- Foam roller
- Fabric scrap (to iron and heat set ink)
- Wrapping paper roll (optional for fabric storage purposes)
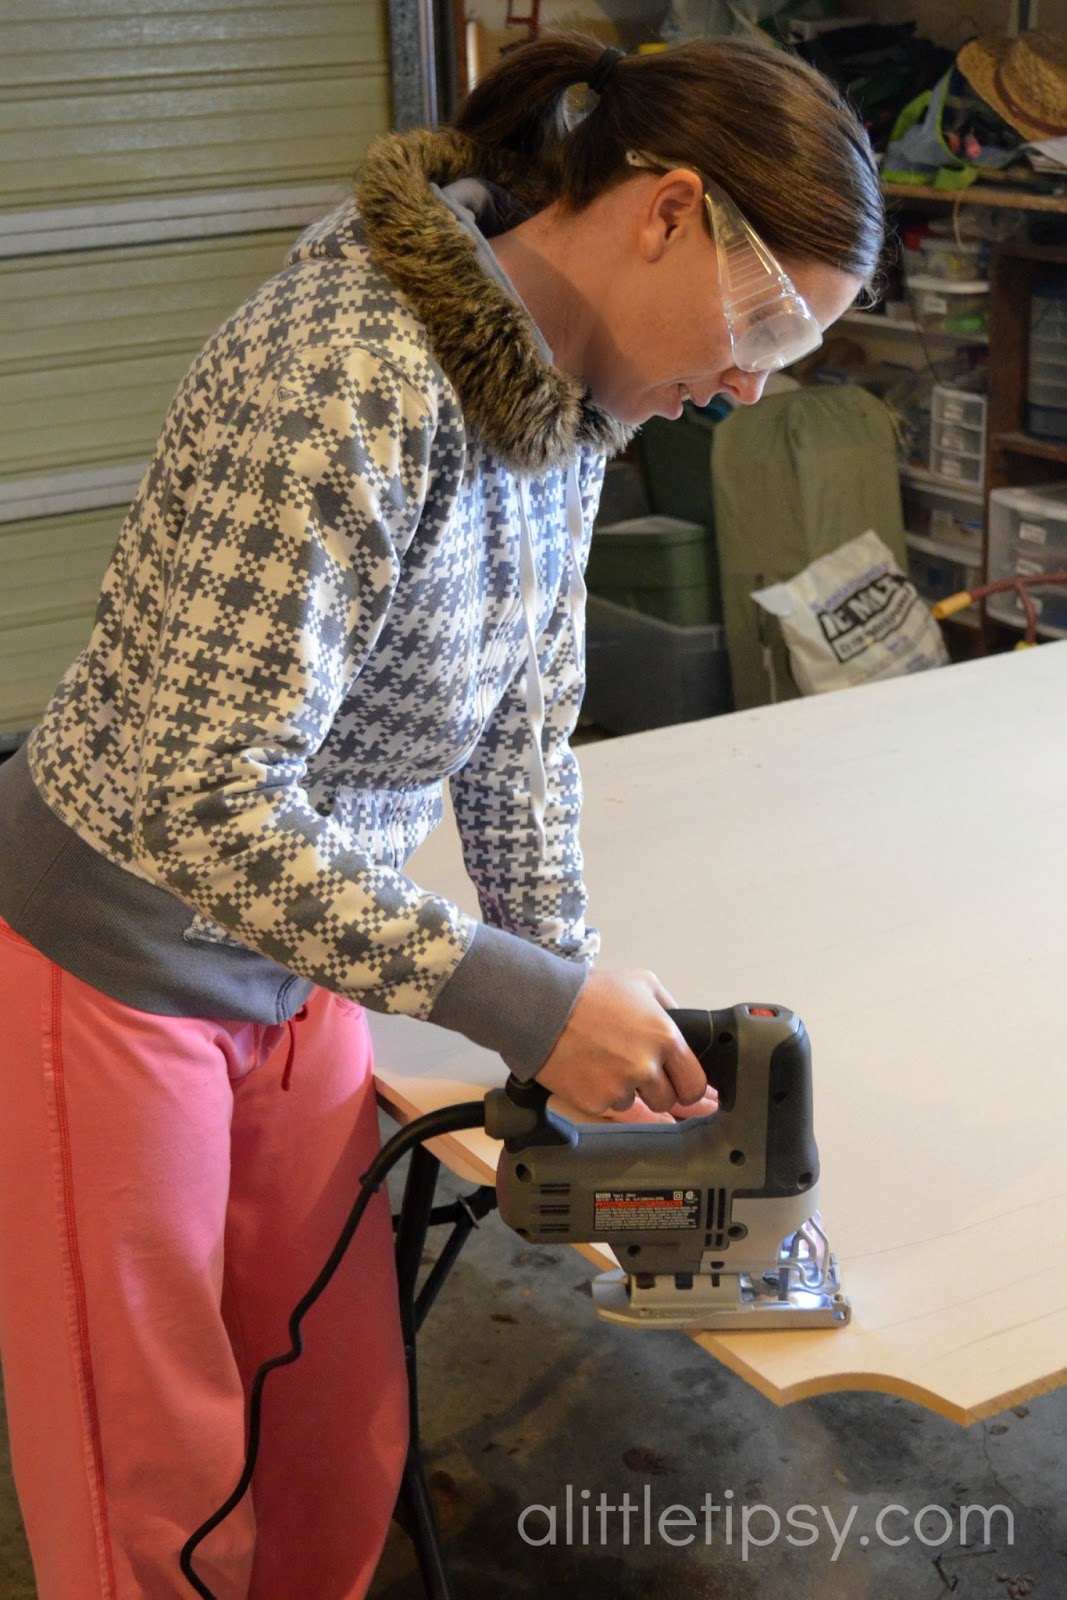
- 1/2” MDF (cut to size)
- Pencil and paper for making a pattern
- Jigsaw
- Two King Sized Foam Egg Crates
- Air compressor with air stapler
- Scissors
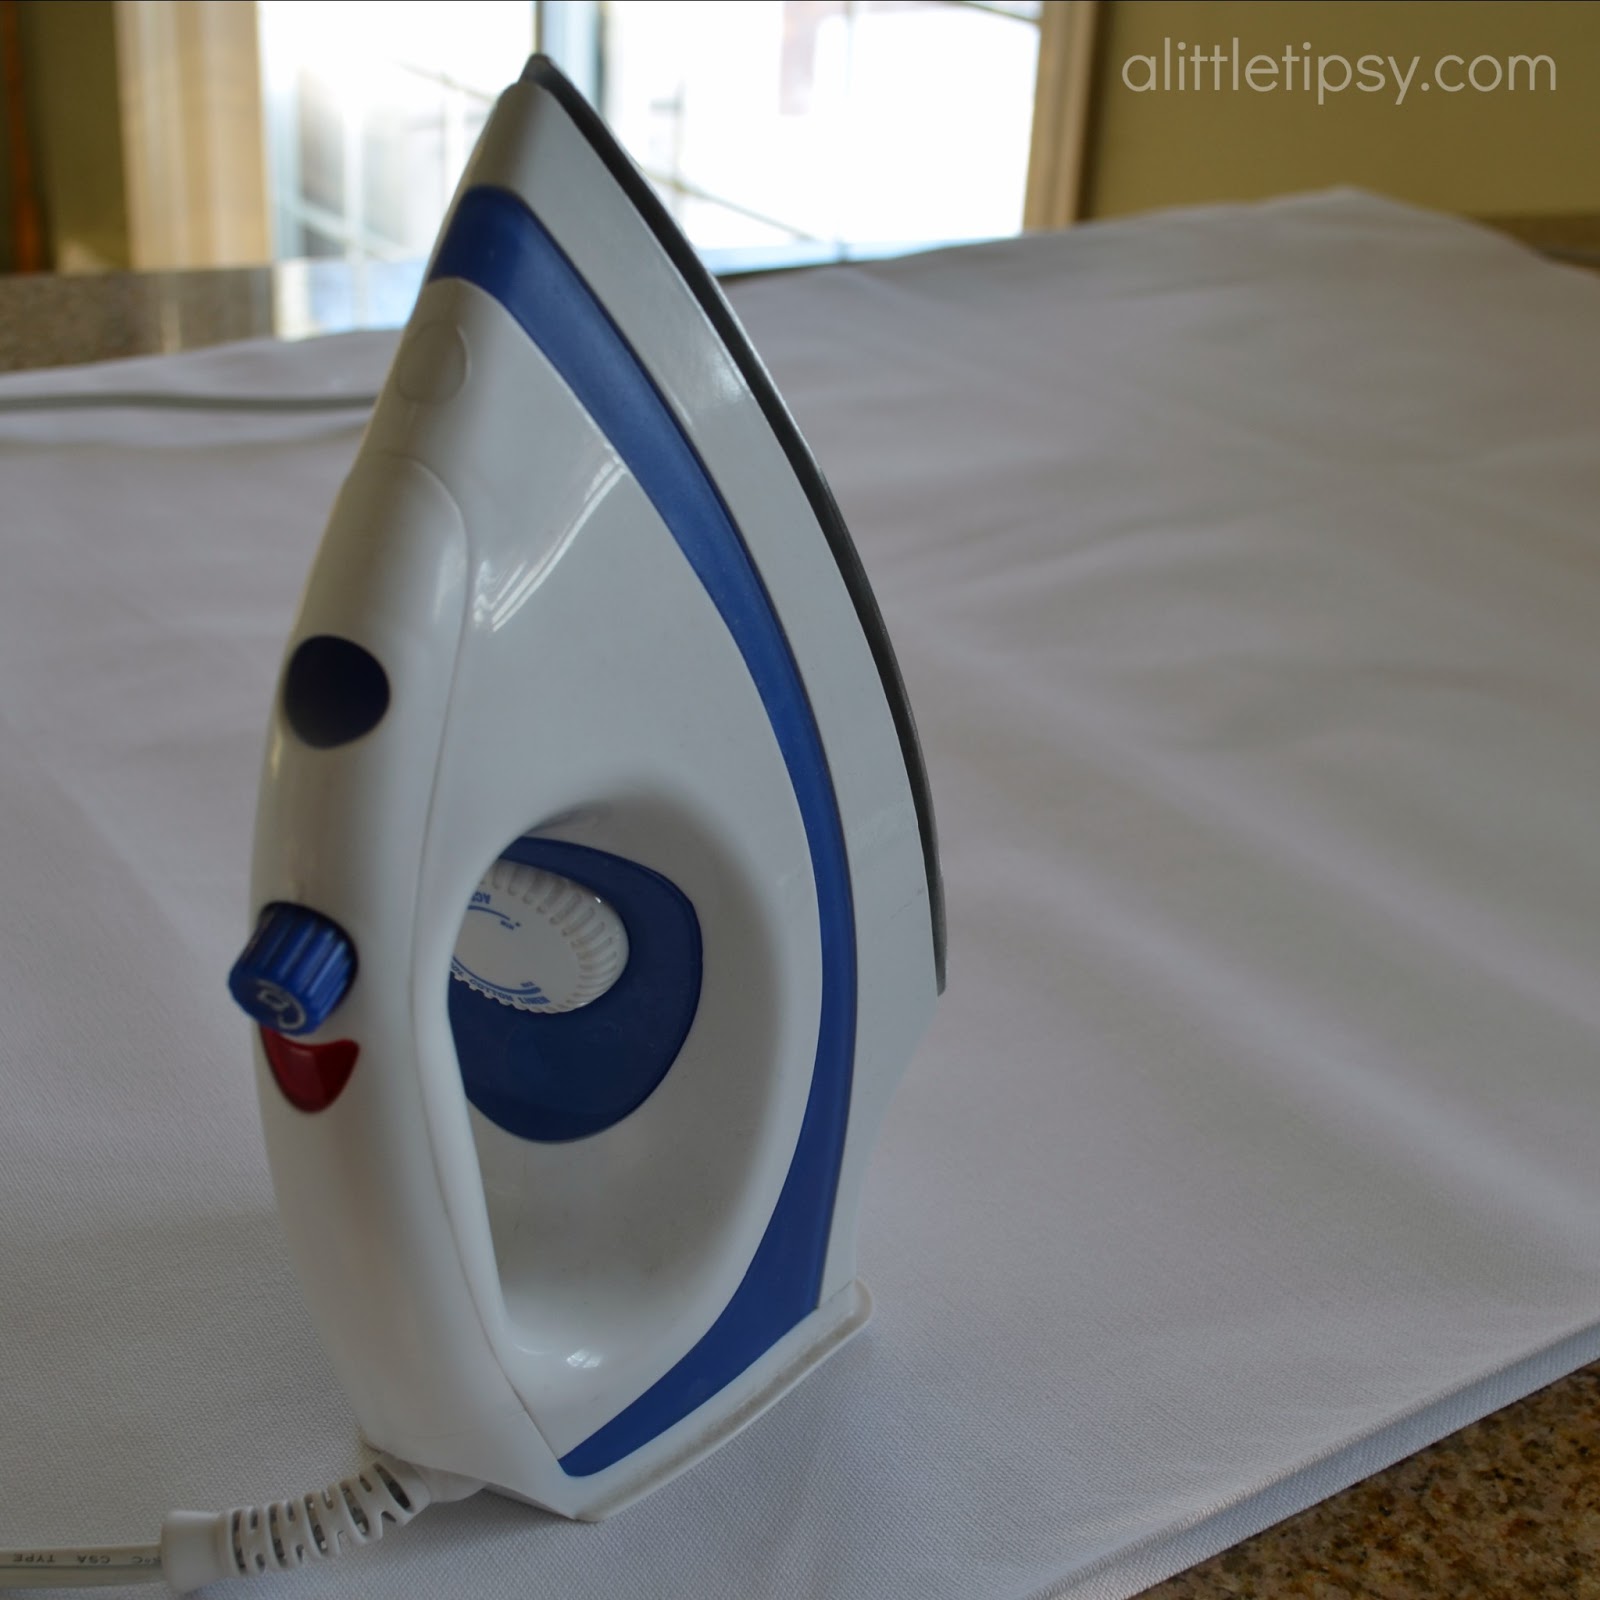
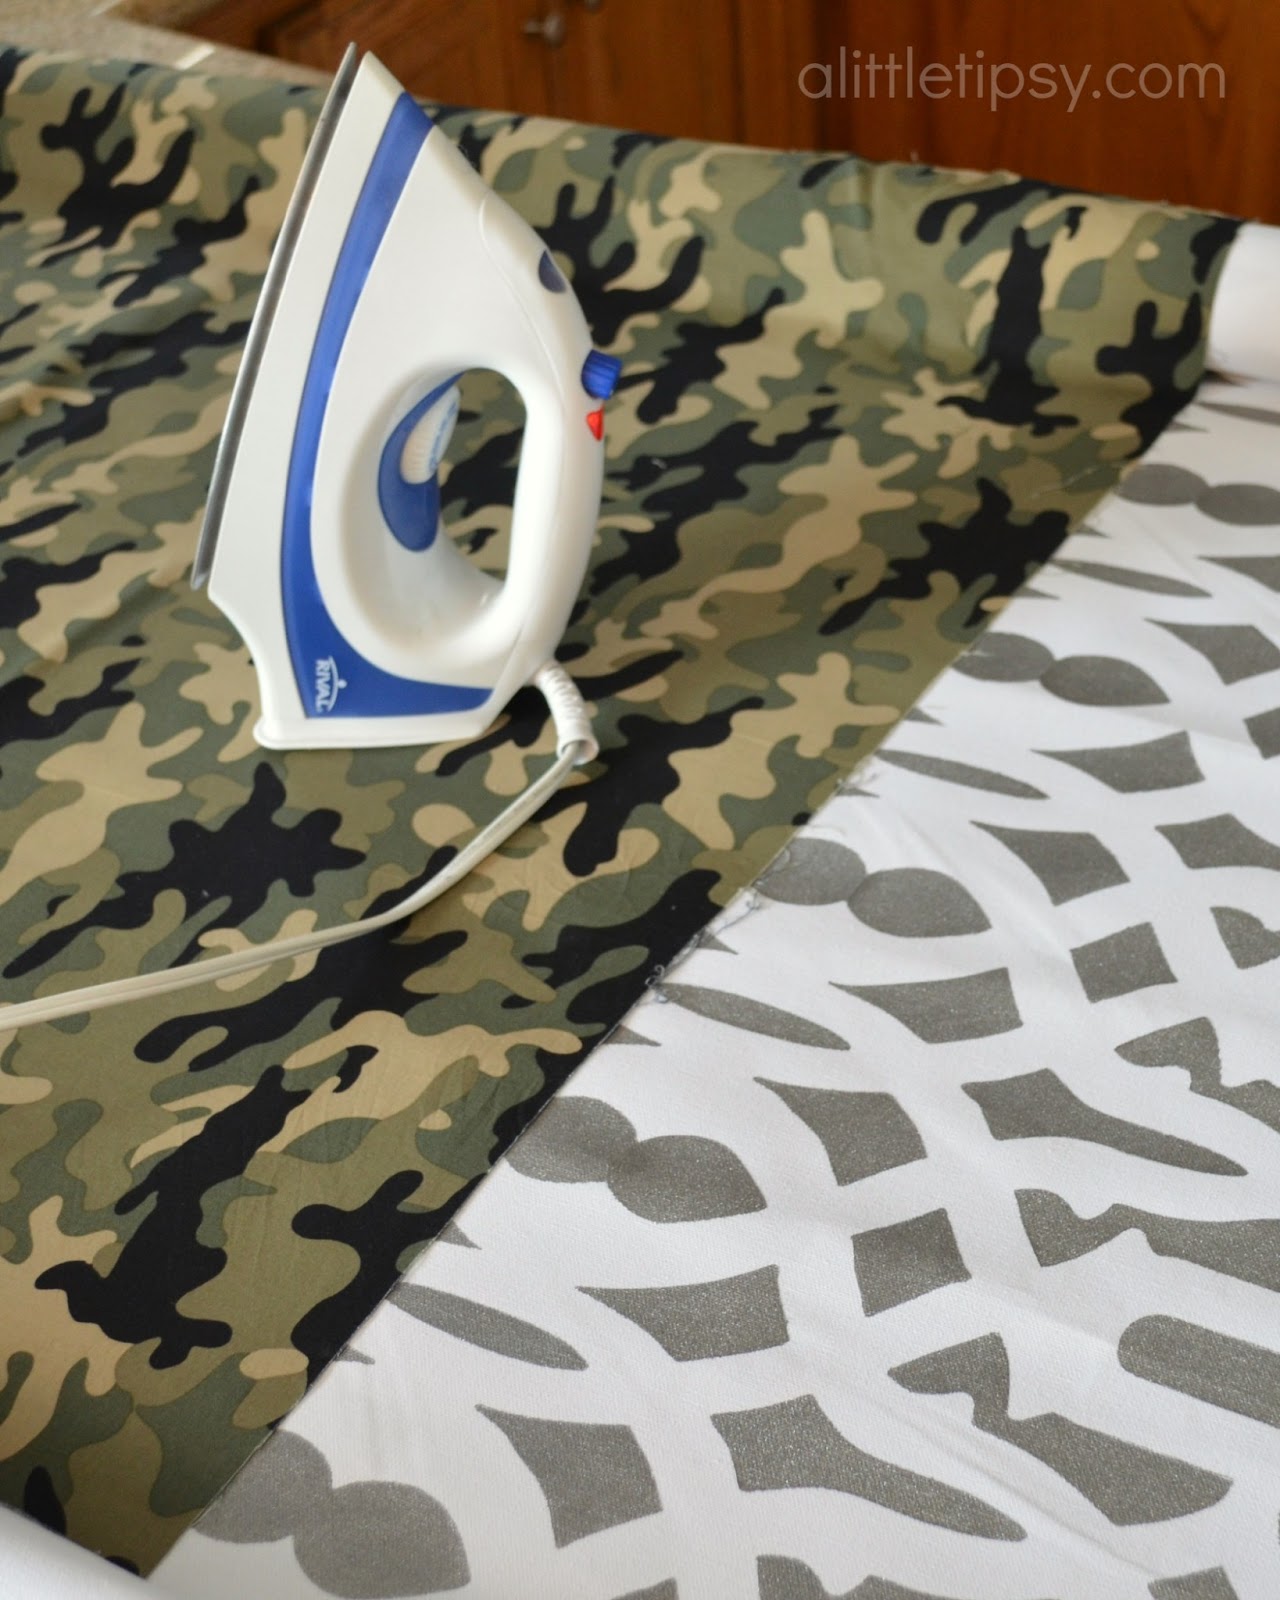
1. Iron your upholstery fabric so it will lie flat to stencil.
2. Spray the back of your stencil with re-positionable adhesive and place it at the corner of your fabric making sure the stencil is straight. Using the small foam roller go over the stencil with the Yudu fabric ink. (I used about 6 Tbs of silver to 1 Tbs of Gunmetal. I just wanted it a little darker.)
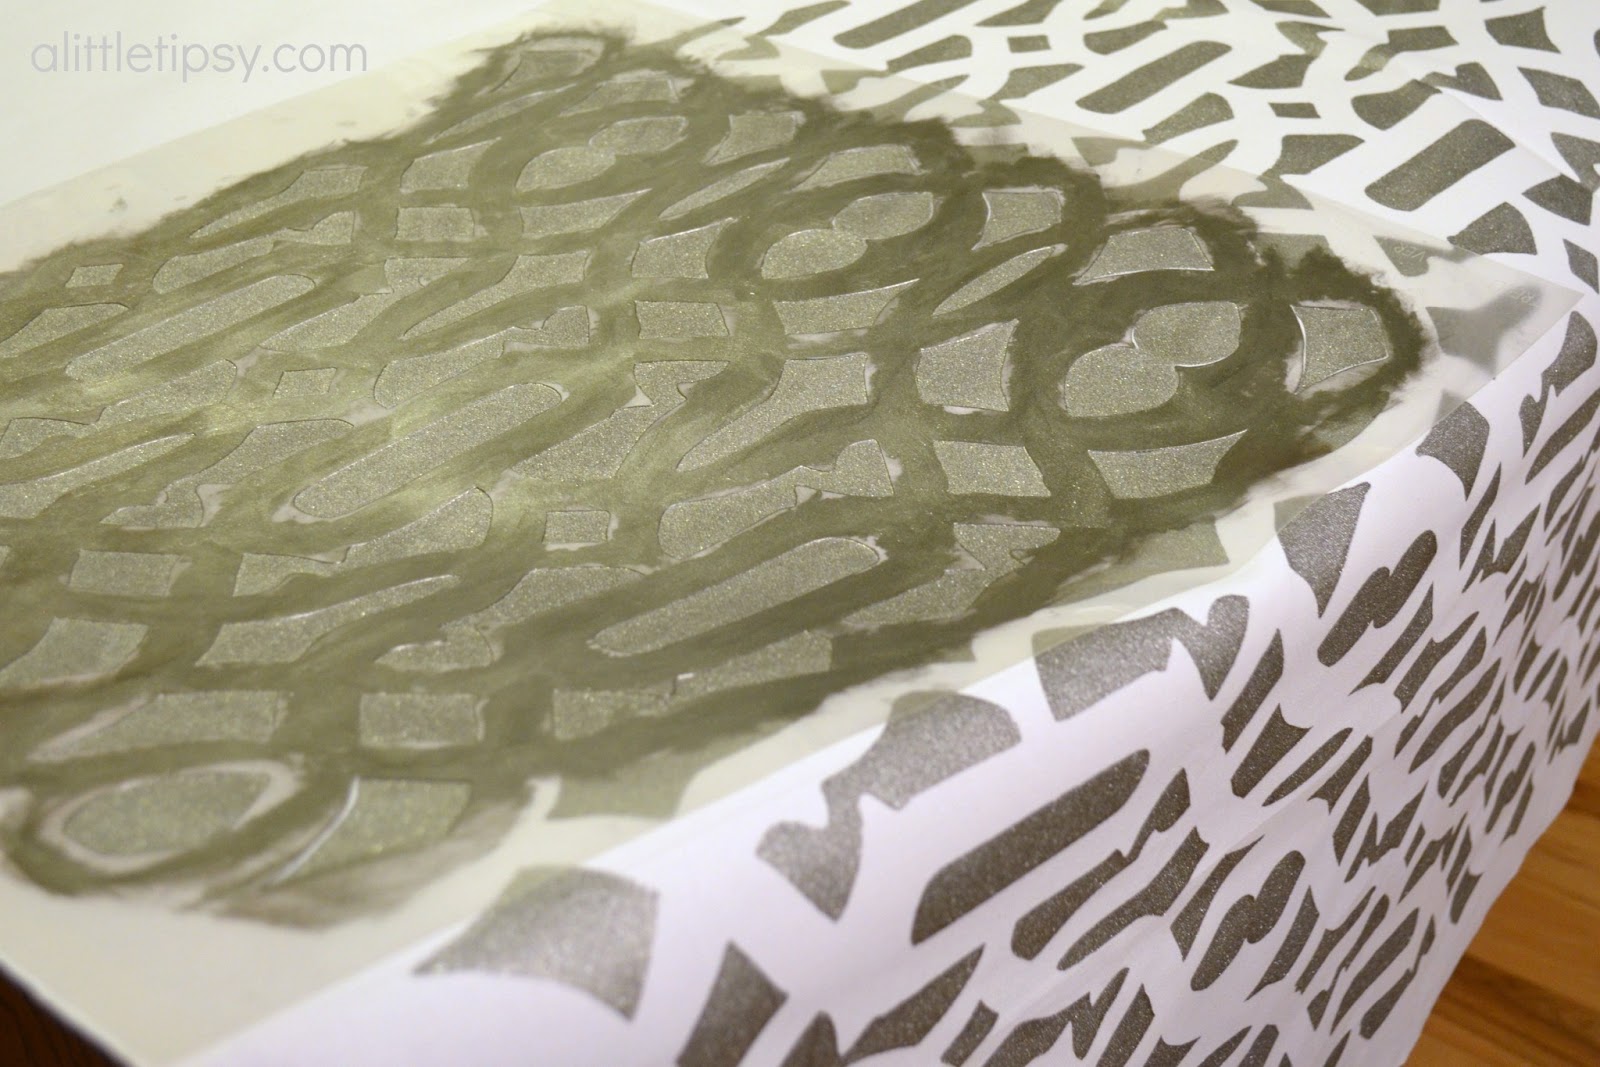
3. Keep aligning your stencil and painting the fabric with the foam roller until your kitchen looks like this. 😉 Fabric draped over your bar, stools, and table. I couldn’t believe how crisp the lines came out with the stencil. The adhesive made it so easy! As you can see I did quite a it more fabric than listed above because I was covering another project as well.
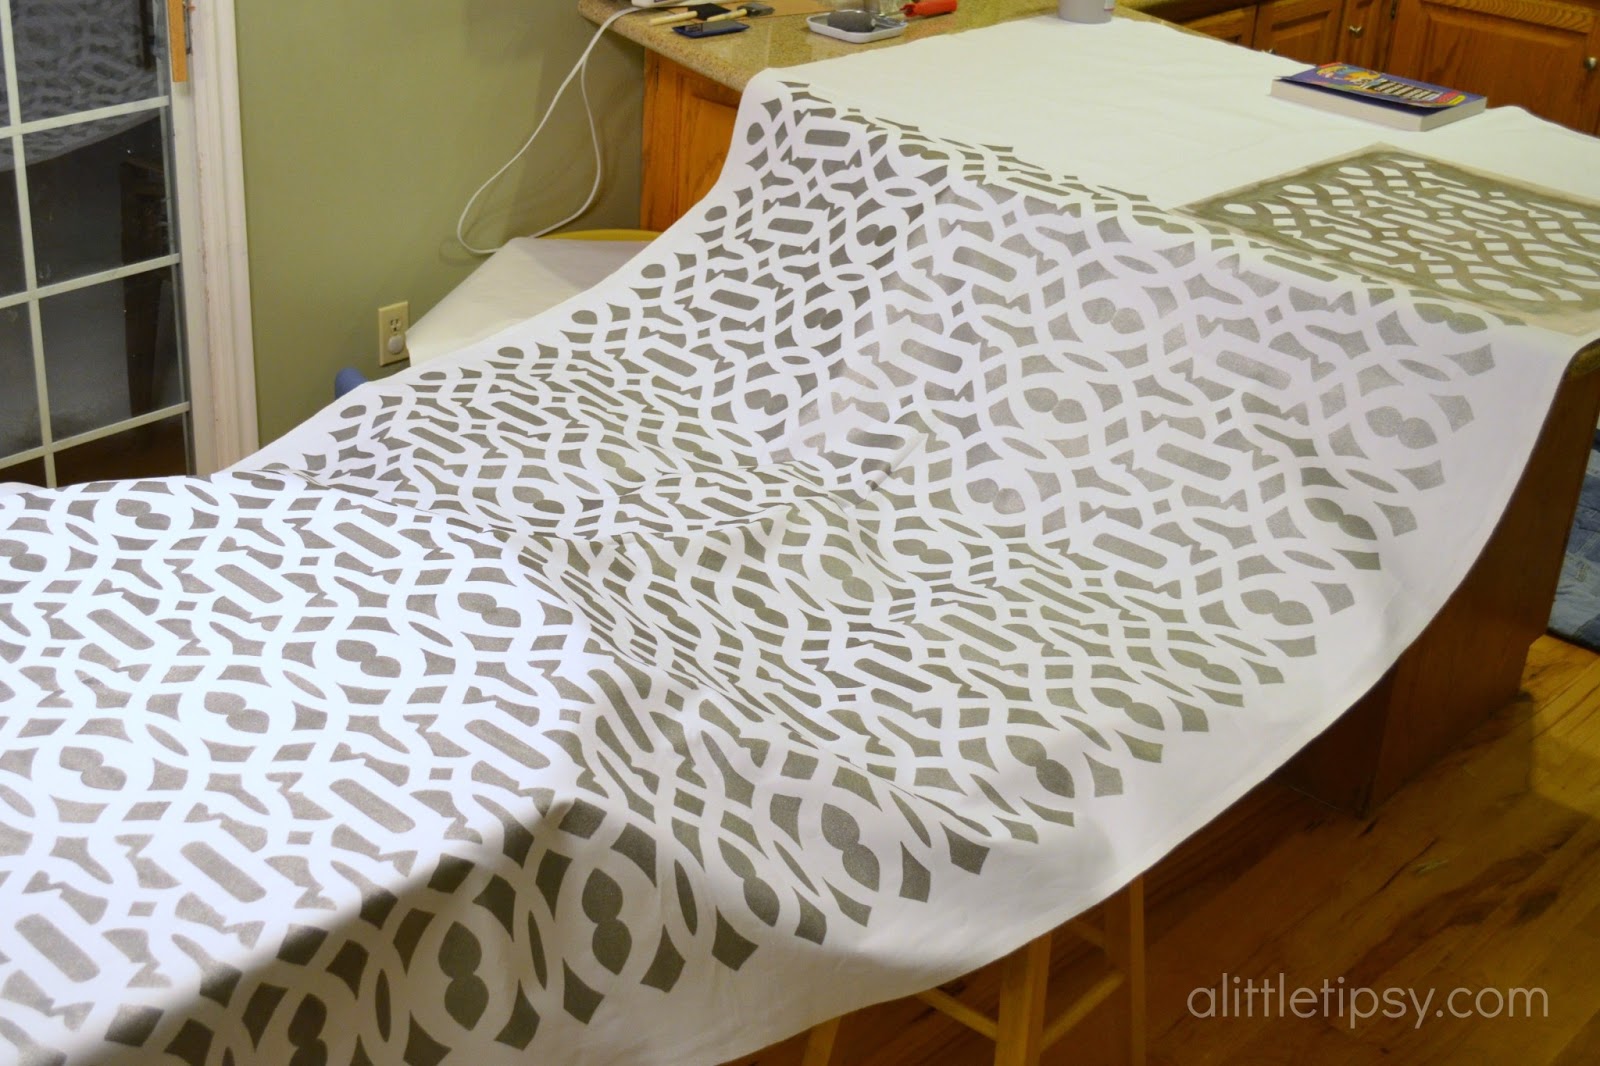
4. Once the fabric is dry, you can roll it up on to a wrapping paper roll to store without wrinkling if you are like me and do this project over two Saturdays.
5. Be sure to heat set the ink with your iron so it wears better. Lay a thin fabric scrap over the ink and iron.
6. Now comes the fun part! Pull out the wood and the power tools and get to building! My friends at Lowe’s had complete confidence in me and helped me pick out the perfect jigsaw. Not gonna lie, I was a little nervous using it for the first time (see my little practice cut on the corner), but I was surprised how easy it was. Seriously, I am a girly girl, if I can do it you can too!
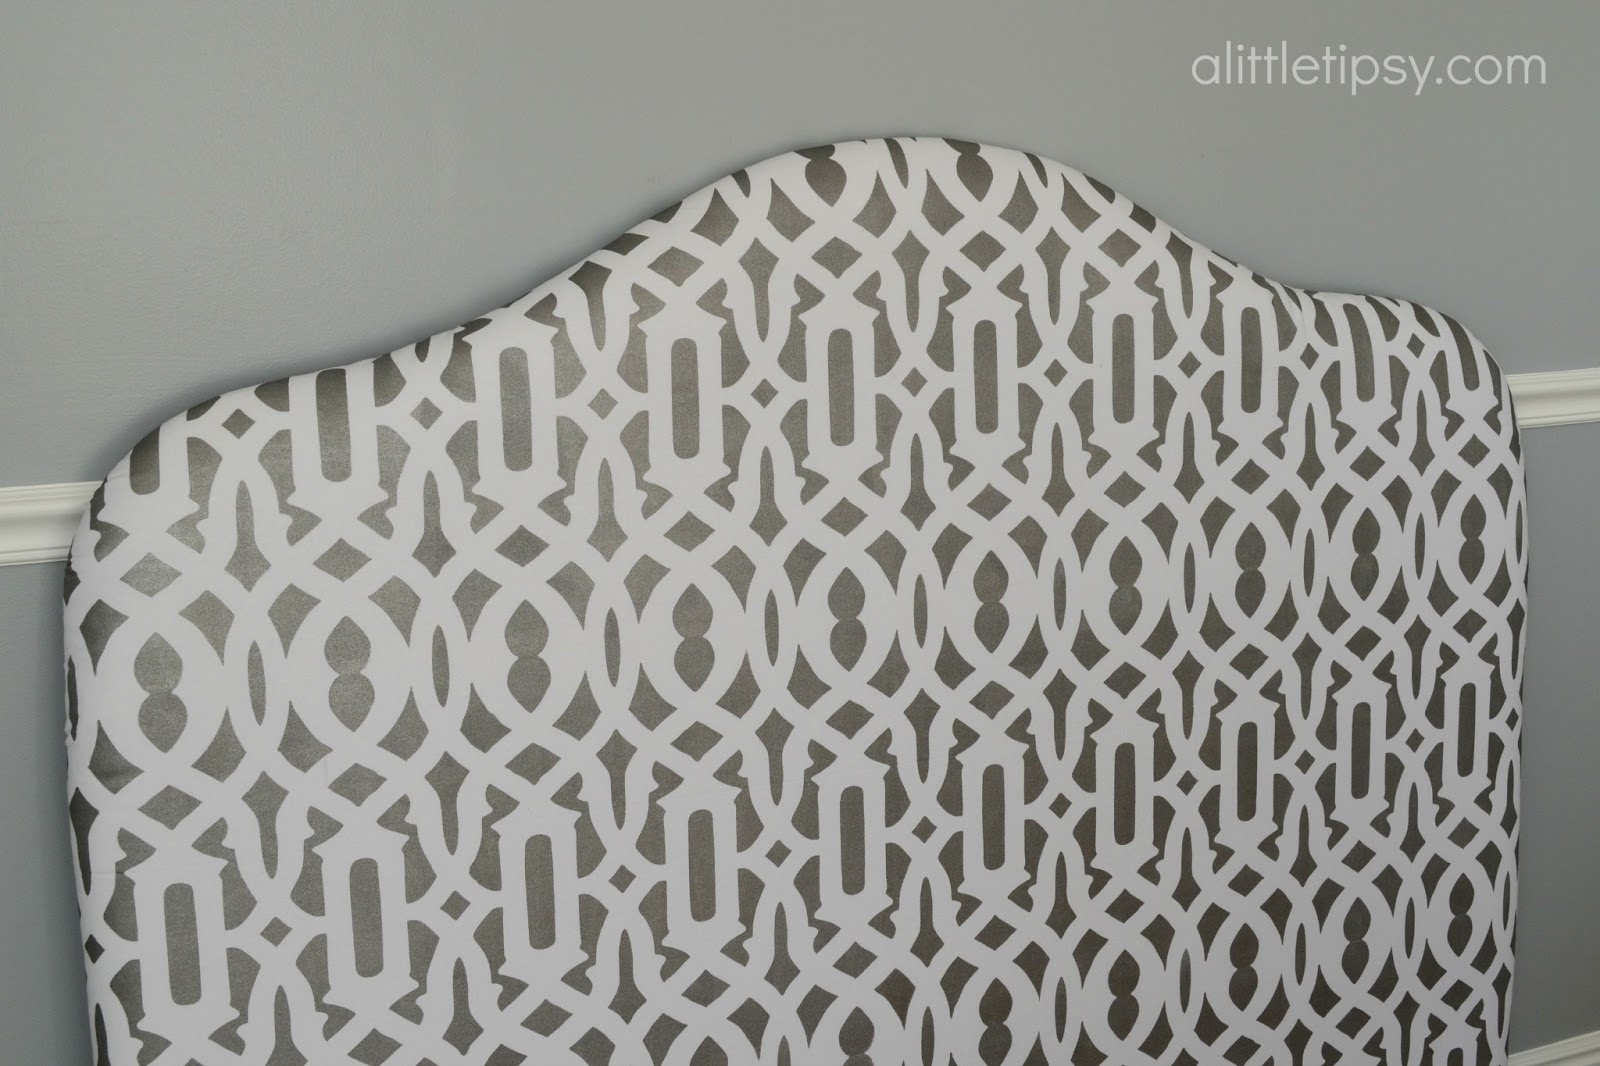
From here, I will actually refer you to the awesome Beckie from Infarrantly Creative because I used her upholstered headboard tutorial and it rocks!
The only thing I did differently from here is I chose to do a little less point in my curve. Otherwise, I followed it exactly until the installation part.
I was totally lucky and there was place on my bed frame that the headboard slid in to perfectly and was then held in place by the mattresses. The only problem was the chair rail. I solved that by buying some furniture sliding pads (also at Lowe’s) and velcroing them to the back so the wood would not rub on the chair rail.

Can you believe I made this?! I am still in shock. My pride is abundant.

Stay tuned for the full master bedroom reveal. The before and afters are quite a treat!
A big thanks to:
Cutting Edge Stencils for the Trellis Allover Stencil
Nathan McGee for the Yudu Fabric Ink
Lowe’s for the Jigsaw, MDF, and power tool confidence boosting
We have decided to truncate our feed to help protect against stolen content. I apologize for any inconvenience. Please love us anyway. 🙂
Beautiful, the headboard turned out great!
-Christine from Makin’ Mud Pies
http://makinmudpies.blogspot.com/
It turned out just gorgeous Michelle! I can’t believe you stenciled that fabric, it looks totally professional. Nicely done my friend!
Nice work…the stenciled fabric look awesome.
Gorgeous! I absolutely love this!
This looks amazingly gorgeous! Thanks for sharing the tutorial. What model of jigsaw did you end up buying? I’ve been thinking of getting one myself, but I have no idea. 😉
This is ah-maz-ing Michelle! I love everything about it
I am in love with this! I can’t believe you even stenciled your fabric! hello!!!
Oh I love this. I so want to do this but am not yet brave to try out the power tools. Thanks so much for the step by step – it makes it look so much more doable. I love the colors of your room as well – totally pinning this for when I am ready to do my room makeover.
This is so beautiful! I need a headboard. I should make one like this. It is so beautiful!
Michelle! So pretty! I love the colors you picked. You are making me think maybe I could do something like this too… 🙂
WOW! Looks like a professonal job. I need one soo bad. The tut is great…maybe I’ll give it a try! Hope mine turns out half as well!
Holy Smokes! I can’t believe you did that! Now come over and help me figure out how on earth to work on my bedroom!!
Beautiful headboard – very professional. I love your color choices as well. What color paint did you use? Does the gray appear to have a blue or lavender hue? Just can’t find a true gray. Thanks.
The headboard is beautiful and looks like it came from a high-priced furniture store. I love the color scheme you chose as well. Does the gray color have a blue or lavender hue? Would appreciate it if you would share the paint color as I’ve been looking for the right gray forever.
@Judy I would say if it has any hue it is a blue one. The paint color is Valspar Woodsmoke and I LOVE it! With the white trim it just makes everything pop!
HOw the crap did I miss this Michelle?? It is awesome. You did a great job. I am proud of ya too!
The headboard DIY idea is great, I never thought that you made it by yourself. Thank you for sharing the procedures on achieving the amazing headboard.
Great work! Really awesome and not bad at all for a first timer. And thanks for the inspiration.