A Little Tipsy

Creative Tips & Ideas

  • home
  • About Me
  • the tipsy top
  • press
  • projects
  • contact me
[print_thumbnail_slider]

3D Snowflake Gift Wrap

December 7, 2013 By Michelle Barneck 3 Comments

Post sponsored by Martha Stewart Crafts.
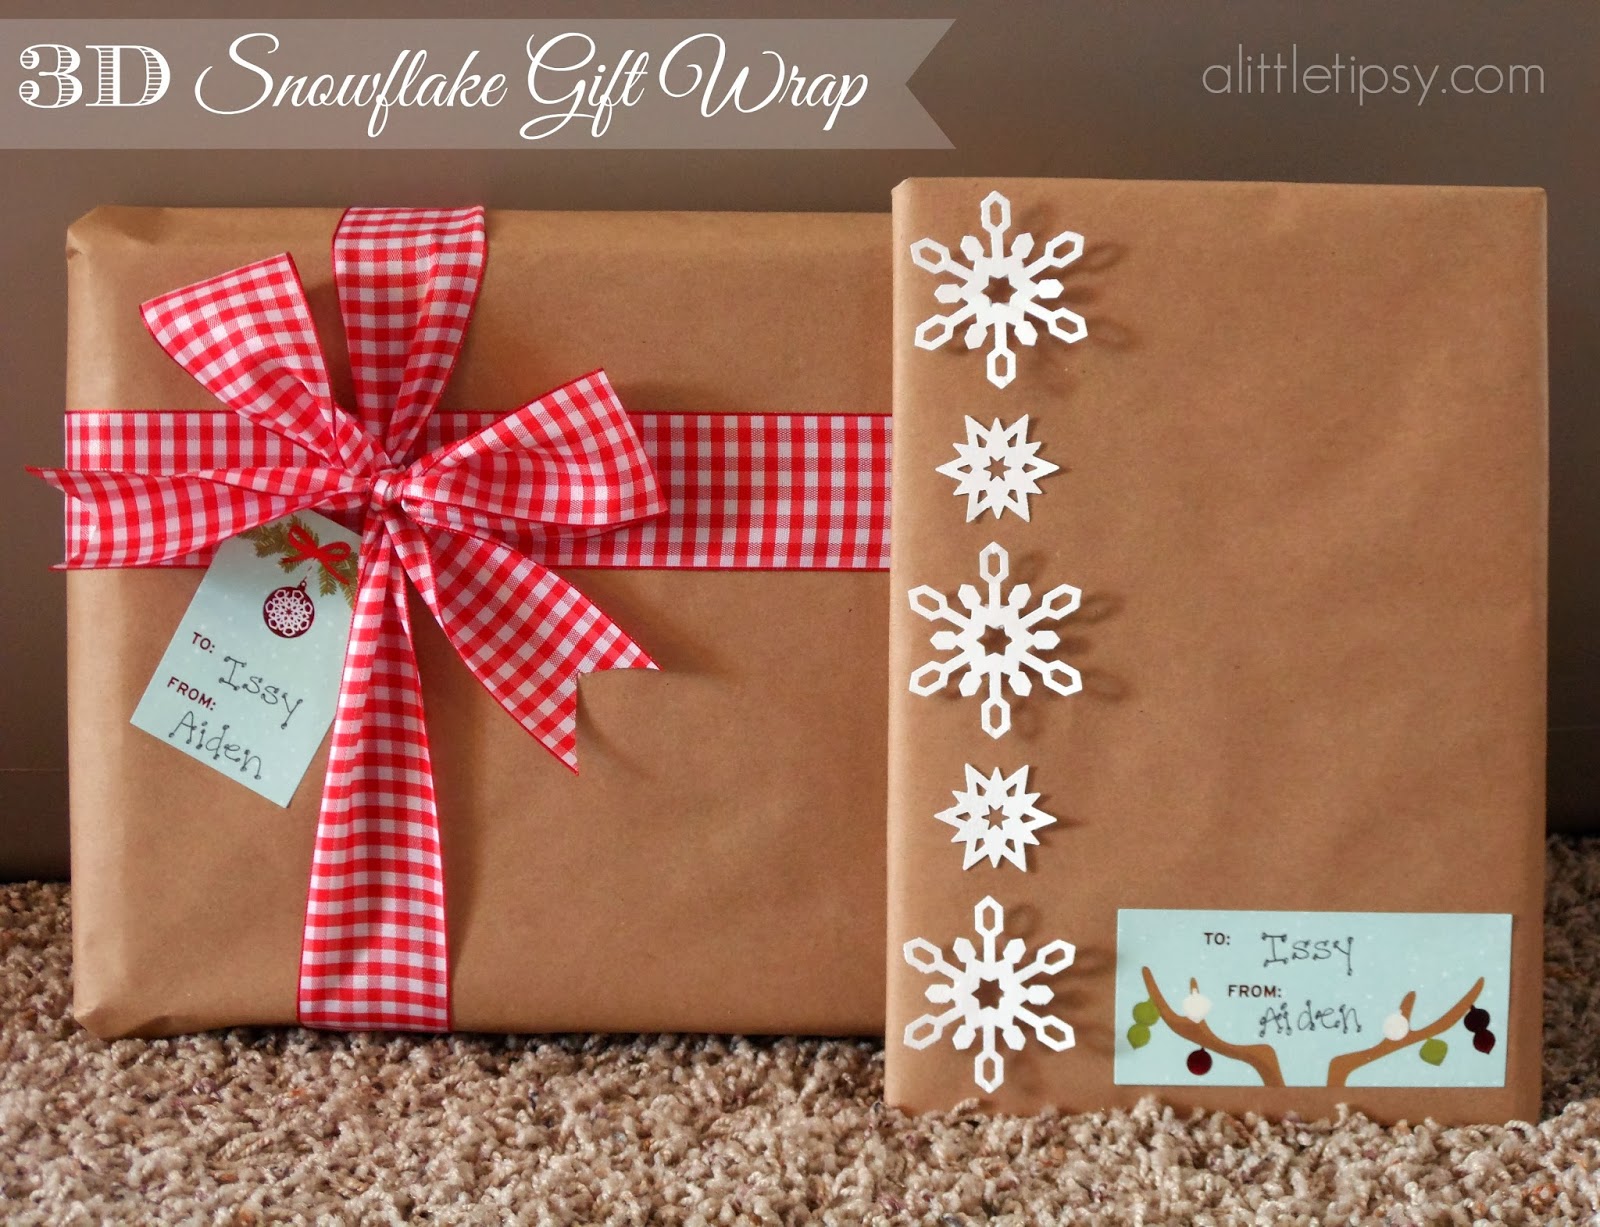
Are you an early bird? Do you have all your Christmas shopping done? I love to have all the shopping done early so I can focus on enjoying family time and focus on the fun parts of the holidays. Wrapping presents is one of my favorite things about Christmastime. I love using fun papers and big colorful bows to make them look beautiful. This year our tree has a nostalgic snow theme, so I thought it would be fun to wrap some packages to match with a little 3D snowflake gift wrap.
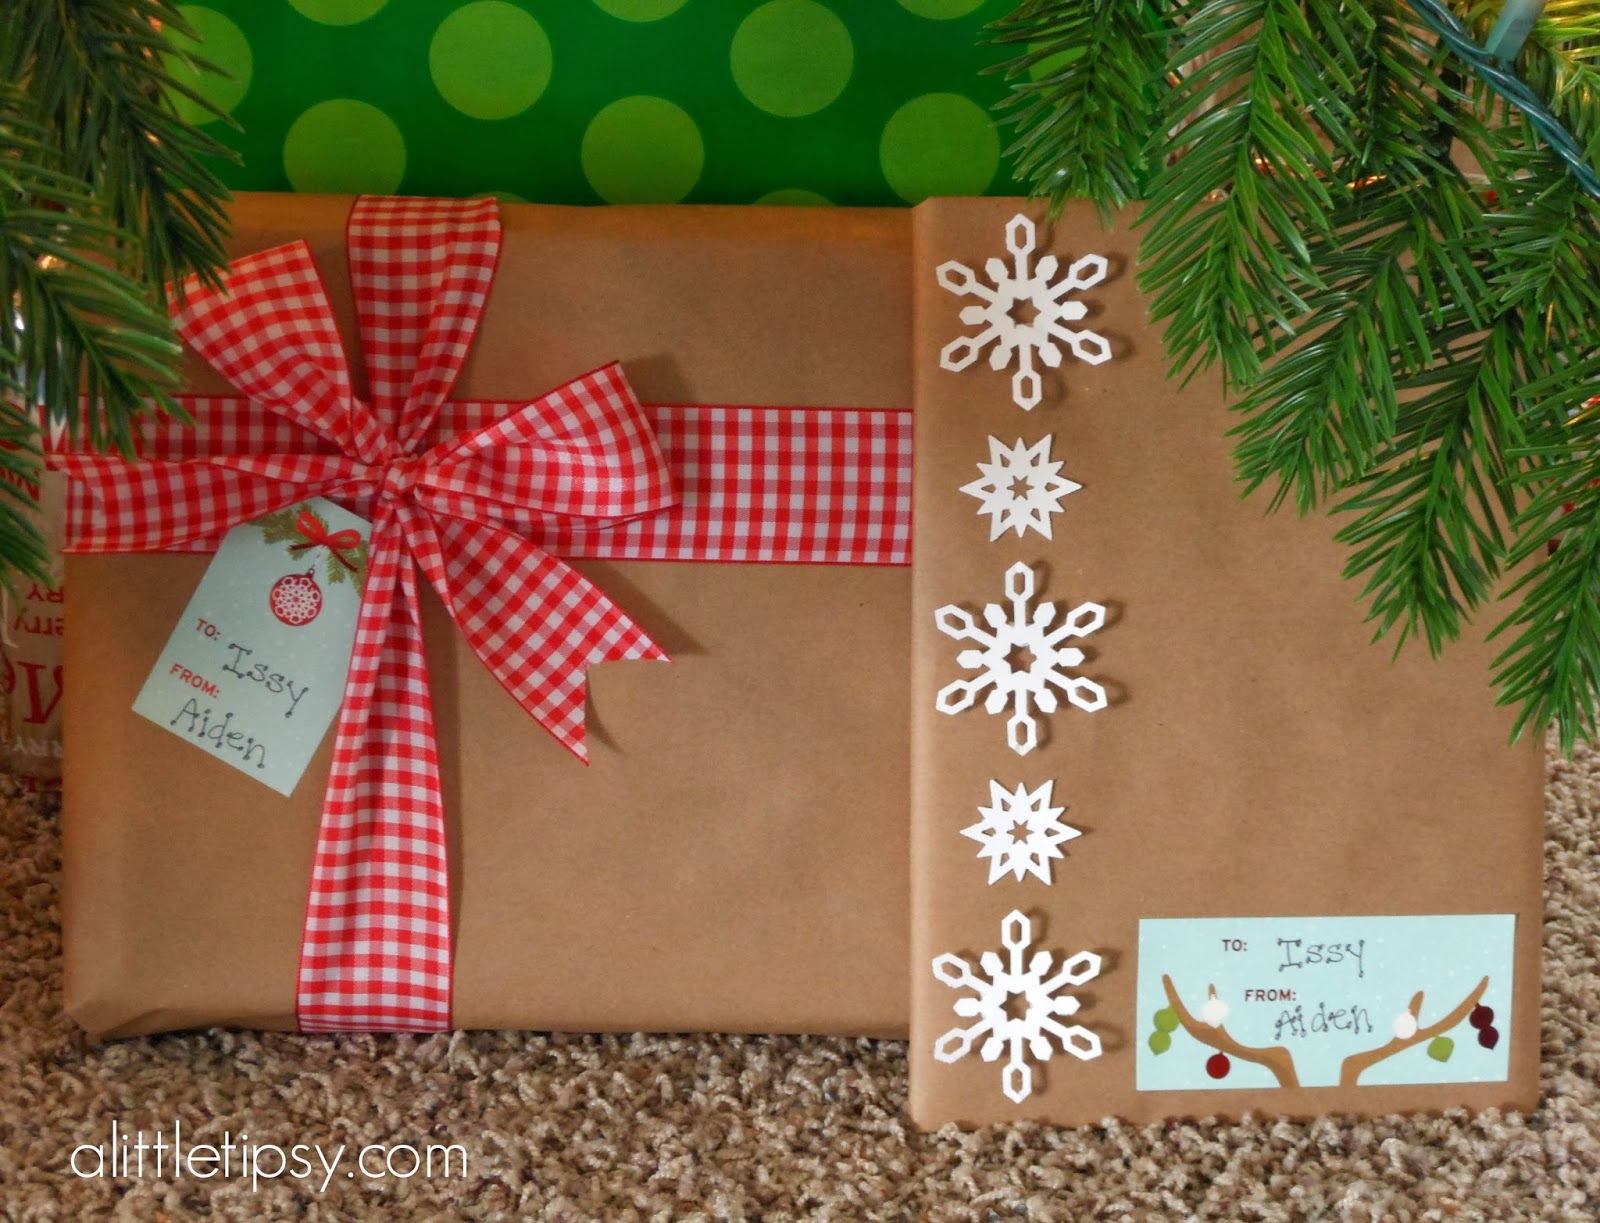
Brown paper packages are not just one of Julie Andrews favorite things. I love the simplicity and the blank canvas it gives for patterned ribbon or in this case snowflakes.
  • Brown Paper
  • Tape
  • Martha Stewart Crafts Bright Star Double Punch, Medium
  • Martha Stewart Crafts Icelandic Snowflake Large Double Punch
  • Mini Glue Dots
  • Foam Adhesive Squares
  • Martha Stewart Crafts Peppermint Winter Label Sticker Book

Wrap up your packages in brown paper. Then embellish by punching snowflakes out of white cardstock. Alternate small and large snowflakes, placing the small with glue dots and large with foam squares to give it more dimension. Add a tag and your done! It’s as easy as that!


Now just sit back and watch smiles you get from taking a little extra time on your packages.
See our other 12 months of Martha projects by checking out the links below:
  • January – Glitter Nails
  • February – Shamrock Banner
  • March – Stenciled Glass Vase
  • April – Gifts for Mom: Easy Photo Magnets
  • May – Flower Sash
  • June – Bottle Piggy Banks
  • July – Glittered Wine Glasses
  • August – Little Star: highlighting your child’s special day
  • September – Spider Cupcakes
  • October – Thanksgiving Place Setting
Disclosure: Martha Stewart Crafts provided product for this post. The idea is entirely my own.
We have decided to truncate our feed to help protect against stolen content. I apologize for any inconvenience. Please love us anyway. 🙂

Holiday Ornament Appliqued Kitchen Towel

November 19, 2013 By Michelle Barneck 1 Comment

Hi everybody.  Ali here from HouseVintage.  I have a great little project to share with you today.  It only takes a few hours and would make a special handmade holiday gift.

See full holiday towel tutorial.

Here is what you need:
  1. Ornament template- I used this one from Martha Stewart.  Print it and cut it out.
  2. Buttons- I used some vintage buttons from my stash, but whatever you have on hand will work.
  3. Felt- This is a great use up for a scrap of felt.
  4. Kitchen Towel- Feel free to sew your own.  I bought this one from IKEA.

I decided to line up my three cutouts.  I then used a zigzag stitch on my machine to sew around the outside edge.  Go slow, and make adjustments, so you stay close to the edge.  If you don’t have a sewing machine, you could use an iron-on adhesive and skip the sewing all together.  
Position and hand sew on your buttons.
You are done!  Iron your towel, and it is ready to display or give as a gift.


———————————————————————-

Thanks Ali! These are the perfect way to spruce up your holiday kitchen or such a fun neighbor gift!

We have decided to truncate our feed to help protect against stolen content. I apologize for any inconvenience. Please love us anyway. 🙂

DIY Halloween Bunting for $1

October 8, 2013 By Michelle Barneck 3 Comments

Hey guys, Vanessa here from Our Thrifty Ideas. I’m super excited to be popping back over here today, sharing this fun and super simple project for Halloween.

  DIY Halloween Bunting for just a dollar
 About 2 1/2 weeks ago I asked my husband if it was too early to put my Halloween wreath on the front door. I barely got the words out of my mouth before he screamed “YES”. I was not allowed to let everyone know that I decorate extremely early for holidays. I was banned from taking down the Summer banner until at least October 1st. UGH, well, that didn’t stop me from putting Halloween stuff up on the INSIDE of the door! And how can he complain when I only spent $1 on the cute bunting!

  DIY Halloween Bunting for just a dollar

You can find the polka dot bunting at Walmart in their Halloween section for just $.97. I cut it in half to create two smaller buntings. For the center one, I used some scrap tulle that I had laying around from past projects, so that didn’t cost me anything. But if you didn’t have any, you could use fabric, ribbon, or even go purchase some for just a few dollars (make sure to use your craft store coupons!). I just did a double knot onto some black ribbon with about 6 inch strips of tulle.

  DIY Halloween Bunting for just a dollar   

I love that not only do you get an impact from our {now} Halloween decorated front door when you get here, but you also see this fun decor right before leaving as well.
If you loved this post, check out some more of my fun Halloween ones.
Paper Bag Monsters made by your kids Coloring your white cake batter to make these fun CandyCorn cupcakes. Just layer them before baking and cook as usual.
Paper Bag Monsters | Candy Corn cupcakes
Spooky Halloween Banner from OurThriftyIdeas.com Halloween Porch Ideas
Spooky banner tutorial | 13 Halloween Porch Ideas
———————————————————————
I love a good bargain and dressing up the door for a pop of holiday fun as you walk out the door is so fun! Thanks Vanessa!
We have decided to truncate our feed to help protect against stolen content. I apologize for any inconvenience. Please love us anyway. 🙂

Friendly Ghost Pencil Toppers

September 17, 2013 By Michelle Barneck 1 Comment

Happy Halloween folks! I’m Kelly from Smart School House sharing a fun Halloween craft with you today! Ok, well, maybe it isn’t technically Halloween yet, but you know it will be here in the blink of an eye (or a googly eye in this case!). Do you have kiddos in your life that enjoy arts and crafts? Then this one is for you! 
Ghost Pencil Toppers 
As a teacher, I love anything to do with pencils and crayons (as you can see in THIS fun post). I think these friendly ghost pencil toppers would be fun to make in the classroom OR at home, no? To get started, you only need some very, very basic (and cheap) materials:

  • pencils 
  • white craft foam 
  • googly eyes glue 
  • polka dot ribbon (optional) 

 I drew a ghost free hand, but this can be done with a stencil if you have one on hand. Each pencil topper has TWO foam ghosts, so cut out as many as you will need depending on how many pencil toppers you want to make. Psssst: here’s a tip, if you’re working with kids, make extra! There are bound top be craft mishaps, and that is all part of the learning process:)

Ghost Pencil Toppers4

Once you have cut out your ghosts, connect them together using glue. I used hot glue because it is quick! But again, if you’re working with kids, plain white glue will also work. Of course, it takes longer for white glue to dry. Only put a little glue around the top and sides of the ghost though! I like to say, “Dot, dot, not a lot!” when I’m working with kids. Simply show them to make small dots of white glue along the outer edges so that the pencil can be pushed inside.

Ghost Pencil Toppers2 

There you have it Halloween lovers! A cute and kid-friendly craft to celebrate the fun! It is always such a pleasure being here. I’d love for you to stop by my blog, Smart School House, and see the other festive crafts (and sweets) that I have up my sleeve these days!

——————————————————————
Thanks Kelly! I am dying over the googly eyes with the eyelashes! So fun!
We have decided to truncate our feed to help protect against stolen content. I apologize for any inconvenience. Please love us anyway. 🙂
Next Page »

  • Bloglovin
  • Facebook
  • Google+
  • Instagram
  • Pinterest
  • RSS
  • Twitter

Hi there! I'm Michelle. Mother of three little boys and one little princess. Welcome to A Little Tipsy, a place for exploring creativity and sharing inspiration.

Follow on Bloglovin


Visit Michelle Barneck {A Little Tipsy}'s profile on Pinterest.

Tutorials by Category


15 Family Reunion Games

Family Reunion Games Collage

15 Sprinkle Party Ideas

Sprinkle Birthday Party
Creative Commons License

© Copyright 2014 A Little Tipsy · Site Designed by The Fairy Blogmother · Web Hosting by RFE Hosting

This website uses cookies to improve your experience. We'll assume you're ok with this, but you can opt-out if you wish.Accept Read More
Privacy & Cookies Policy