A Little Tipsy

Creative Tips & Ideas

  • home
  • About Me
  • the tipsy top
  • press
  • projects
  • contact me
[print_thumbnail_slider]

Ruched Rosette Legwarmers

October 1, 2013 By Michelle Barneck 4 Comments

Hi again! This is Terra from mama says sew with another sewing tutorial for you today. Its some ruched leg warmers. I originally pinned them about a year ago, and now that they are no longer available for sale, I thought I’d make my own.

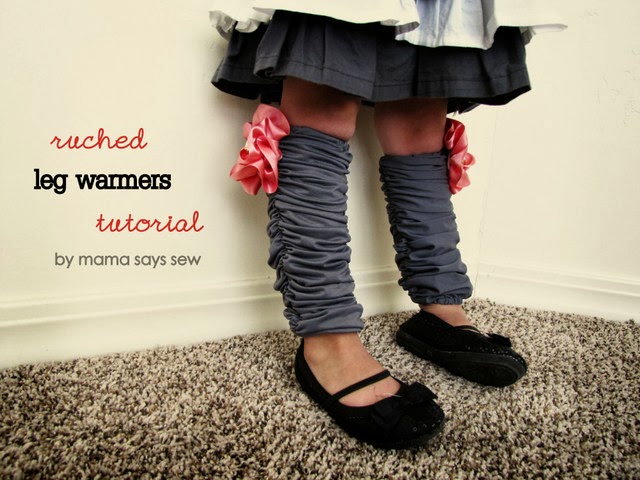
They are really pretty simple, and I love them paired with her striped ruffle skirt.

Continue for the full tutorial…

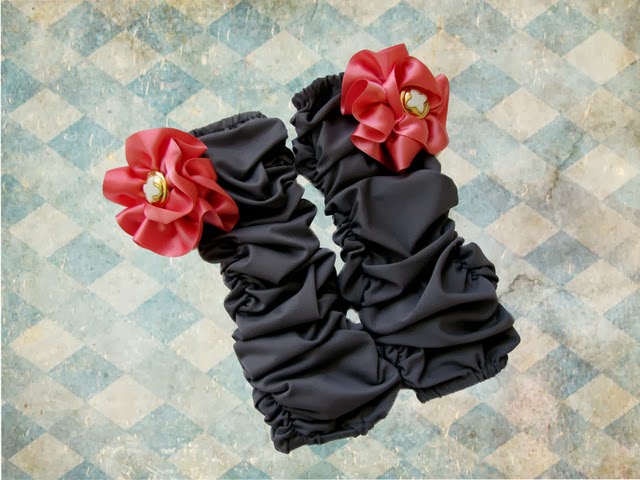
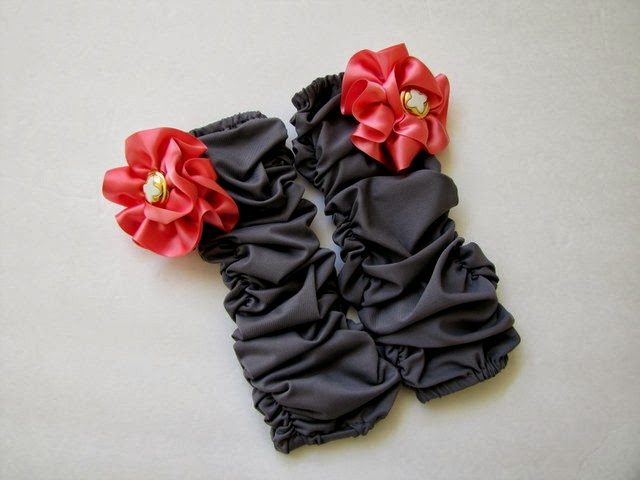
I also made a rosette by gathering some wide satin ribbon into a rosette and then sewing a button in the middle. I am really loving the combination of gold and coral lately.
To make these, you will need:
  • Knit fabric (very important-it must stretch!)
  • Elastic-both 1/4 inch and 1/8 inch wide
  • Sewing supplies-thread, scissors, your machine
  • Optional: Rosettes (or supplies to make them)

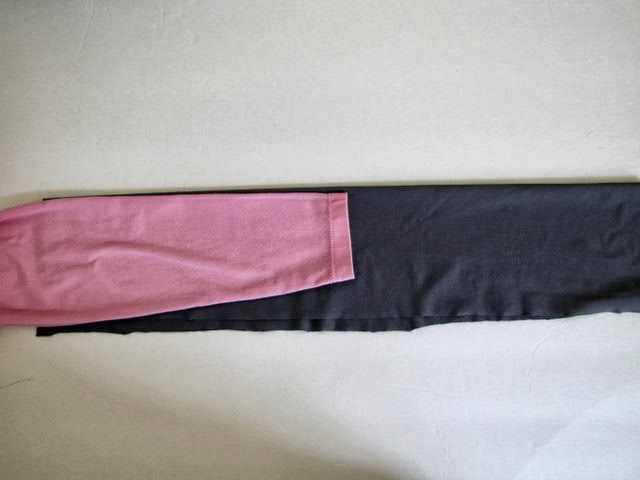
First, start by cutting the fabric for your leg warmers. I used a pair of leggings for a guide. You want your fabric to be at least twice as long as the length you want the finished leggings to be (in this case, knee to ankle). My fabric is also folded in half the long way, to make it wide enough to go all the way around the leg.
Make sure your fabric stretches from side to side (the short way).
  
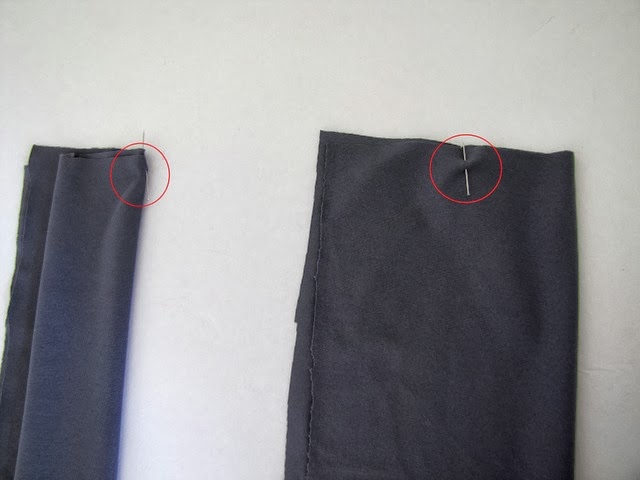
Mark where you want your ruching to start. You will do two rows of ruching per leg warmer. I folded in half, then folded in half again, leaving room for a seam allowance (shown on the left). I put two pins, one in the top layer of fabric and one in the bottom layer of fabric (shown on the right-just imagine you have x-ray vision and can see the other pin).
Pin at the same place at the other end of the leg warmers so you know where to end up. You can draw a line from the top of the leg warmers straight down to the pin in the bottom of the legwarmers if you want.

Sew a 1/8 inch elastic from a top pin to a bottom pin, stretching the elastic as far as you can as you sew. Backstitch a couple of times at the beginning so the elastic stays in place when you stretch it. {Look at the next step before completing this one}.

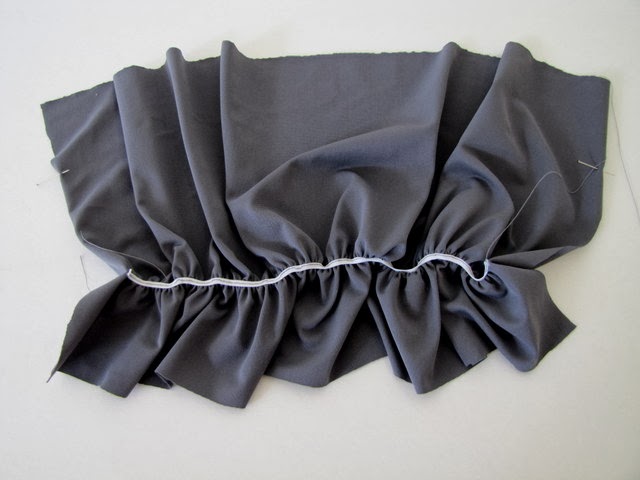
Leave a space at the top and the bottom with no elastic so you can make a casing.

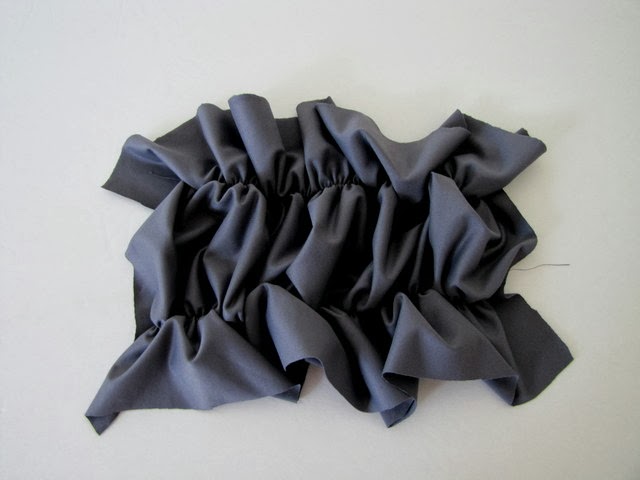
Repeat on the other side, so that you have two rows of elastic.

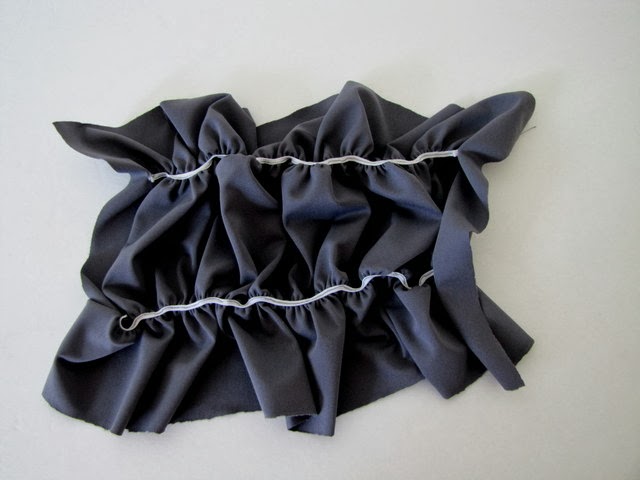
This is what it looks like on the other side.

Sew a casing on the top of the leg warmer wide enough for the 1/4 inch elastic.

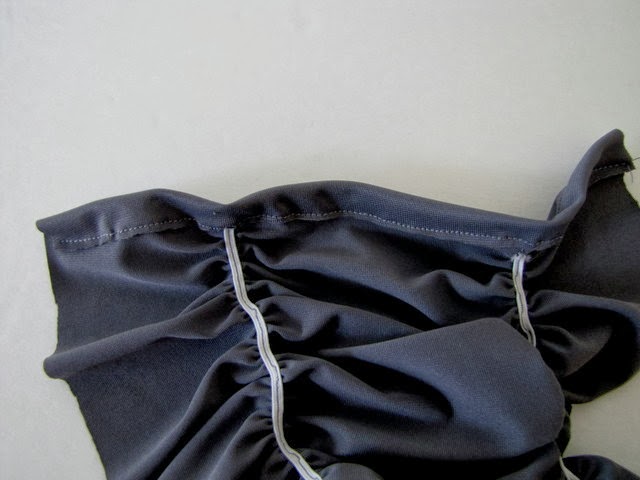
Insert your elastic and stitch at both ends to secure. You want it to be snug fitting but not too tight. Repeat for the bottom of the leg warmer so that you have elastic at the top and the bottom.

Fold it in half with right sides together and stitch up the back.

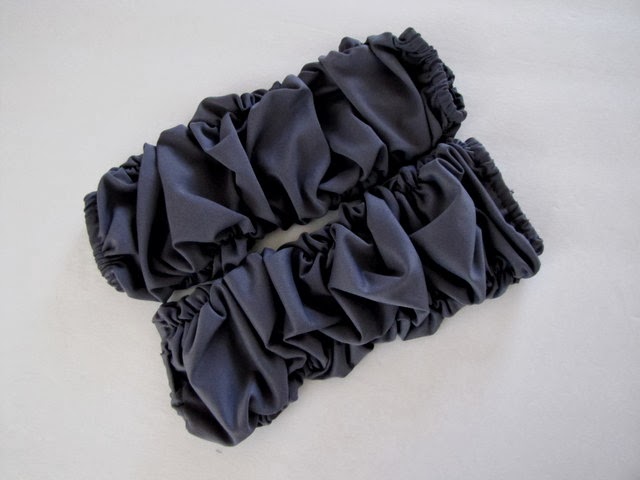
Turn it right side out and this is what you should have.

Don’t forget to make another one the same way!

 You can add some embellishments if you want. I recommend attaching them with a pin, like a brooch. That way you can take them off to wash the leg warmers and you can also switch out the flowers so you can have one pair of legwarmers that matches everything.

I hope you enjoyed this tutorial. Please visit me over at mama says sew for more!

—————————————————————
These are the times I wish I had a girl! These are adorable Terra!

We have decided to truncate our feed to help protect against stolen content. I apologize for any inconvenience. Please love us anyway. 🙂

Halloween Spider Cupcakes #12monthsofmartha

September 26, 2013 By Michelle Barneck 3 Comments

Sponsored by Martha Stewart Crafts.

Halloween is on it’s way and that means parties, treats and well more treats. It is fun to have some Halloween themed goodies up your sleeve for class parties and other get togethers and these spider cupcakes are so perfect! They look impressive, but are so easy!
SPIDER CUPCAKE SUPPLIES:
  • Favorite Cake Recipe
  • Martha Stewart Treat Wrappers
  • Favorite Frosting Dyed Purple
  • White Candy Melts
  • Ziploc Bag
  • Martha Stewart Spider Stickers

1. Prepare cupcakes, bake, and while letting them cool prepare the spider webs. 
2. Melt the candy melts 30 seconds at a time in the microwave. Put the candy melts in a ziploc bag and cut a tiny hole in the end. Draw some spider webs on a piece of paper and cover the sketches with wax paper. 
3. Trace the drawings with the chocolate and let them harden while you frost the cupcakes with purple.

4. Carefully remove the spider webs from the wax paper and place on top of the frosted cupcakes. Place a spider sticker on each spider web.

I love these Martha Stewart Treat Wrappers! They are lined with foil so the designs stay perfectly bright!

We had so much fun making these spider cupcakes and probably even more fun sharing them with our friends and neighbors!

This treat was created as part of the 12 months of Martha program.

ST_12_months_of_Martha_Logo-1

See our other 12 months of Martha projects by checking out the links below:

  • January – Glitter Nails
  • February – Shamrock Banner
  • March – Stenciled Glass Vase
  • April – Gifts for Mom: Easy Photo Magnets
  • May – Flower Sash
  • June – Bottle Piggy Banks
  • July – Glittered Wine Glasses
  • August – Little Star: highlinghting your child’s special day

I also wanted to let you know about a movement sweeping the creation nation. It’s called Cre8time and it is all about reclaiming your time to do the things you love. Check out all the details and share your creations at cre8time.org.

Disclaimer: Martha Stewart Crafts provided product for review.

We have decided to truncate our feed to help protect against stolen content. I apologize for any inconvenience. Please love us anyway. 🙂

Halloween Spooky Front Porch Arrows

September 24, 2013 By Michelle Barneck 3 Comments

Hi, it’s Amy again, here from The Happy Scraps.  I’m so excited to share my Halloween Front Porch with you today.  These arrows are one of my very favorite ways to decorate for different Holidays and Seasons.

Let me show you how I did this.  I started by painting the face of my arrows, the color that I wanted my letters. Then I put vinyl lettering on the arrows. Next, I painted over the lettering, with the color that I wanted the arrow.  On the Mummy Tomb one, after the white paint dried, I used painters tape to make it look like a mummy, and painted the small lines gray.  Once the paint was all dry, I peeled up the vinyl.  My arrows were looking pretty good, but I finished them off my sanding them, and distressing the edges. 

Once they were distressed, I added ribbon to them, and attached them to the stake. 

I also added some cob webs. 

Seeing this by my front door is getting me really excited for Halloween!!

I hope you’ve enjoyed this tutorial!  If you’d like to see more Halloween Projects, come on over to The Happy Scraps and check them out.

 
———————————————————————-
Thanks Amy! These are the perfect way to add some spook to your porch! I love how you added the mummy feel with the painters tape!
We have decided to truncate our feed to help protect against stolen content. I apologize for any inconvenience. Please love us anyway. 🙂

Friendly Ghost Pencil Toppers

September 17, 2013 By Michelle Barneck 1 Comment

Happy Halloween folks! I’m Kelly from Smart School House sharing a fun Halloween craft with you today! Ok, well, maybe it isn’t technically Halloween yet, but you know it will be here in the blink of an eye (or a googly eye in this case!). Do you have kiddos in your life that enjoy arts and crafts? Then this one is for you! 
Ghost Pencil Toppers 
As a teacher, I love anything to do with pencils and crayons (as you can see in THIS fun post). I think these friendly ghost pencil toppers would be fun to make in the classroom OR at home, no? To get started, you only need some very, very basic (and cheap) materials:

  • pencils 
  • white craft foam 
  • googly eyes glue 
  • polka dot ribbon (optional) 

 I drew a ghost free hand, but this can be done with a stencil if you have one on hand. Each pencil topper has TWO foam ghosts, so cut out as many as you will need depending on how many pencil toppers you want to make. Psssst: here’s a tip, if you’re working with kids, make extra! There are bound top be craft mishaps, and that is all part of the learning process:)

Ghost Pencil Toppers4

Once you have cut out your ghosts, connect them together using glue. I used hot glue because it is quick! But again, if you’re working with kids, plain white glue will also work. Of course, it takes longer for white glue to dry. Only put a little glue around the top and sides of the ghost though! I like to say, “Dot, dot, not a lot!” when I’m working with kids. Simply show them to make small dots of white glue along the outer edges so that the pencil can be pushed inside.

Ghost Pencil Toppers2 

There you have it Halloween lovers! A cute and kid-friendly craft to celebrate the fun! It is always such a pleasure being here. I’d love for you to stop by my blog, Smart School House, and see the other festive crafts (and sweets) that I have up my sleeve these days!

——————————————————————
Thanks Kelly! I am dying over the googly eyes with the eyelashes! So fun!
We have decided to truncate our feed to help protect against stolen content. I apologize for any inconvenience. Please love us anyway. 🙂
« Previous Page
Next Page »

  • Bloglovin
  • Facebook
  • Google+
  • Instagram
  • Pinterest
  • RSS
  • Twitter

Hi there! I'm Michelle. Mother of three little boys and one little princess. Welcome to A Little Tipsy, a place for exploring creativity and sharing inspiration.

Follow on Bloglovin


Visit Michelle Barneck {A Little Tipsy}'s profile on Pinterest.

Tutorials by Category


15 Family Reunion Games

Family Reunion Games Collage

15 Sprinkle Party Ideas

Sprinkle Birthday Party
Creative Commons License

© Copyright 2014 A Little Tipsy · Site Designed by The Fairy Blogmother · Web Hosting by RFE Hosting

This website uses cookies to improve your experience. We'll assume you're ok with this, but you can opt-out if you wish.Accept Read More
Privacy & Cookies Policy