A Little Tipsy

Creative Tips & Ideas

  • home
  • About Me
  • the tipsy top
  • press
  • projects
  • contact me
[print_thumbnail_slider]

DIY Wood Lantern

September 3, 2013 By Michelle Barneck 1 Comment

Thank you, Michelle, for letting me steal the show! I had the great opportunity to meet Michelle the other day and I’m so glad that I did! Her projects are amazing 🙂 I guess I should introduce myself, I’m Alicia, voice behind Thrifty and Chic.

Like most of you, I’m sure, I love to create and decorate! I usually focus on projects like building furniture and easy….and cheap :)…..DIY projects for your home. I’ve been on a kick lately of changing up the walls in my house, like this planked wall in my front room. I am in love with it…well, as in love with it as you can be with an inanimate object 😉 lol. I also just redid my guest bathroom for under $60…and the board and batten in there was only $11. I’m all about decorating on the cheap…or lets class it up and say ‘being thrifty’. That’s also why I choose to build my own furniture. It’s a great easy way to change up a space without spending a lot of money…just using a little bit of elbow grease.  You can find all my furniture plans, from farmhouse tables to benches, on my blog!

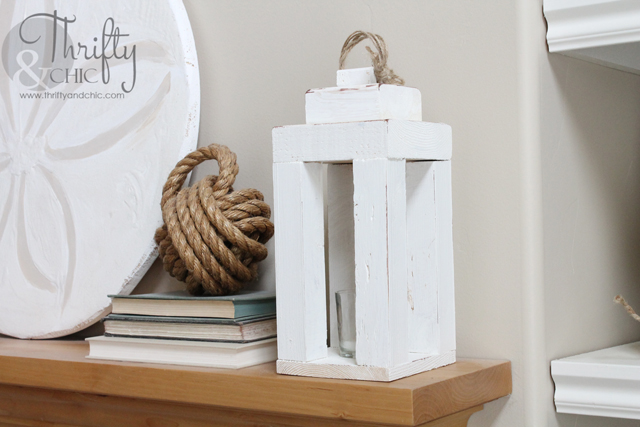
Today I’m going to share with you a super simple ‘building’ project. A lantern. A cute little shabby chic lantern 🙂 If you have some wood sitting around your house, I’m sure you’ll have enough to make this. I just used some scrap pieces. And the best part, since it’s ‘shabby chic’ who cares what the wood looks like 🙂 The more beat up the better!

Read on for the full tutorial…

Here are the supplies:

  • 2 pieces of wood cut to the same measurements. Mine are 5 1/2″ x 5 1/2″. I used a 2×6 board and a cedar plank board for this. You can use a cedar plank for both or a 2×6 for both. However you want it to look.
  • One 2×4 cut squared, so about 3 1/2″ x 3 1/2″
  • Four ‘legs’ cut the same height. You can use a 1×2 or a 2×2 for this. I cut mine 8 inches high
  • One 1×2 cut square (not pictured)
  • Wood glue
  • Screws (if you plan to actually hang this)
  • Paint/stain
  • Jute/rope

First step: Place the ‘legs’ (I know they aren’t legs, but it’s easier to explain this way lol) on top of one of the 5 1/2×5 1/2 pieces in the corners. Secure with wood glue.

Step two: Place the top 5 1/2 x 5 1/2 piece on top, secure with wood glue.

This would be a great time to screw the legs into both sides if you are deciding to hang the lantern. Counter sink your screws on the top piece, and fill with wood putty so you won’t see them.

Step three: Secure the 2×4 piece on top of the piece in step 2, make sure it is centered.

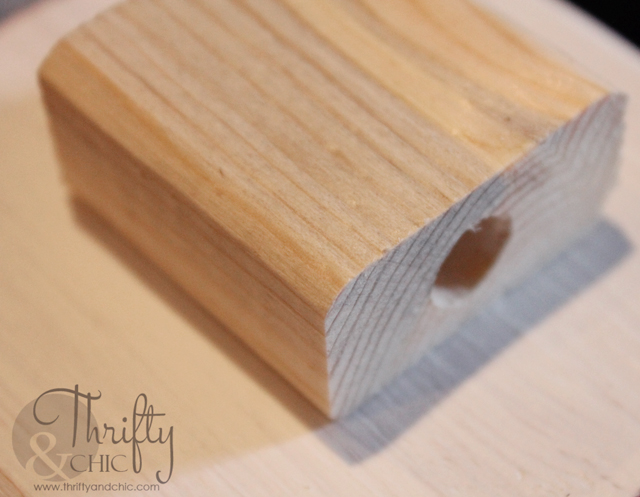
Step four: Take your square 1×2 piece, and drill a hole down the middle long ways. Secure to the top of the lantern.

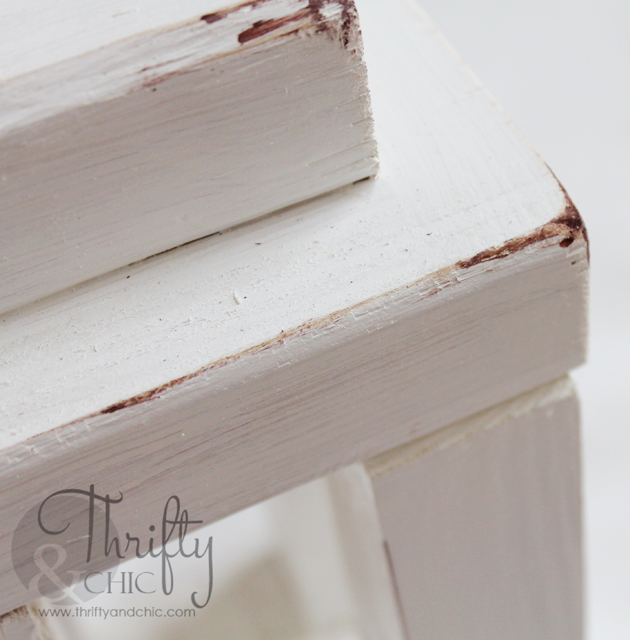
Step five: Make it look nice. Sand and then paint/stain and distress (if you would like).

Step six: Get some jute, and send it through the top hole, tie it off.

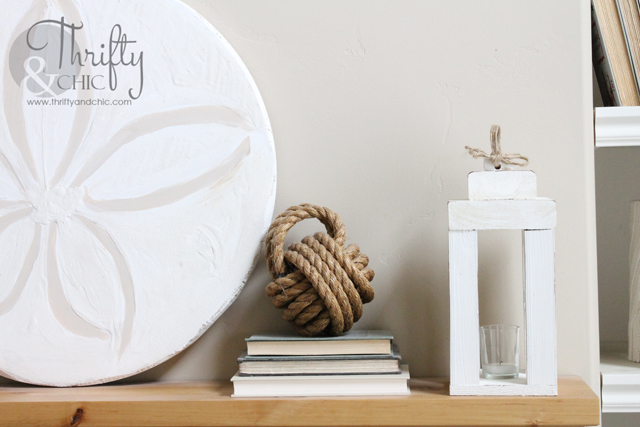
And there you have it! Just needs a light. I used a votive candle holder for mine. Just make sure that if you use a candle that actually burns, you have enough room from the top and all sides of the wood. Just use your own discretion on this, and be safe 🙂

You can probably tackle this project in about an hour if you aren’t making dinner or wrestling around with the kiddos.

Thanks again Michelle! I hope to see you all soon 🙂
—————————————————————————–
I want one of these lanterns for my boys bathroom right now! So fun, thanks Alicia!

We have decided to truncate our feed to help protect against stolen content. I apologize for any inconvenience. Please love us anyway. 🙂

Grandparent’s Day Heart Banner Letter

August 30, 2013 By Michelle Barneck 1 Comment

Grandparent’s Day is coming up Sunday, September 8th and with my parents temporarily living across the country on an LDS mission in Kirtland, we decided to make them a special letter to show them we are thinking of them! We love doing heart attacks (where you decorate people’s doors covered in hearts) so we decided it would be super fun to make a mailable heart attack.

I had the kiddos help me cut out a whole bunch of hearts and then I stitched them together with my sewing machine and added the letters to spell “Happy Grandparent’s Day!” Then, we just folded them in groups of about three hearts and stuffed them in the envelope with the string taped to the flap of the envelope. Instruct them to “pull here” and they will get a surprise as the hearts just keep coming and the message unfolds!

What fun things have you given or received for Grandparent’s Day?

We have decided to truncate our feed to help protect against stolen content. I apologize for any inconvenience. Please love us anyway. 🙂

Little Star: Highlighting a Child’s Special Day

August 26, 2013 By Michelle Barneck 1 Comment

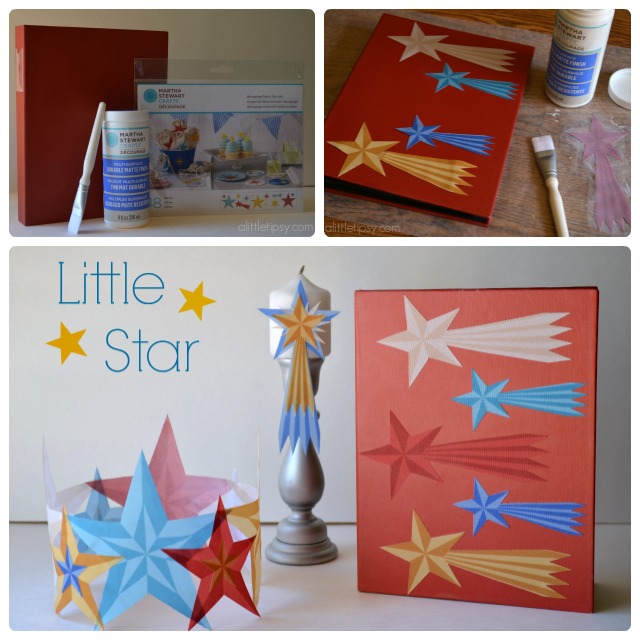
Whether soccer or art or singing, each child has their own special talent. I wanted to create a fun way to celebrate and make them feel special for their achievement whether it be a report card full of A’s, a successful dance performance, or being in the school play. I decided to create this Little Star crown, badge, and photo book to capture the shining moments of their lives.
They all coordinate and are easy to make with just a few supplies. I will share tutorials for each of items below.

SUPPLIES:
  • Martha Stewart Decoupage Fabric Die-Cuts
  • Martha Stewart Decoupage Durable Oilcloth Finish
  • Martha Stewart Decoupage Brush
  • Martha Stewart Fabric Stiffener
  • Martha Stewart Decoupage Durable Matte Finish
  • #10 Size Can
  • Wax Paper
  • Photo Book

Let’s start with the star crown.
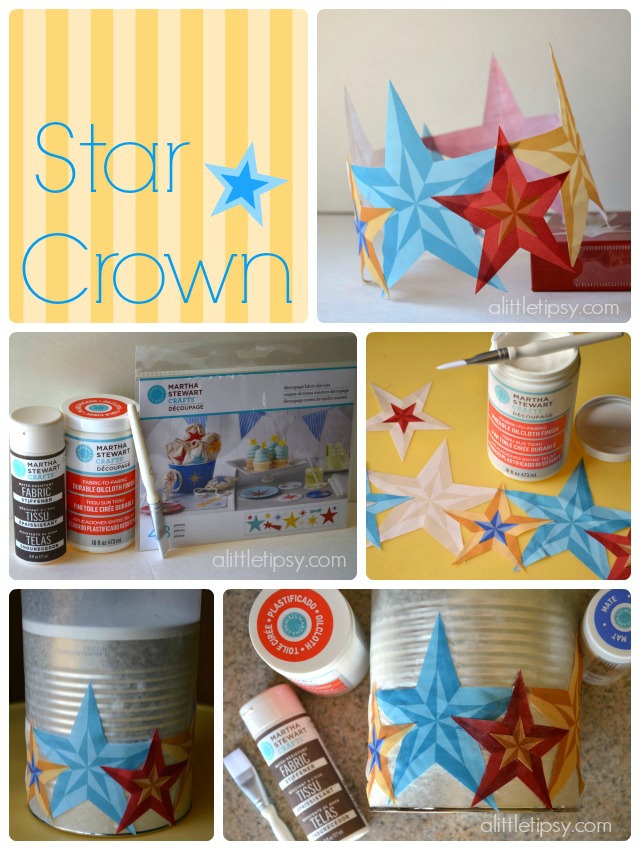
1. Measure your child’s head and using the star fabric die cuts line them up overlapping until you get the correct length. I lined up the large stars overlapping the points about a half inch then layered the medium stars on top, then adding the small stars for embellishment. 
2. Using the oilcloth decoupage as adhesive, glue the small stars to the medium. Then, glue all of the star points that touch like the overlapping points of the large and the five points of the medium to secure. Let dry.
3. Cover a #10 size can with wax paper and lay your stars around it. Secure the last two ends of the stars together with the oilcloth decoupage to form the crown. Glue the top point of each large star to the wax paper to keep it vertical. Let dry. 
4. Using your decoupage brush, paint the stars with a thin layer of fabric stiffener. You want it thick enough to soak through the die-cuts, but thin enough that it will dry clear. Brush away from the points so it does not pool. Let dry.
5. Carefully slide the crown down the can to remove. 

Next up, the photo book. We hardly ever print pictures anymore, so my kids love to see photos of themselves in a book! 
1. Place the stars how you like them and decoupage using the matte finish decoupage and decoupage brush. Cover the back of the star with the medium, place it on the book and then paint over the top. Do a few coats, letting them dry between to make sure the stars are secure and protected.
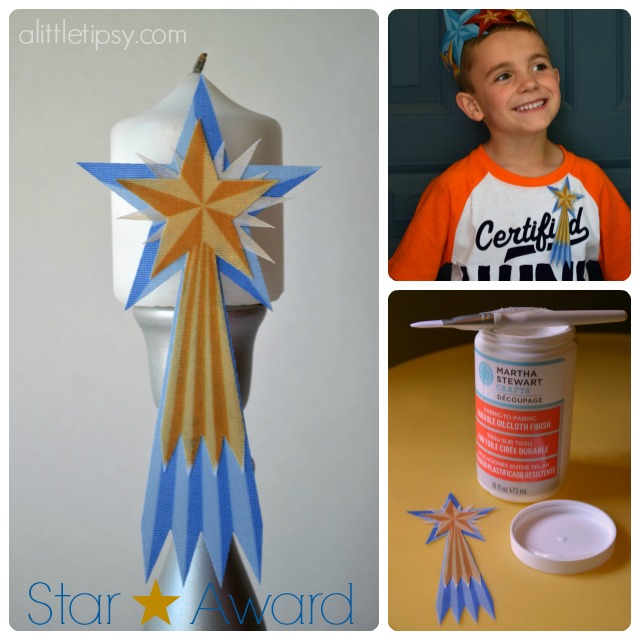
Now for the cute little star award badge. Who doesn’t like getting  gold star?
1. Layer a yellow shooting star, cream colored burst and blue shooting star. Glue them all together using the oilcloth decoupage. Then, cover with two coats to protect and give it a durable shiny finish. I attached it with double sided sticky tape, but you could easily glue on a pin if you prefer.
Isn’t this little star collection adorable? I love having an extra special way to celebrate hard work and resulting achievements and with the school year starting up there will be more and more on their way!
The full line of of decoupage products is available at Michael’s.
ST_12_months_of_Martha_Logo-1
Disclaimer: Martha Stewart Crafts provided product for review.
We have decided to truncate our feed to help protect against stolen content. I apologize for any inconvenience. Please love us anyway. 🙂

Hex Pencil Case Tutorial

August 13, 2013 By Michelle Barneck Leave a Comment

Hi again, A Little Tipsy readers! I’m stopping by from mama says sew again to share the tutorial for this zippered pencil case with you. Don’t let the zipper scare you! It’s actually really easy to sew up.

See the full tutorial.

It’s the perfect time of year to make one! My kids are getting ready to go back to school, and what better way to show their personality than to make them their own pencil case? Okay, really, I’m sure there are lots better ways to show their personality, but it’s still fun to have something that no one else will have.
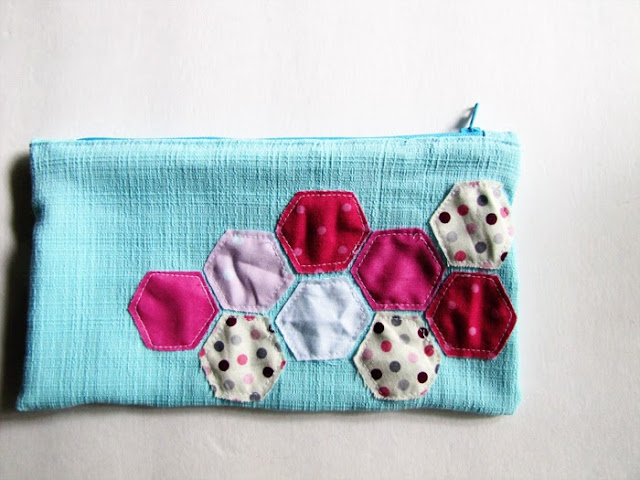
I appliqued hexagons in a honeycomb pattern, but you could do whatever you want. Here’s what to do.
You will need:
  • Fabric (scraps work great)
  • 7 inch zipper
  • Sewing supplies, such as scissors and thread

First, cut out your fabric. My rectangles are 6 inches by 10.5 inches. Also cut out your applique pieces {here is a hexagon template if you want}, and some scraps for the zipper ends {to make the zipper long enough for the pouch}. 
First, stitch one of your scraps to the bottom of the zipper with right sides together, like this:

Trim off the end of the zipper.

Repeat with the other end and the other scrap piece. Your zipper should now be 10 inches long, including the fabric {or the total length of the top of the pencil case, if you made it different dimensions}.

Next, applique your case. I arranged the applique pieces how I wanted them.

Then just stitched them in place.
Line up the zipper with the top of the pouch. The zipper should be face down on the top of the pouch. Stitch the zipper to the pouch along the top edge of the zipper and pouch.

Then stitch the back of the pouch to the zipper the same way. When you’re done, it should look like the picture below. Press flat and topstitch along the edges of the zipper if desired.
Fold the pouch so that right sizes are together and stitch it down one side, across the bottom, and up the other side. Make sure the zipper is open when you do this so that you can turn the pouch right side out! You can zig zag the raw edges to help keep them from fraying.

Ta da! All set for school! 
———————————————————————
Thanks Terra! I love the pattern and colors you used and it’s so perfect to use up those scraps we all having hanging about!
We have decided to truncate our feed to help protect against stolen content. I apologize for any inconvenience. Please love us anyway. 🙂
« Previous Page
Next Page »

  • Bloglovin
  • Facebook
  • Google+
  • Instagram
  • Pinterest
  • RSS
  • Twitter

Hi there! I'm Michelle. Mother of three little boys and one little princess. Welcome to A Little Tipsy, a place for exploring creativity and sharing inspiration.

Follow on Bloglovin


Visit Michelle Barneck {A Little Tipsy}'s profile on Pinterest.

Tutorials by Category


15 Family Reunion Games

Family Reunion Games Collage

15 Sprinkle Party Ideas

Sprinkle Birthday Party
Creative Commons License

© Copyright 2014 A Little Tipsy · Site Designed by The Fairy Blogmother · Web Hosting by RFE Hosting

This website uses cookies to improve your experience. We'll assume you're ok with this, but you can opt-out if you wish.Accept Read More
Privacy & Cookies Policy