A Little Tipsy

Creative Tips & Ideas

  • home
  • About Me
  • the tipsy top
  • press
  • projects
  • contact me
[print_thumbnail_slider]

Top 14 of 2014

December 31, 2014 By Michelle Barneck 2 Comments

At the end of each year it is fun to reflect and see all that you created. As a fun year in review, we put together our readers’ top 14 favorite posts of 2014. We hope you enjoy the glimpse of fun and easy projects and ideas we share here on A Little Tipsy!

Top 14 of 2014 A Little Tipsy

1. Glitter Candle

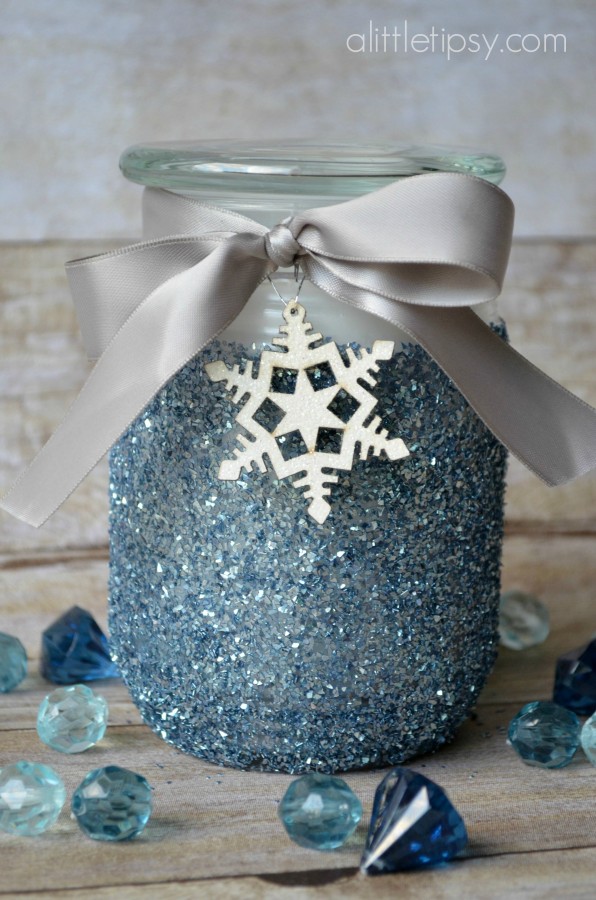
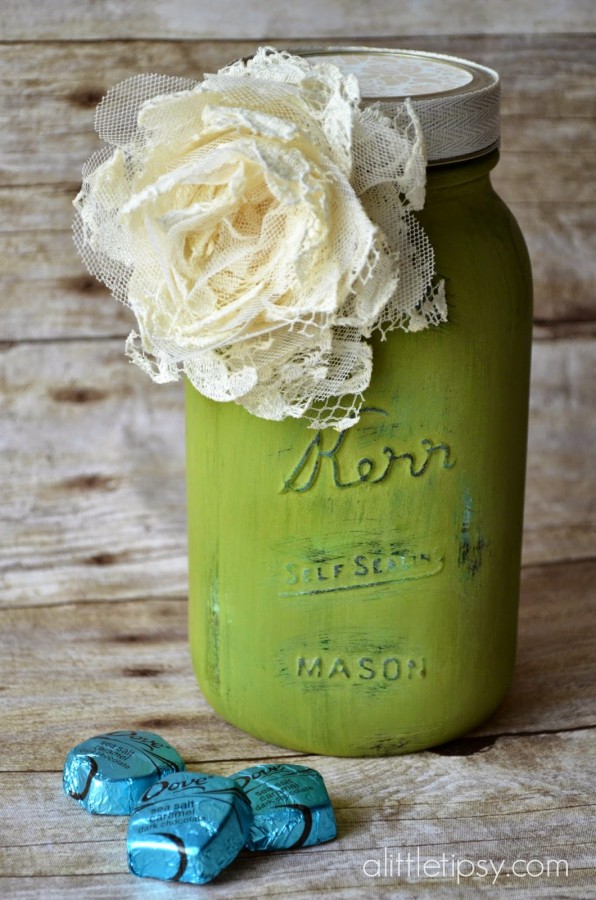
Create a unique piece for a gift or your home in just minutes!

Glitter Candle Gift Idea

2. The Best Burger Recipe – Mozzarella Burgers

Why top with cheese when you can put it inside for delicious flavor in every bite!

Best Burger Recipe

3. Family Reunion Games

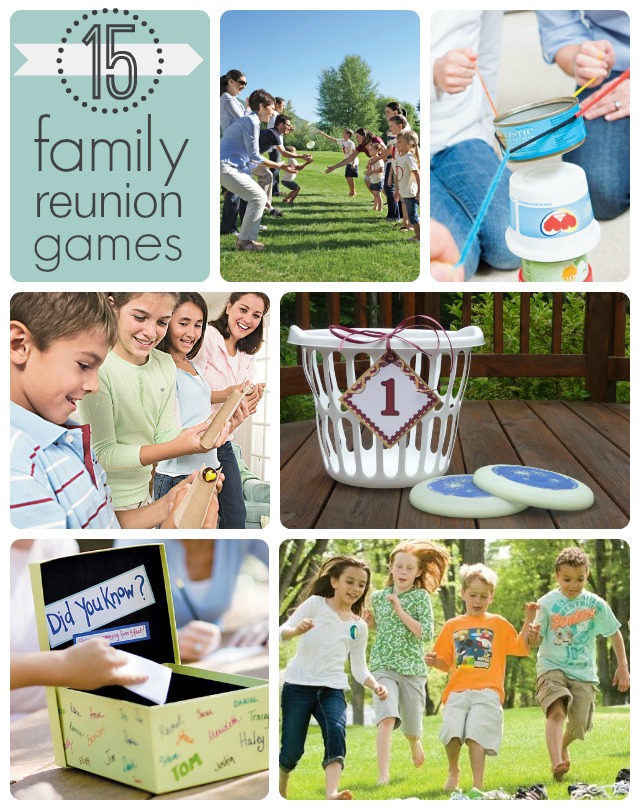
A great collection of ideas for tons of fun with your family!

15 Fun Family Reunion Games

4. Straw Rockets

Just print, cut, tape, and fly!

Straw Rockets Kids Summer Activity

5. Girls Just Want to Have Fun Birthday Gift

A classic movie for a totally fun gift!

Girls Just Want to Have Fun Birthday Gift with free printable

6. Red, White, and Chocolate Valentine Treats

Because the way to a man’s heart is through his stomach!

Red White & Chocolte Valentine Treats

7. Bathroom Rules

What better place than right on the toilet lid?!

Bathroom Rules on the toilet lid

8. Easy Mother’s Day Time out for Mom Gift Idea

Fill with chocolate and give the favorite mom’s in your life their own time out!

Moments of Promise for Mom

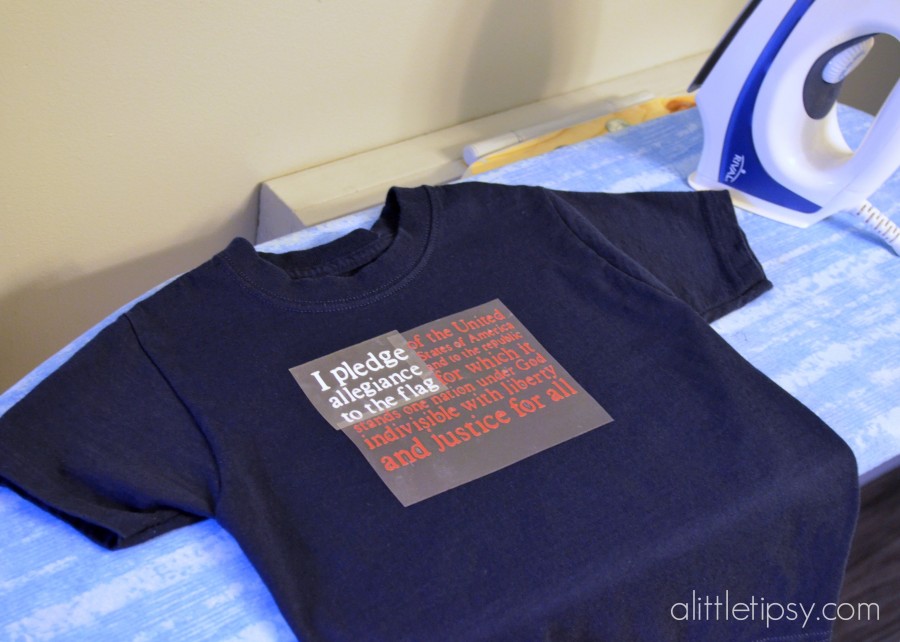
9. 4th of July Pledge of Allegiance Flag Shirts

Also a cheat sheet for grade schoolers. 😉

4th of July Pledge of Allegiance Flag Shirt

10. Spider Web Nail Gift Idea

Vinyl decals make this pedi a snap!

Halloween Nail Gift Idea

11. Mummy Halloween Treats

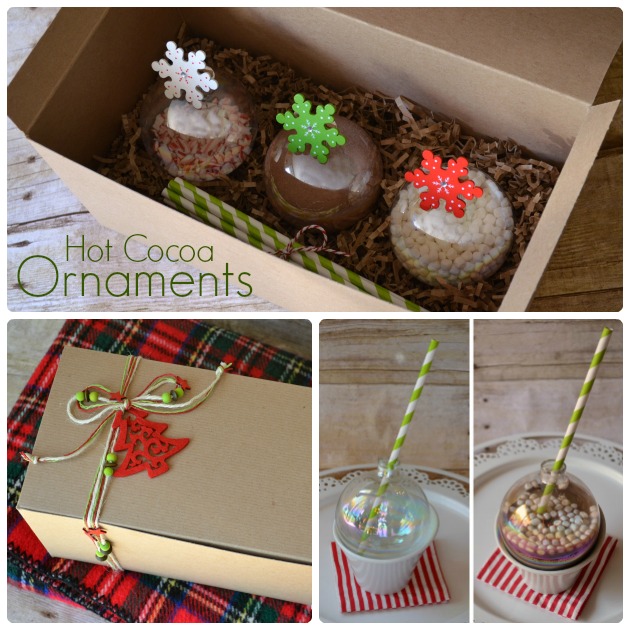
No bake, 3 ingredient, what more could you ask for?!

No- bake Mummy Halloween Treats

12. Hot Chocolate Ornaments

Yummy and cute. Win-win!
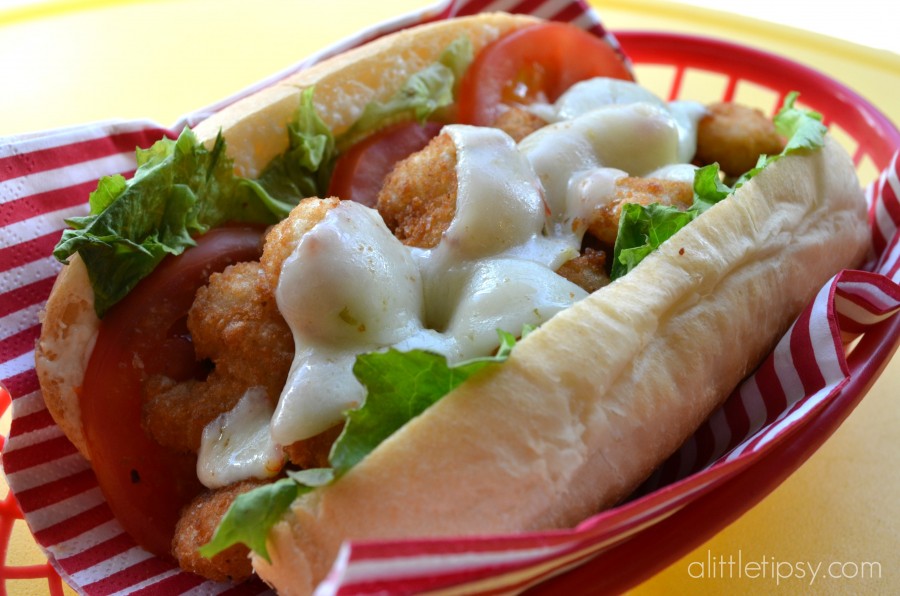
Hot Cocoa Ornaments

13. Shrimp Po’ Boys

Super fast and delicious!

Easy Shrimp Po Boys

14. Celebrate Summer Party

All you need is $20 to throw this fun celebration for kiddos!

Celebrate Summer Water Party Spending Only 20 dollars


Thanks for sharing this year with us and we look forward to 2015 with fresh ideas and loads of new projects to share!

4th of July Shirts: Pledge of Allegiance Flag

June 27, 2014 By Michelle Barneck 4 Comments

July 4th is right around the corner! Every clothing store around is selling flag shirts for a little USA spirit, but why not make some of your own? I love to put my boys in customized shirts and figured this would be the perfect opportunity for a little patriotic display of The Pledge of Allegiance. We kept the flag in there too for good measure.

4th of July Pledge of Allegiance Flag Shirt

You may recognize the design from a flag canvas I made for my house last year. I loved it so much I figured why not spread the joy to shirts?!

SUPPLIES:

  • Cricut Design Space Software
  • Cricut Explore
  • White Heat Transfer
  • Red Heat Transfer
  • Navy Shirts
  • Weeding Tool
  • Clean Cloth
  • Iron

I took this image from last years post and uploaded it in to Cricut Design Space. Cleaned it up, made a copy of the image and hid the contour to separate the white and red areas alternately on the two images. I was planning to share the design and save you a lot of work, but the software will not let you share designs of things you upload.

It will be easiest to just choose a font you like and copy my layout by typing in text boxes. Trust me. Then group the text boxes so you can move them as two images the white letters and the red letters.

Size the flags according to the size of shirt. Now you are ready to cut. Be sure your shirts are pre-washed to remove any shrinkage.

Be sure to flip the letters horizontally before cutting so they won’t be backwards! Cricut Design software has a check box to remind you of this on the cut screen. Select the iron-on setting (I use a Cricut Explore so mine is on a dial on the machine) and you are good to go. Load the heat transfer vinyl shiny side down and cut. You will load the mat twice, once with the white and once with the red.

Weed your vinyl removing all excess from between the designs. Be sure all the i’s have their dots.

Preheat the iron on it’s hottest setting with the steam turned off. Place the groups of white letter and red letters on the shirt to make sure you get them in the right place.

Iron on Heat Transfer 4th of July Shirts

Then remove the red letters and apply the white ones first. Place a clean cloth over it (I use a tea towel) and press firmly for 30 -40 seconds. Let it cool a bit and check for adherance. If it lifts up try 20 more seconds. If it is stuck remove the clear sheet and place the red letters in place to iron. Cover with cloth and iron as before.

For my boys shirts (size 4 and 6) the letters ended up tiny!! This was proof how accurately the Cricut Explore can cut. Look at them next to a quarter. Crazy!

Cut details with Cricut

I love how our 4th of July shirts turned out and can’t wait for them to sport them next week!

4th of July Shirt Pledge of Allegiance Flag

4th of July Pledge of Allegiance Flag Shirts

Iron-on Version Shirts for Father’s Day or New Dads

May 27, 2014 By Michelle Barneck 6 Comments

Product was provided by Expressions Vinyl.

It seems simple to shop for the Dad who loves fishing or golf. But, what about those of us married to computer geeks? They already have their laptop, tablet, and accessories. And even if they didn’t, sometimes it is hard to know what would be best with all the tech lingo specs that can confuse even the most savvy. We love to make Dad something special for Father’s Day and involving the kids is a total bonus. With a new little one on the way I wanted some coordinating shirts for them to sport so what do you do with a Computer geek dad and soon to be three boys? I introduce the version shirt.

version shirts for computer geeks

Hubby is a software developer and is always talking about how they are getting the next version ready for launch so I thought how perfect to incorporate that into shirts with our brand new version on his way in August!

I wanted our version shirts to look like the old school command prompt screen so I chose green apple on black for the heat transfer vinyl. The process is so simple!

1. In the Cricut Design Software find a rounded rectangle and using Bookman Old Style font place the letters v 1.0 for Dad, v 2.0 for the first child, and so on in each rectangle. I sized the rectangles and letters according to the size of shirt. Now you are ready to cut.

2. Be sure to flip the letters horizontally before cutting so they won’t be backwards! Cricut Design software has a check box to remind you of this on the cut screen. Select the iron-on setting (I use a Cricut Explore so mine is on a dial on the machine) and you are good to go. Load the heat transfer vinyl shiny side down and cut.

3. Weed your vinyl removing all excess from between the designs.

iron on version shirts

4. Cut apart the rectangles and version groups to prepare for ironing. Preheat the iron on it’s hottest setting with the steam turned off. Place a black rectangle down 1-3 inches from the neck of the shirt (depending on size of shirt) with the shiny side up. Place a clean cloth over it (I use a tea towel) and press firmly for 30 -40 seconds. Let it cool a bit and check for adherance. If it lifts up try 20 more seconds. If it is stuck remove the clear sheet and place the letters in the center of the rectangle. Cover with cloth and iron as before.

version shirt iron on

That’s it! You have a personalized gift for Dad that appeals to his fabulously geeky nature!

Version shirts for dad and kids

These version shirts are a huge hit with the hubby and I can’t wait for version 4.0 to arrive so he can don his!

version 4 shirt for 3rd baby

Our little family just keeps getting better with each new version!

Computer geek version shirts

  • Bloglovin
  • Facebook
  • Google+
  • Instagram
  • Pinterest
  • RSS
  • Twitter

Hi there! I'm Michelle. Mother of three little boys and one little princess. Welcome to A Little Tipsy, a place for exploring creativity and sharing inspiration.

Follow on Bloglovin


Visit Michelle Barneck {A Little Tipsy}'s profile on Pinterest.

Tutorials by Category


15 Family Reunion Games

Family Reunion Games Collage

15 Sprinkle Party Ideas

Sprinkle Birthday Party
Creative Commons License

© Copyright 2014 A Little Tipsy · Site Designed by The Fairy Blogmother · Web Hosting by RFE Hosting

This website uses cookies to improve your experience. We'll assume you're ok with this, but you can opt-out if you wish.Accept Read More
Privacy & Cookies Policy