July 4th is right around the corner! Every clothing store around is selling flag shirts for a little USA spirit, but why not make some of your own? I love to put my boys in customized shirts and figured this would be the perfect opportunity for a little patriotic display of The Pledge of Allegiance. We kept the flag in there too for good measure.

You may recognize the design from a flag canvas I made for my house last year. I loved it so much I figured why not spread the joy to shirts?!
SUPPLIES:
- Cricut Design Space Software
- Cricut Explore
- White Heat Transfer
- Red Heat Transfer
- Navy Shirts
- Weeding Tool
- Clean Cloth
- Iron
I took this image from last years post and uploaded it in to Cricut Design Space. Cleaned it up, made a copy of the image and hid the contour to separate the white and red areas alternately on the two images. I was planning to share the design and save you a lot of work, but the software will not let you share designs of things you upload.
It will be easiest to just choose a font you like and copy my layout by typing in text boxes. Trust me. Then group the text boxes so you can move them as two images the white letters and the red letters.
Size the flags according to the size of shirt. Now you are ready to cut. Be sure your shirts are pre-washed to remove any shrinkage.
Be sure to flip the letters horizontally before cutting so they won’t be backwards! Cricut Design software has a check box to remind you of this on the cut screen. Select the iron-on setting (I use a Cricut Explore so mine is on a dial on the machine) and you are good to go. Load the heat transfer vinyl shiny side down and cut. You will load the mat twice, once with the white and once with the red.
Weed your vinyl removing all excess from between the designs. Be sure all the i’s have their dots.
Preheat the iron on it’s hottest setting with the steam turned off. Place the groups of white letter and red letters on the shirt to make sure you get them in the right place.
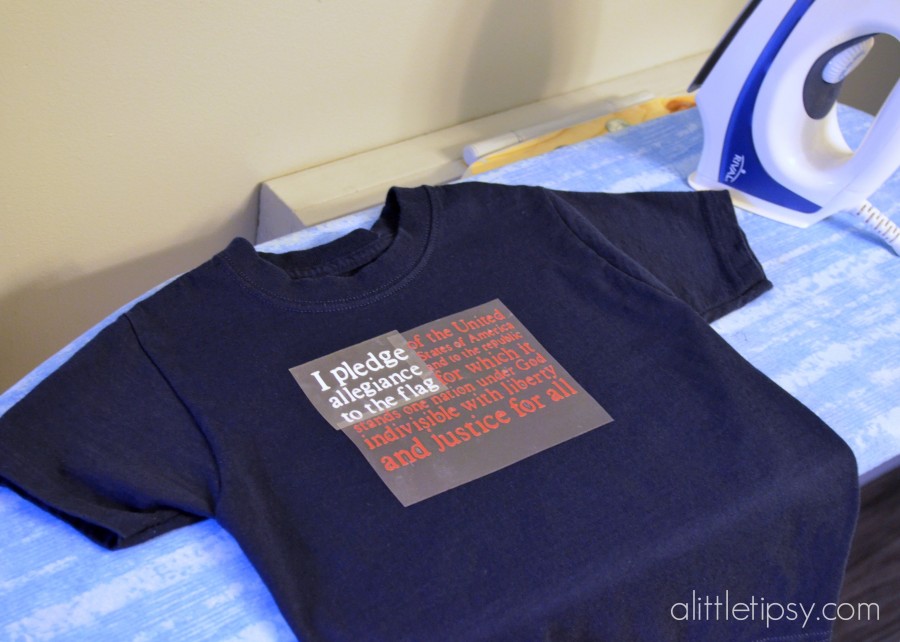
Then remove the red letters and apply the white ones first. Place a clean cloth over it (I use a tea towel) and press firmly for 30 -40 seconds. Let it cool a bit and check for adherance. If it lifts up try 20 more seconds. If it is stuck remove the clear sheet and place the red letters in place to iron. Cover with cloth and iron as before.
For my boys shirts (size 4 and 6) the letters ended up tiny!! This was proof how accurately the Cricut Explore can cut. Look at them next to a quarter. Crazy!
I love how our 4th of July shirts turned out and can’t wait for them to sport them next week!


This is super cute! My life is way to crazy to try and make this….do u have an etsy shop to sell these?
I’m so glad you like them! Unfortunately, I do not have an etsy shop.