A Little Tipsy

Creative Tips & Ideas

  • home
  • About Me
  • the tipsy top
  • press
  • projects
  • contact me
[print_thumbnail_slider]

DIY Halloween Bunting for $1

October 8, 2013 By Michelle Barneck 3 Comments

Hey guys, Vanessa here from Our Thrifty Ideas. I’m super excited to be popping back over here today, sharing this fun and super simple project for Halloween.

  DIY Halloween Bunting for just a dollar
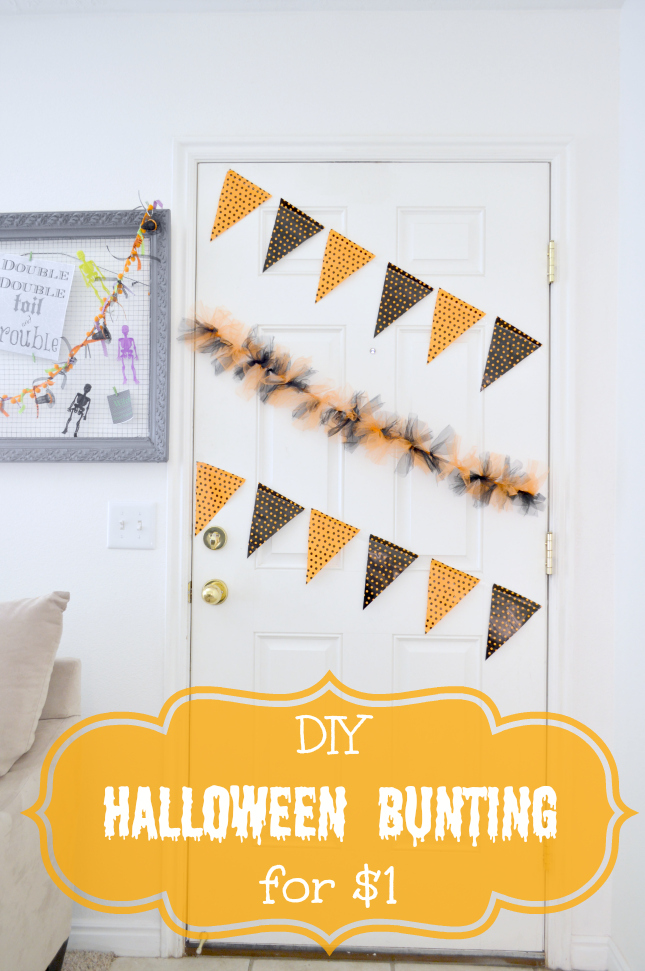
 About 2 1/2 weeks ago I asked my husband if it was too early to put my Halloween wreath on the front door. I barely got the words out of my mouth before he screamed “YES”. I was not allowed to let everyone know that I decorate extremely early for holidays. I was banned from taking down the Summer banner until at least October 1st. UGH, well, that didn’t stop me from putting Halloween stuff up on the INSIDE of the door! And how can he complain when I only spent $1 on the cute bunting!

  DIY Halloween Bunting for just a dollar

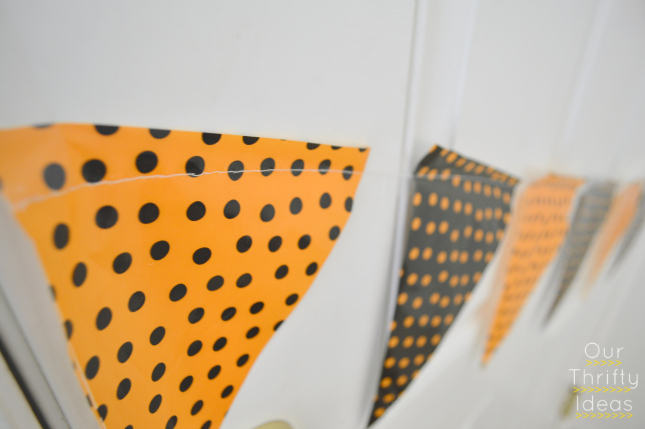
You can find the polka dot bunting at Walmart in their Halloween section for just $.97. I cut it in half to create two smaller buntings. For the center one, I used some scrap tulle that I had laying around from past projects, so that didn’t cost me anything. But if you didn’t have any, you could use fabric, ribbon, or even go purchase some for just a few dollars (make sure to use your craft store coupons!). I just did a double knot onto some black ribbon with about 6 inch strips of tulle.

  DIY Halloween Bunting for just a dollar   

I love that not only do you get an impact from our {now} Halloween decorated front door when you get here, but you also see this fun decor right before leaving as well.
If you loved this post, check out some more of my fun Halloween ones.
Paper Bag Monsters made by your kids Coloring your white cake batter to make these fun CandyCorn cupcakes. Just layer them before baking and cook as usual.
Paper Bag Monsters | Candy Corn cupcakes
Spooky Halloween Banner from OurThriftyIdeas.com Halloween Porch Ideas
Spooky banner tutorial | 13 Halloween Porch Ideas
———————————————————————
I love a good bargain and dressing up the door for a pop of holiday fun as you walk out the door is so fun! Thanks Vanessa!
We have decided to truncate our feed to help protect against stolen content. I apologize for any inconvenience. Please love us anyway. 🙂

Halloween Spider Cupcakes #12monthsofmartha

September 26, 2013 By Michelle Barneck 3 Comments

Sponsored by Martha Stewart Crafts.

Halloween is on it’s way and that means parties, treats and well more treats. It is fun to have some Halloween themed goodies up your sleeve for class parties and other get togethers and these spider cupcakes are so perfect! They look impressive, but are so easy!
SPIDER CUPCAKE SUPPLIES:
  • Favorite Cake Recipe
  • Martha Stewart Treat Wrappers
  • Favorite Frosting Dyed Purple
  • White Candy Melts
  • Ziploc Bag
  • Martha Stewart Spider Stickers

1. Prepare cupcakes, bake, and while letting them cool prepare the spider webs. 
2. Melt the candy melts 30 seconds at a time in the microwave. Put the candy melts in a ziploc bag and cut a tiny hole in the end. Draw some spider webs on a piece of paper and cover the sketches with wax paper. 
3. Trace the drawings with the chocolate and let them harden while you frost the cupcakes with purple.

4. Carefully remove the spider webs from the wax paper and place on top of the frosted cupcakes. Place a spider sticker on each spider web.

I love these Martha Stewart Treat Wrappers! They are lined with foil so the designs stay perfectly bright!

We had so much fun making these spider cupcakes and probably even more fun sharing them with our friends and neighbors!

This treat was created as part of the 12 months of Martha program.

ST_12_months_of_Martha_Logo-1

See our other 12 months of Martha projects by checking out the links below:

  • January – Glitter Nails
  • February – Shamrock Banner
  • March – Stenciled Glass Vase
  • April – Gifts for Mom: Easy Photo Magnets
  • May – Flower Sash
  • June – Bottle Piggy Banks
  • July – Glittered Wine Glasses
  • August – Little Star: highlinghting your child’s special day

I also wanted to let you know about a movement sweeping the creation nation. It’s called Cre8time and it is all about reclaiming your time to do the things you love. Check out all the details and share your creations at cre8time.org.

Disclaimer: Martha Stewart Crafts provided product for review.

We have decided to truncate our feed to help protect against stolen content. I apologize for any inconvenience. Please love us anyway. 🙂

15 Creative Family Costumes

September 25, 2013 By Michelle Barneck Leave a Comment

It’s time to start thinking costumes and I love that my kids are still little enough that they don’t argue at the mention of family costumes. I think it is super fun to coordinate and went on a search for the best family costumes. There are so many creative families out there and I think you’re going to love what we stumbled upon!


Mario Bros.


Flinstones


Pacman

DSC_0083.JPG

Plants vs. Zombies

Napoleon Dynamite Family - Homemade costumes for families

Napoleon Dynamite

Despicable Me Family - Homemade costumes for families

Despicable Me Family


Scooby Doo 


Lions and Tigers and Bears…oh my


Superheroes
Family #StarWars Costumes. Saw the R2D2 costume IRL and it rocked!
Star Wars


Peter Pan


Where’s Waldo?


S’mores

Classic B.L.T.

B.L.T.


Cops and Robbers
There are so many adorable ideas, how can you choose just one? I’m hoping I have a few more years of having my kids think family costumes are fun so we can squeeze in as many as possible.

Have you done/do you do family costumes? What is the best family costume you’ve seen?
We have decided to truncate our feed to help protect against stolen content. I apologize for any inconvenience. Please love us anyway. 🙂

Halloween Spooky Front Porch Arrows

September 24, 2013 By Michelle Barneck 3 Comments

Hi, it’s Amy again, here from The Happy Scraps.  I’m so excited to share my Halloween Front Porch with you today.  These arrows are one of my very favorite ways to decorate for different Holidays and Seasons.

Let me show you how I did this.  I started by painting the face of my arrows, the color that I wanted my letters. Then I put vinyl lettering on the arrows. Next, I painted over the lettering, with the color that I wanted the arrow.  On the Mummy Tomb one, after the white paint dried, I used painters tape to make it look like a mummy, and painted the small lines gray.  Once the paint was all dry, I peeled up the vinyl.  My arrows were looking pretty good, but I finished them off my sanding them, and distressing the edges. 

Once they were distressed, I added ribbon to them, and attached them to the stake. 

I also added some cob webs. 

Seeing this by my front door is getting me really excited for Halloween!!

I hope you’ve enjoyed this tutorial!  If you’d like to see more Halloween Projects, come on over to The Happy Scraps and check them out.

 
———————————————————————-
Thanks Amy! These are the perfect way to add some spook to your porch! I love how you added the mummy feel with the painters tape!
We have decided to truncate our feed to help protect against stolen content. I apologize for any inconvenience. Please love us anyway. 🙂
« Previous Page
Next Page »

  • Bloglovin
  • Facebook
  • Google+
  • Instagram
  • Pinterest
  • RSS
  • Twitter

Hi there! I'm Michelle. Mother of three little boys and one little princess. Welcome to A Little Tipsy, a place for exploring creativity and sharing inspiration.

Follow on Bloglovin


Visit Michelle Barneck {A Little Tipsy}'s profile on Pinterest.

Tutorials by Category


15 Family Reunion Games

Family Reunion Games Collage

15 Sprinkle Party Ideas

Sprinkle Birthday Party
Creative Commons License

© Copyright 2014 A Little Tipsy · Site Designed by The Fairy Blogmother · Web Hosting by RFE Hosting

This website uses cookies to improve your experience. We'll assume you're ok with this, but you can opt-out if you wish.Accept Read More
Privacy & Cookies Policy