A Little Tipsy

Creative Tips & Ideas

  • home
  • About Me
  • the tipsy top
  • press
  • projects
  • contact me
[print_thumbnail_slider]

White Picket Fence

March 26, 2013 By Michelle Barneck 3 Comments

Hey everyone. I’m Vanessa hopping over today from Our Thrifty Ideas. I’m so happy to be a contributor here at A Little Tipsy and be able to share some of my crazy life with you from time to time. Today I’m sharing a fun tutorial to get you in the spring and summer mood!

Mini Picket Fence

I love to make décor to feature at my home for the seasons and holidays. Recently I made this fun homemade picket fence to use as a background for my table décor. Our kitchen table is pushed up against the wall, and I try to use just a small section of it to brighten up the area for the coming season.

DSC_0050

I used some pine stakes from Home Depot (just $4 for 12 stakes!) to get the fence effect. You can find them by the cement. I then used my staple gun to connect them. One at the top (just below the point) and one at the bottom.

Then I primed them and put a white wash on top of that. Once both were dry, I sanded them down a bit for a more rustic look.

DSC_0086

Once the “fence” was done, I dressed it up with a small fabric bunting. Using fabric shears, I cut out triangles and hot glued them to some bright bakers twine.

DSC_0094

Then I strung it (aka, used packaging tape to tape it to the back. Yup, real technical!) Oh, and I didn’t even take the time to paint the back. Lazy I guess!

Lazy or not, it turned out amazing and I’m loving it. You can use it as a center piece like I did (paint the back and stand it up in the middle if you’d like), use it to add height to already existing decorations you have, or even clip a picture to the bunting and use it like a frame.

PicMonkey Collage

However you choose to use it, you can switch out the bunting for the holidays, and use it all year round.

Do you have a home décor staple that stays up all year with just a little tweaking? I’d love to hear what it is.

————————————————————————–
Isn’t this the American dream, the white picket fence? I totally want one! This is so fun for spring and would be great with red and blue for summer! This is totally on my to do list. Thanks Vanessa!
We have decided to truncate our feed to help protect against stolen content. I apologize for any inconvenience. Please love us anyway. 🙂

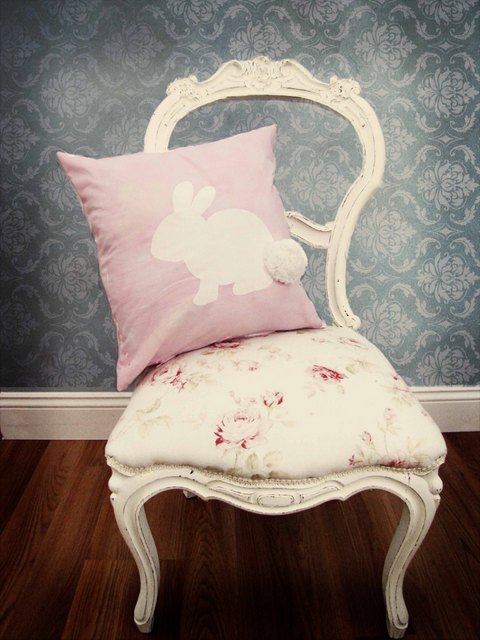
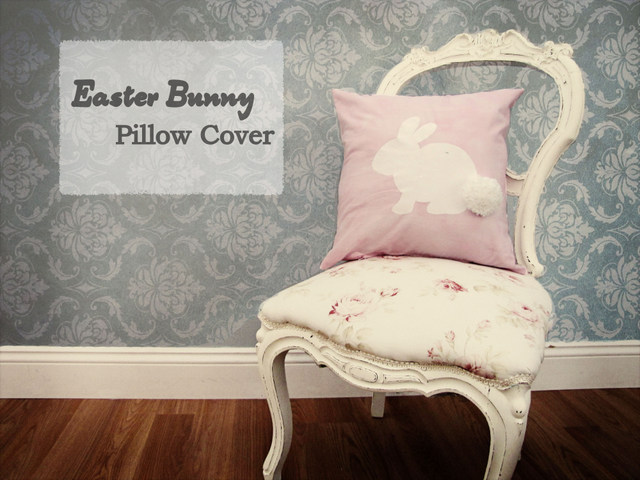
Pom Pom Bunny Pillow

March 19, 2013 By Michelle Barneck 5 Comments

Hi there, A Little Tipsy readers! I’m Terra from mama says sew and I’m excited to be here to share a sewing project with you today.
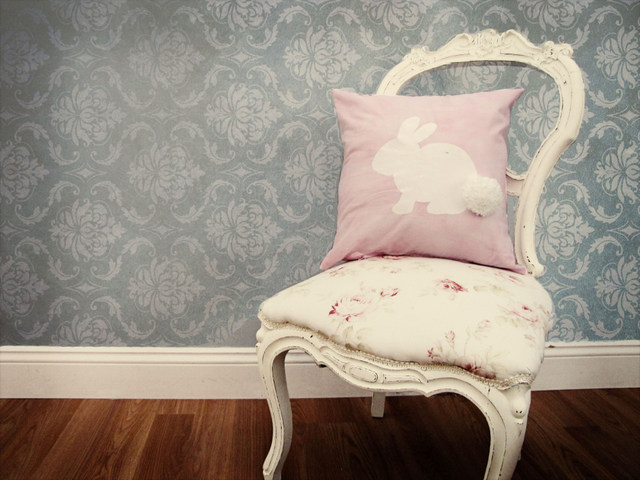
I’ve seen some Easter decor that have a bunny with a pom pom for a tail {see here and here}. I decided to take that idea and turn it into a bunny pillow cover.

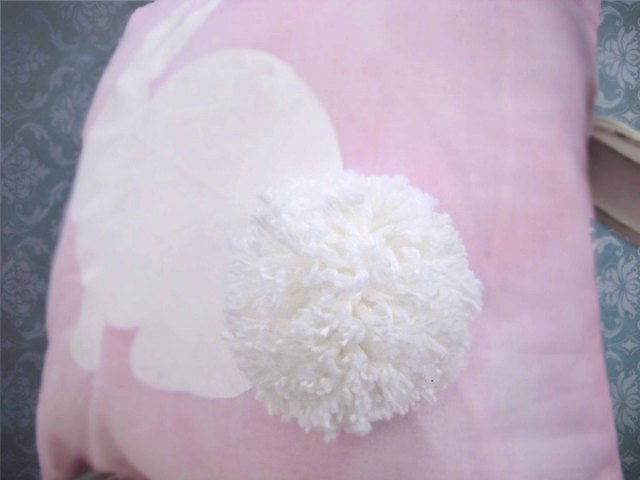
I love his fluffy little tail.
I’ll show you how to stencil the bunny on your fabric, and then insert a zipper as you make your pillow cover. That way, you can easily change out your decor when Easter is over {and you don’t have to store an entire pillow}! Another great thing about zippered pillow covers is you don’t have to do any hand stitching to finish up.

Here’s how to make the bunny pillow.
You will need:
  • About 1 yard of fabric
  • Pillow Form
  • Freezer Paper
  • Fabric Paint or Acrylic Paint
  • Zipper
  • Sewing supplies, ie, thread, scissors, sewing machine

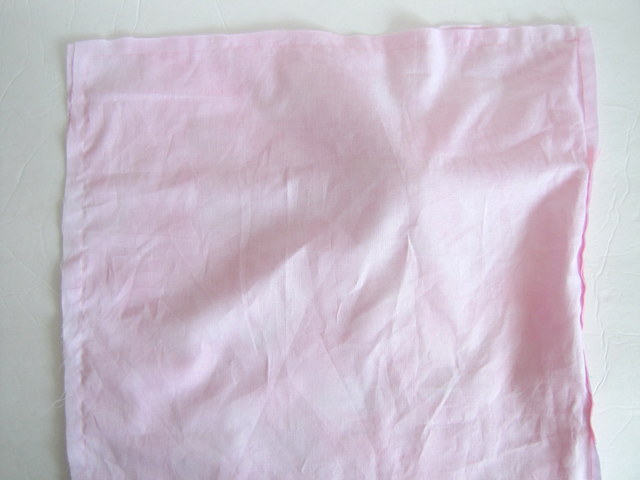
First, cut out two squares of fabric, the size of your pillow form, plus 1 inch. For example, if you have an 18 x 18 inch pillow form, cut out two 19 X 19 inch squares.

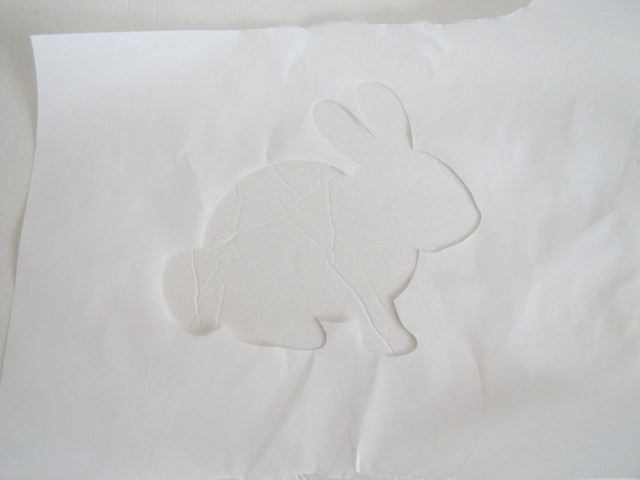
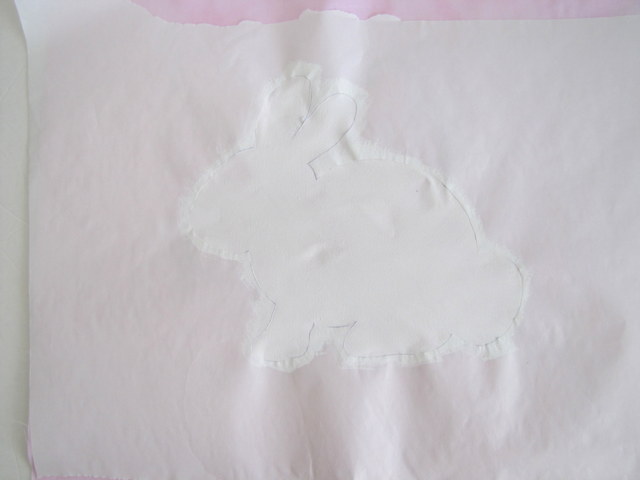
First, draw or trace a stencil onto freezer paper. I found the stencil I used here and enlarged it.

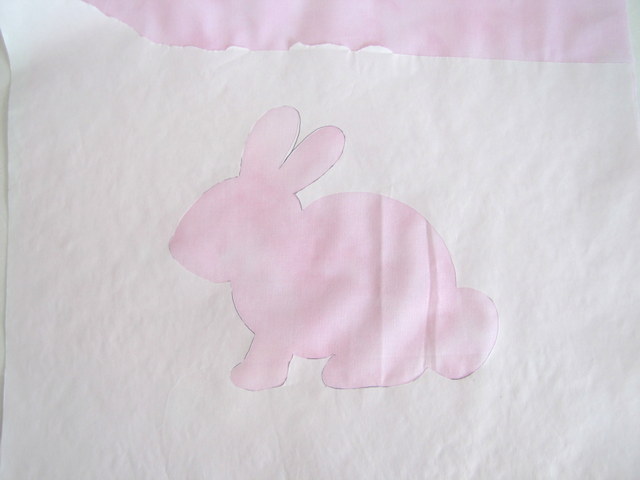
Cut out the stencil and iron the freezer paper onto the right side of one of your pillow squares.
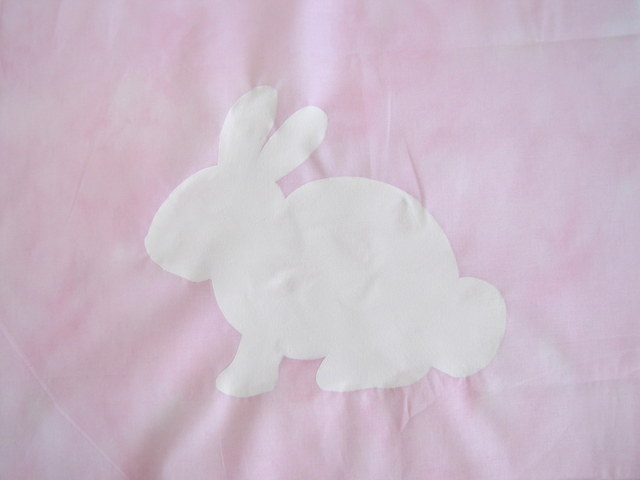
Fill in the stencil with paint and allow to dry.
Peel off the stencil.

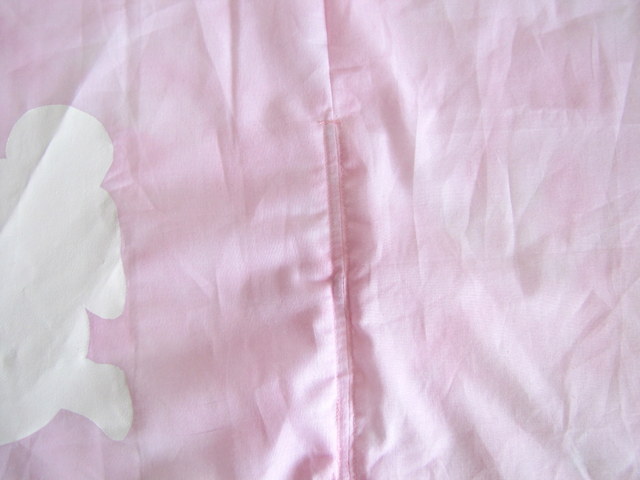
Sew your two squares right sides together along the bottom edge of what will be your pillow. This is important. Make sure the bottom of the bunny is closest to the seam.

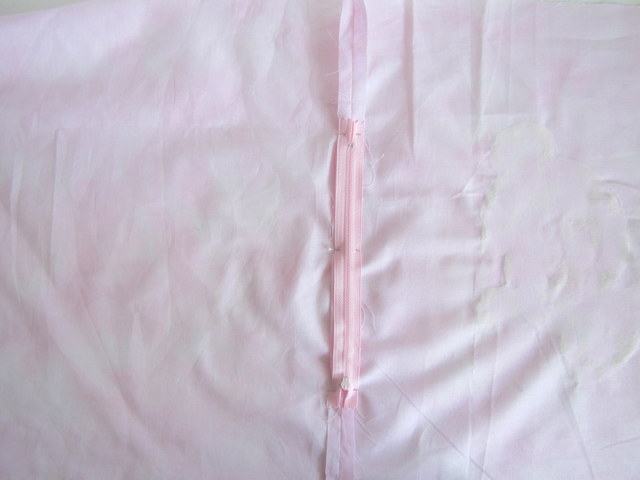
Press the seam open and center the zipper over the wrong side of the seam with the zipper pull on the bottom, as shown. The size of your zipper isn’t a big deal, as long as it opens wide enough to insert your pillow through and is shorter than your pillow form.
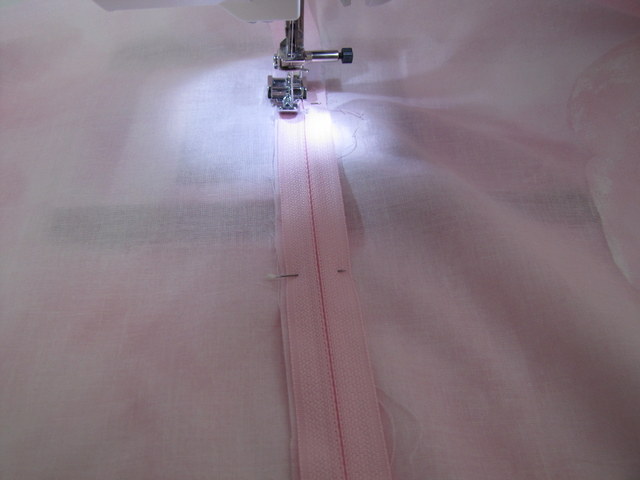
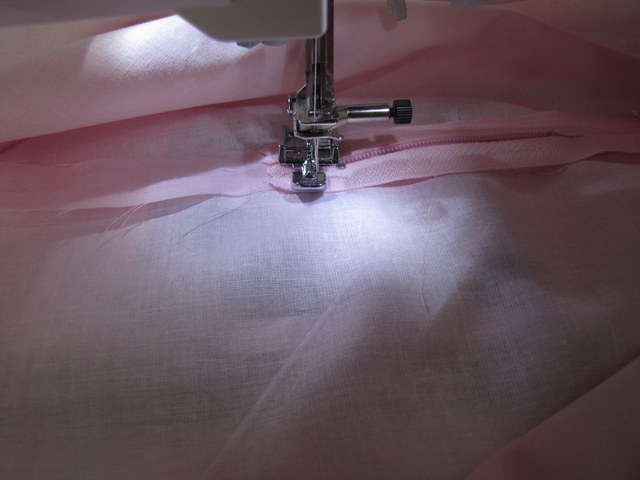
Using your zipper foot, stitch up one side of the zipper.

When you get to the top of the zipper, leave the needle inside the fabric and pivot. Sew across the top of the zipper. Go back and forth a couple of times to make sure your zipper is secure. Then pivot again and go back down the other side. Pivot and go back and forth to secure the bottom of the zipper. You may find it helpful to stop and move the zipper pull as you sew, so that it is out of your way.
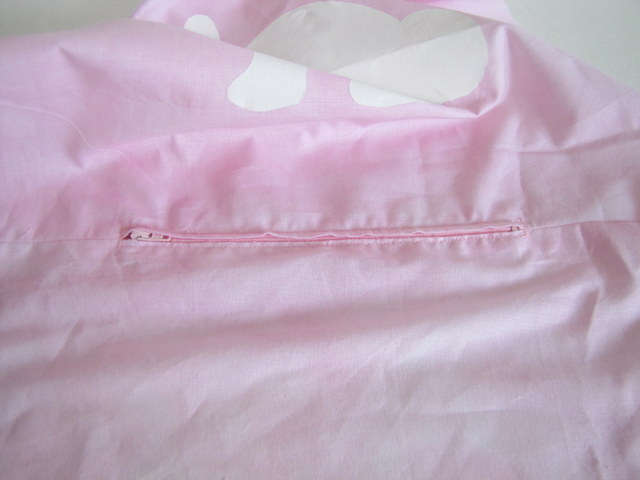
When you’re done, you should have something like this.
Use your seam ripper to open up the stitches on top of the zipper.
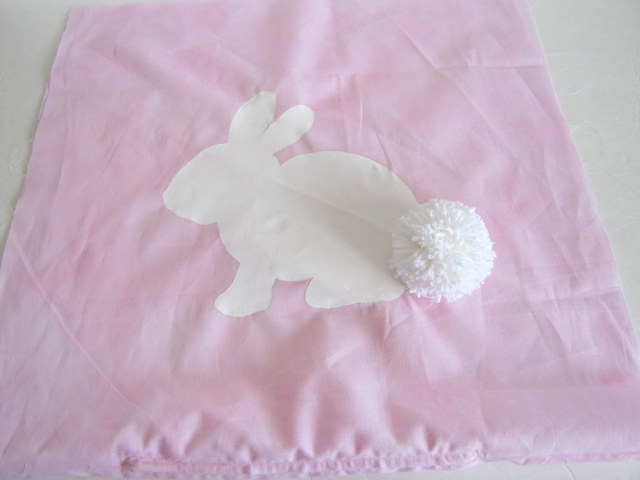
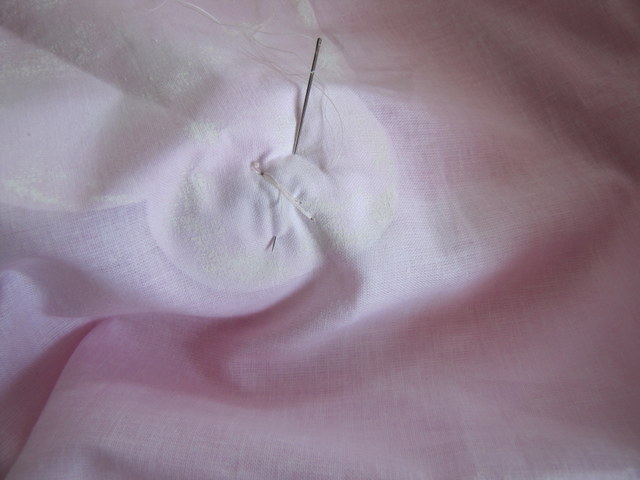
Make a pom pom and stitch it to the tail of the bunny.
I used a needle to make big stitches underneath the pom pom to hold it securely.
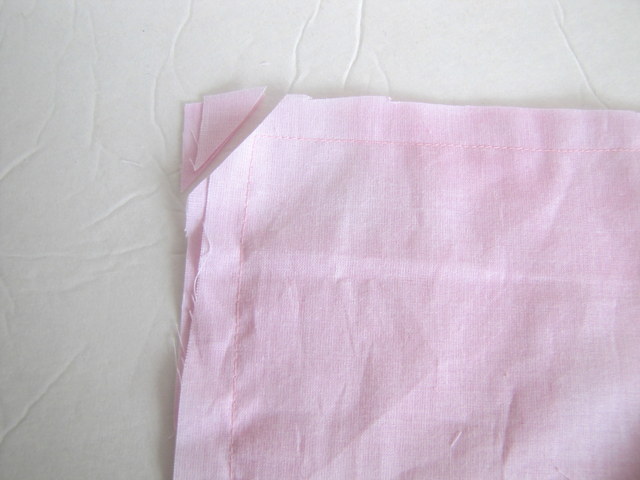
Match up the pillow squares right sides together and stitch around the rest of the pillowcase 1/2 inch from the edges. Make sure to unzip the zipper before you do this!

Clip your corners and turn right side out.
Insert your pillow into your new pillowcase and viola! Instant decor.
Thanks Terra for such a cute Easter project! I have seen pom poms popping up everywhere and this bunny pillow is such a fun way to try out the trend!
We have decided to truncate our feed to help protect against stolen content. I apologize for any inconvenience. Please love us anyway. 🙂

Easter Treats for Kids

March 13, 2013 By Michelle Barneck 3 Comments

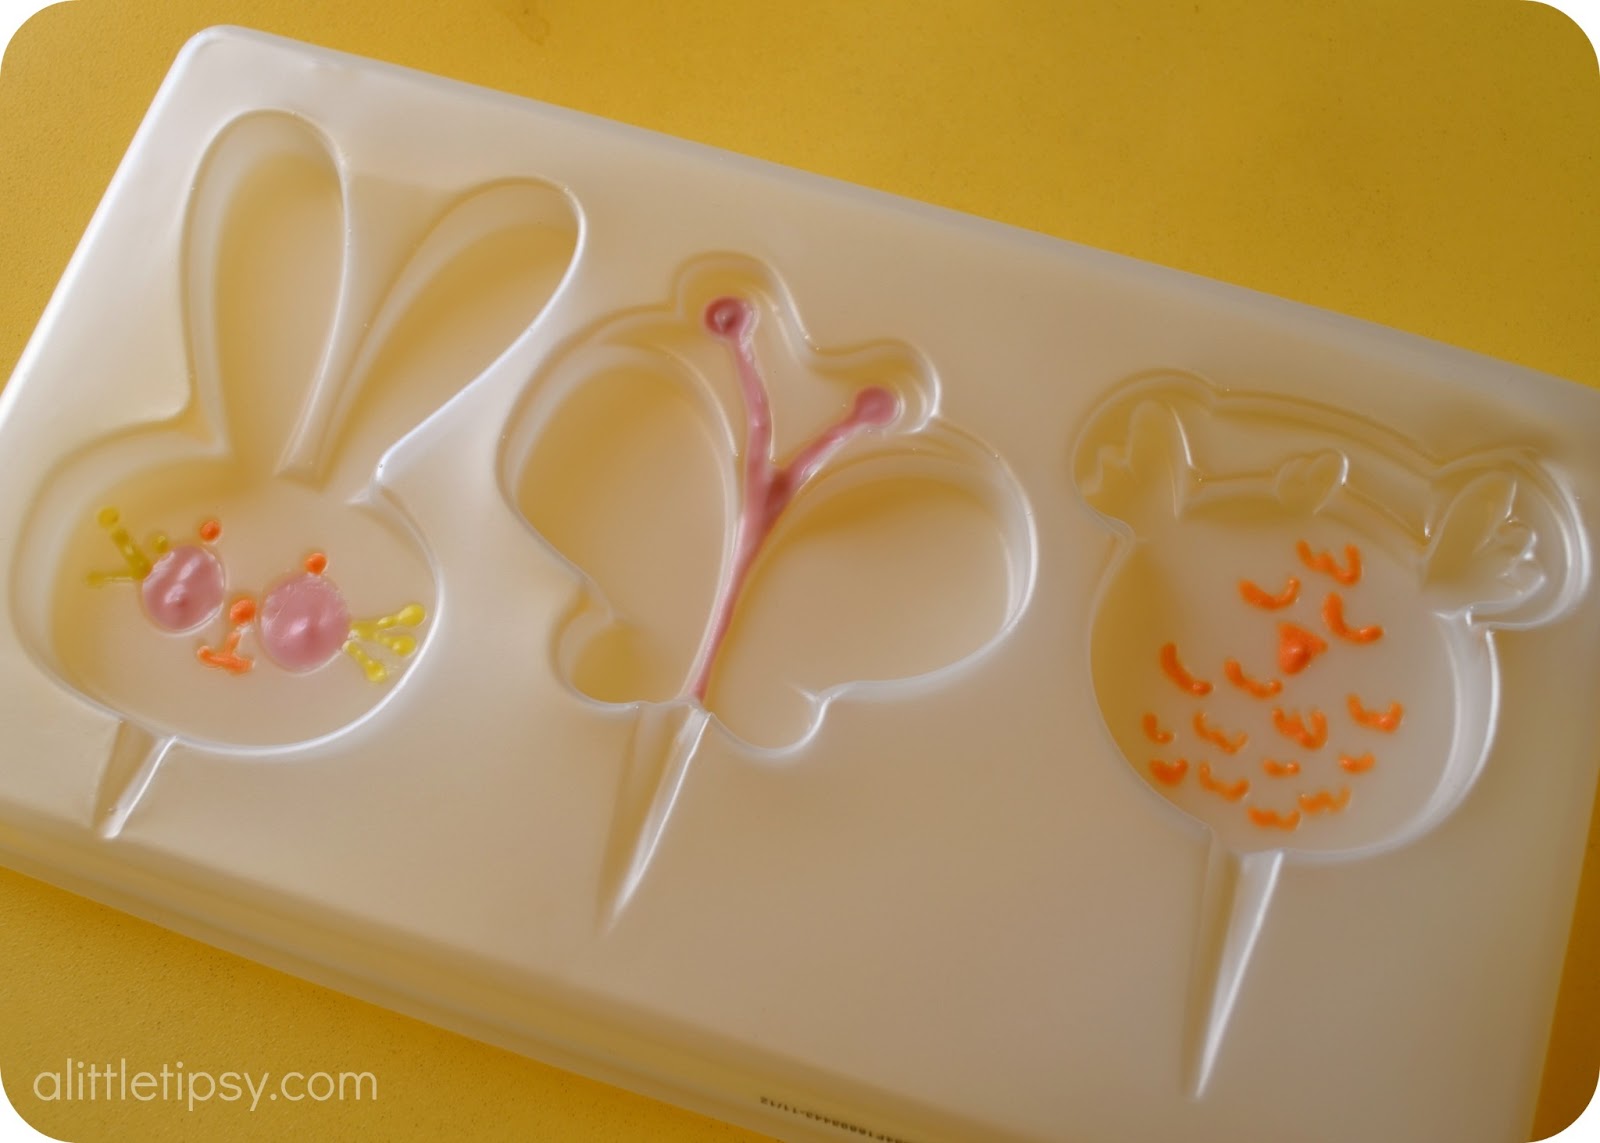
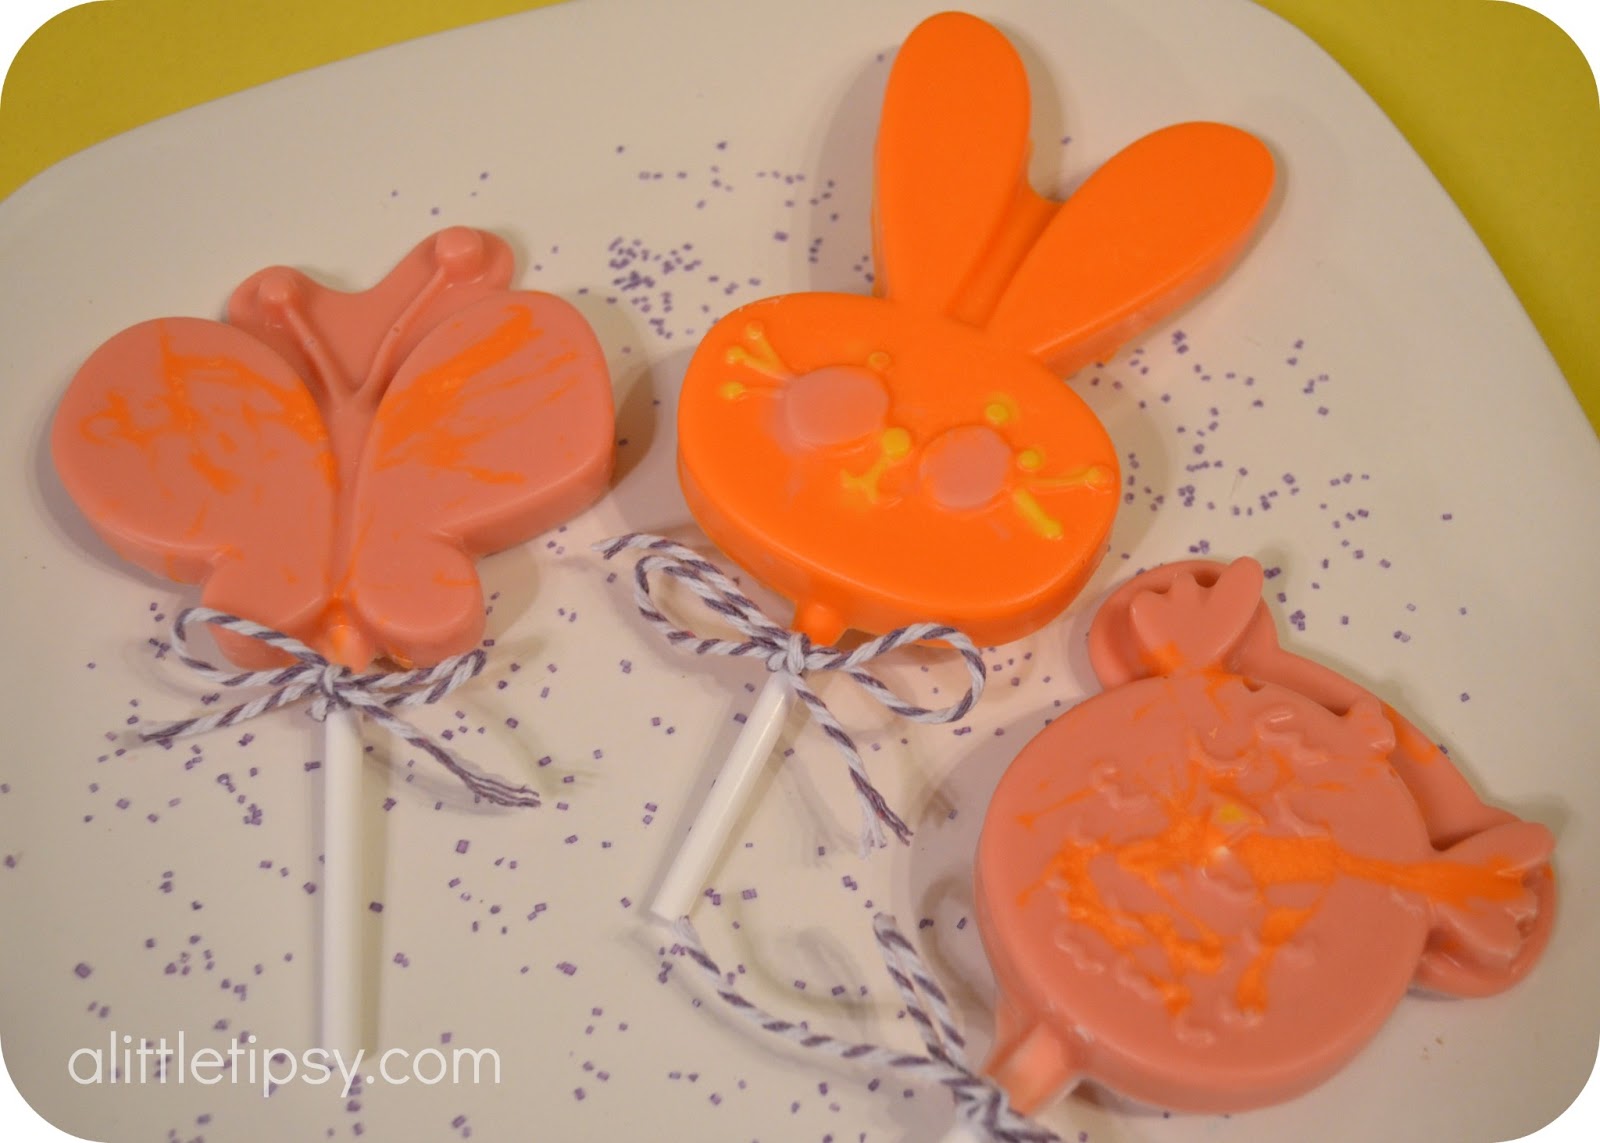
We found the cutest candy molds in the Target Dollar Spot. They had bunnies, butterflies, chicks, eggs and flowers. I remembered making lollipops with my mom when I was young and how fun it was to make your own candy. I knew it would be the perfect Easter treats for kids.

Easter Treats for Kids
SUPPLIES:
  • Candy Mold and sucker sticks (both in the Target dollar spot kit)
  • Colored candy melts
  • Small bowls
  • Spoons
  • Toothpicks

1. Melt down the candy melts you want for your first layer of color according to package directions. You’ll only need a little bit for this step. Use a toothpick to “paint” the melts in to the detailed grooves in the mold. Let dry.

2. Melt down the colors for your second layer. Spoon the melts into the molds and move in to grooves as necessary with toothpick. Add the sucker sticks and cover them. Let this dry until the top layer is set.
3. Add your last layer (white behind butterfly antennae and chick wings) and make sure there is a thick enough layer behind the sticks to hold them securely. Let them dry completely. You can put them in the fridge if you you need to speed it up.

4. To remove from mold, turn them over and carefully wiggle them out.
These easter treats are easy for the kids to do themselves too. This bunny was made by my 5 year old and the other two by my two year old. They LOVED painting with candy!
They are totally kid approved, which means they may not last long!

We have decided to truncate our feed to help protect against stolen content. I apologize for any inconvenience. Please love us anyway. 🙂

DIY Stenciled Easter Decor

March 12, 2013 By Michelle Barneck 2 Comments

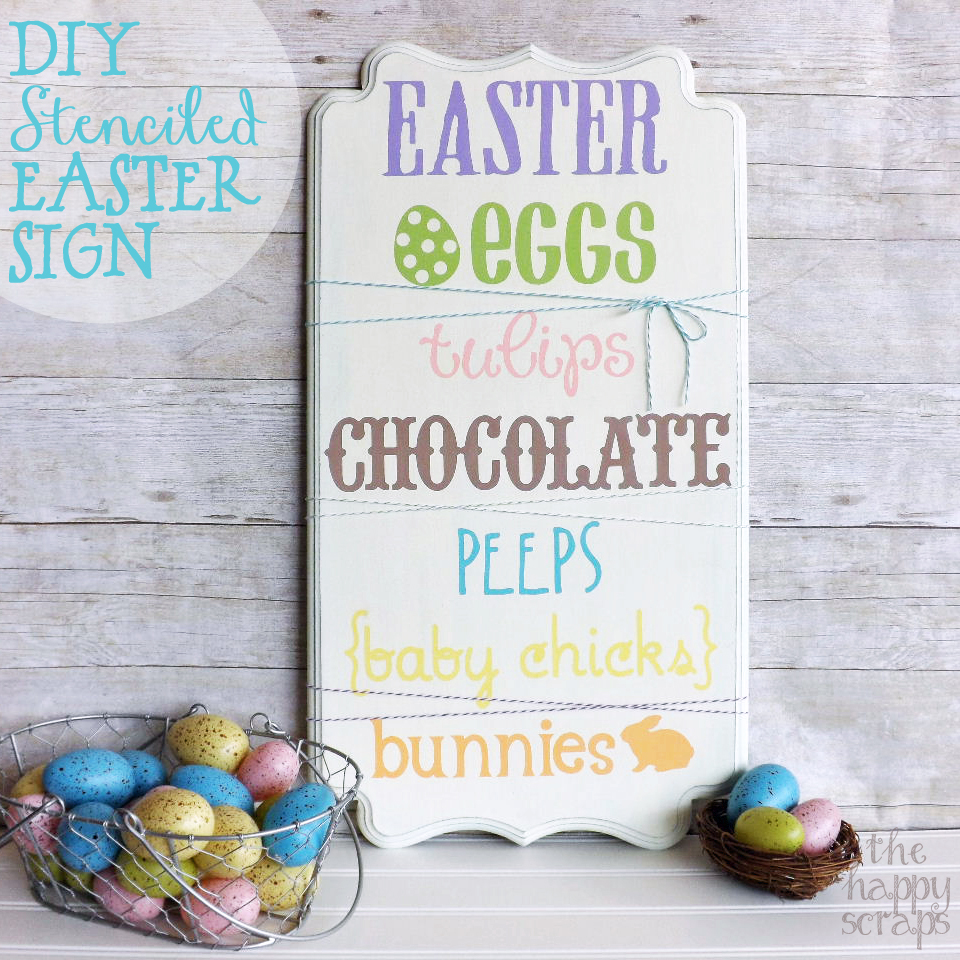
I am so delighted to be here at A Little Tipsy, sharing my first contributor post!  I am Amy and I blog over at The Happy Scraps. Today I want to share with you this fun DIY Stenciled Easter Sign.  It is so simple to make, but does take a little bit of time.

Start off with your board, and paint the edges blue.  Once that is dry, you can start putting your layers of white on.  If you are using MDF, then it will take a few coats.  Once you are finished painting the white on, distress your edges to reveal the blue.  Next, using some vinyl and your Cricut, you will cut out your stencil and stick it on. Click here to download the template for Cricut Craft Room. Now you are ready to paint!  Pick out your Easter colors of paint and get painting.

Once you’ve painted all of your words the desired colors, peel up your stencil.  At this point, I took some fine sandpaper and sanded the top of my sign, just to smooth it out a little bit, then I wiped it down with a wet wipe to get the dust off.

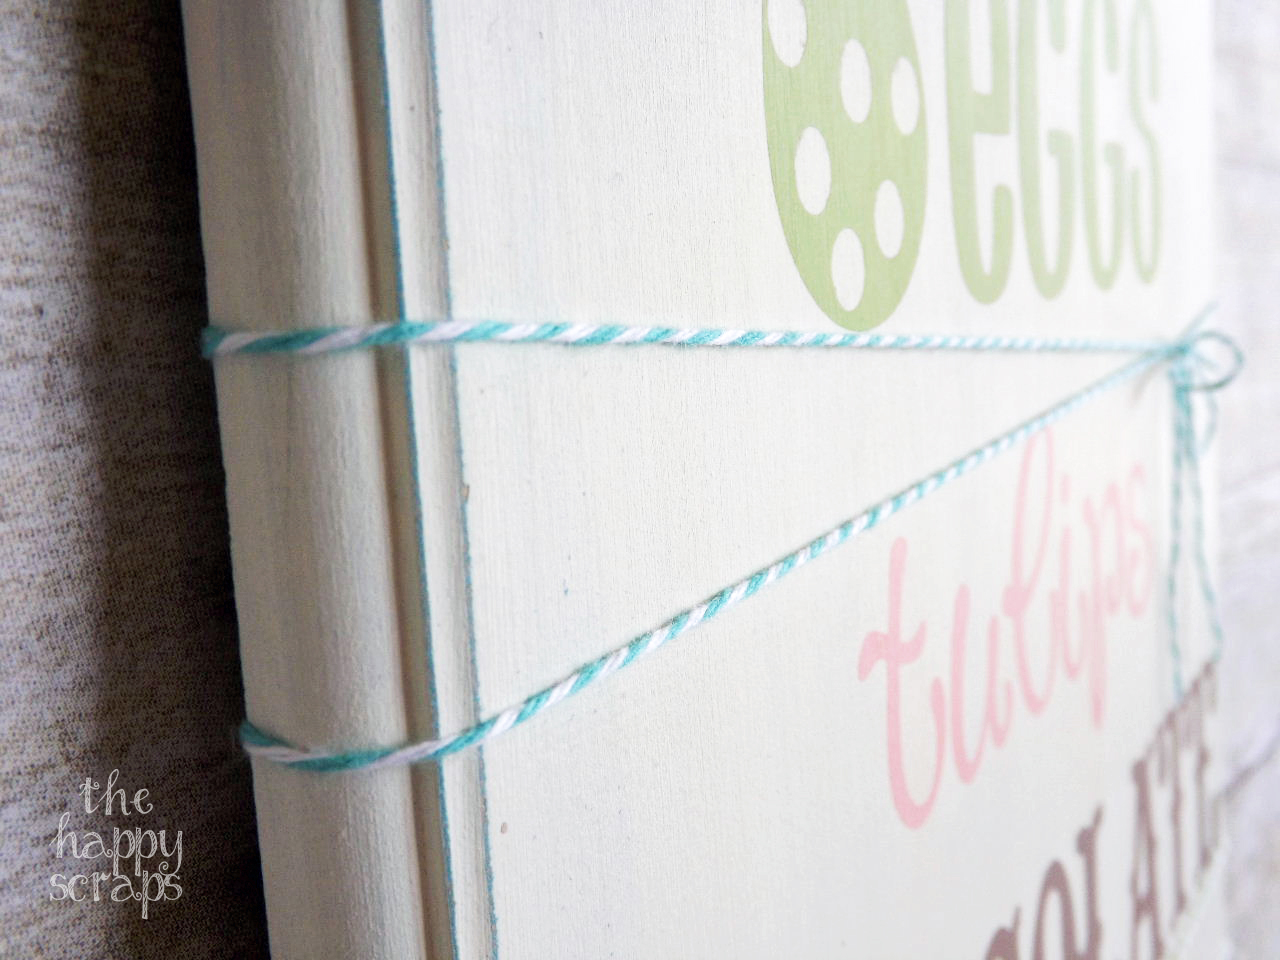
Once I was finished with the distressing, I wrapped some twine around the board in a few different places. 

That’s it, you are finished!  Now you just need to find the perfect place to put it in your home.

I hope you’ll come by and visit over at The Happy Scraps!  I’d love to have you!

Thanks Amy! Love this project and I think the twine was the perfect addition! 

We have decided to truncate our feed to help protect against stolen content. I apologize for any inconvenience. Please love us anyway. 🙂
« Previous Page
Next Page »

  • Bloglovin
  • Facebook
  • Google+
  • Instagram
  • Pinterest
  • RSS
  • Twitter

Hi there! I'm Michelle. Mother of three little boys and one little princess. Welcome to A Little Tipsy, a place for exploring creativity and sharing inspiration.

Follow on Bloglovin


Visit Michelle Barneck {A Little Tipsy}'s profile on Pinterest.

Tutorials by Category


15 Family Reunion Games

Family Reunion Games Collage

15 Sprinkle Party Ideas

Sprinkle Birthday Party
Creative Commons License

© Copyright 2014 A Little Tipsy · Site Designed by The Fairy Blogmother · Web Hosting by RFE Hosting

This website uses cookies to improve your experience. We'll assume you're ok with this, but you can opt-out if you wish.Accept Read More
Privacy & Cookies Policy