A Little Tipsy

Creative Tips & Ideas

  • home
  • About Me
  • the tipsy top
  • press
  • projects
  • contact me
[print_thumbnail_slider]

DIY Under $5 {Lucky Penny}

August 24, 2011 By Michelle Barneck 16 Comments

Find a penny pick it up, rest the day you’ll have good luck. What luck to find such a cute idea in Law Student Craft’s Etsy shop! I was inspired by her simple, happy design, but decided to take it a step further and make it a wearable reminder of how each of us is lucky in our own way.


This was a super fast and easy project. I used my 1/4 inch stamp set (got mine at Harbor Freight for like $10) and stamped in the letters using a hammer.

I got the rest of the supplies (keychain, jump rings, silver ring base) at Hobby Lobby for $5.

Lucky Penny Keychain:

1. Punch a hole in the top of the penny with the pointed stamping tool or a nail or screw.

2. Attach the penny to the keychain with a jump ring.

Totally complicated right. 😉

Lucky Penny Ring:

1. Glue the penny to the ring base (one of those ones with the big circle on it for stability) using glue meant for metal.

I know, really difficult tutorial.

You can use old or new pennies depending on the coloring you like. I love the idea of using a penny from the recipients birth year.

On the new penny I rubbed a little Martha Stewart Satin Chestnut Brown paint in to the letters to make them stand out more.

I think I may make these for my church youth group as well. We gave them charm bracelets that we give them charms for every now and again and I think these would be perfect!

Now it’s time to link up your $5 projects!

Please remember:

  • Only link to your own projects that cost you $5 or less (price does not have to include items you had on hand)
  • You can link past projects that fit the dollar limit, but please only link each project one time to one DIY Under $5 party. Do not link the same project week after week.
  • No linking giveaways or items for sale
  • Please link back so others can join the party and so you have the opportunity to be featured on Saturday!


DIY under $5


Thrifty Thursday

Transformation Thursday

Strut Your Stuff

Show Off Your Stuff

Look What I Made

Whatever Goes Wednesday

————————————————

Also, just a little FYI…the winner of the Pick Your Plum Giveaway is…


Crafting For Chiari said…

I always look forward to my daily email from pick your plum! I have already ordered twice!

Congrats!

P.S. Don’t forget to sign up for free Tipsy updates via RSS or email.

We have decided to truncate our feed to help protect against stolen content. I apologize for any inconvenience. Please love us anyway. 🙂

Frosted Mirror with Martha Stewart Paint

August 23, 2011 By Michelle Barneck 32 Comments

About a week ago I got a box in the mail. It’s one of those times when you open up the package and know you’ve hit the jackpot. It was brimming with amazing new products coming at the end of August exclusively to Michael’s Stores. I’m so excited to show you the Martha Stewart Crafts Decorative Paint Line, brought to you by Plaid Crafts. You are seriously going to love it!

  • The paint is formulated to work on all crafting surfaces including wood, metal, glass, ceramic, terra-cotta and fabric. It is indoor/outdoor safe, dishwasher-safe on glass.
  • There are 160 paint colors in five finishes (Satin, High Gloss, Glitter, Pearl, Metallic). All come in 2 oz. bottles and are non-toxic (so safe to use with children).
  • Prices start at just $1.99!

Wanna see what I did for my very first project with the new Martha Stewart Paint?!

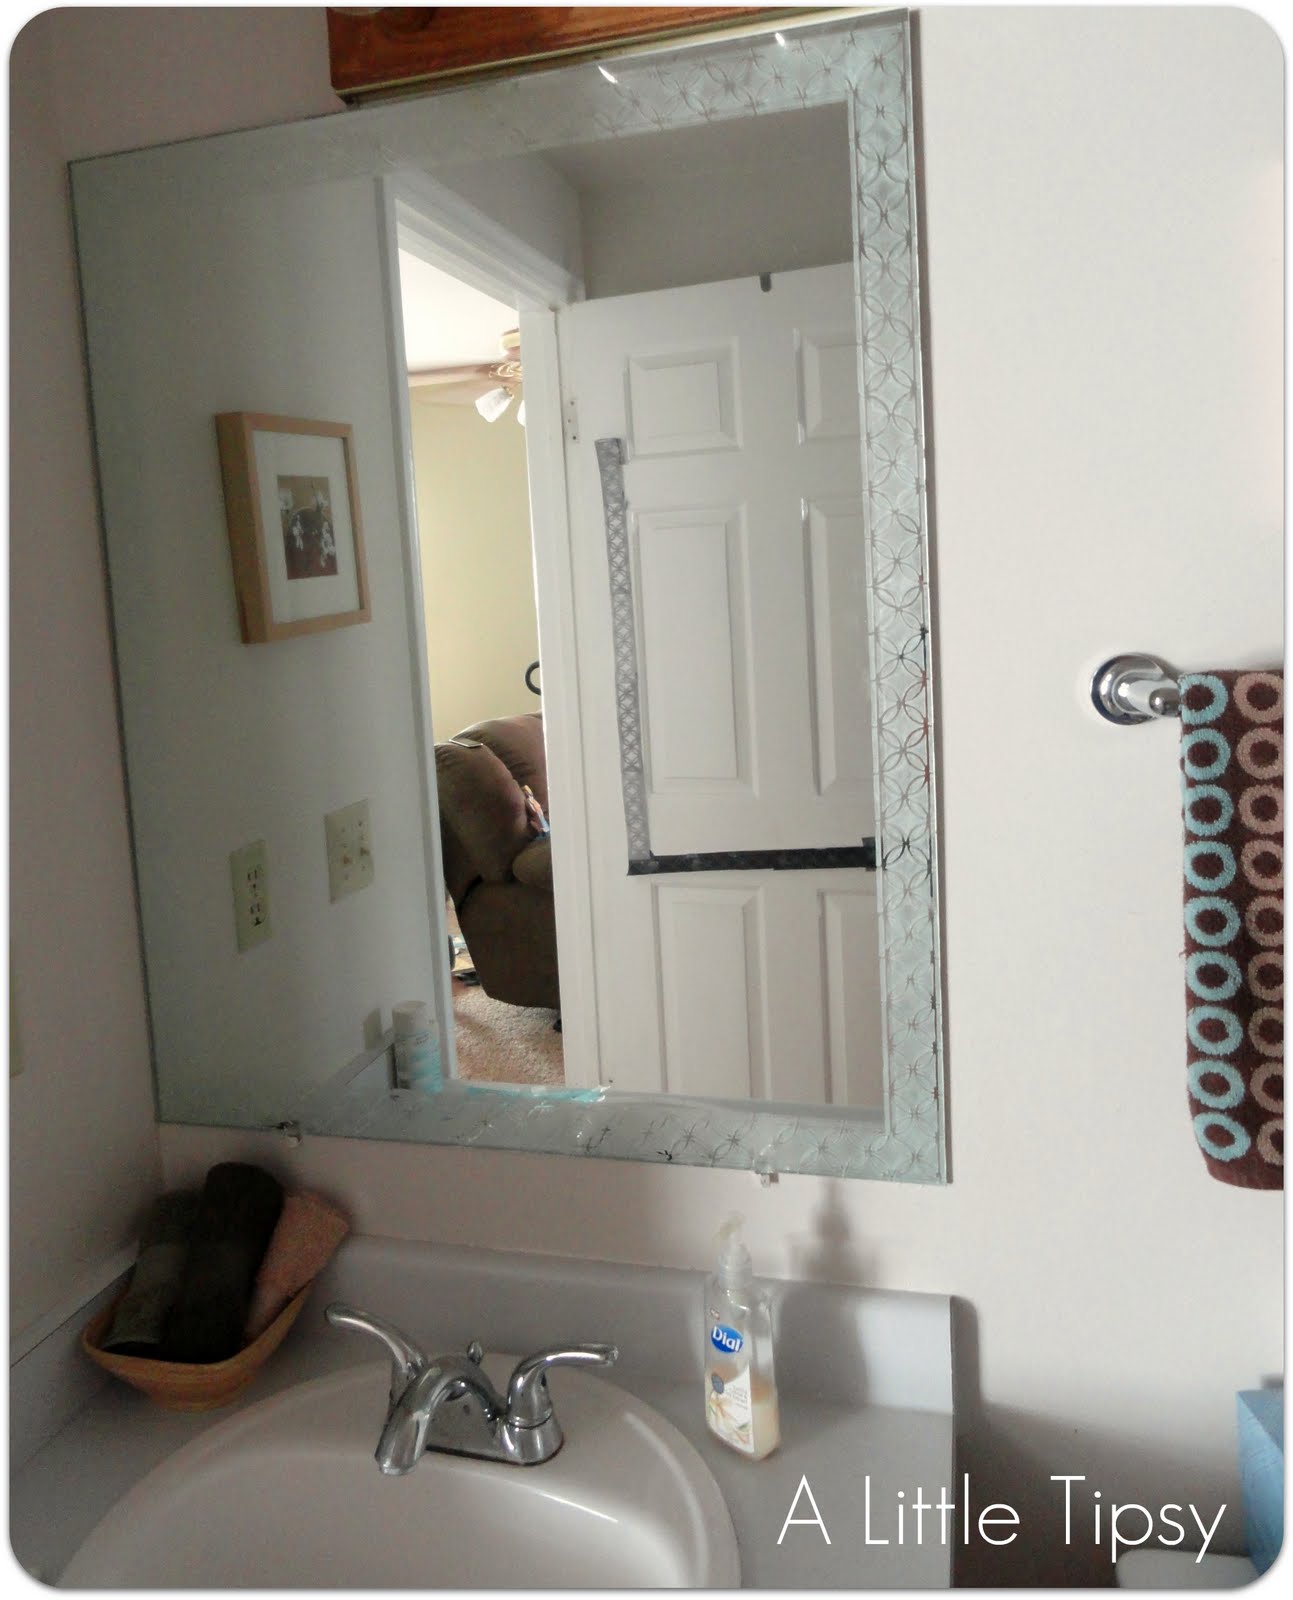
I have the most boring builder grade mirror in my guest bathroom. You know the big rectangle pretty much just glued to the wall. I have been wanting to spruce it up for a while now and this gave me the perfect opportunity!

Hello cyclops. Yikes!

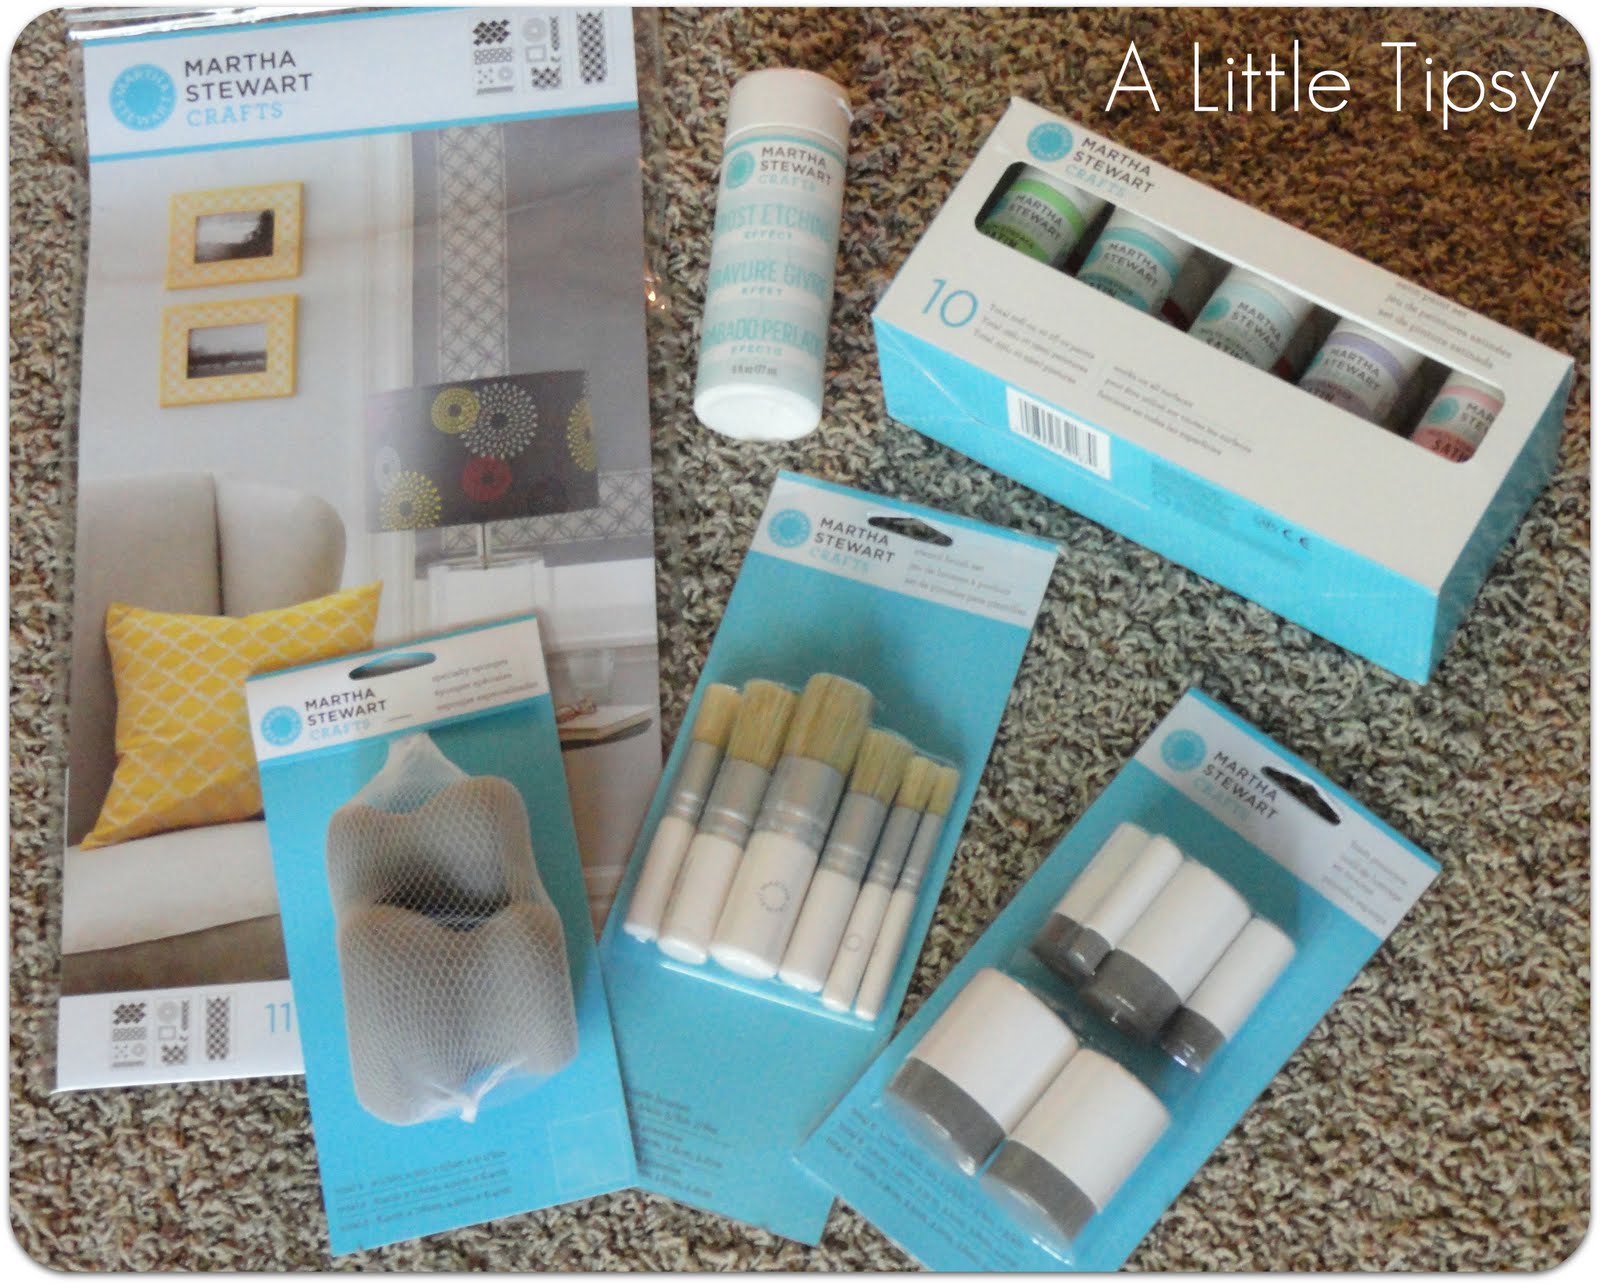
I started out with this group of tools below, not sure which brushes would work best on glass. Now I know, the stencil brushes (the ones with the flat cut bristles) give the best look on glass with frost effect paint.


{Frosted Mirror}

Supply list:
  • Boring mirror
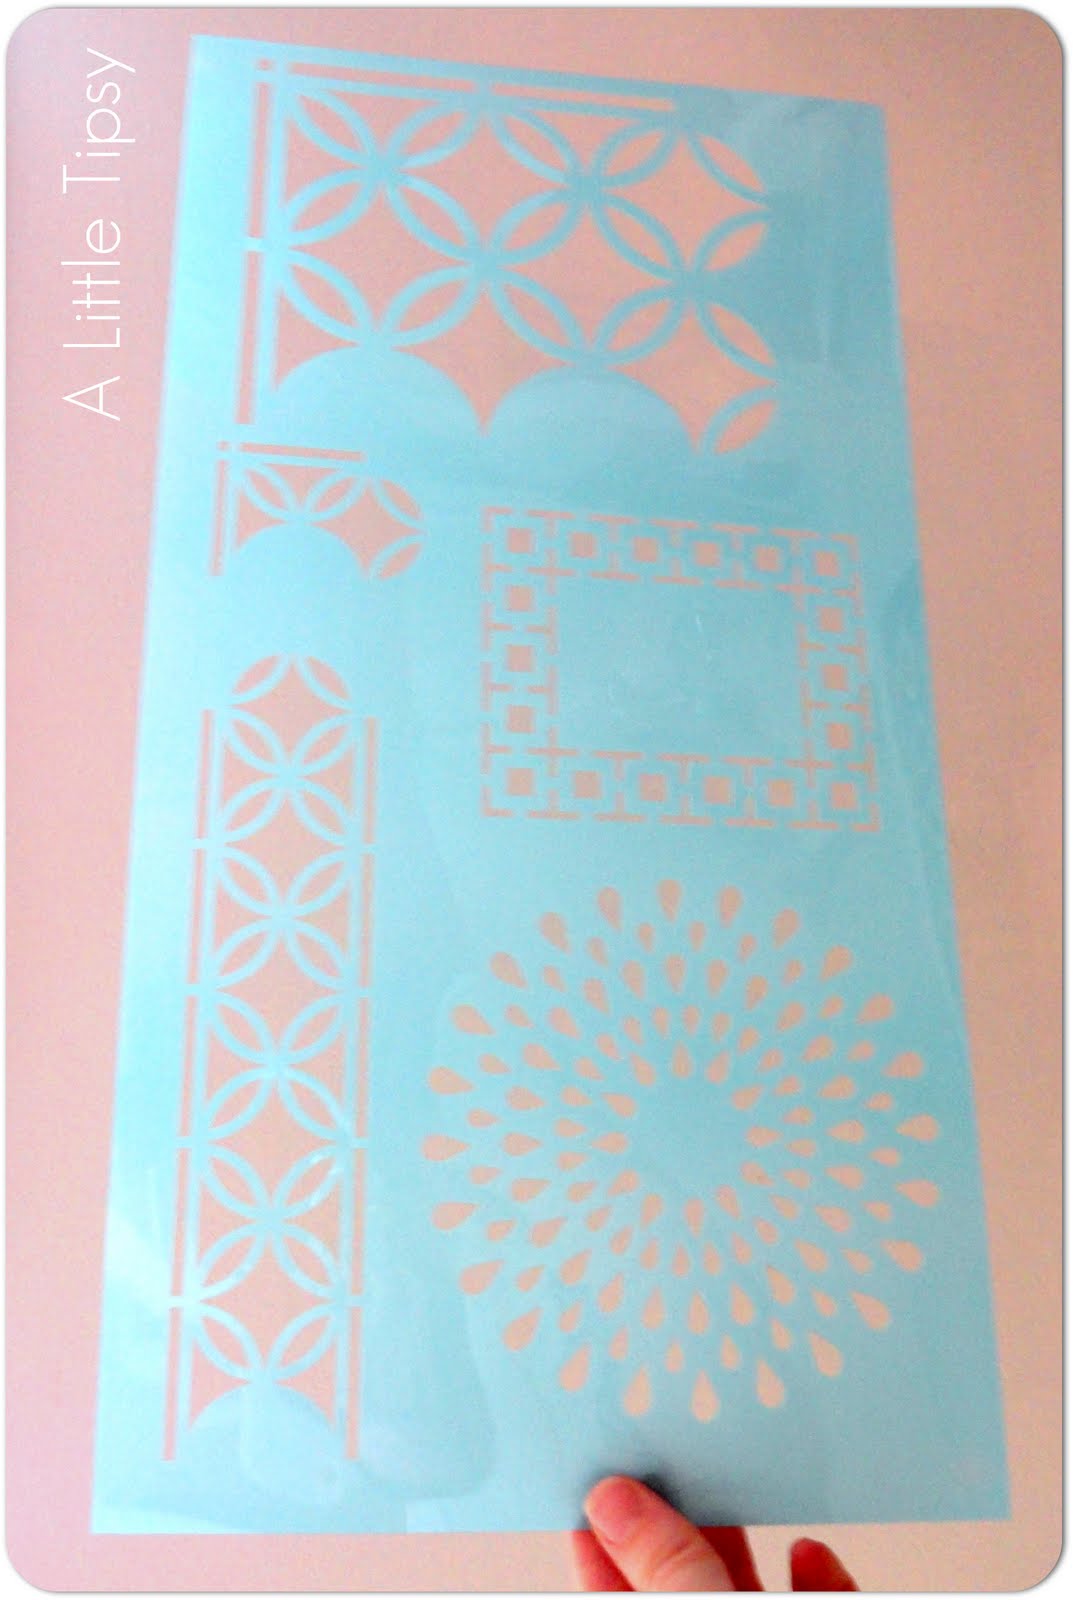
  • Martha Stewart large stencil (Arabesque line)
  • Copier or scanner/printer (optional)
  • Scissors
  • Tape
  • Martha Stewart Stencil Brushes(the bristle ones)
  • Martha Stewart Frost Etching Effect Paint
  • Martha Stewart Satin Sea Lavender Paint (in the center of the box below)
  • Toothpick

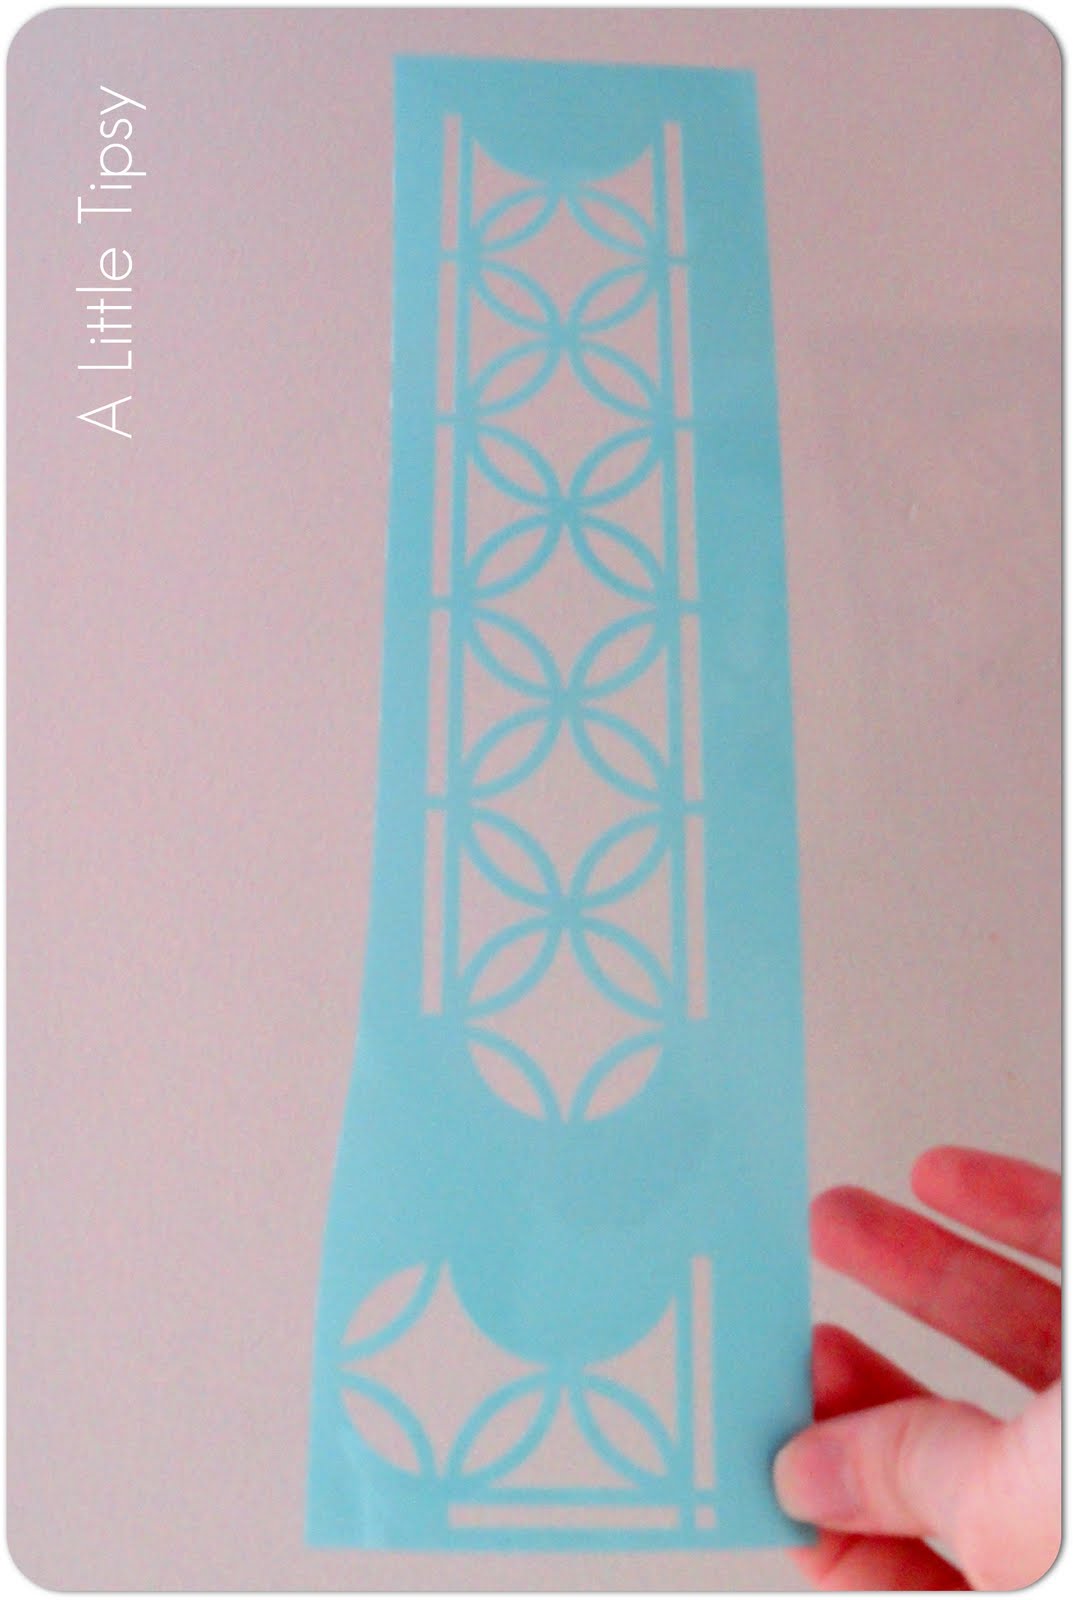
1. First off, I chose the design that would work best for me and trimmed it for the stencil so I wouldn’t have so much to hold in place.

2. I made copies of my stencil and taped them to the mirror to see how it would look and if everything would fit right.

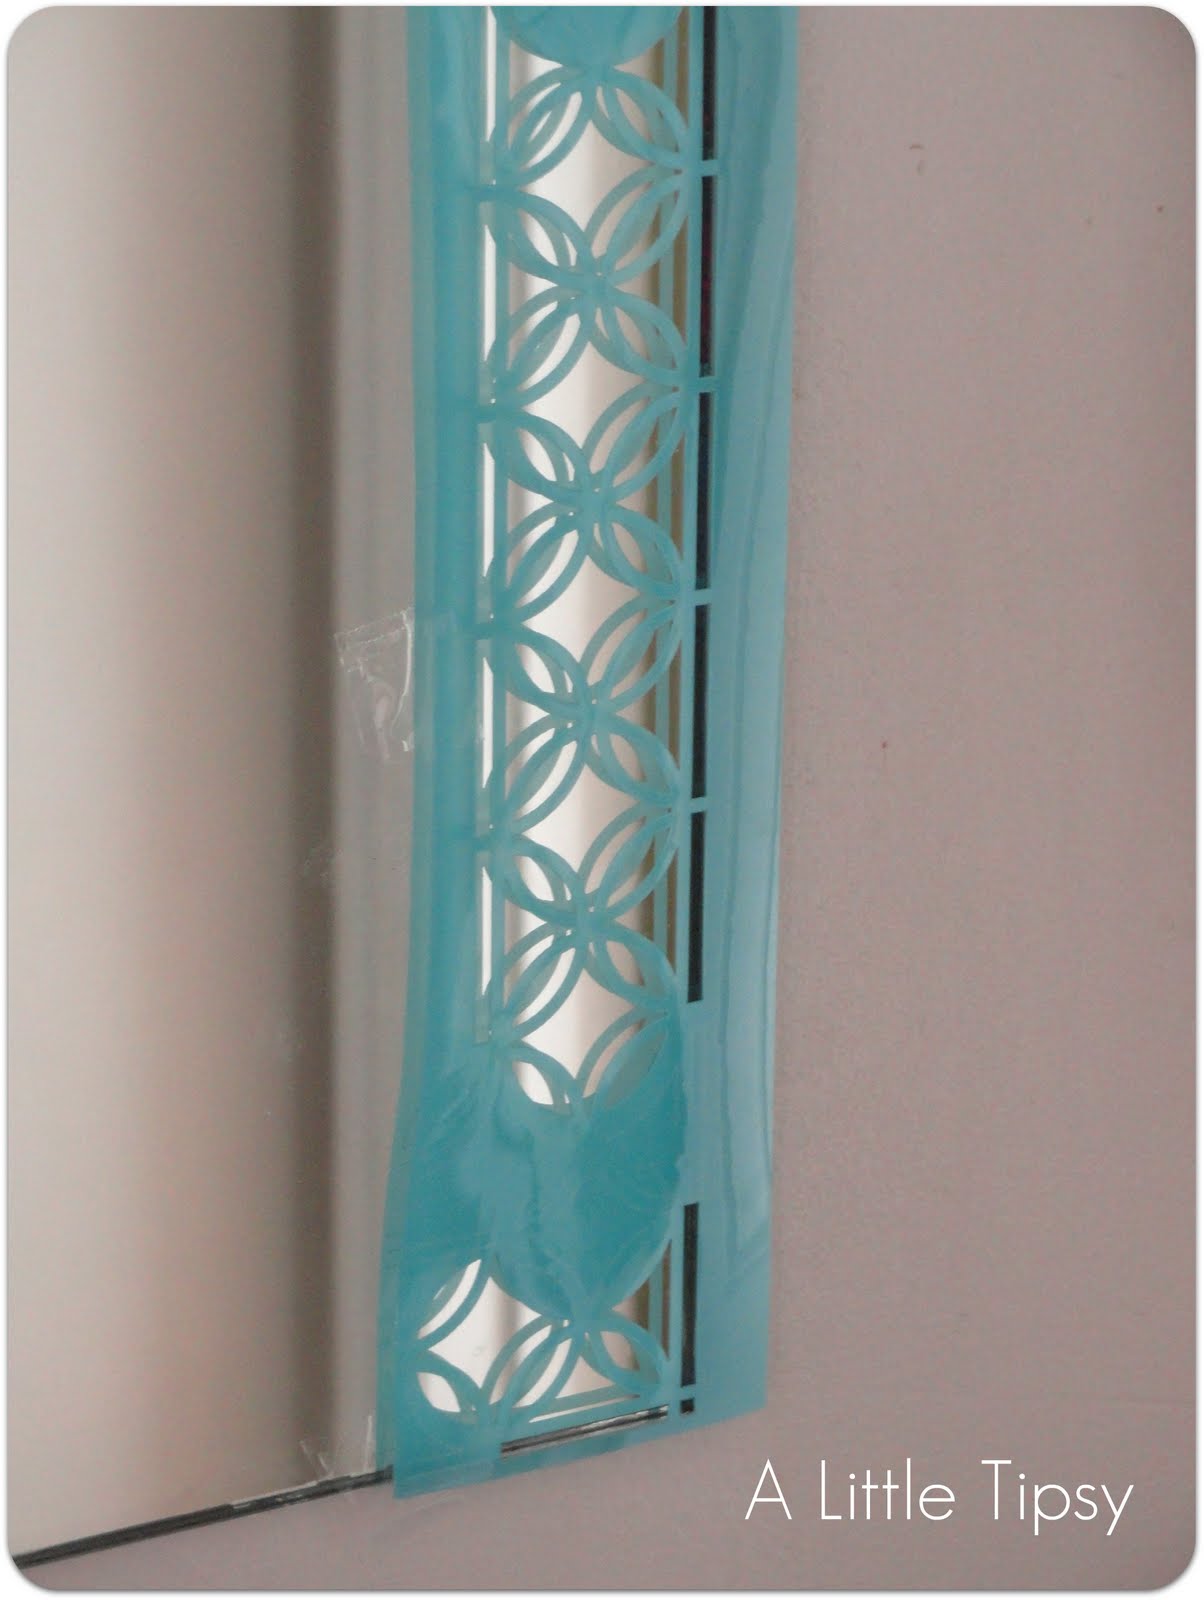
3. Start with the most visible corner and tape your stencil in place.

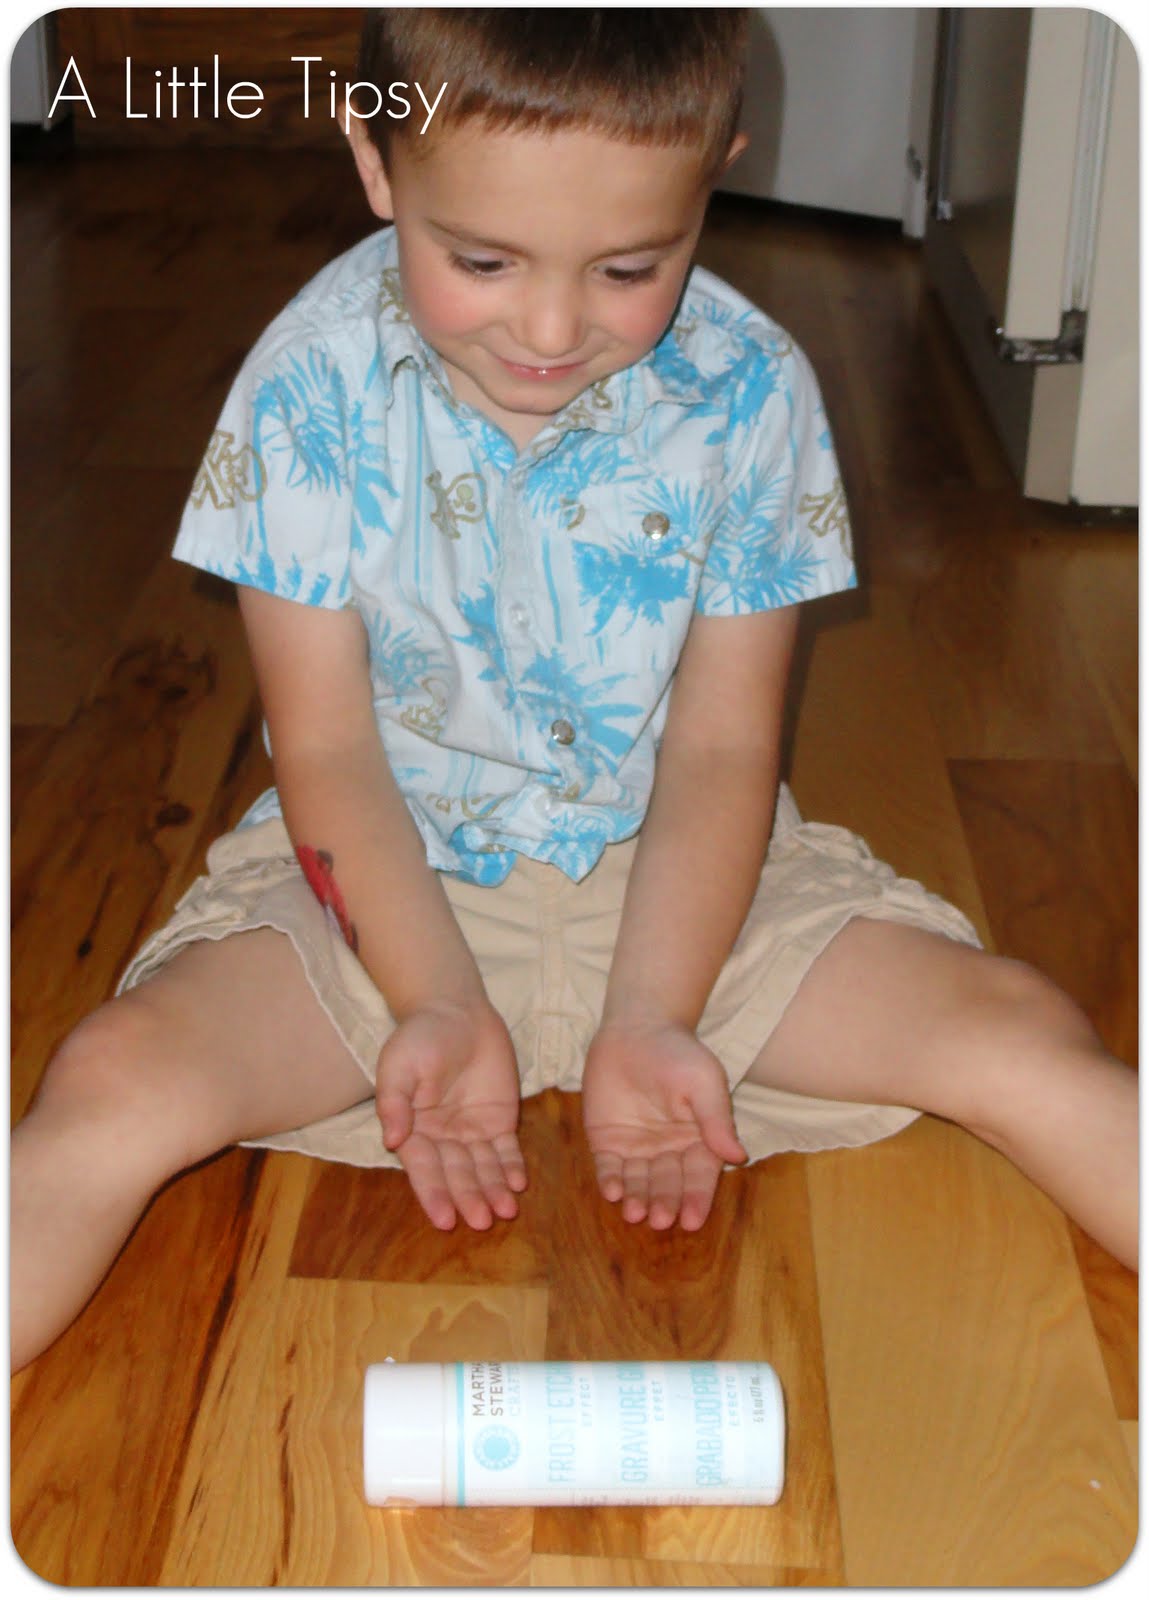
4. Roll the frost etching paint to mix well. You can do this easily on the table or with a game of pass the paint with a more than willing 3 year old. Squirt the frost etching on a palatte (or plastic plate if you’re like me) and mix with your desired color. I used the tiniest drop of color possible because I wanted to stay true to the frost for this project and just wanted it visible from certain angles. Use more paint if you want it more vibrant.

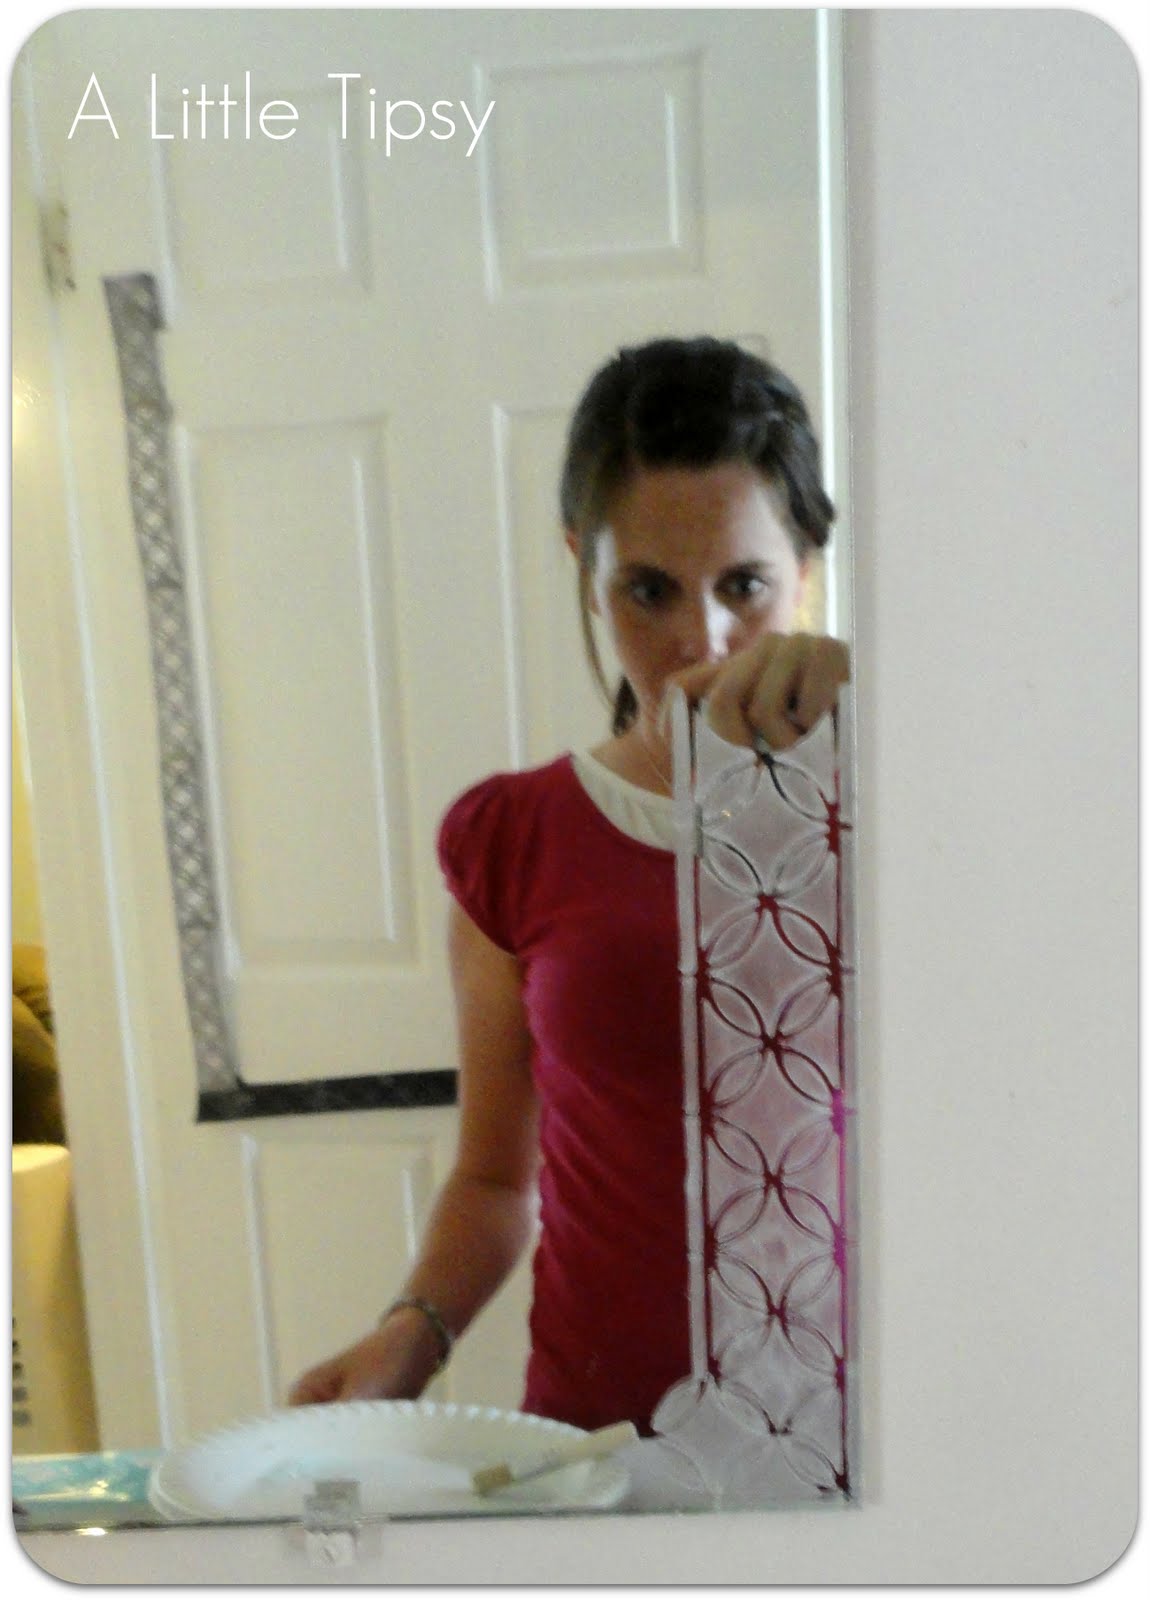
5. Brush on a light coat making sure to get in all the nooks and crannies of the stencil. Remove the stencil while the paint is still wet. Clean up any leaks or messes with the end of a toothpick. For larger leaks I wrapped a tiny piece of toilet paper around the end of the toothpick.


Sorry the video is sideways. I have not put my video editing software on my laptop yet.

6. Wait until the paint is dry, which is really fast with the frost effects. Then, line up the next piece of the stencil, tape it on and repeat with paint. The Martha Stewart stencils make it super slick because they have guides to make lining up the stencil easy as pie.


Notice the wardrobe change?
There was an unfortunate incident involving baby food and an untimely sneeze.

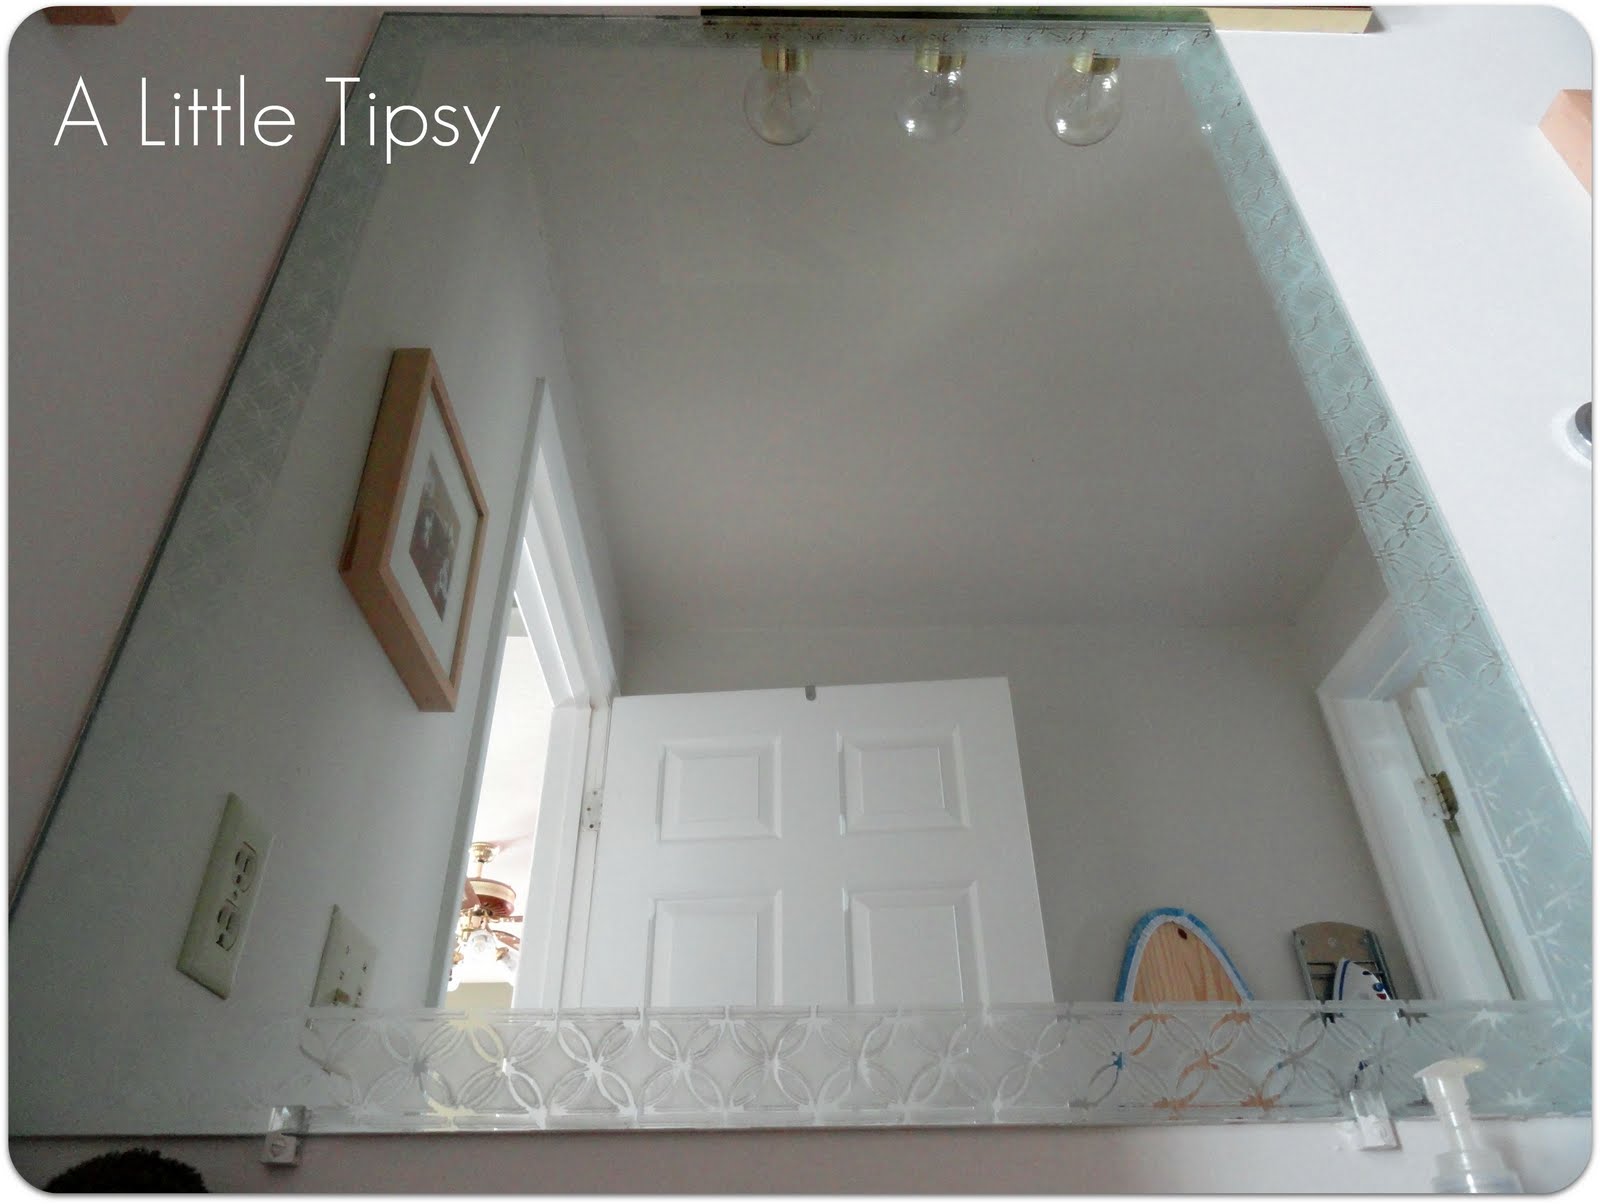
7. Most likely, you will get to a corner where the pattern does not align perfectly. This is where you get creative with using only part of the design or overlapping and erasing parts to make it look cohesive. Thus, also why you did the most visible corner first so it would look perfect, while the others are less noticeable.

Enjoy your new upgraded mirror!

Stay tuned for a whole bunch more projects in the line up with the new Martha Stewart paint line! I love all the possibilities!

Full post disclosure here.

Linking up with:
Thrifty Thursday
Transformation Thursday
Strut Your Stuff
Show Off Your Stuff
Look What I Made
Whatever Goes Wednesday
Get Your Craft On

P.S. Don’t forget to sign up for free Tipsy updates via RSS or email.

We have decided to truncate our feed to help protect against stolen content. I apologize for any inconvenience. Please love us anyway. 🙂

Make a Memory {Butterfly Kit}

August 22, 2011 By Michelle Barneck 1 Comment

Here we are, week 13 of the Make a Memory series. Each Monday through Labor Day I will feature a special family tradition from one of my favorite bloggers. It is so important to create lasting memories with our families and this will be a fun way to get ideas for fun traditions we can start with our own families. So let’s dive right in and see how Amy from Positively Splendid and her family make a memory!


Hi, everyone! My name is Amy, and my blogging home is Positively Splendid. I am so excited to be taking part in Michelle’s Making a Memory series! As a mama of three (with one more due this fall), I strive to make every day special, and this series has been brimming with terrific ideas to do just that.


This summer, I started a new tradition with my children. We raised our very own butterfly “family” from teensy larvae all the way until they were ready to be released into our backyard! This was an activity we all loved, and it was a terrific learning opportunity for all of us.


To start, I purchased one of the Painted Lady Butterfly Kits from Insect Lore. I loved that with this particular kit, everything we needed for our butterflies was included, and next year when it comes time to raise butterflies again, we will be able to use the same habitat.


When the kit arrived on our doorstep, we found five tiny larvae in the bottom of a special cup containing just the right food to nourish them as they underwent their transition into caterpillars. Making sure to keep the cup out of direct sunlight, we eagerly watched our caterpillars and they grew bigger and bigger each day, until finally, about 10 days later, they all crawled to the top of the cup to form their chrysalises.


Once we carefully transferred the chrysalises into our habitat, we watched and waited until our butterflies hatched. This was the most exciting time of all! We discovered that our new butterflies loved to eat sugar water sprinkled on fresh flowers and the juice from fresh orange slices.


After we watched our butterflies in our habitat for a few days, it was time to let them go and say goodbye. We released them into our backyard, and my kids were thrilled that a few of the butterflies decided to stay nearby for about a week after we let them go.


This was such a fun, unique activity to keep the kiddos excited about learning even during the summer months. I know we’ll all be excited to raise butterflies again next year!


Thanks, Michelle, for having me over today. Y’all are welcome over at Positively Splendid any time!


Photobucket

—————————————————————————-

What a neat idea! I have never seen the butterfly process. I bet I would enjoy this as much as the kids. Thanks Amy, for another great way to make a memory!

P.S. Don’t forget to sign up for free Tipsy updates via RSS or email.
We have decided to truncate our feed to help protect against stolen content. I apologize for any inconvenience. Please love us anyway. 🙂

DIY Under $5 Features

August 20, 2011 By Michelle Barneck 8 Comments

Another week of fabulous projects to peruse! But first, a bit of business, or shall I say a plea. I really try to visit each blog and comment on each and every post linked up. I love to see what you have created. But, it take a lot of time. I spend as much time typing in word verification as I do my comments.

Please, please, turn off word verification.

Pretty please!


It will be fine. I have mine off and I hardly get any spam. If I do get a weird comment, I just delete it.
Trust me, your readers will thank you and probably leave more comments because it will be easy. 🙂 Now I will step off my soap box and share with you this weeks features.


My favorites:

Baby Name Banner from Scrappin’ with DeeDee


Clay Rose Pendant and Earrings from Southern Lovely

Lap Desks from Pleased as Punch

Link with the highest clicks:

PB Knock-off Pallet Art by Sweet Serendipity

Photobucket

Be sure to grab your A Little Tipsy featured button here.

P.S. Don’t forget to sign up for free Tipsy updates via RSS or email.

We have decided to truncate our feed to help protect against stolen content. I apologize for any inconvenience. Please love us anyway. 🙂
« Previous Page
Next Page »

  • Bloglovin
  • Facebook
  • Google+
  • Instagram
  • Pinterest
  • RSS
  • Twitter

Hi there! I'm Michelle. Mother of three little boys and one little princess. Welcome to A Little Tipsy, a place for exploring creativity and sharing inspiration.

Follow on Bloglovin


Visit Michelle Barneck {A Little Tipsy}'s profile on Pinterest.

Tutorials by Category


15 Family Reunion Games

Family Reunion Games Collage

15 Sprinkle Party Ideas

Sprinkle Birthday Party
Creative Commons License

© Copyright 2014 A Little Tipsy · Site Designed by The Fairy Blogmother · Web Hosting by RFE Hosting

This website uses cookies to improve your experience. We'll assume you're ok with this, but you can opt-out if you wish.Accept Read More
Privacy & Cookies Policy