A Little Tipsy

Creative Tips & Ideas

  • home
  • About Me
  • the tipsy top
  • press
  • projects
  • contact me
[print_thumbnail_slider]

Make Your Own Key Hanger

May 31, 2010 By Michelle Barneck 40 Comments

I wanted to get all of our keys out of a jumbled pile, but could not find a cute key hanger I liked so I decided to make my own. I like the sheet music and Typewriter trends out there right now, so I decided I would incorporate all 3 types of keys: music keys, typewriter keys, and car keys.

And of course being the kind and generous person that I am, I made you a tutorial because good things are meant to be shared right?!
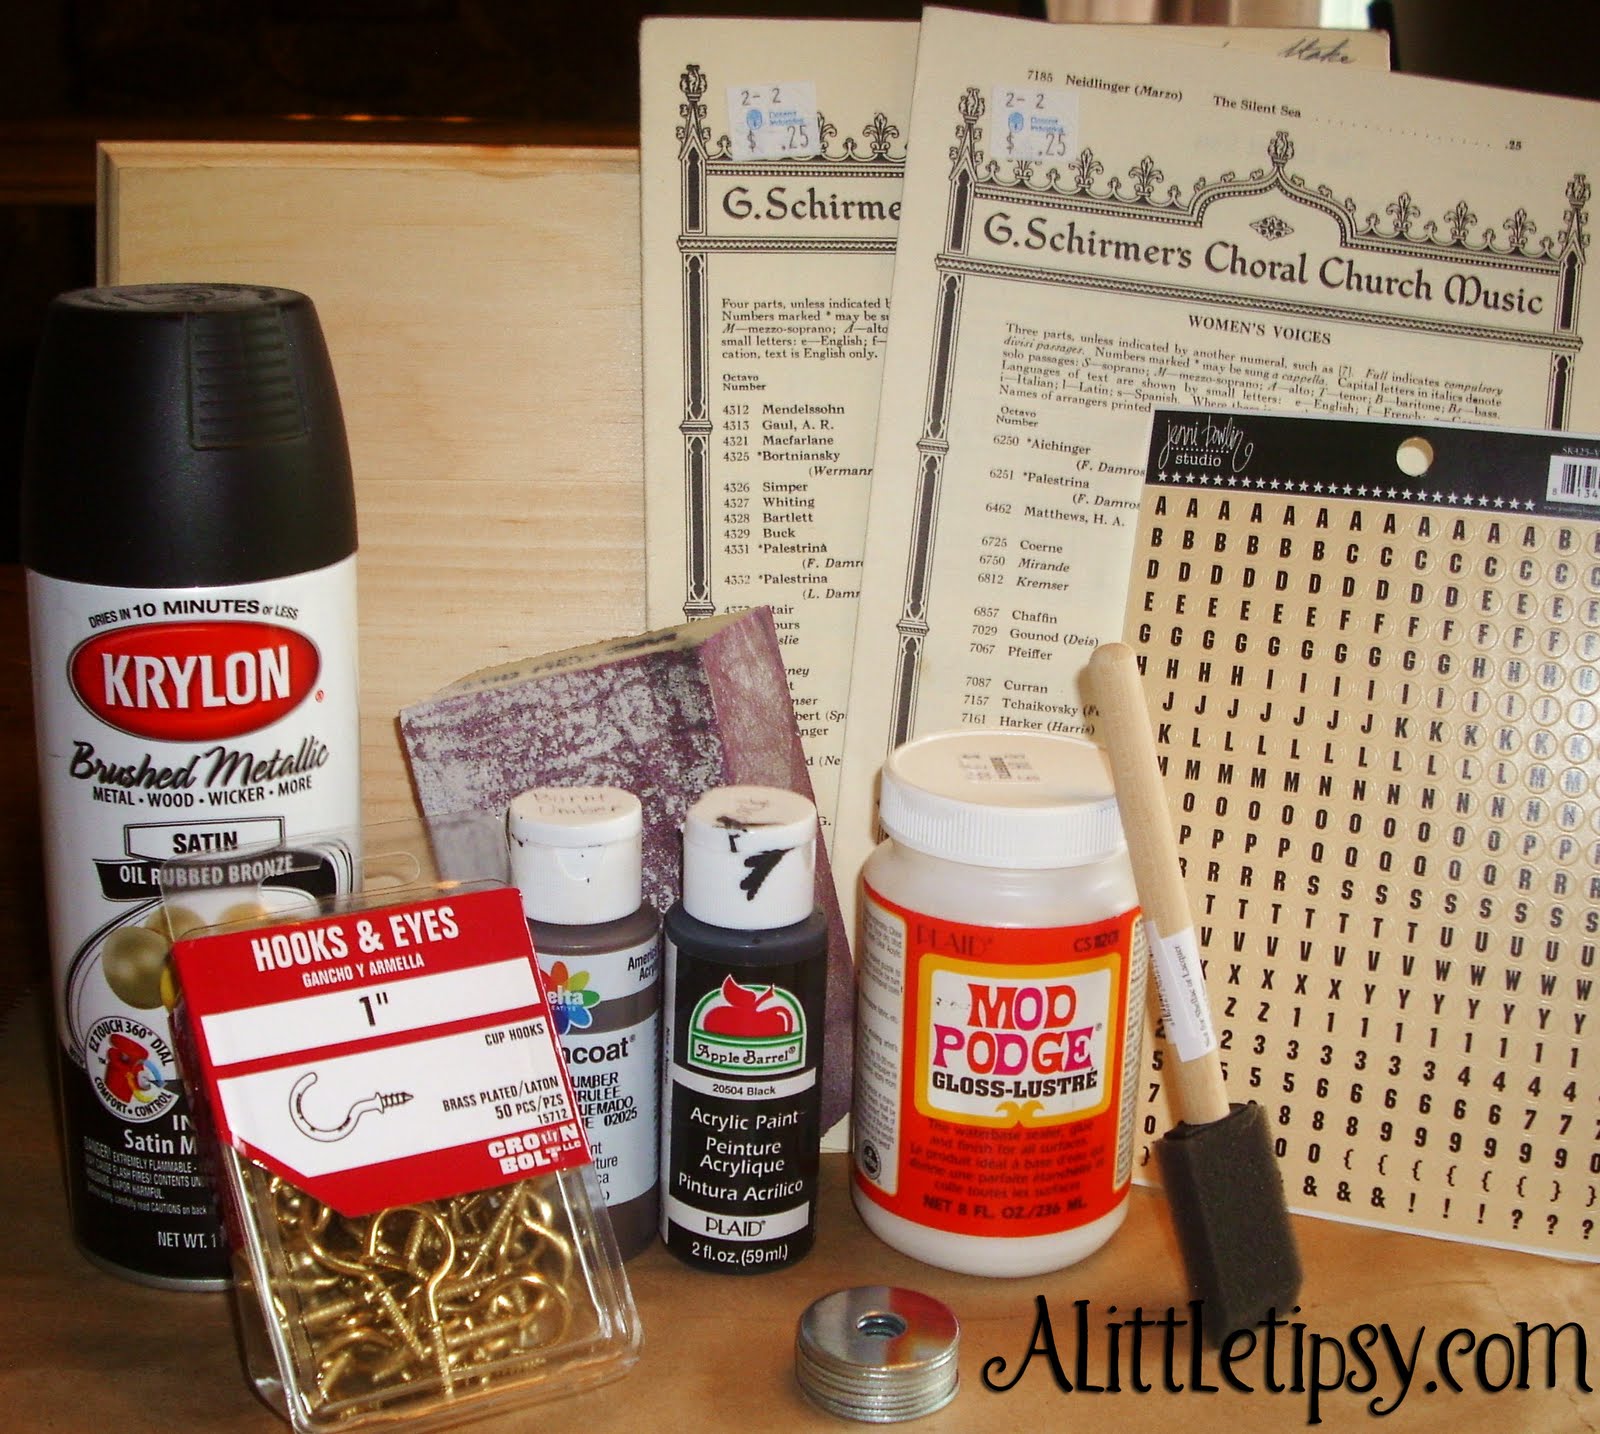
Supplies needed:

  • 9×12 wood board (Wal-Mart)
  • Black & Brown Craft Paint
  • Mod Podge
  • Foam Brush
  • Sand Paper
  • A few old sheets of music (D.I.)
  • 8-1″ hooks
  • 8-1 1/4 inch Washers
  • 4-1 3/4 inch Washers
  • Oil rubbed bronze spray paint
  • E-6000 or other industrial glue
  • Little letter stickers (Robert’s)
  • Cream and black card stock
  • Free Typewriter font
  • Picture hangers (Robert’s)

How to Make a Key Hanger:

1. Sand the edges of the board smooth. Mix the black and brown to somewhat match oil rubbed bronze paint. Apply to the edges of the board with a foam brush. It will probably need a couple coats. Rough up the edges a little with the sand paper.

2. My sheet music was not as wide as the board, so I cut it in strips and used 5 strips (about 1 3/4 inch) across to cover the board. Just line up the music and you can barely tell it came from another page. I left a 2 1/4 inch space at the top of the board for the label. My sheet music had a nice break where I wanted to add the hooks for my keys. Mod podge the strips to the board one at a time to cover the board. I left the black/brown paint residue in the container I put the mod podge in so it would give it a antiqued tint.

3. Cut a strip of black card stock (about 2 1/4 in tall) to cover the top for the label where it will says “KEYS.” Mod podge it on. Cut a strip of cream card stock slightly smaller to create a black frame and mod podge it on.

4. Screw the tiny hooks into the top of a box for easy spray painting. Cover your area and spray paint the hooks and washers with a few coats according to the directions on the paint can. Let dry.

5. Attach the 8 small washers where you want the hooks with industrial glue. Let set.
6. Add tiny letter stickers to those spots you want labeled. I name our cars Tuck (Hyundai Tuscon) and Tepid (97 Dodge Intrepid that someone needs to haul out of our driveway). I left the top shorter hanging area spots unlabeled for random church keys, relatives house keys, etc.
7. Screw the tiny hooks in with your sheer strength and bare hands.

8. Print out “KEYS” using the free typewriter font on cream card stock. I think I used 90 pt font to get it the right size. You’ll want them to fit on about 1 1/2 inch circles. Trace the circles around the letters and cut them out.

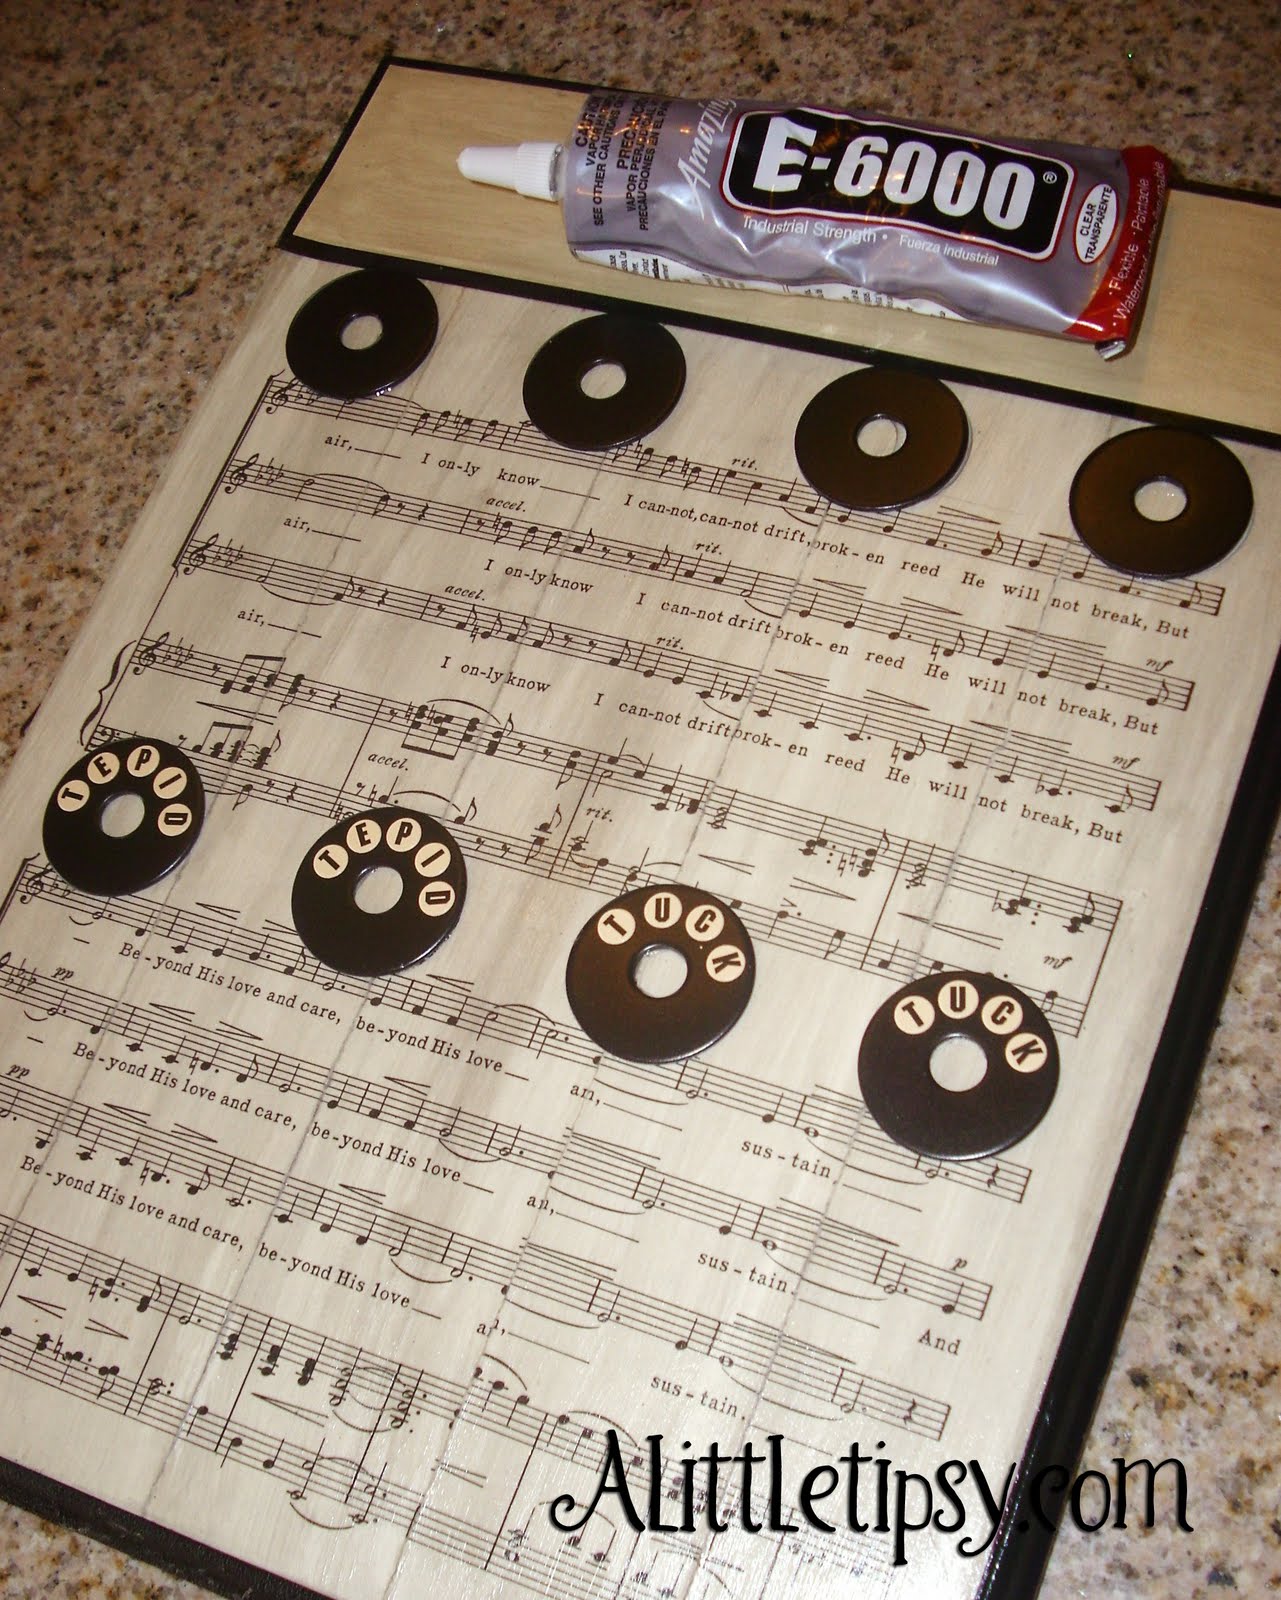
9. Glue the letters to the big washers. Then, glue the big washers to the label area on top of the board.

10. Attach some picture hangers to the back and hang.

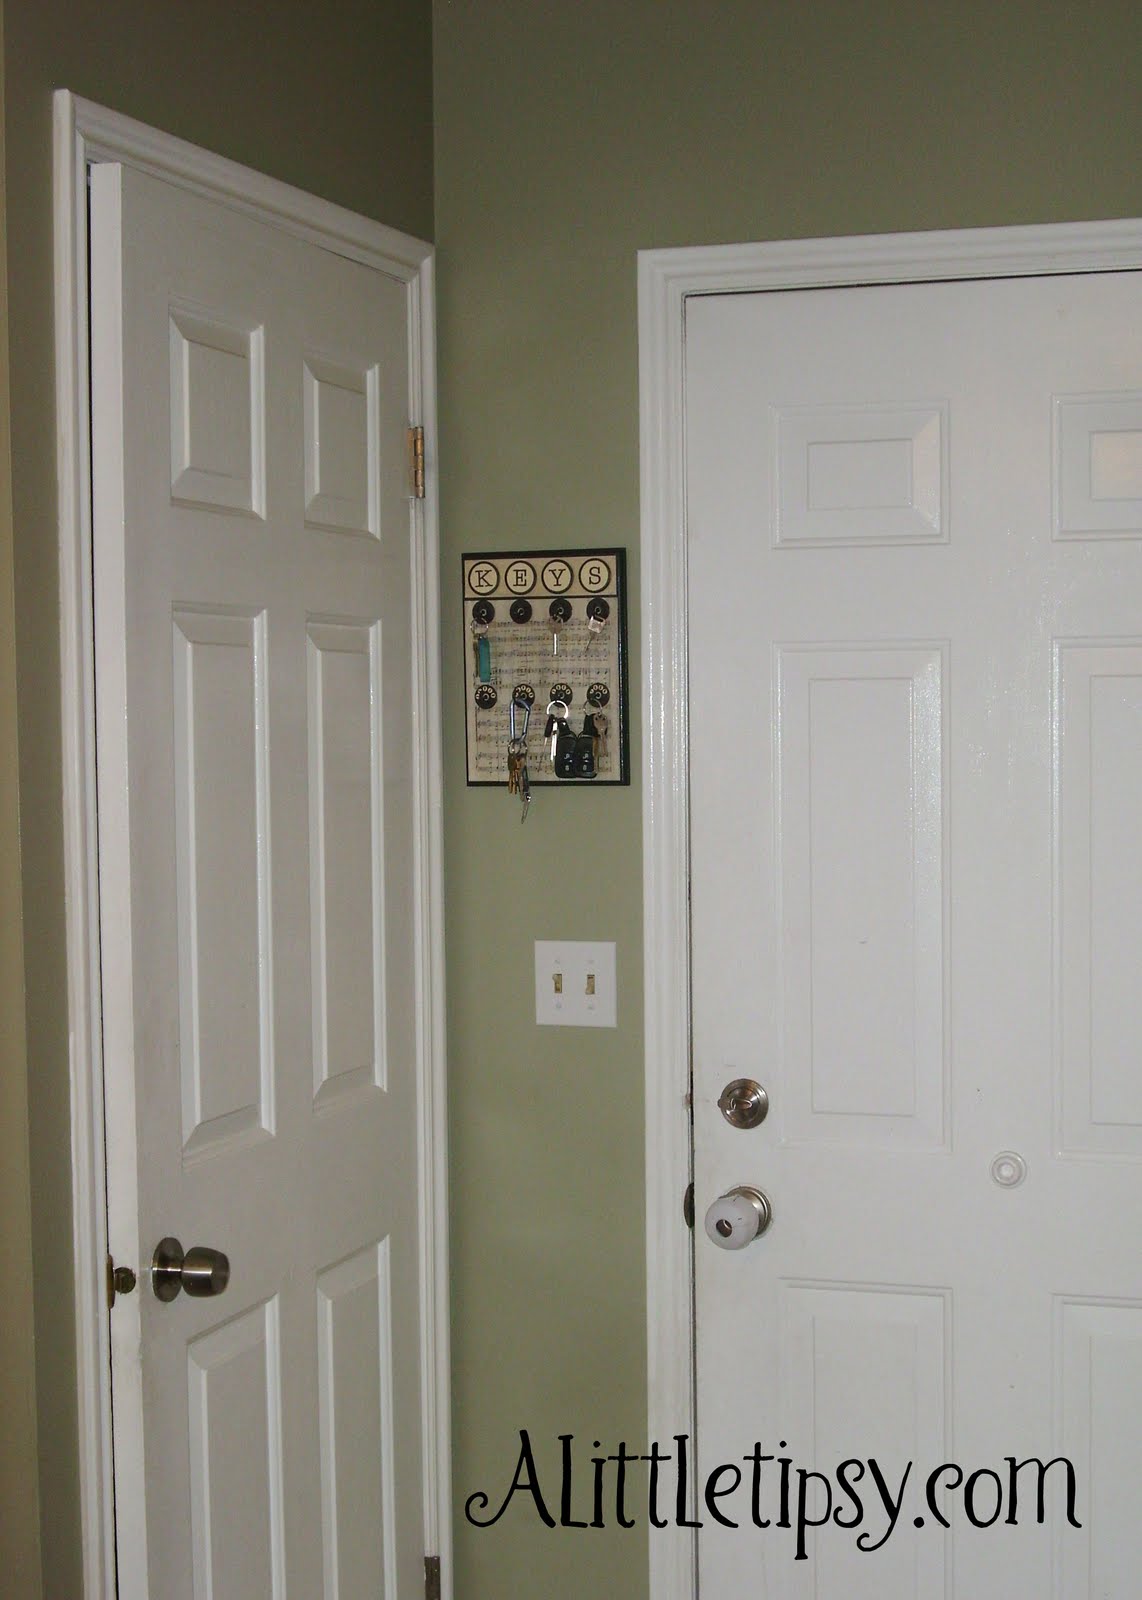
Now I can grab my keys off the hanger as I head out to the garage and not have to sift through a pile on a shelf. Yay!

Linking up with:
Made By You Monday
Just Whipped Something Up
Making the World Cuter
It’s So Very Creative
Making Monday Marvelous
Visit thecsiproject.com


P.S. Don’t forget to sign up for free Tipsy updates
via RSS or email.

We have decided to truncate our feed to help protect against stolen content. I apologize for any inconvenience. Please love us anyway. 🙂

Cute Bean Bags from Worn Out Socks

May 24, 2010 By Michelle Barneck 24 Comments

Am I a hoarder? Maybe, but sometimes I just can’t seem to get rid of things. Like my cute socks that are perfectly good accept for the heels and the toes. A little pathetic that I did not just send them to their landfill grave, but I just knew I could do something with them, someday. Well, today is that day. I introduce to you the Sock Bean Bag.

The fun patterns make me oh so happy and the recycling is a total bonus!
(See honey, another craft using only what I had.)

Items needed:

  • Worn out socks
  • Scissors
  • Sewing Machine
  • Pinto beans (or any other cheap filler) I used 4 lbs for 21 small bean bags.
  • Card stock
  • Bowl
  • Needle & Thread

1. Cut the usable material from your socks. I used the ankle tube part and the top of the foot from most. You will have a big pile of scraps that don’t make the cut. (Notice the pins, they are from my sock matching system)

2. With the sock inside out, sew the edges using a straight stitch on your sewing machine. Be sure to leave a 1 1/2 inch open to turn them right side out and put the beans in.

3. Make a cone with your card stock to help you pour in the beans. (My funnel’s hole was too small) I did this over a bowl so any beans that spilled would not scatter. I found the easiest way to get them really full was to keep pulling the funnel in and out so it pushed the beans down while it poured more in.

4. Sew the hole shut by either using your machine (if you don’t mind the change in seam) or whip stitching it with a needle and thread.

5. Now grab a bucket and practice your throw!

Linking up with:
Made By You Monday
Just Whipped Something Up
Making the World Cuter
Market Yourself Monday
Make Your Monday
Motivate Me Monday
It’s So Very Creative

P.S. Don’t forget to sign up for free Tipsy updates via RSS or email.

We have decided to truncate our feed to help protect against stolen content. I apologize for any inconvenience. Please love us anyway. 🙂

Make Your Own $6 Berry Wreath

May 18, 2010 By Michelle Barneck 24 Comments

I always loved those cute berry wreaths, but like many other things I thought “I can make that.” So when I found stems of purple and white berries at the Dollar Tree, I had to do it, and I love it! Behold the $6 Spring Berry Wreath.

Items needed:

  • 5 Stems of Berries in various colors ($1 each, I had 2 purple & 3 white)
  • Small Grapevine wreath (50 cents at the thrift store, stash busting again)
  • Ribbon Scrap (on hand)
  • Wire cutters (on hand)

1. Start by cutting each little group of berries off the stem, leaving the stick long. I left the leaves on the purple and pulled them off the white. I wanted a little green, but not too much.
2. Start spacing your dominant color and attach by winding the wire stem through the wreath. If you want it more secure you can hot glue.

3. Continue placing the stems, alternating colors until the wreath is full.

4. Attach a coordinating ribbon to the grapevine on the back and tie in to a bow to hang. I adore this sparkly paisley ribbon from Michael’s!

5. Enjoy your new wreath that cost $6 and took 15 minutes! It rounds out my $5 Spring Porch Decor just perfectly! Hello $11 makeover.


Plain & Boring…Springified

I am giving you fair warning about these rogue berries that will inevitably fall off and get everywhere. They are the perfect size for little nostrils. They made their way in to my little guys like three times before I got them all cleaned up and thrown away. Luckily they are shot out easily by plugging the other nostril and blowing. Get rid of them ASAP!

Linking up with:
Get Your Craft On
Do It Yourself Day
Trash to Treasure
2nd Time Around Tuesday
Toot Your Horn Tuesday
Visit thecsiproject.com


P.S. Don’t forget to sign up for free Tipsy updates
via RSS or email.

We have decided to truncate our feed to help protect against stolen content. I apologize for any inconvenience. Please love us anyway. 🙂

Cheesy Pesto Chicken Rolls

May 13, 2010 By Michelle Barneck 10 Comments

I mentioned last week on Facebook that I made up this recipe and here it is, finally. I give you, Cheesy Pesto Chicken Rolls, a recipe made up by me and packed full of flavor!

No ingredient pic because well, I made it up as I went along, but here is what you’ll need. I am feeding 2 adults and one small child so adjust the recipe as needed.

Ingredients:

  • 1 Chicken Breast
  • Approx. 4 T. Fresh Pesto (I used this recipe or you could buy some)
  • Olive Oil cooking spray (or whatever kind you like)
  • 1 Cup Shredded Mozzarella
  • 1 can Crescent dough
  • 1/4 C. Freshly grated Parmesan

Preheat the oven according to crescent dough directions.

1. Cover the chicken in 1 T. of Pesto and marinate for 15 minutes.
2. Warm a non stick skillet and spray with Olive oil cooking spray.
3. Cook the chicken for a few minutes on each side. I like to cut it in to pieces as it cooks so I can see exactly when it’s done. Plus, then all sized get some of the yummy flavor. The pesto will for a nice crust and look a little something like this.

4. Roll out your crescent dough on a cookie sheet.
5. Put a big pinch of mozzarella on each crescent, a dollop of pesto on top of that and a piece of chicken on top.

6. Roll each crescent and make sure the filling is covered.
7. Cover the top of each roll with shredded Parmesan.

8. Bake according to crescent package instructions until golden brown.

I made some Alfredo sauce to pour over the top, but found that we really did not need it. I preferred them without the sauce because they had so much flavor on their own.

Enjoy!

Linking up with:
Strut Your Stuff
Show Off Your Stuff

P.S. Don’t forget to sign up for free Tipsy updates via RSS or email.

We have decided to truncate our feed to help protect against stolen content. I apologize for any inconvenience. Please love us anyway. 🙂
« Previous Page
Next Page »

  • Bloglovin
  • Facebook
  • Google+
  • Instagram
  • Pinterest
  • RSS
  • Twitter

Hi there! I'm Michelle. Mother of three little boys and one little princess. Welcome to A Little Tipsy, a place for exploring creativity and sharing inspiration.

Follow on Bloglovin


Visit Michelle Barneck {A Little Tipsy}'s profile on Pinterest.

Tutorials by Category


15 Family Reunion Games

Family Reunion Games Collage

15 Sprinkle Party Ideas

Sprinkle Birthday Party
Creative Commons License

© Copyright 2014 A Little Tipsy · Site Designed by The Fairy Blogmother · Web Hosting by RFE Hosting

This website uses cookies to improve your experience. We'll assume you're ok with this, but you can opt-out if you wish.Accept Read More
Privacy & Cookies Policy