A Little Tipsy

Creative Tips & Ideas

  • home
  • About Me
  • the tipsy top
  • press
  • projects
  • contact me
[print_thumbnail_slider]

$2 Spring Soda Bottle Flower Arrangement

May 10, 2010 By Michelle Barneck 4 Comments

It may be raining outside, but we have a touch of spring on our dining table. This little arrangement brightens up my day, even when the clouds are looming outside. Were you wondering where the sixth bottle from this collection went? Now you know!

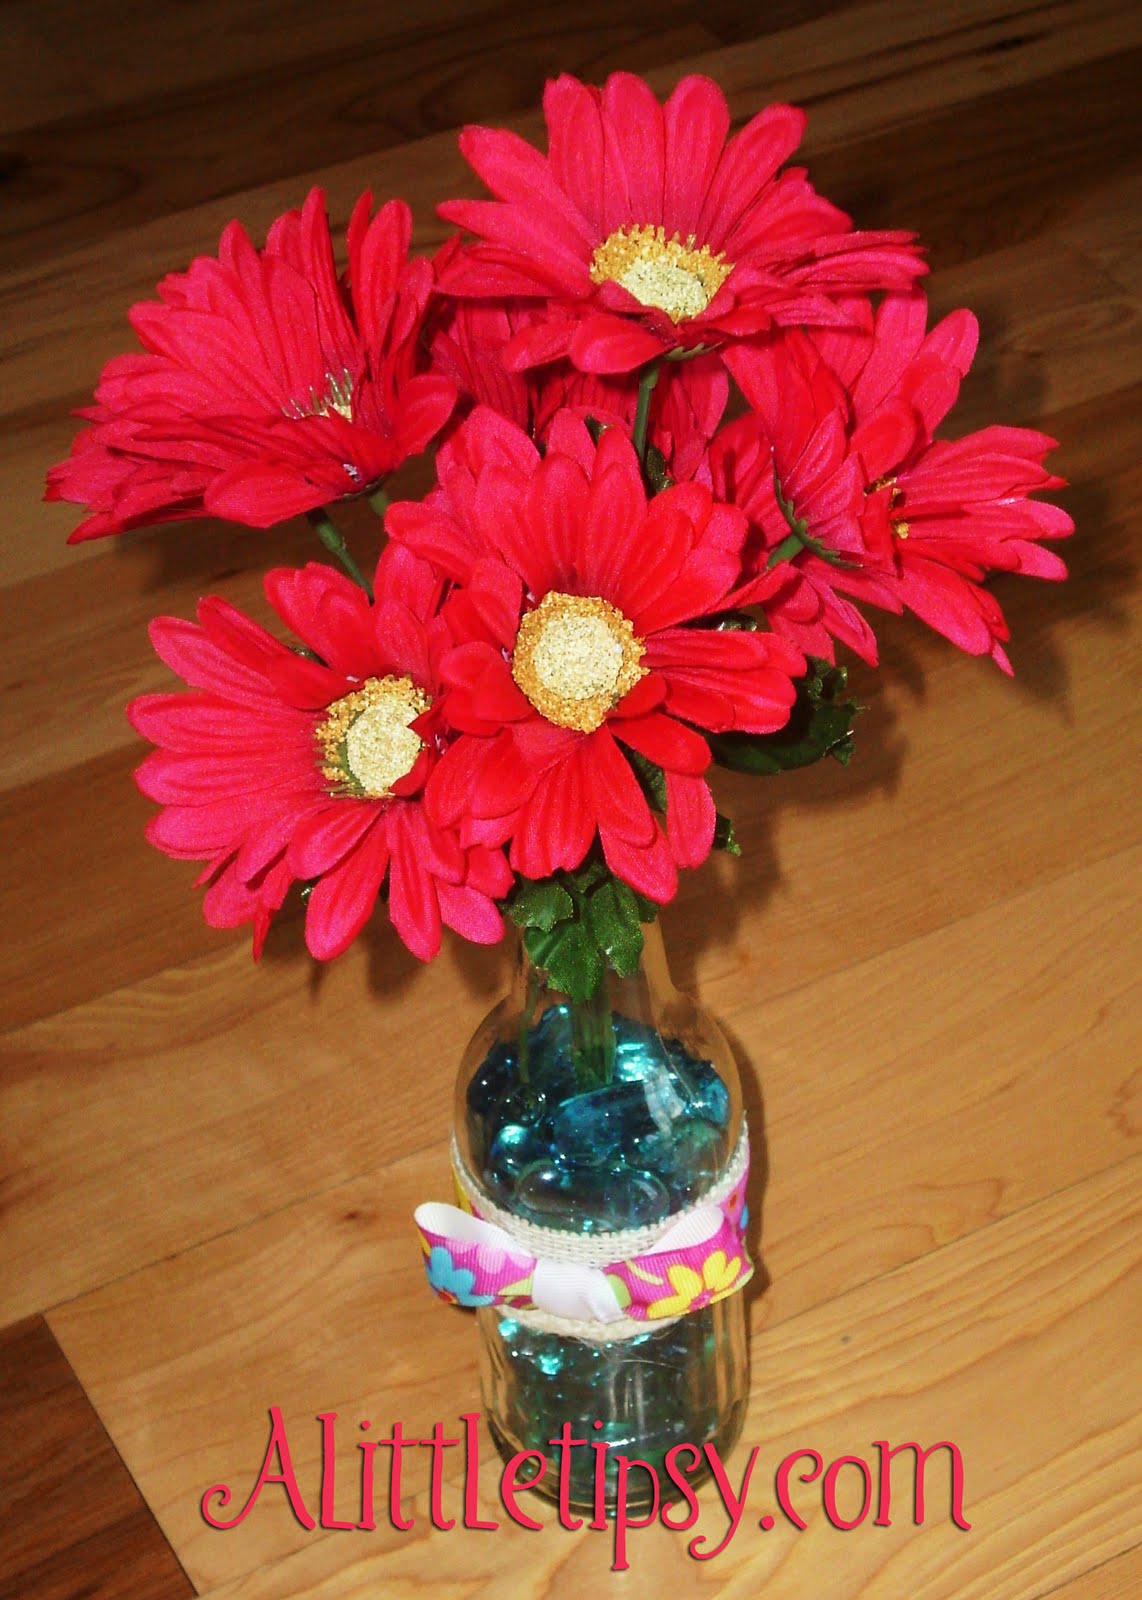
My little one chose these daisies at the dollar store. He was very insistent and would not let them go, so I decided to go with it and found the turquoise glass gems to add another pop of color. This project cost me a total of $2!! Another stash busting hubs pleaser!

What you’ll need:
Silk Flowers
Soda Bottle with labels removed
Glass gems
Burlap scrap
Ribbon Scrap
Glue gun

1. Put all the gems inside the bottle.
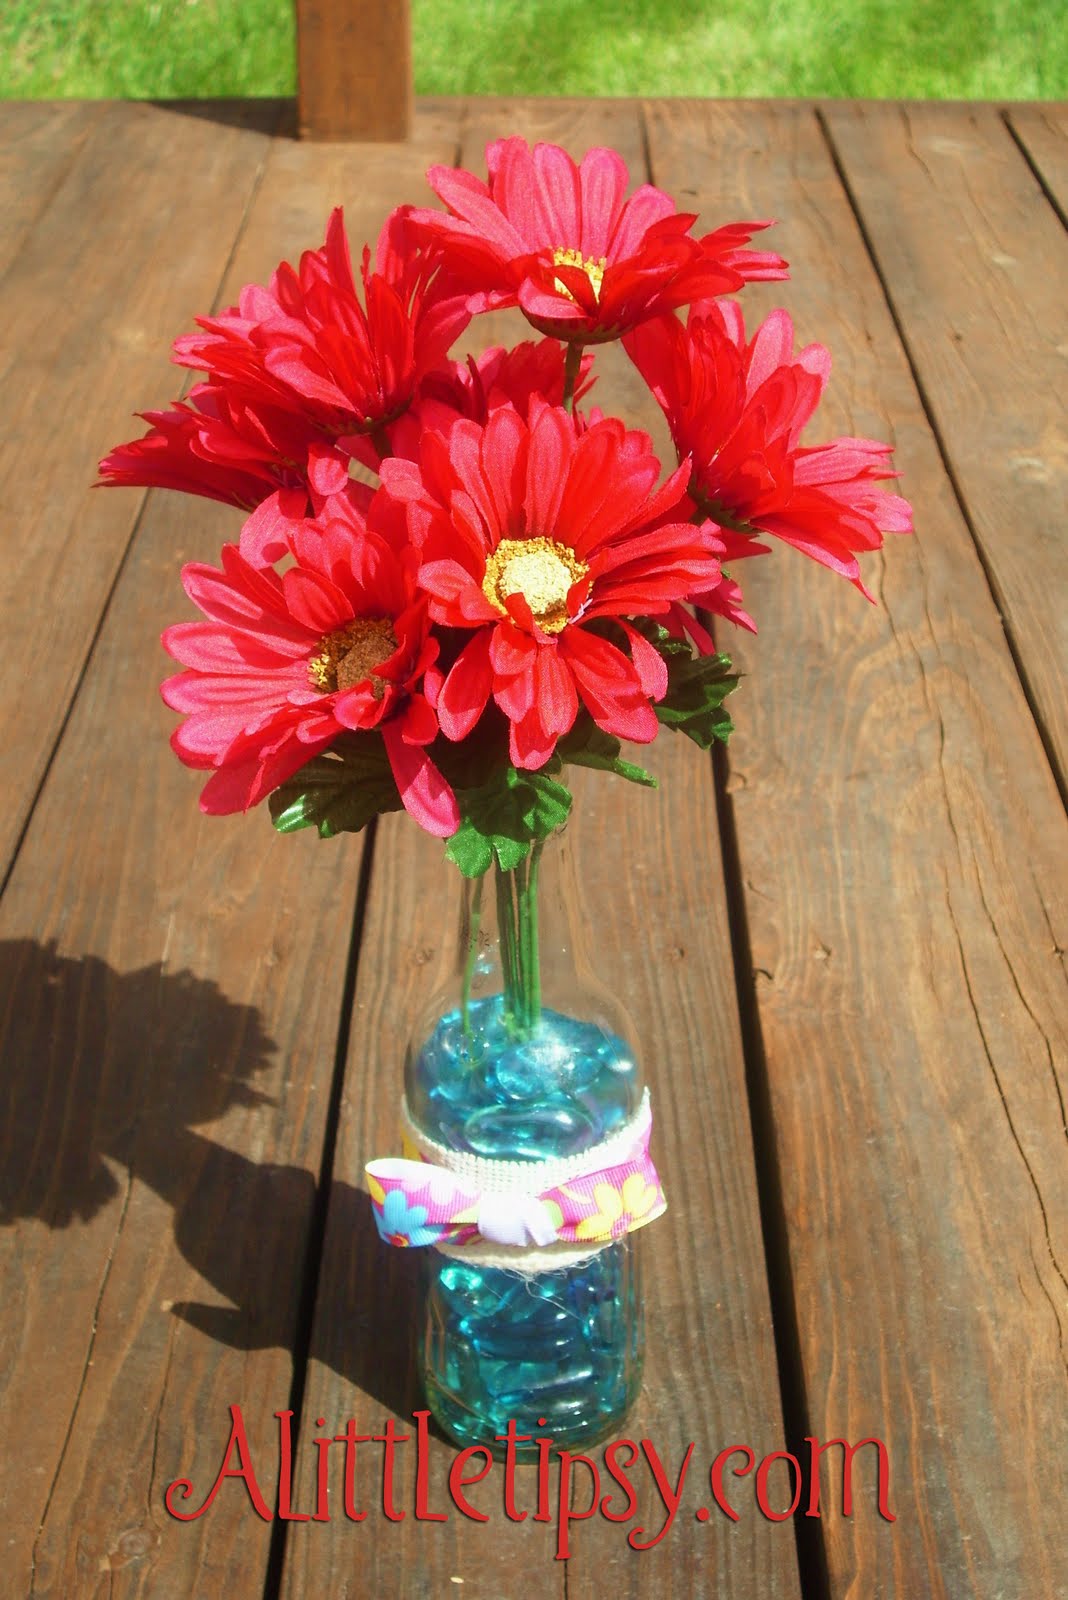
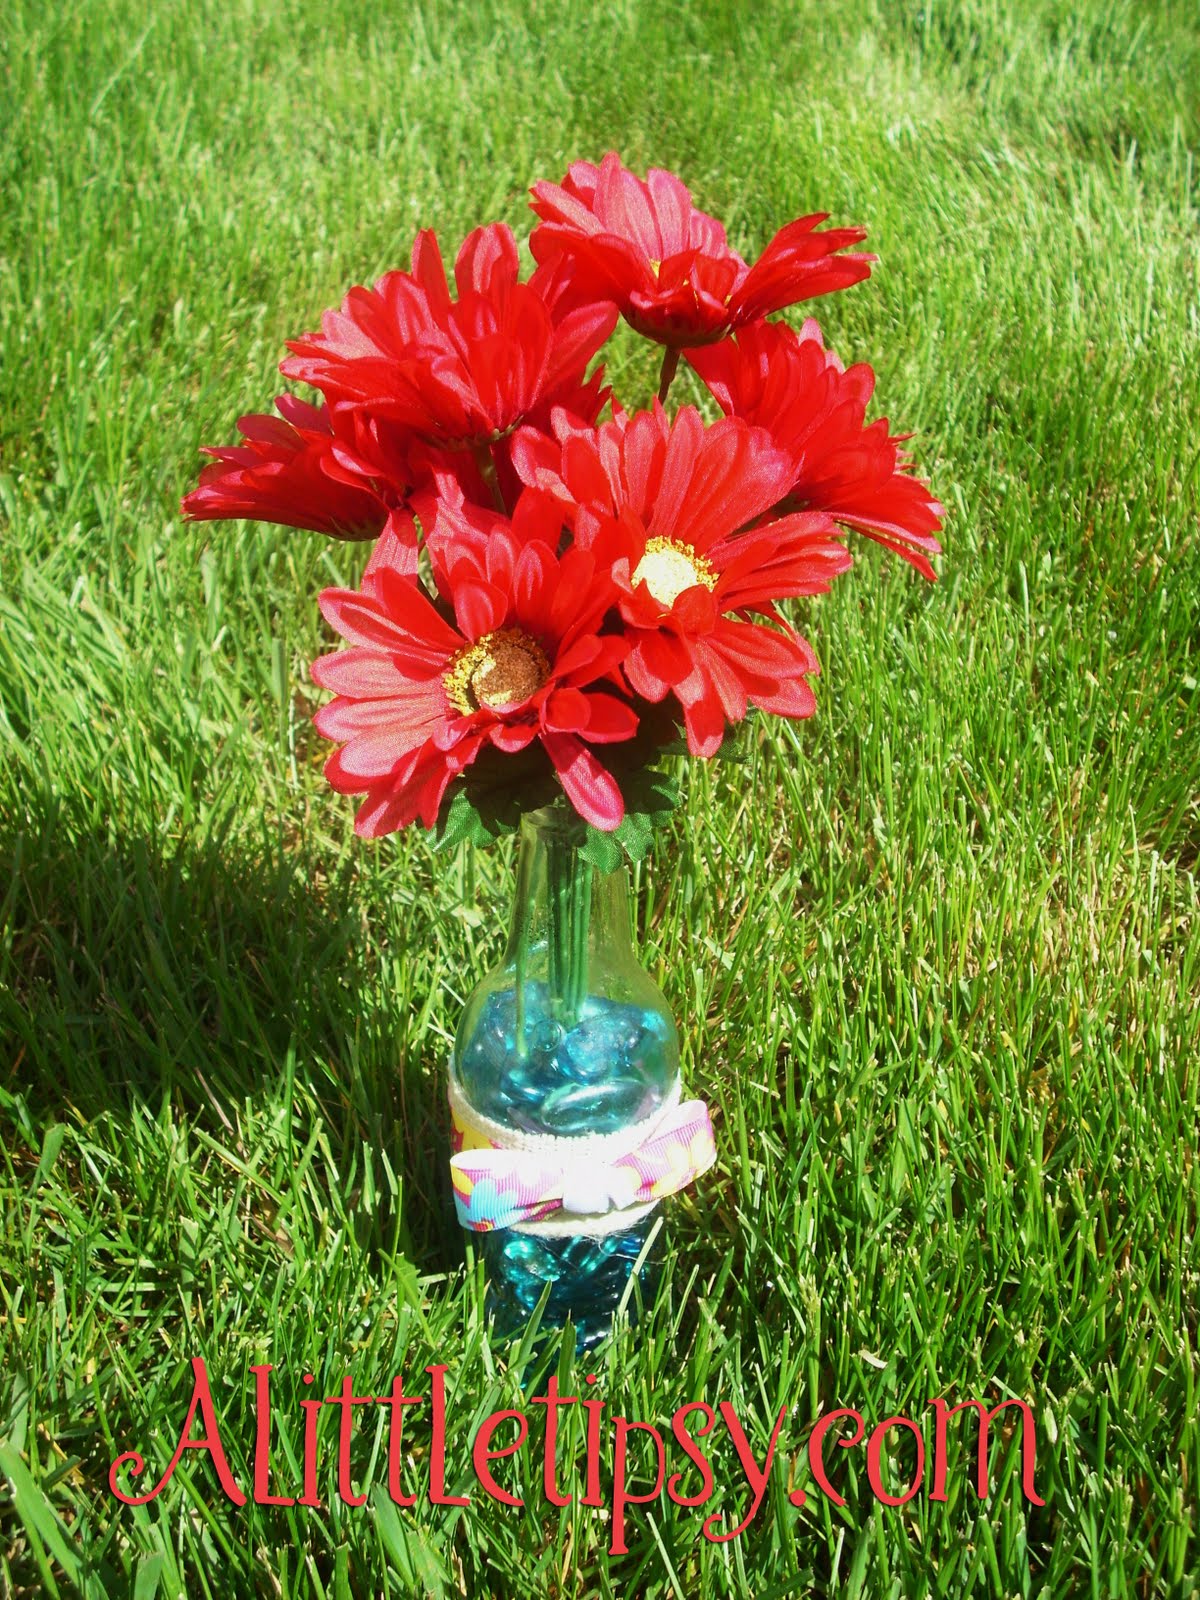
2. Hot glue a scrap of burlap just wider than your ribbon on the bottle.
3. Tie a bow in your ribbon leaving the tails long enough to wrap around the bottle. Glue it in place on the burlap.
4. Insert the flowers. I cut a few of the stems off so I could arrange them at different heights.

That’s it! $2 and 5 minutes and you have a fun arrangement for your table!

Linking up with:
Made By You Monday
Just Whipped Something Up
Making the World Cuter
Market Yourself Monday

P.S. Don’t forget to sign up for free Tipsy updates via RSS or email.

We have decided to truncate our feed to help protect against stolen content. I apologize for any inconvenience. Please love us anyway. 🙂

Rain Cloud Art & Music Activity & Teaching Toddlers How to Use Glue

April 27, 2010 By Michelle Barneck 2 Comments

Dear Spring,

Your killing us with all this rain. We are doing our best to keep busy and happy inside, but are hoping May brings flowers and no more of these showers. To show our appreciation for all this moisture we are dedicating this activity to you. Know that you are officially recognized and that you can feel free to go on your merry way!

Sincerely,
Sunny Sky Hopefuls

So I’m sure many of you are like me and trying to keep the kids entertained and distracted from the fact that outside is not an option everyday. Here is a little Art/Music Project that is super easy, uses what you already have and will keep the kiddos busy for a good few minutes.


Items needed:

White Cardstock
Blue paper
Scissors
Glue
Q-tips
Condiment dish

Since my little guy is not yet 2 1/2 I did all the cutting, but older kids can handle this on their own. Cut out a Cloud shape from the white and lots of raindrops in varying sizes from the blue. This can be a fun way to teach about big and small.

I decided it was high time my guy had his first experience with Elmer’s so I pulled out a few helpful tools to minimize the mess.

He loved dipping the Q-tips in the glue and doing it all by himself. After a while, the cotton starts to stretch so I recommend changing Q-tips a few times so the end stays intact and easy to work with.

He also liked choosing which raindrop to use and where to put it. Sometimes with toddlers it is all about giving them choices. I like that this made him feel really independent. Frankly, I have never seen him this quiet and concentrated!

Success!

After our little Rain Cloud Art Project, I taught him some rain songs. Basically, the only ones I could think of, I was too lazy to look any up.

We sang:

  • Rain, Rain, Go Away
  • I’m Just a Little Black Raincloud (from Winnie the Pooh)
  • It’s Raining, It’s Pouring

I have been realizing that lots of little kids rhymes and songs are kind of gruesome. Now, my little guy insists that the old man “broke” his head, not just “bumped” it.

Here’s a little clip I caught halfway through…

When I told the hubs what we had done, he suggested the song “Rain drops keep falling on my head.” That may have been one with a happier spin. 😉 I can’t help that my songs have one saying “Go AWAY”, one pretending to be something else so you can steal, and one with a man dying.

Just thought I would share. I know if you live in UT you will have plenty of time to use this in the next three days with highs in the 40s!

P.S. Don’t forget to sign up for free Tipsy updates via RSS or email.

We have decided to truncate our feed to help protect against stolen content. I apologize for any inconvenience. Please love us anyway. 🙂

DIY Interchangeable Butterfly Headband

April 21, 2010 By Michelle Barneck 9 Comments

Do you want to join the headband craze, but not for $25 a pop?! Me too. I am loving all the adorable headbands you find everywhere and decided to try one out for myself. Enter the DIY Interchangeable Butterfly headband!

Isn’t she a doll?! I saw this adorable headband (below, sorry it’s hard to see, it’s the only pic I could find because cute Quinn is always behind the camera!)on my friend Quinn a few months ago and thought, I bet I could make one of those!

<span class=

I went on my quest and found this dandy three pack of headbands at the Dollar Tree. I am good with 33 cents!!


Next, I headed over to Hobby Lobby and found these little beauties for $1.99! I did a little dance in the aisle. I love the colors and the little wings are made out of stiff feathers which gives them a cool texture.

You could easily glue the butterflies right to the headband, but I wanted to be able to switch out colors. The butterflies came with a wire sticking out of them, so I just secured the wire in the butterfly better with some glue and wired it right on to the headband.

Now, I can wear them and change them around as I please!

I think I might go get some of those permanent stick black velcro dots and attach the butterflies with those so they are easier to change out.

Oh, and nothing like wearing a bug on your head for Earth Day!;)

Linking up with:

Show and Tell @ Blue Cricket Design

Look What I Made @ Creations By Kara

Works for Me Wednesday

Whatever Goes Wednesday

Bring Spring @ Scraps n Strings

P.S. Don’t forget to sign up for free Tipsy updates via RSS or email.

We have decided to truncate our feed to help protect against stolen content. I apologize for any inconvenience. Please love us anyway. 🙂

Dunking Oreos with a Fork

April 14, 2010 By Michelle Barneck 16 Comments

Thank my Daddy for this little tip. He has been dunking his Oreos with a fork for as long as I can remember. It’s a great way to enjoy cookies and milk without dunking fingers or only getting half the cookie. Just poke your fork tines in to the white center and you are good to go!


I love me some Oreos and milk!

Oreo did not in any way compensate me for this post, though I would accept a lifetime worth of Oreos, or heck one free package for my trouble. 😉

P.S. Don’t forget to sign up for free Tipsy updates via RSS or email.

We have decided to truncate our feed to help protect against stolen content. I apologize for any inconvenience. Please love us anyway. 🙂
« Previous Page
Next Page »

  • Bloglovin
  • Facebook
  • Google+
  • Instagram
  • Pinterest
  • RSS
  • Twitter

Hi there! I'm Michelle. Mother of three little boys and one little princess. Welcome to A Little Tipsy, a place for exploring creativity and sharing inspiration.

Follow on Bloglovin


Visit Michelle Barneck {A Little Tipsy}'s profile on Pinterest.

Tutorials by Category


15 Family Reunion Games

Family Reunion Games Collage

15 Sprinkle Party Ideas

Sprinkle Birthday Party
Creative Commons License

© Copyright 2014 A Little Tipsy · Site Designed by The Fairy Blogmother · Web Hosting by RFE Hosting

This website uses cookies to improve your experience. We'll assume you're ok with this, but you can opt-out if you wish.Accept Read More
Privacy & Cookies Policy