A Little Tipsy

Creative Tips & Ideas

  • home
  • About Me
  • the tipsy top
  • press
  • projects
  • contact me
[print_thumbnail_slider]

For Valentines

January 30, 2012 By Michelle Barneck 2 Comments

I am married to a geek which means I sometimes get to make geeky gifts. This year it is a geek valentine. I saw this idea on Paper, Plate and Plane and knew it would be perfect for valentines. They spray painted the keys and used rub on letters, but I am too lazy for that so I just bought two thrift store keyboards that matched and that was that!

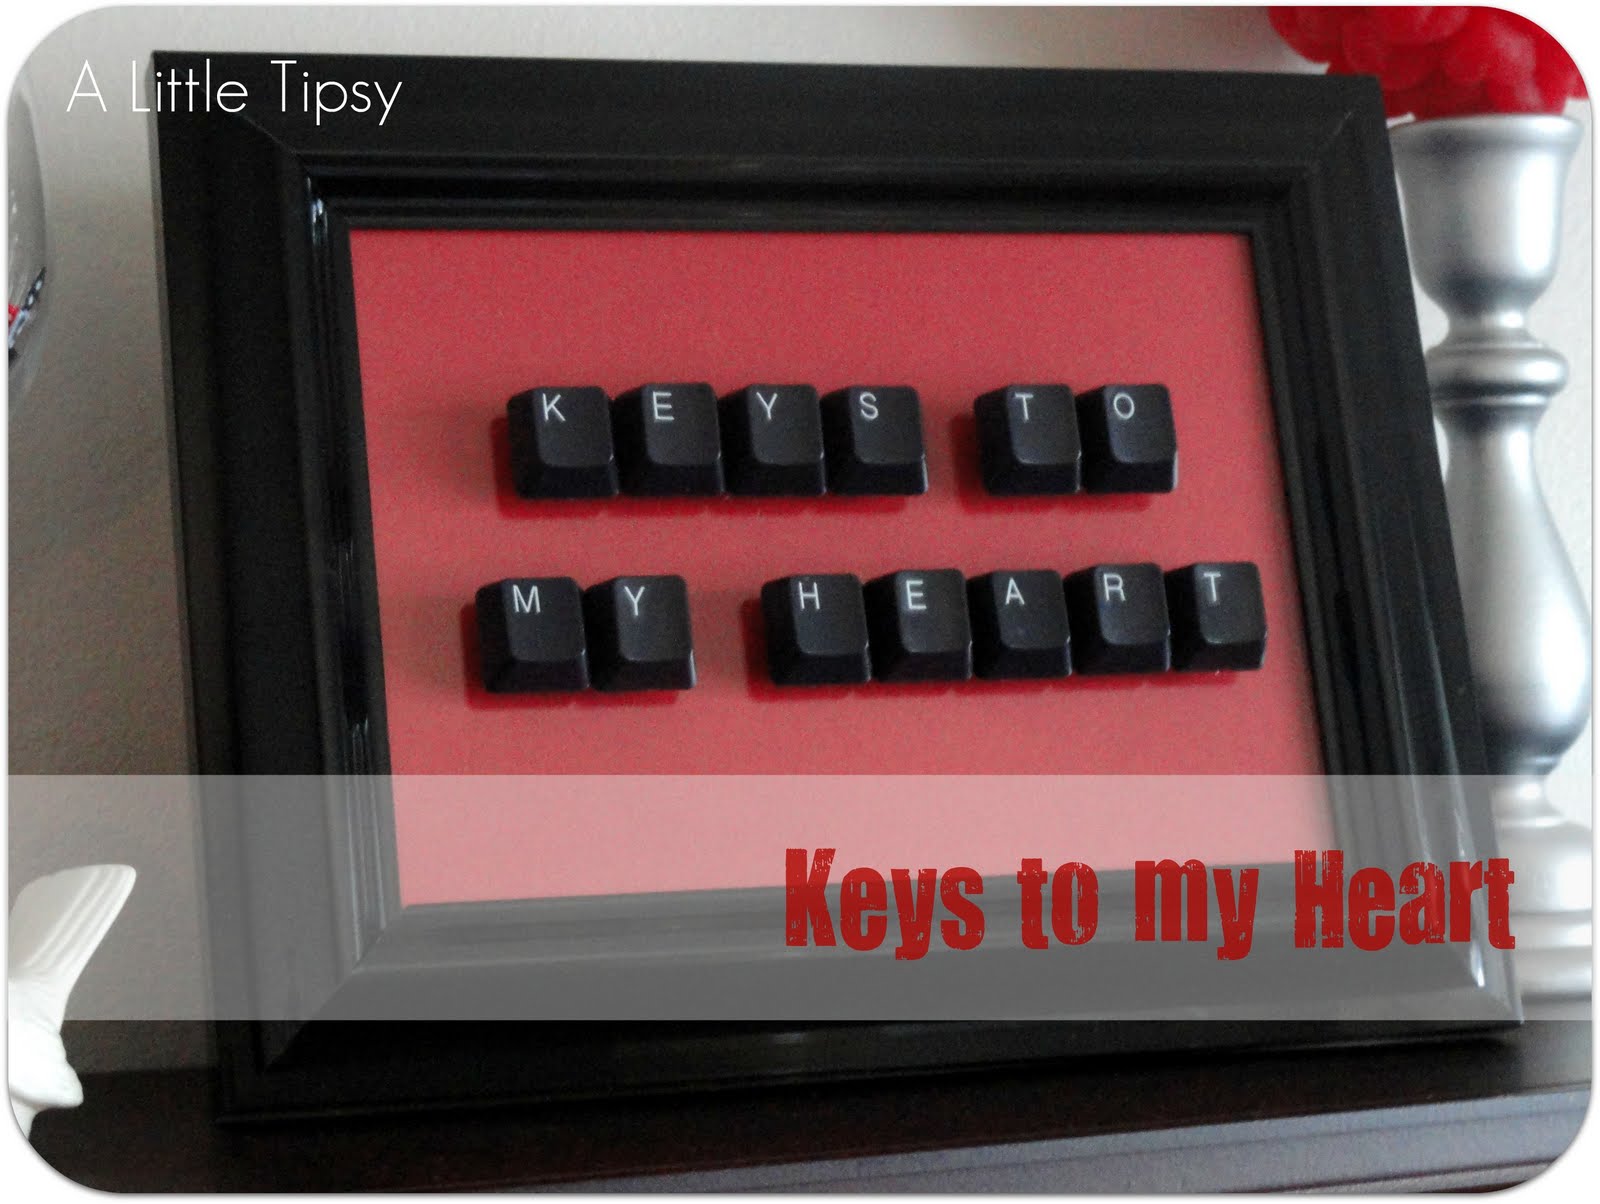
Just pop off the keys, fill the frame with colored paper and hot glue the letters on to the glass. It’s that easy!
And it was a success! He loved it! Thought it was very clever. How do I know you may ask. Wasn’t this supposed to be for Valentines? Yes, yes it was, but he found it. Apparently, to me the top of the fridge is a good hiding spot. To the husband, it’s eye level. Whoops.
But, don’t worry. I have another geek Valentine up my sleeve. he he

P.S. Don’t forget to sign up for free Tipsy updates via RSS or email.

We have decided to truncate our feed to help protect against stolen content. I apologize for any inconvenience. Please love us anyway. 🙂

Valentine Crafts: Framed Heart Art

January 26, 2012 By Michelle Barneck 8 Comments

I needed a little something for my Valentine’s shelf. We whipped up this heart art that is a fun Valentine craft for the kids while doubling as a piece of home decor.

Valentine Crafts: Framed Heart Art
Supplies:
Paper or cardstock
Scissors
Stapler
White glue
Plate
8×10 frame
1. Cut paper in to strips (about 4 inch x 1/2 inch).
2. Make in to hearts by putting two strips together, stapling the top, pulling the bottom out and around to make a heart shape and stapling the bottom. We alternated having the pattern on the outside and inside of the hearts.
3. Dip the edge of the heart in white glue.

4. Place heart on your piece of cardstock cut to fit your frame. Repeat until you have your desired look.
5. Take glass out of frame and put your Valentine craft in.
Display your Valentine Crafts for all to see! My little guy is so proud to have something he helped with displayed so prominently in our front room.
Linking up:
Get Your Craft On

P.S. Don’t forget to sign up for free Tipsy updates via RSS or email.

We have decided to truncate our feed to help protect against stolen content. I apologize for any inconvenience. Please love us anyway. 🙂

Valentines Recipe: Red Velvet Waffles

January 24, 2012 By Michelle Barneck 9 Comments

If you’ve been with us a while, you are probably aware of my love of themey food. I saw this red velvet crepe recipe on Pinterest and loved it, but I’m kinda lazy and thought it was made with a cake mix (I know, blasphemy for some of you). Not so. So I decided to take things in to my own hands and make a Valentine’s recipe using a red velvet cake mix. Oh yes, I did.

Valentines Recipe {Red Velvet Waffles}

How you do it depends on how you want it. We made a breakfast version and a dessert version.
Dessert Waffle (Soft & cake like)
Mix up the cake mix according to package directions and pour in to waffle maker. Cook as usual. It comes out as a waffle shaped piece of cake in a few minutes! Tops with Strawberries and whipped cream or chocolate sauce or frosting and ice cream. Whatever you love!
Breakfast Waffle (Waffle like: crunchy outside with cake inside)
Mix up Bisquick and Cake mix separately according to package directions.
Mix together 1 part prepared cake batter to 4 parts Bisquick batter. (We did 1 cup Bisquick to 1/4 cup cake mix)
Pour in Waffle Maker and cook as usual.

We topped ours with homemade Strawberry jam (warmed to a syrupy state) and whipped cream. Daddy likes a little…
But, mommy likes a LOT!
MMmmm!
We have a small family, so after making our breakfast style waffles I poured the rest of the batter into a square pan and baked it up as a cake for later that night.
What’s your favorite Valentines recipe?

P.S. Don’t forget to sign up for free Tipsy updates via RSS or email.

We have decided to truncate our feed to help protect against stolen content. I apologize for any inconvenience. Please love us anyway. 🙂

Marshmallow Pops

February 9, 2011 By Michelle Barneck 10 Comments

Need a fun quick Valentine treat for the kiddos? How about some cute little marshmallow pops. They are super fast and cause big smiles.

What you will need for Marshmallow Pops:

  • Heart shaped marshmallows
  • White or chocolate chips (whatever you want to dip them in)
  • Jelly Hearts
  • Sprinkles
  • Skewers or sucker sticks (cut the skewers in thirds with heavy duty shears, mine are Cutco)
  • Ribbon

Put a marshmallow on top of a stick. Dip it in melted chips. Sprinkle with sprinkles. (ha ha) Put a jelly heart on the bottom to make it stand up. Put in fridge for a minute to harden chocolate faster. Add a little flair with ribbon.

Store in a Ziploc bag so the marshmallows don’t harden.

Linking Up:

Strut Your Stuff
Show Off Your Stuff
Show and Tell
Look What I Made
Whatever Goes Wednesday
Works for Me Wednesday
Sugar & Spice & Everything Nice

P.S. Don’t forget to sign up for free Tipsy updates via RSS or email.

We have decided to truncate our feed to help protect against stolen content. I apologize for any inconvenience. Please love us anyway. 🙂
« Previous Page
Next Page »

  • Bloglovin
  • Facebook
  • Google+
  • Instagram
  • Pinterest
  • RSS
  • Twitter

Hi there! I'm Michelle. Mother of three little boys and one little princess. Welcome to A Little Tipsy, a place for exploring creativity and sharing inspiration.

Follow on Bloglovin


Visit Michelle Barneck {A Little Tipsy}'s profile on Pinterest.

Tutorials by Category


15 Family Reunion Games

Family Reunion Games Collage

15 Sprinkle Party Ideas

Sprinkle Birthday Party
Creative Commons License

© Copyright 2014 A Little Tipsy · Site Designed by The Fairy Blogmother · Web Hosting by RFE Hosting

This website uses cookies to improve your experience. We'll assume you're ok with this, but you can opt-out if you wish.Accept Read More
Privacy & Cookies Policy