A Little Tipsy

Creative Tips & Ideas

  • home
  • About Me
  • the tipsy top
  • press
  • projects
  • contact me
[print_thumbnail_slider]

DIY Disney Tattoos for Kids

November 7, 2012 By Michelle Barneck 19 Comments

With two curious little boys I was nervous that one of them would get lost in the crowds at Disneyland. They aren’t quite old enough to know their phone number, so I decided tattooing it right on them would be the next best thing. I created fun Disney themed tattoos for kids using free images, a little creative wording, and some Silhouette’s printable tattoo paper.
Tattoos for Kids
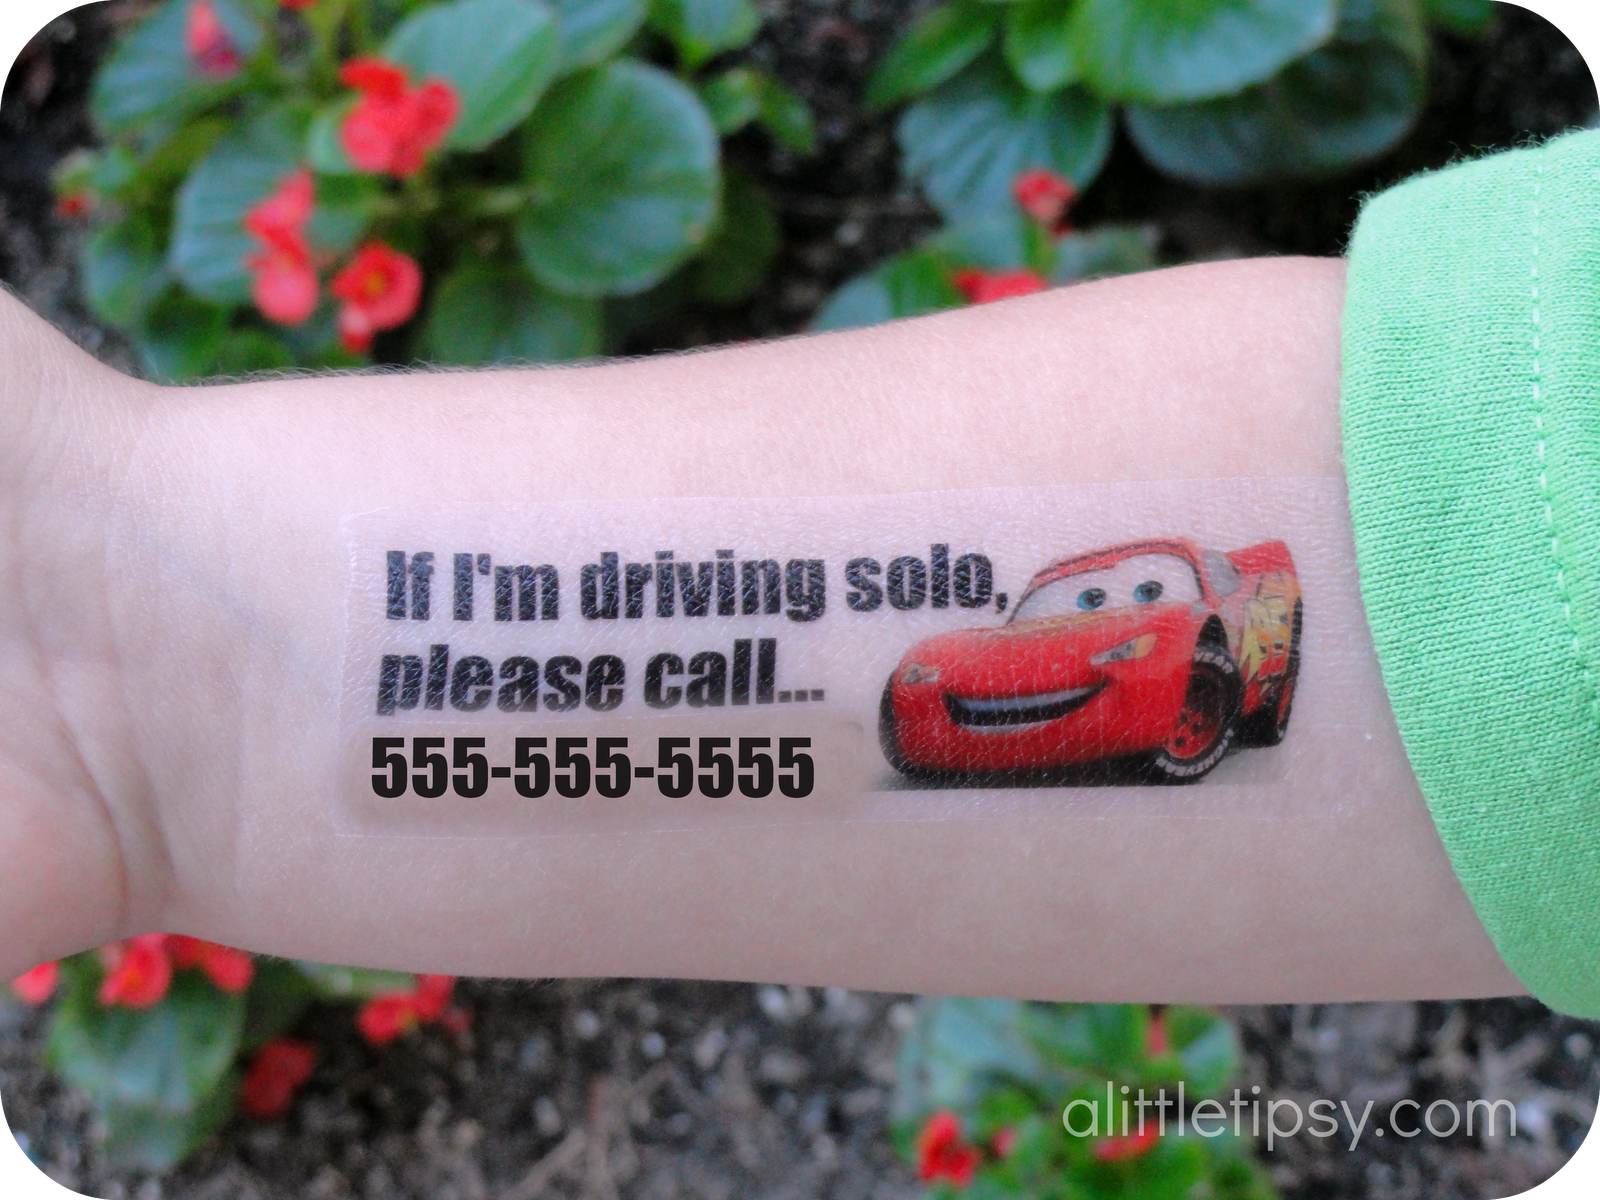
I put the tattoos on the inside of their forearm so my phone number would not be broadcast, but would be there if needed.
Our tattoos for kids read as follows:
  • Lightning McQueen: If I’m driving solo please call…#
  • Finn McMissile: If I made a stealthy getaway, please call #
  • Peter Pan: If I’m a lost boy, please call…#
  • Nemo: If my dad is looking for me, please call #
  • Pirate Mickey: If you found our little treasure call #
Here is the template I used to create tattoos for each day. It used a half sheet of tattoo paper and just printed them right on following package directions.
Download tattoo template here.
Wednesdays through January
We have decided to truncate our feed to help protect against stolen content. I apologize for any inconvenience. Please love us anyway. ๐Ÿ™‚

Mike Wazowski Shirt

October 24, 2012 By Michelle Barneck 14 Comments

Who doesn’t love Mike Wazowski? Seriously, he’s hilarious not to mention simple so he is easy to make in to a shirt. It cost me all of $1. Gotta love those numbers!
SUPPLIES:
Computer
Silhouette
Contact paper
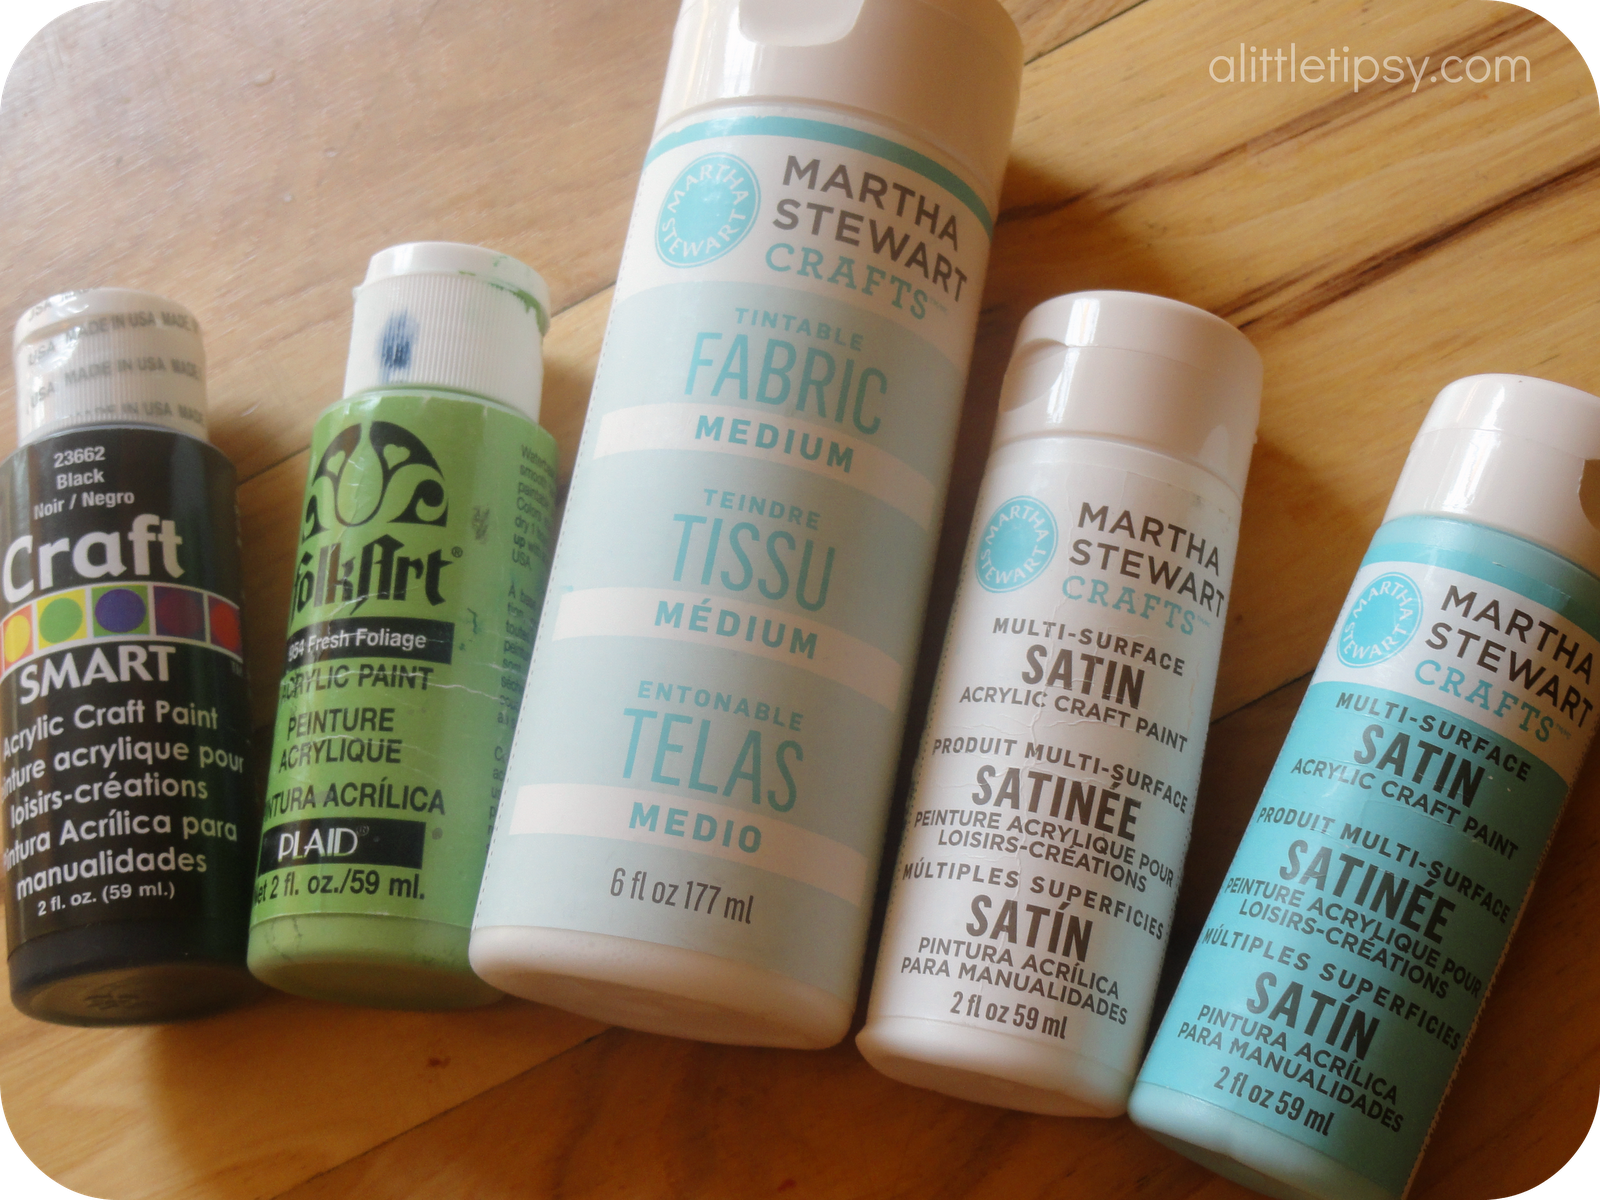
Fabric Medium
Black paint
Green Paint
White Paint
Turqouise paint
Foam brush
Cardboard
Green shirt
Iron

INSTRUCTIONS:
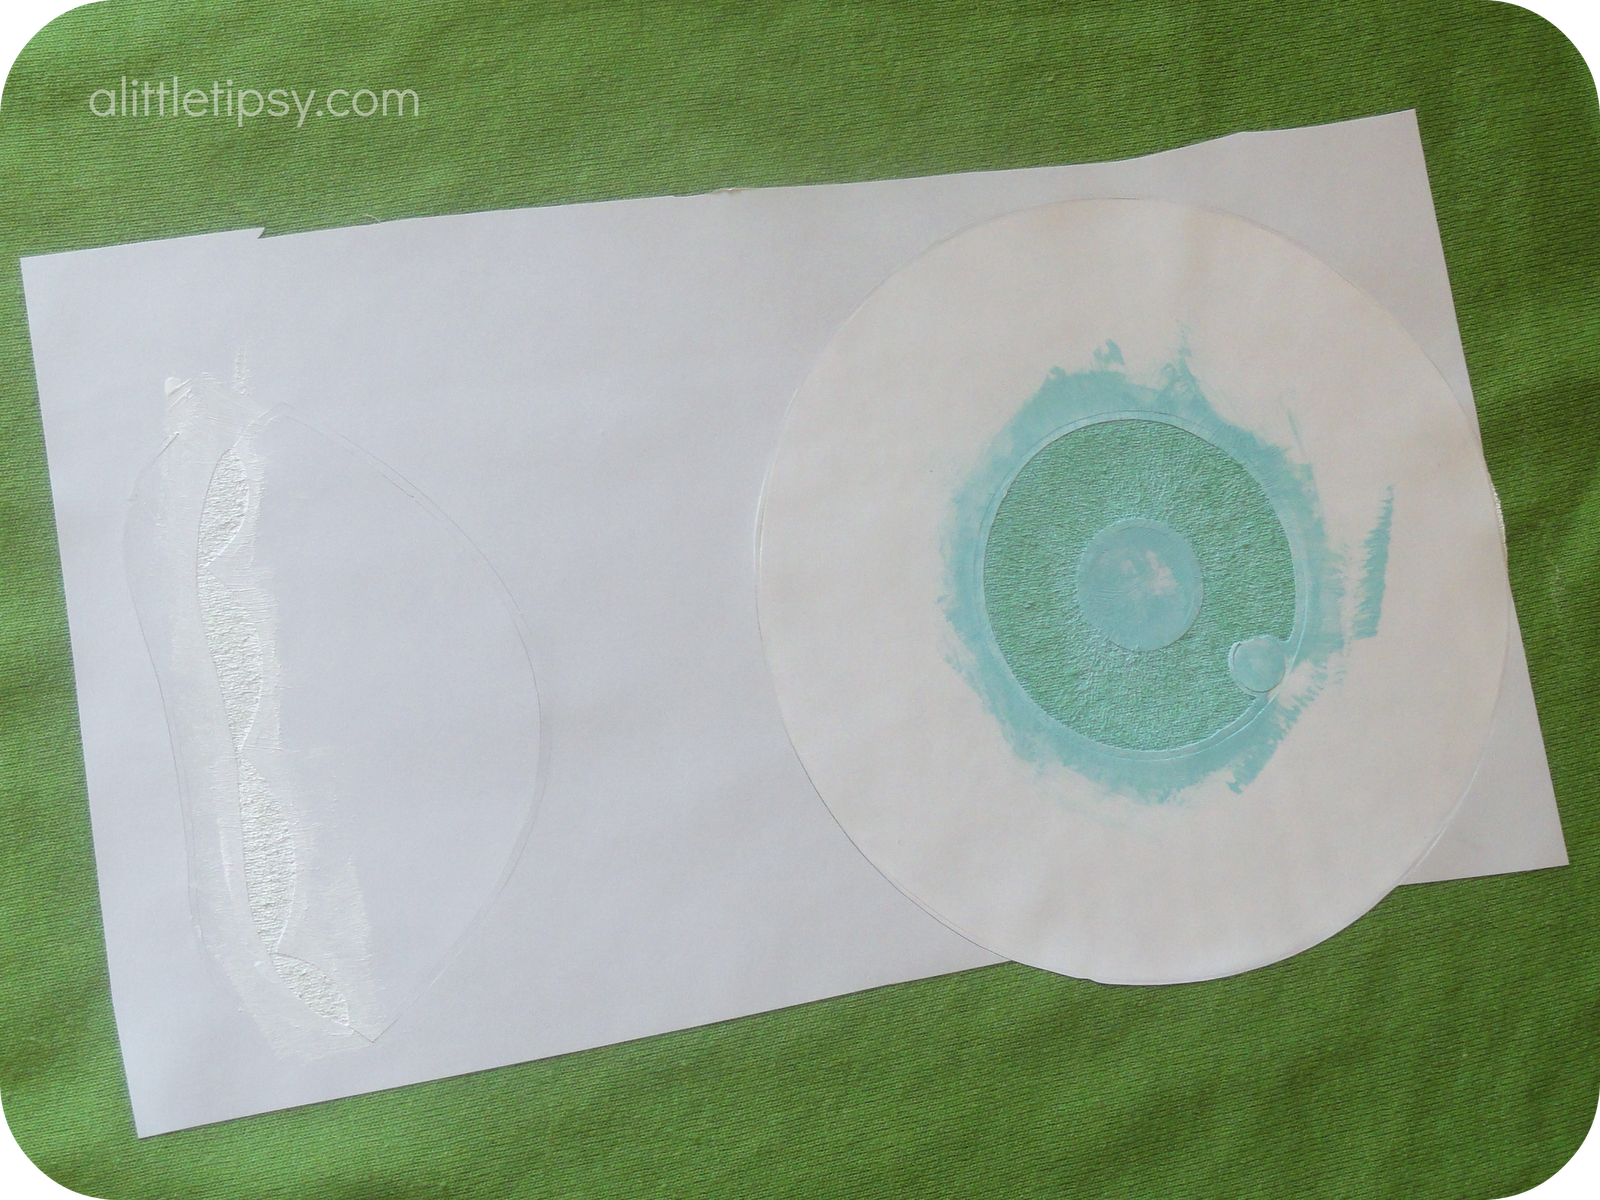
1. I saw this shirt and took matters in to my own hands. Import the image in to the silhouette software and use the trace feature to get your cut lines. Cut two stencils out of contact paper. You’ll use different pieces at different times.
2. Place your first set of contact paper stencil shapes as shown below.

 3. Using separate little bowls mix up black, white and green with the fabric medium according to package directions. Carefully paint by dabbing with the foam brush. Paint the mouth and the middle of the eye black. Paint the outer eye and little dot in the eye white. Paint the lip line green. Use as many coats as it takes to get the vibrancy you want. Let it dry completely.


4. Layer the stencil as shown below covering the painting you already did. Mix up the turquoise with the fabric medium. 
5. Paint the teeth white and the middle of the eye turquoise. Let dry completely.
6. Carefully remove all stencils.

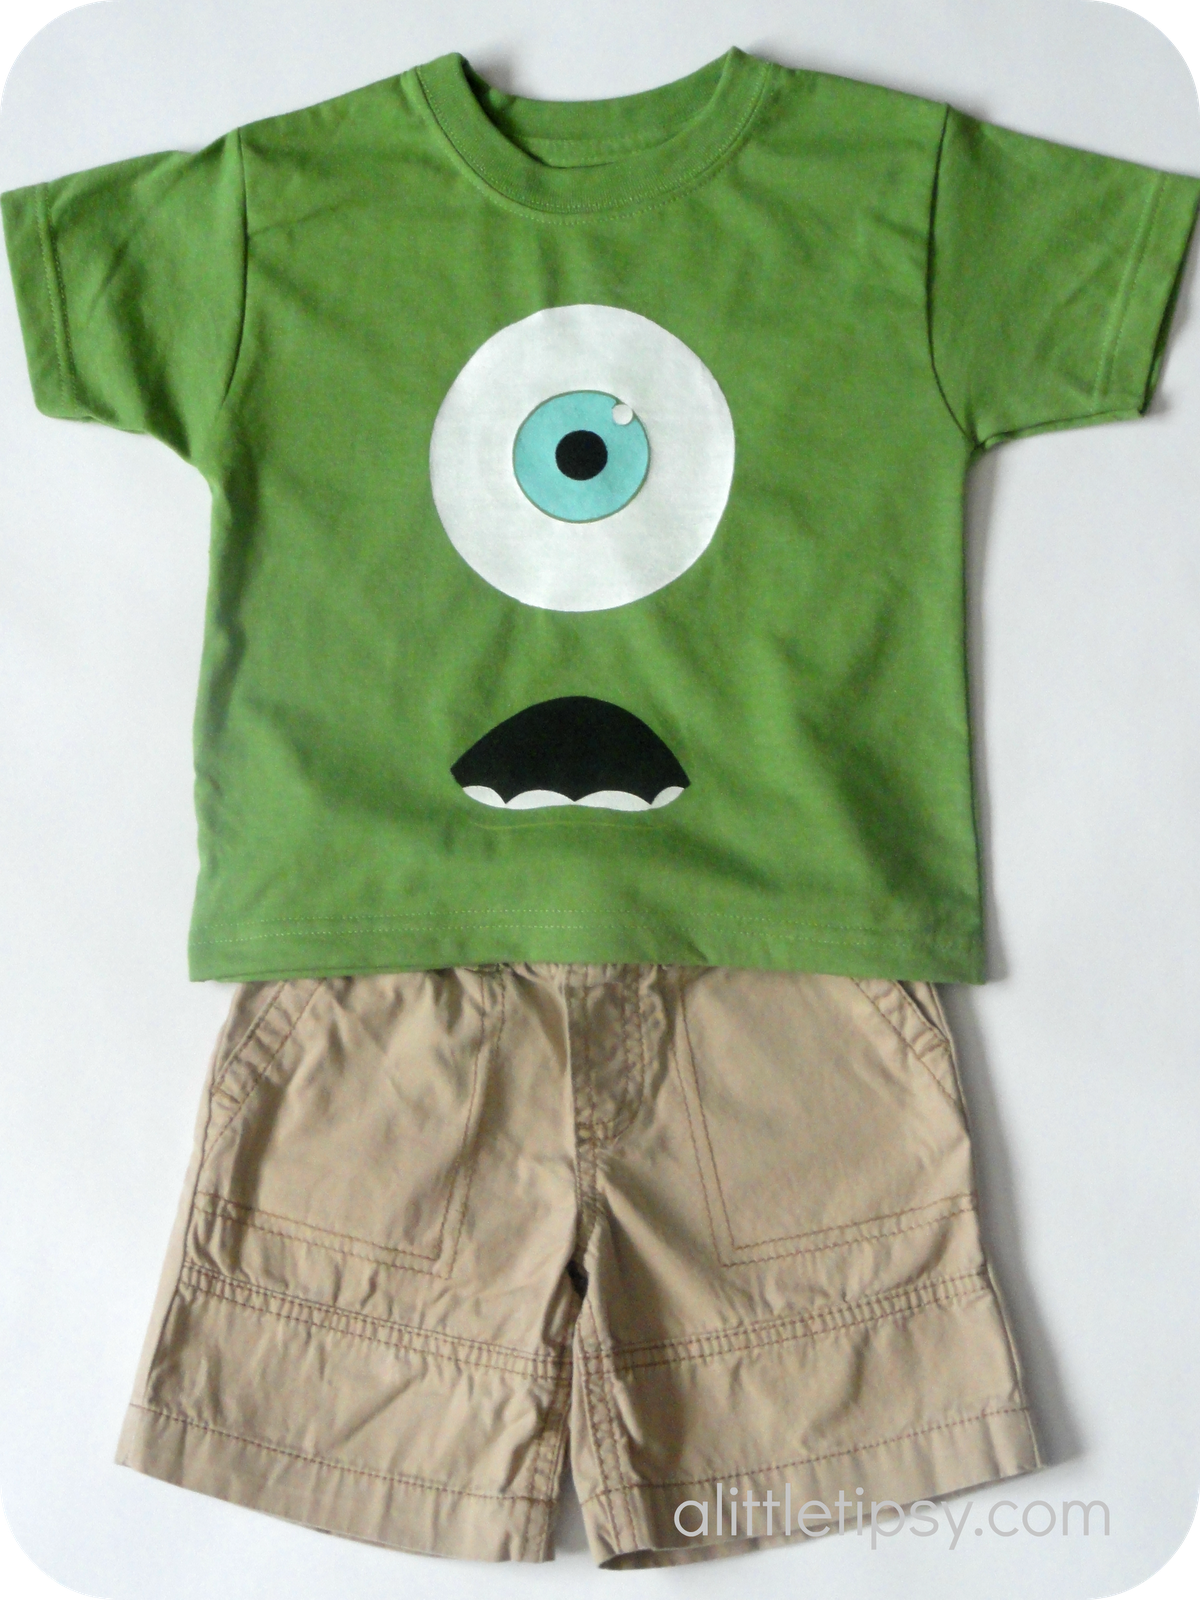
I am seriously in love with this Mike Wazowski shirt!! 
It was easier and turned out better than I thought!

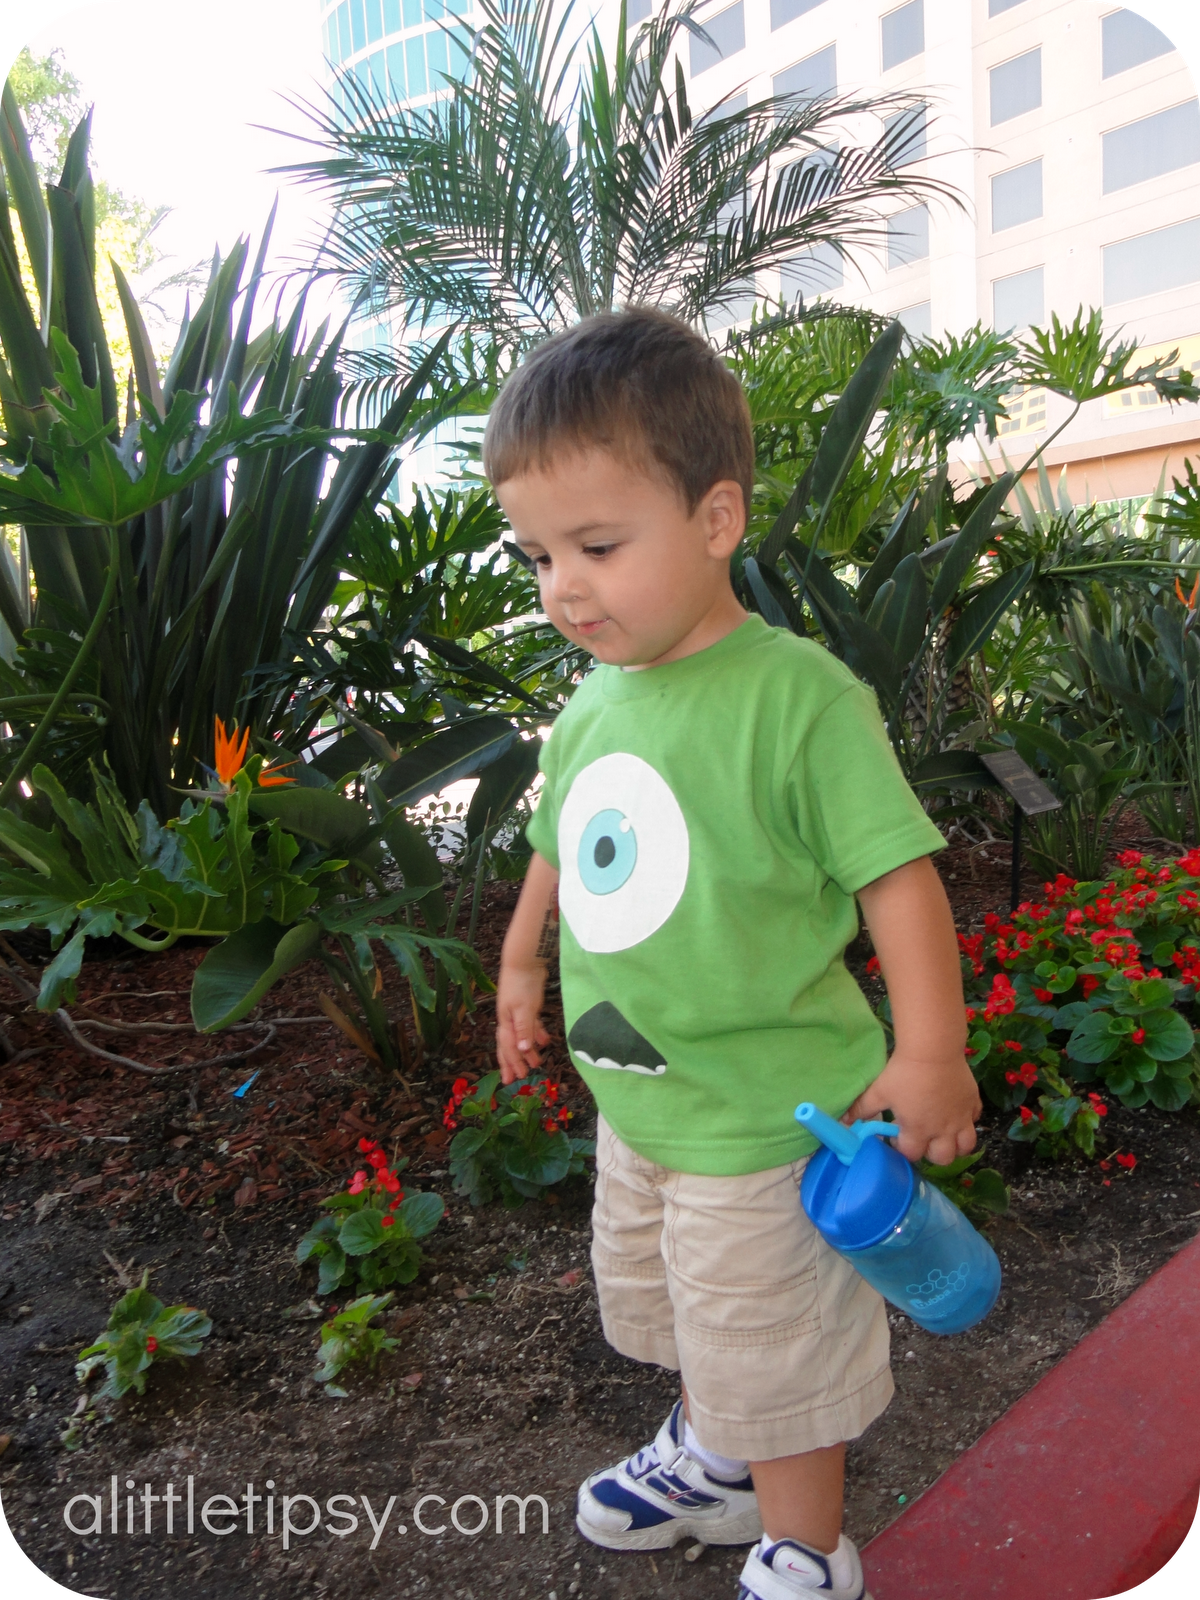
Pair it with some shorts and you’re all ready for Disneyland!

Mike was my little guy’s favorite Disney shirt of them all and that’s saying something considering I made  about 10 different shirt designs for our trip.
If you liked this Mike Wazowski shirt, stay tuned every Wednesday through January for a new Disney DIY project each week!

P.S. Don’t forget to sign up for free Tipsy updates via RSS or email.

We have decided to truncate our feed to help protect against stolen content. I apologize for any inconvenience. Please love us anyway. ๐Ÿ™‚

Kid Chatteroo

October 22, 2012 By Michelle Barneck 1 Comment

I am so super delighted to tell you that my cute friend Kirsten from Crafting Chicks created an app and it launches today!! She has been working her tail off on it and it’s finally done. Not only is she one of the cutest girls I know, but her app idea totally rocks!


KID CHATTEROO is fun to play at bedtime, dinnertime and snuggletime. Easily turn those potentially โ€œtime-wastingโ€ moments such as amusement park lines, waiting rooms, car rides,  into meaningful moments. Use KID CHATTEROO anytime and anywhere you want to connect with your kids. Capture those little voice recordings with an easy-to-use recording feature, itโ€™s like capturing time in a bottle.  

Here are examples of some of the fun questions and answers you might experience with Kid Chatteroo:

  • If you ate a rainbow what would it taste like?  
    • Aiden age 5: “Nothing, because they’re clear and when you put your hand on them it just goes through.” 
    • Benny age 5:  “really good burritos”  
    • Delany age 3:  “chicken”
  • If you lived in candy land what would you build your house out of? 
    • Aiden: “For wood, it would be candy canes.” 
    • Delany:  “a rainbow”  
    • age 3: “popcorn”
  • What are you most excited for?  
    • Aiden: “Easy, Halloween.” 
    • Delany:  “my birthday cake”  
    • Benny:  “everything”
  • What is the silliest thing about Dad?  
    • Aiden: “He toots so loud.” 
    • Delany: “He scares me with a {Halloween }mask all the time.”
  • Why are moms so super?  
    • Aiden: “That’s really hard, I think we should skip that one.” 
    • Delany:  “Cuz you’re awesome. And I like Aunt Kristi more.”
  • If animals could talk, which one would you talk to and what would you say? 
    • Aiden:”Ribbit, ribbit to a frog.” 
    • Delany:  “Monkey: Dora has shoes”
  • If you were a princess/knight what would your castle look like? 
    • Aiden: “Like the castle in Brave or a giant rectangle with two towers with lots of squares on top.”
    • Delany:  “Purple” 
  • If you ate a rain cloud what would it taste like?  
    • Aiden: “Rain, I meant water because rain is water.” 
    • Delany “watermelon”  
    • age 3: “Yucky Stuff”
  • Why do dogs have a tail? 
    • Aiden: “To show when they like someone.” 
    • Delany:  “Cuz they um, they swish them around”
  • What is your favorite thing to do with mom?  
    • Aiden: “Aiden time.” 
    • Delany:  “Go on a walk to Circle K to get a pop” 
    • age 3: “LAUGH”

I love the idea of having their cute little voices and silly answers recorded to keep forever. And the fact that it is easy as pushing a button on your phone is a huge bonus! And 99 cents? Please. I spend that on a candy bar in the checkout.

Check out the app and if you like it, tell her by giving her a 5 star rating! Catch them around the web too!

TWITTER: https://twitter.com/kidchatteroo 
FACEBOOK: http://www.facebook.com/pages/Chatteroo/506943849332176 
PINTEREST: http://pinterest.com/chatteroo/ 
WEBSITE: WWW.KIDCHATTEROO.COM join their mailing list for updates and other fun tidbits!

DIY SITE:  www.thecraftingchicks.com creator of Kid Chatteroo & her four friends share awesome DIY stuff
We have decided to truncate our feed to help protect against stolen content. I apologize for any inconvenience. Please love us anyway. ๐Ÿ™‚

Clipboard Art Frame

September 24, 2012 By Michelle Barneck 3 Comments

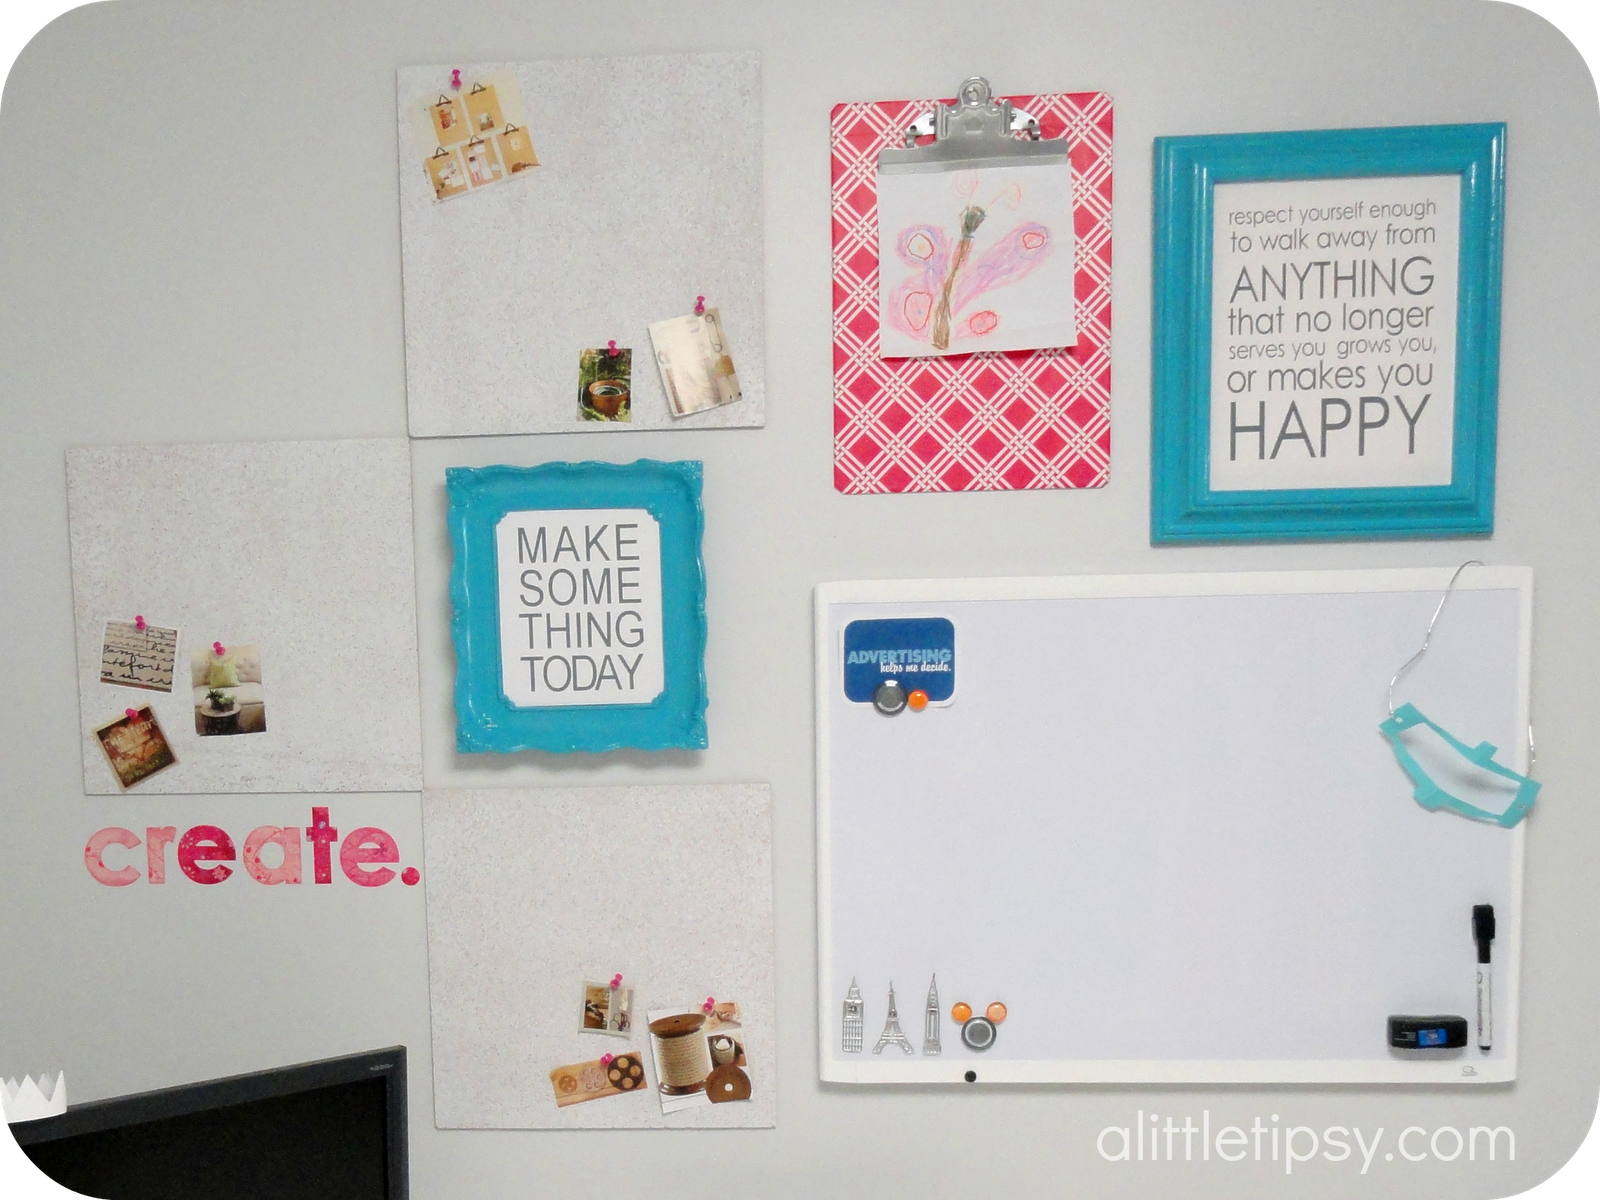
I have a budding artist at my house. My little guy can crank out a good number of pictures in a day and they are totally precious and surprisingly good for a not yet five year old. When putting together my craft room, I knew I wanted a place to display his latest masterpiece but being that there is quite a bit of turnover it needed to be something easily switchable. A clipboard was the perfect solution.
This way he feels special that his art is important to show off, but I am not constantly fiddling with a frame of some sort.
CLIPBOARD ART FRAME

SUPPLIES:

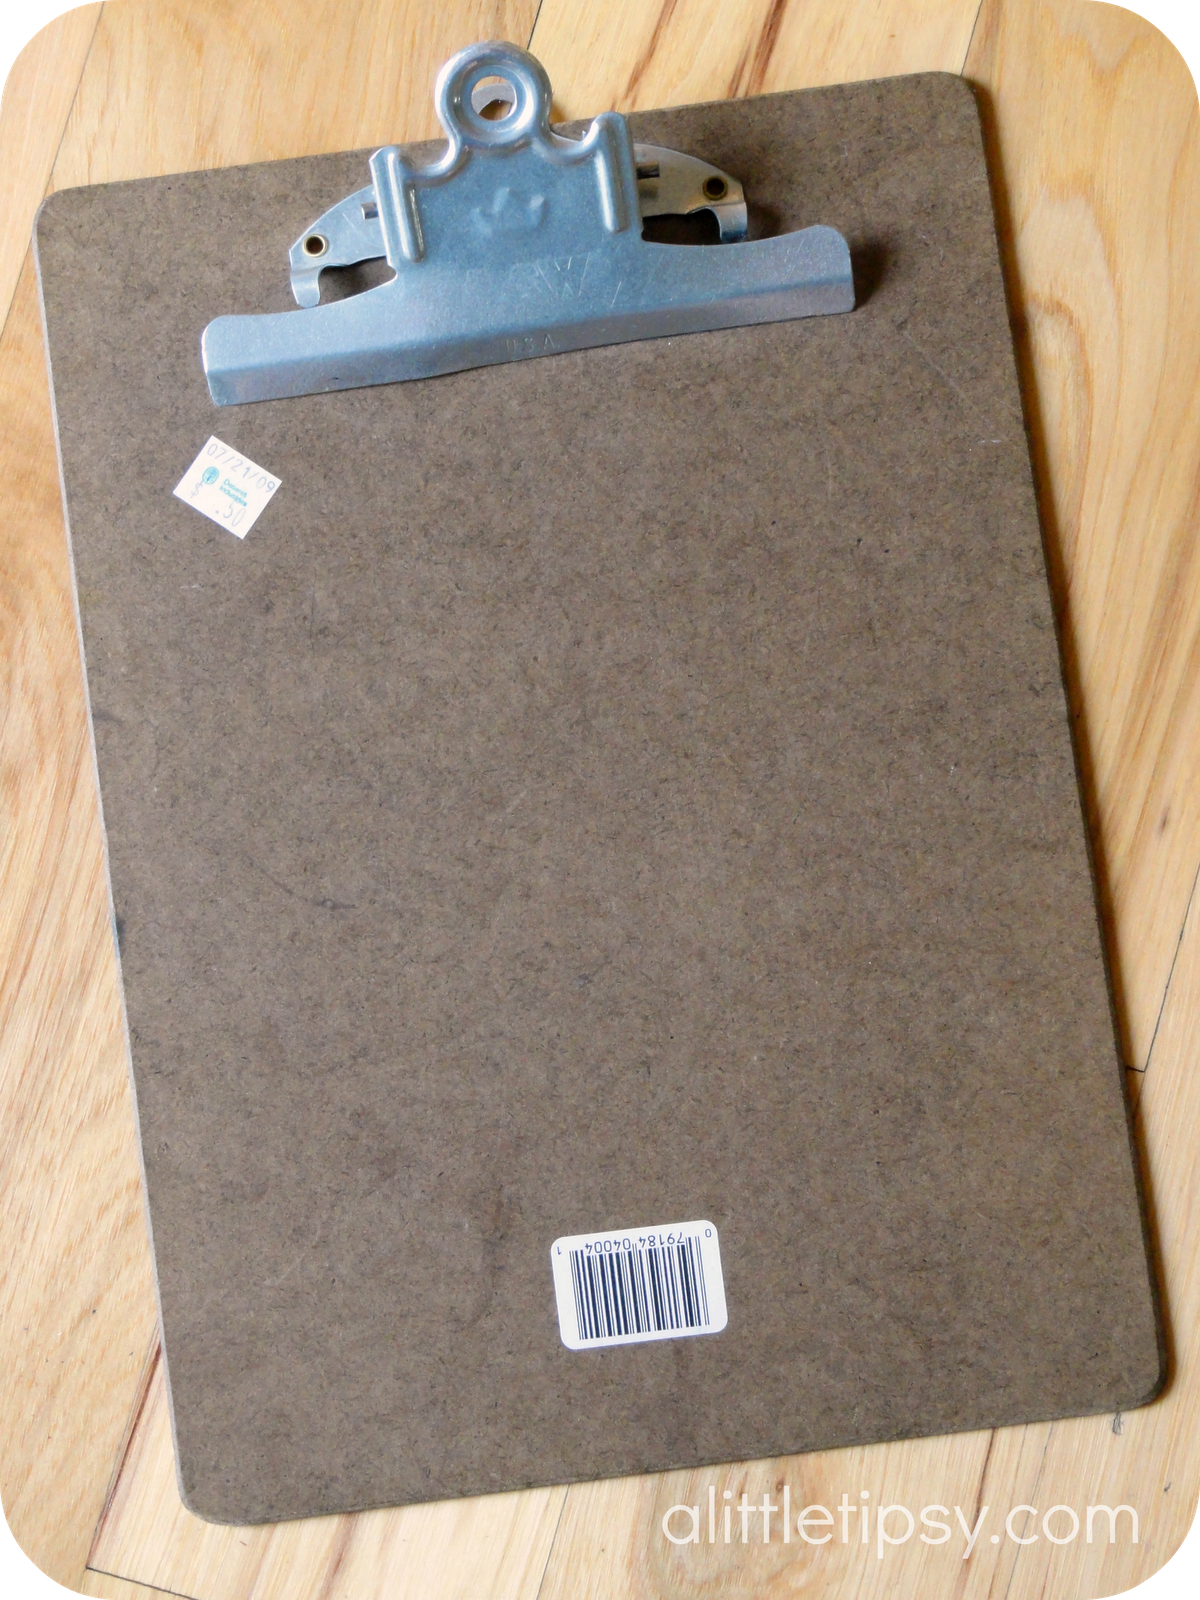
Clipboard (thrifted 75 cents)
Wrapping paper
Scissors
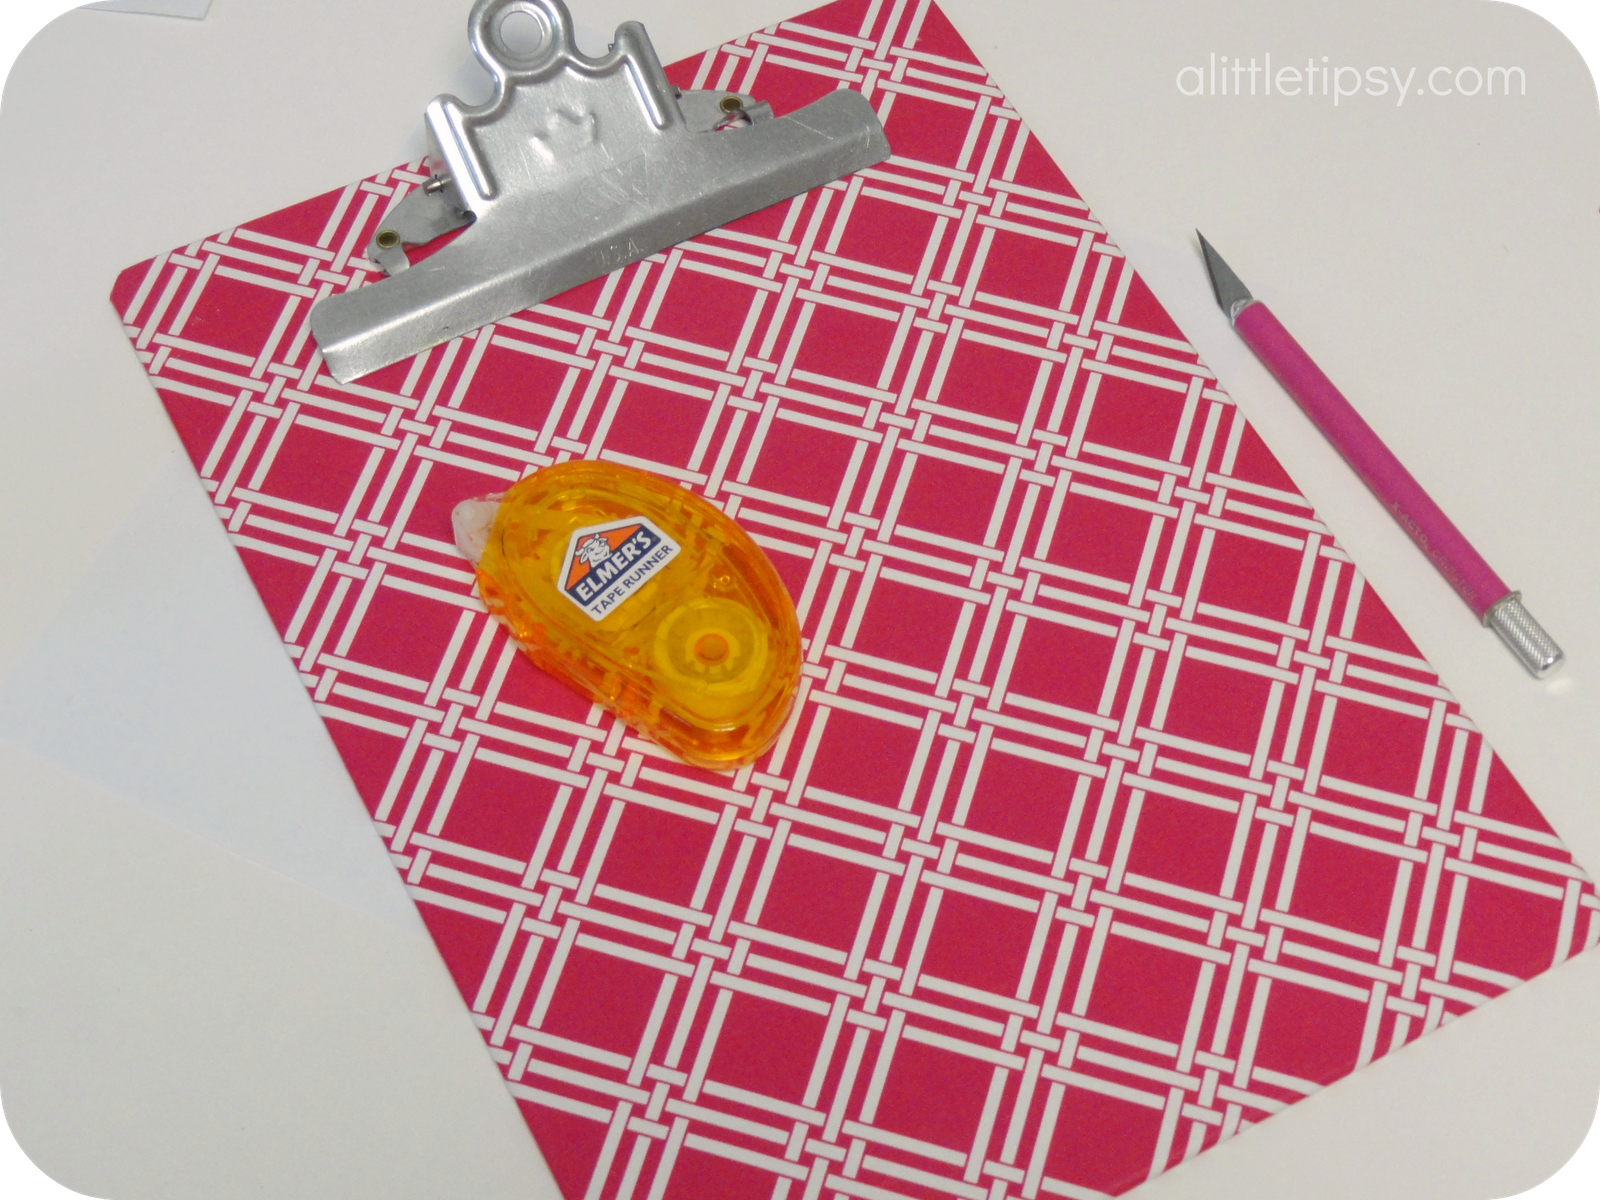
Elmer’s tape runner
Xacto knife

Project Time: 15 minutes

INSTRUCTIONS:

1. Cut a square of wrapping paper about two inches larger than your clipboard.
2. Line the edges of the clipboard with the tape runner.
3. Place the square of wrapping paper as close to the top as you can get it sliding it under the clamp as much as possible and secure on the tape.

4. Cut out some rectangles of paper to cover the top corners of the clipboard where the square of paper could not reach. Lay them on the board aligning the design. Secure with the tape runner.
5. Score the paper along the edge of the clamp with a fingernail to give you a line to trace with your Xacto. Trim the paper to the edge of the clamp and if possible tuck under the clamp slightly.
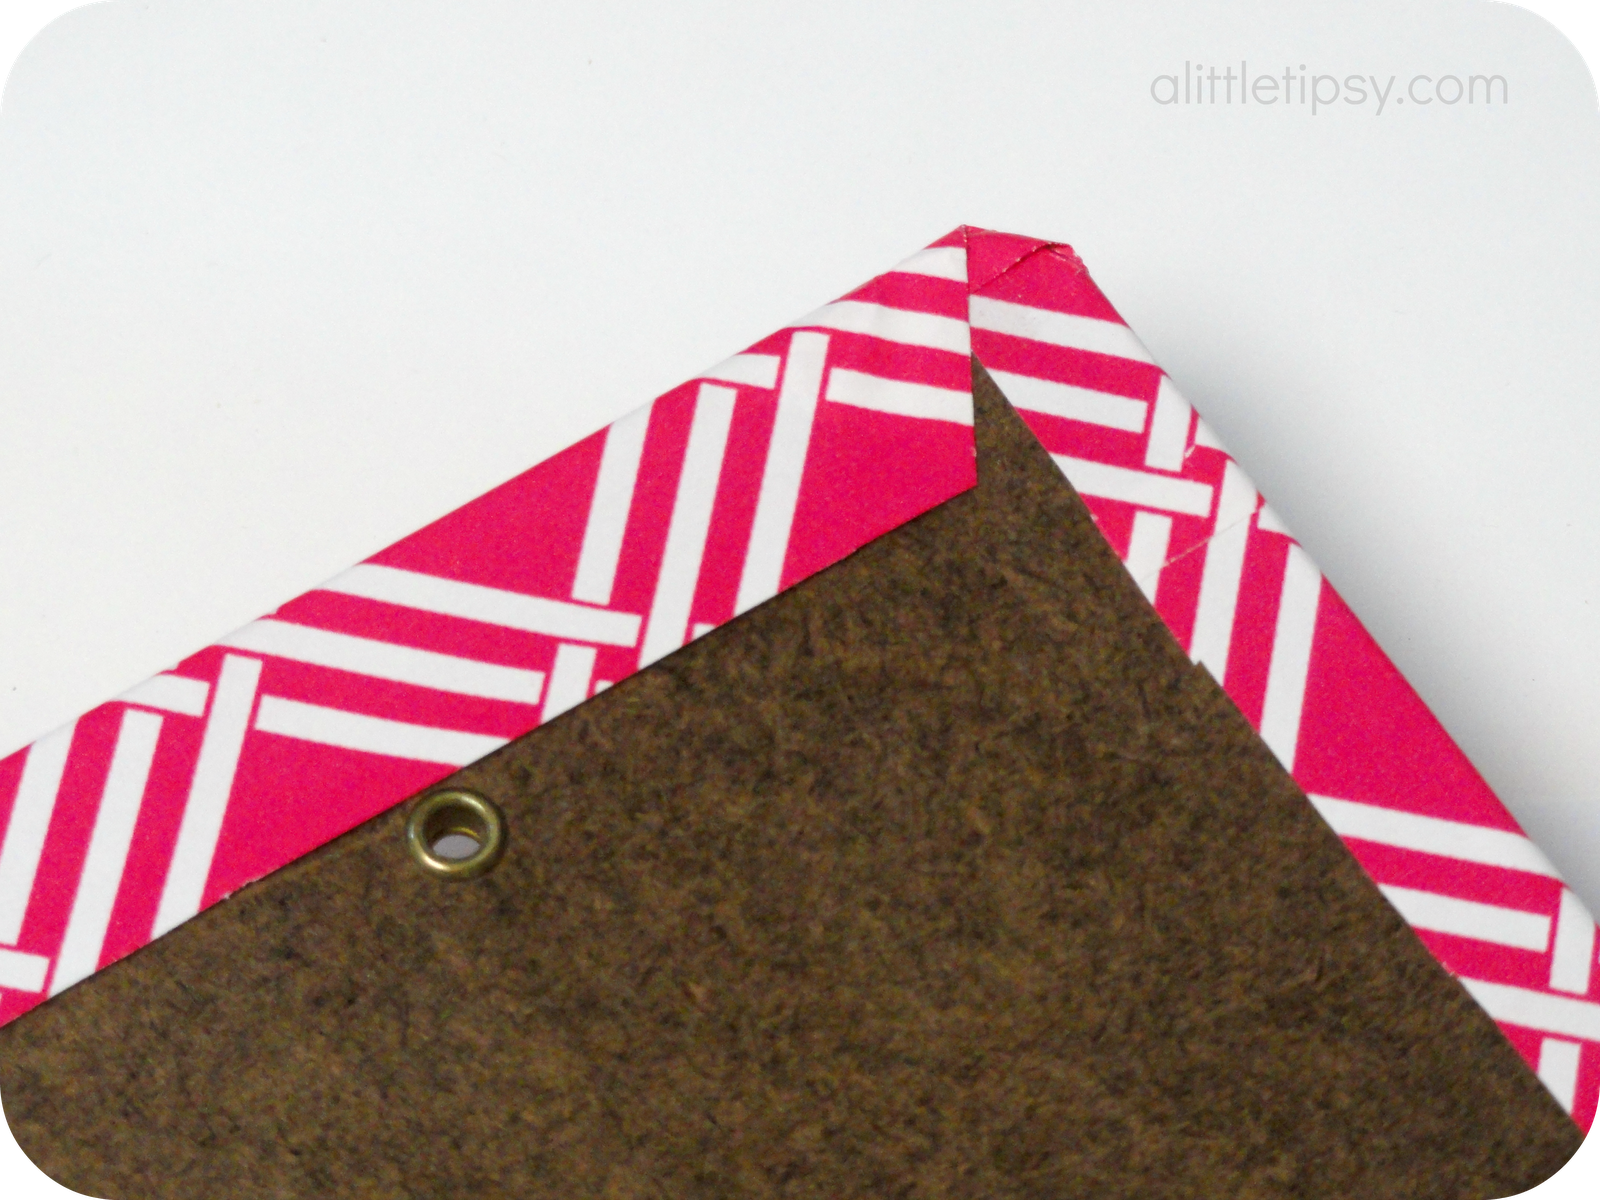
6. With the front secured, tape around the back edge of the clipboard. Fold the paper around the edge and secure. Fold corners like wrapping a present so they lay flat and look nice from the front.
I didn’t worry about covering the back of the clipboard because I was hanging it on a wall.
Add some art or a photo and hang. A clipboard frame would be great for a command center, bedroom, or playroom too!

I love the pattern and color it adds to my craft room gallery wall!

P.S. Don’t forget to sign up for free Tipsy updates via RSS or email.

We have decided to truncate our feed to help protect against stolen content. I apologize for any inconvenience. Please love us anyway. ๐Ÿ™‚
« Previous Page
Next Page »

  • Bloglovin
  • Facebook
  • Google+
  • Instagram
  • Pinterest
  • RSS
  • Twitter

Hi there! I'm Michelle. Mother of three little boys and one little princess. Welcome to A Little Tipsy, a place for exploring creativity and sharing inspiration.

Follow on Bloglovin


Visit Michelle Barneck {A Little Tipsy}'s profile on Pinterest.

Tutorials by Category


15 Family Reunion Games

Family Reunion Games Collage

15 Sprinkle Party Ideas

Sprinkle Birthday Party
Creative Commons License

© Copyright 2014 A Little Tipsy · Site Designed by The Fairy Blogmother · Web Hosting by RFE Hosting

This website uses cookies to improve your experience. We'll assume you're ok with this, but you can opt-out if you wish.Accept Read More
Privacy & Cookies Policy