A Little Tipsy

Creative Tips & Ideas

  • home
  • About Me
  • the tipsy top
  • press
  • projects
  • contact me
[print_thumbnail_slider]

DIY Under $5: Ruching Shirt Refashion in 10 Minutes

April 6, 2011 By Michelle Barneck 21 Comments

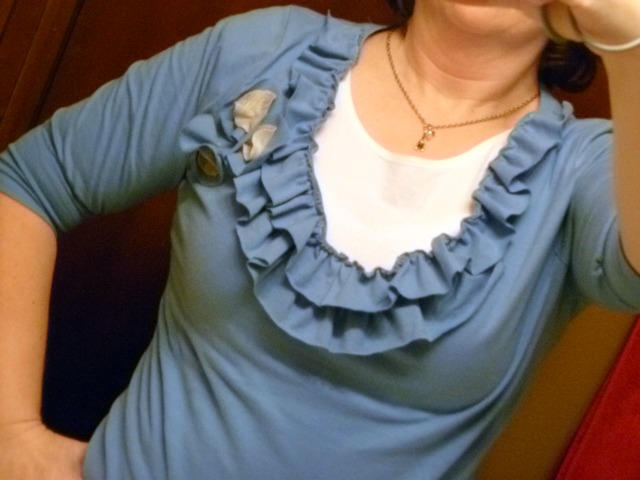
Do you have a shirt that is a little too big, too long, or just needs a little flavor? You are gonna love this little 10 minute shirt ruching refashion.

Did I mention that it will cost you $1.50?!

Supplies:
  • shirt
  • coordinating thread
  • elastic thread ($1.50)
  • sewing machine

All you do is hand wind the elastic thread on the bobbin. Put the coordinating thread on the machine and through the needle as usual, turn your shirt inside out and sew using a large baste stitch along the existing seams. I stitched from 4 inches down from the arm pit to the bottom. Be sure to back stitch at the top and bottom to keep it more secure. It is sooo easy!

I got the elastic thread idea from my friend Amanda, who was awesome enough to let me borrow hers. She has a more detailed tutorial on how to use it to make a cute ruffly scarf.


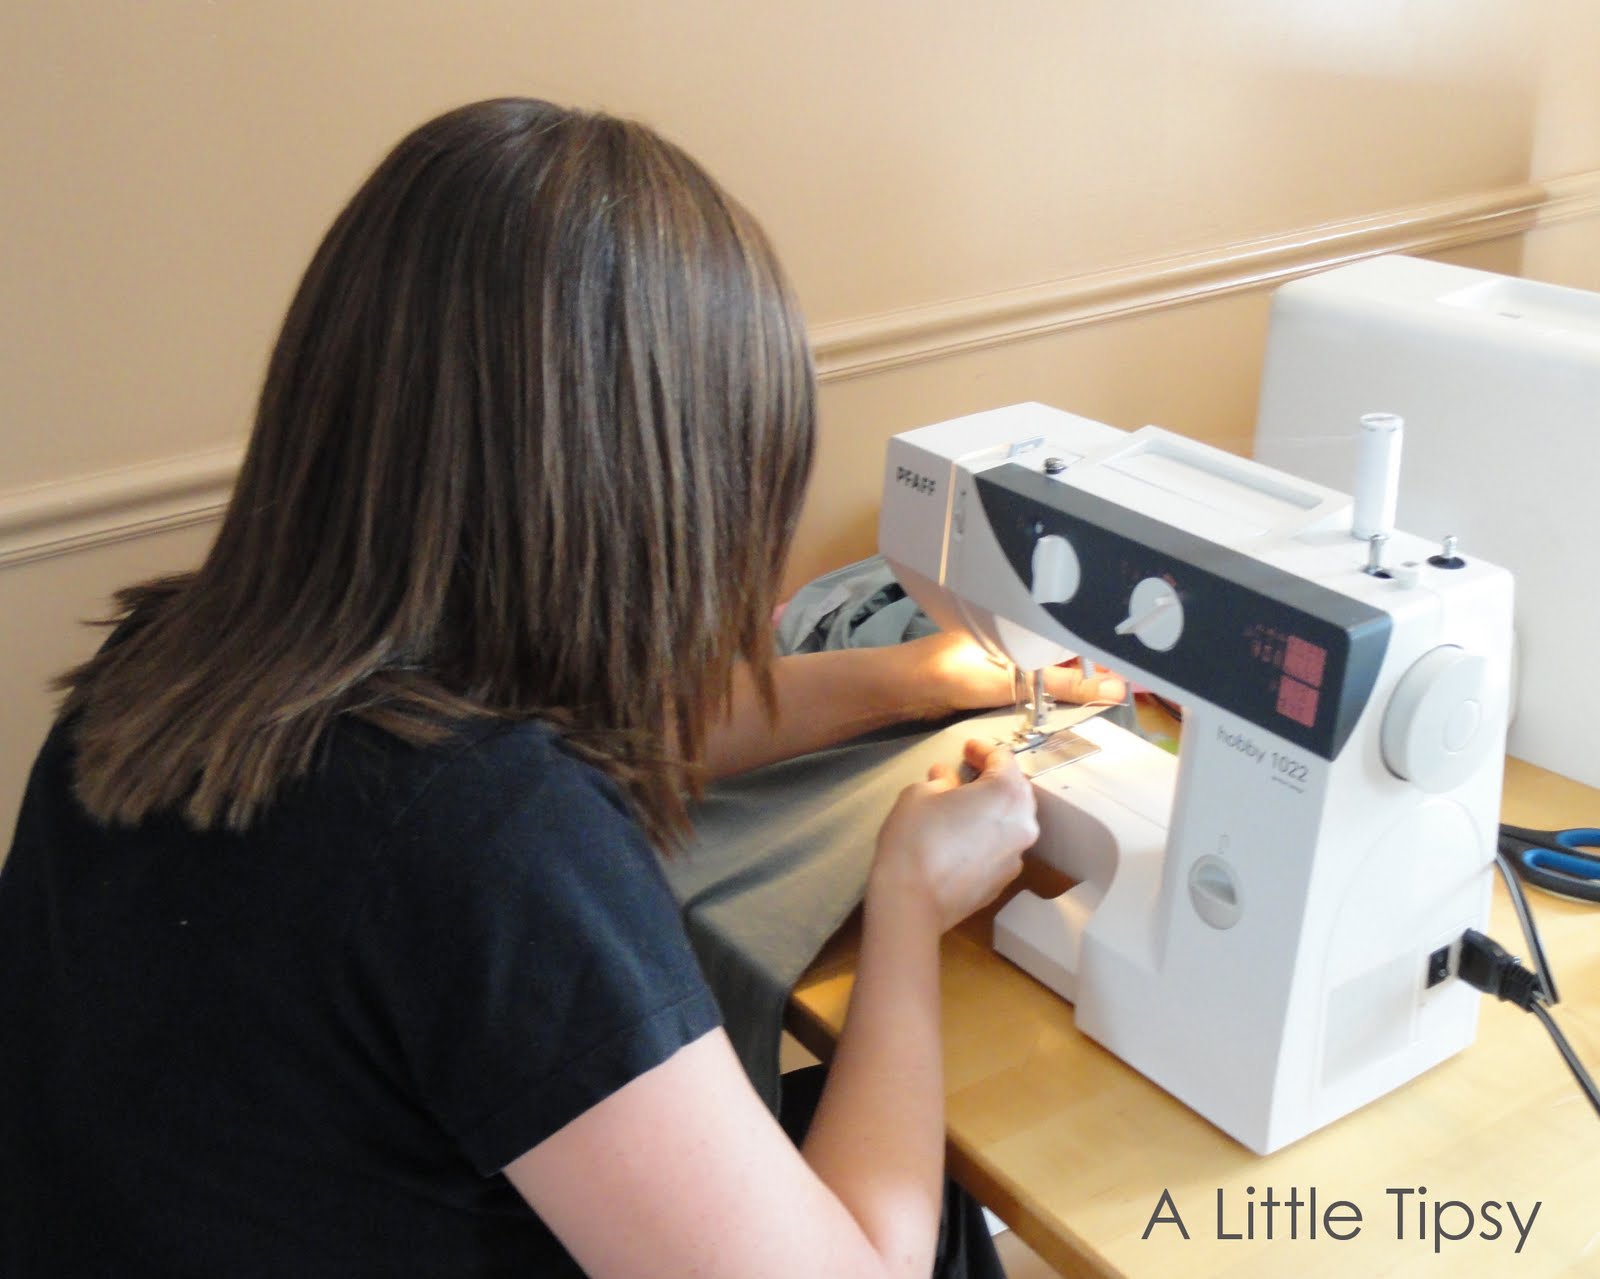
My sweet sis Jen sewing away. 🙂

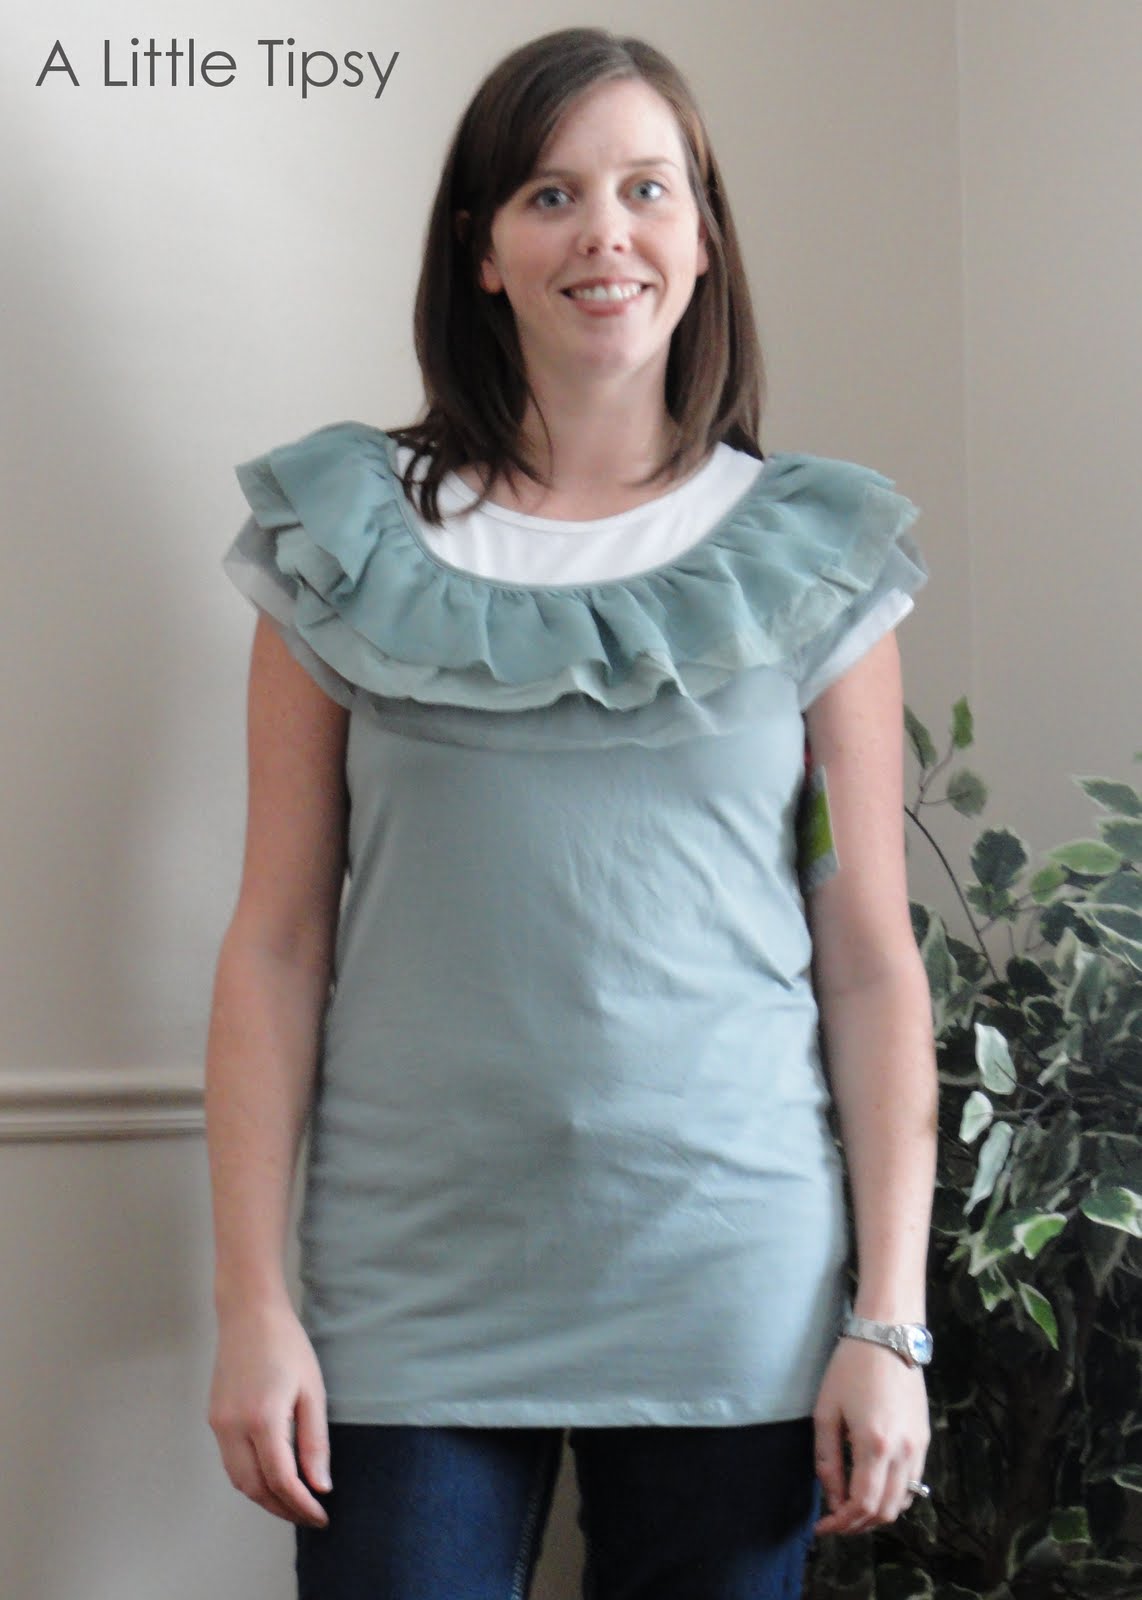
Before<————————–> After

It made it a few inches shorter and more fitted. I love that it hides the things I don’t want to display (namely post baby bulges and that odd poker from my jeans’s waistband that makes me look like I have an outie belly button.) and made my super long shirt a more flattering length (look at my elbows in both pics for a reference point on how much shorter). I’ll totally be debuting this baby at the Creative Estates conference this weekend.

I have not washed it yet, so I’m not sure how that will go, but this shirt is hand wash only so I’m sure it will be fine.

So now it’s time to link up!

Please remember:

  • Only link to your own projects that cost you $5 or less (price does not have to include items you had on hand)
  • You can link past projects that fit the dollar limit
  • Please link back so others can join the party

DIY under $5

P.S. Don’t forget to sign up for free Tipsy updates via RSS or email.

We have decided to truncate our feed to help protect against stolen content. I apologize for any inconvenience. Please love us anyway. 🙂

Feature Friday-DIY Under $5

April 1, 2011 By Michelle Barneck 12 Comments

There have been so many great project linked up for the DIY Under $5!! I wanted to share some from our first three link ups! I will be featuring the link from each week with the highest clicks and then a few of my favorites.

Week 1

Most Clicks: Recipe Command Station from Creating Our Cozy Home

My Faves:

Monogram with Book Page Flowers from Creations with Kara

Dress to Skirt by A Law Student’s Journey

Week 2

Most Clicks: T-Shirt Makeover from Pocket Full of Pink (also one of my faves!)

My Faves:

Loving Every Second’s Bird Nest


Dictionary Page Butterflies
by Organize and Decorate Everything

Week 3

Most clicks: Spring banner for $0 from Lotte Lu and Brother Too

My Faves:

Fleece Flower Pillows by Come Together Kids


Reversible Spring Skirt
by Dew This

There were so many great projects to choose from! Be sure to link up your $5 or less project every Wednesday! I will be featuring people from the linky each week.

Although I will say one thing, I was surprised how many people did not link back to the party. I remember Kim From Today’s Creative Blog warning me about this! Shame, that is all.

If you were featured today feel free to grab the featured button!

P.S. Don’t forget to sign up for free Tipsy updates via RSS or email.

We have decided to truncate our feed to help protect against stolen content. I apologize for any inconvenience. Please love us anyway. 🙂

DIY Under $5: Easter Printables

March 30, 2011 By Michelle Barneck 33 Comments

I wanted something meaningful for my Easter display this year to remind us what that Easter is more than bunnies and baskets full of treats. I made this printable with the words to “I Know That My Redeemer Lives” a hymn written by Samuel Medley.

The best thing about printables is they are free! I made mine in dark purple as a part of a display I will be debuting soon, but I wanted to get this out there if you would like to use it! I printed mine to fit an 8×10 frame. Click the pic to go to photobucket to download.

Photobucket


Click the thumbnails above to print in
Black, Green, or Lavender.

So now it’s time to link up!

Please remember:

  • Only link to your own projects that cost you $5 or less (price does not have to include items you had on hand)
  • You can link past projects that fit the dollar limit
  • Please link back so others can join the party

DIY under $5

P.S. Don’t forget to sign up for free Tipsy updates via RSS or email.

We have decided to truncate our feed to help protect against stolen content. I apologize for any inconvenience. Please love us anyway. 🙂

DIY Under $5: Making Fabric Flowers

March 23, 2011 By Michelle Barneck 8 Comments

I wanted a little something to spruce up my wardrobe, but did not want to dent my pocket book. I pulled out my fabric stash and got to work. I made a few little fabric flowers (you have seen them EVERYWHERE), but made them so I can interchange them and wear them a whole bunch of ways depending on my mood and outfit.

How to make Fabric Flowers

Supplies:

  • Scrap Fabric
  • Buttons
  • Hot Glue

Cost: FREE!!

Everything I used for making these fabric flowers was stashed in a drawer or on a shelf.

1. Cut out four fabric flowers. (I liked the back of this material better. It looked aged and had a burlap/canvas feel.)

2. Fold each flower in half and then in half again.

3. Glue all four folded flowers to a circle of felt or cardstock. Add a button to the middle.

4. Glue an additional piece of cloth over the one the petals are glued to. I only glued two edges so I could slide it on a headband or clip and interchange the flowers.

I also made another type of fabric flower by cutting out circles instead of flowers and using the same folding technique. I did two layers of circle petals making he second layer a bit smaller.


Wear them any way you like from head to toe!

In your hair…

On a cardi or necklace…

or bracelet…

{The grey knit bracelet is actually the top of a sock from my cute bean bags from worn out socks project. Shhh. Don’t tell. Does this make me a certified hoarder? I knew I could use it for something someday.}

or on your shoes!

OK, so now it’s time to link up!!

Please remember:

  • Only link to your own projects that cost you $5 or less (price does not have to include items you had on hand)
  • You can link past projects that fit the dollar limit
  • Please link back so others can join the party

DIY under $5

——————————————————————————-
Linking Up:

Look What I Made
Whatever Goes Wednesday
Sugar & Spice & Everything Nice

The winner of the $50 to GiftCardRescue is…
The Sims Family!
Congrats!!

P.S. Don’t forget to sign up for free Tipsy updates via RSS or email.

We have decided to truncate our feed to help protect against stolen content. I apologize for any inconvenience. Please love us anyway. 🙂
« Previous Page
Next Page »

  • Bloglovin
  • Facebook
  • Google+
  • Instagram
  • Pinterest
  • RSS
  • Twitter

Hi there! I'm Michelle. Mother of three little boys and one little princess. Welcome to A Little Tipsy, a place for exploring creativity and sharing inspiration.

Follow on Bloglovin


Visit Michelle Barneck {A Little Tipsy}'s profile on Pinterest.

Tutorials by Category


15 Family Reunion Games

Family Reunion Games Collage

15 Sprinkle Party Ideas

Sprinkle Birthday Party
Creative Commons License

© Copyright 2014 A Little Tipsy · Site Designed by The Fairy Blogmother · Web Hosting by RFE Hosting

This website uses cookies to improve your experience. We'll assume you're ok with this, but you can opt-out if you wish.Accept Read More
Privacy & Cookies Policy