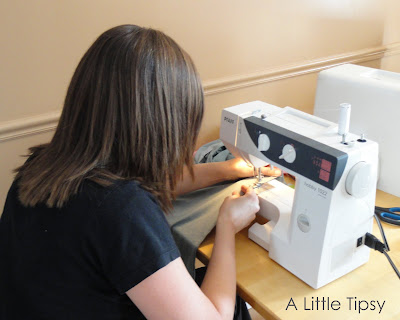
Do you have a shirt that is a little too big, too long, or just needs a little flavor? You are gonna love this little 10 minute shirt ruching refashion.

Did I mention that it will cost you $1.50?!
- shirt
- coordinating thread
- elastic thread ($1.50)
- sewing machine
All you do is hand wind the elastic thread on the bobbin. Put the coordinating thread on the machine and through the needle as usual, turn your shirt inside out and sew using a large baste stitch along the existing seams. I stitched from 4 inches down from the arm pit to the bottom. Be sure to back stitch at the top and bottom to keep it more secure. It is sooo easy!
I got the elastic thread idea from my friend Amanda, who was awesome enough to let me borrow hers. She has a more detailed tutorial on how to use it to make a cute ruffly scarf.


Before<————————–> After
It made it a few inches shorter and more fitted. I love that it hides the things I don’t want to display (namely post baby bulges and that odd poker from my jeans’s waistband that makes me look like I have an outie belly button.) and made my super long shirt a more flattering length (look at my elbows in both pics for a reference point on how much shorter). I’ll totally be debuting this baby at the Creative Estates conference this weekend.

I have not washed it yet, so I’m not sure how that will go, but this shirt is hand wash only so I’m sure it will be fine.
So now it’s time to link up!
Please remember:
- Only link to your own projects that cost you $5 or less (price does not have to include items you had on hand)
- You can link past projects that fit the dollar limit
- Please link back so others can join the party

P.S. Don’t forget to sign up for free Tipsy updates via RSS or email.

super cute!! I love it thanks for sharing 🙂
Love this idea! Im totally going to have to try this one!
Very Cute! See you at Creative Estates.
Look at you! You look adorable!
Love the shirt! I can’t find elastic thread anywhere. It’s maddening.
Have fun at Creative Estates. Can’t wait to hear about the conference.
Great way to add more shelf life to your clothes! I have SO many shirts that are just too long. And I’m 5’2 and half of me looks like I’m wearing a short dress half the time.
What a great idea for a shirt that doesn’t fit quite right. Love the new look.
Cute! Although I don’t have a problem with shirts being too long – I have THE longest torso!
i have a bunch of shirts that are too big for me now that the post baby weight is finally going away. this would be a perfect way to be able to wear them again!
what a great party! found you from “a law students journey”
-caroline @ c.w.frosting
ok. i tried it today and posted a pic on my blog. love it!
This is so cute! And so simple! And so genius! I must now go in search of elastic thread.
As usual, what takes other people 10 minutes stretched to over an hour for me… but I finally figured out what to do to fix my problem of the elastic not gathering (so maybe my next one truly will take only 10 minutes!) and thought I’d share in case anyone else with a drop-in bobbin was having the same problem. Here’s the link: Creative Heart: Shirring Problems
Thanks for the great idea, though. I’m new to your blog but I will be back for more!
I have that shirt and you just made me love it more, I’m going to find elastic thread this weekend so I can do that!
I love all your re-purposing. I am now your newest follower:>
I am short and curvy; I always wanted to do this but didn’t really know how; thanks for the tutorial!
This is such a good idea! I am going to try this on a shirt today. Thanks for the tutorial!
Love this idea. I have one that needs shortened. Your blog is amazing and I’m happy I “found” you.
Blessings,
Pamela
I have been meaning to do this with several of my shirts. Didn’t think about elastic thread. I was going to use 1/4 inch elastic. I have an existing shirt that us d the elastic. Might be helpful for those that can’t find elastic thread!
I was SO excited to see this post. I recently bought a shirt and debated between two sizes. Went with
the larger and after wearing for the first time, wished I had gone with the smaller. Trying to figure out how to make it shorter or more fitted……BUT, I had trouble with the elastic threat. I adjusted the tension on the bobbin, adjust the top tension……got the shirt done, but the stitching is pretty loose, not sure how long it
will last. Love the idea, wish it had worked better on my shirt.