A Little Tipsy

Creative Tips & Ideas

  • home
  • About Me
  • the tipsy top
  • press
  • projects
  • contact me
[print_thumbnail_slider]

Arm Warmers from Brassy Apple

September 5, 2014 By Michelle Barneck Leave a Comment

DIY arm warmers REfashion - BrassyApple.com

Fall Fashion is my favorite time of year! Over on Brassy Apple I love upcycling and RE-fashioning items for me and my kiddos to wear! Take the chill off of the winter season without over roasting your kids in a bulky sweater or too many layers. Or if you kids are like mine they are cold one minute and “So HOT” the next they are running to change into a tank top! Here’s the solution – pair a t-shirt up with some inexpensive arm warmers made from tube socks! So easy to slip them on and off quickly.
The basic shape and construction are SUPER easy to do and anybody can do it!
DIY arm warmers REfashion - BrassyApple.com
SUPPLIES:

A pair of long socks (or tube socks) Pick out your favorite pattern/color, etc
Sewing Machine
Scissors
Thread
measuring tape (optional)

EMBELLISHMENTS:

Buttons
Rhinestones
grommets
scrapbooking brads
ribbons – all different widths
lace
rep gathered ruffles
tulle
ric rac
zippers
pre-made appliques
faux fur
jingle bells
rosettes
snaps (if you want to change out your embellishments)
etc., etc., etc.
Step 1: Pick out your favorite pair of socks. They can be Holiday, solid colored, patterned etc. Make sure to buy the Knee Length or Tube Sock style.
Step 2: Measure the length you want your arm warmers to be. You can measure out how long you want them to extend up your child’s arm by placing the sock on their arm and eyeing it out. You want the sock to reach to or just past their first knuckles. Or you can measure with a tape.
diy arm warmers - BrassyApple.com #refashion #fashion #kids
Step 3: Measure and cut off your socks to the desired length. Be sure to cut from the toe end. We want to keep the other finished end intact.
Step 4: Turn your socks inside out and find the “heel” spot. *(note: some socks are made without a built in heel. If yours do NOT have a rounded heel in them please proceed to step 7)* Pull the heel up as shown in the picture making sure the other sock fabric is separated. We will be sewing and cutting the heel out to create one long tube.
Step 5: Pin the heel area as close as you can to the “bottom” of it to create a straight “tube” when it is sewn together and cut off.
diy arm warmers

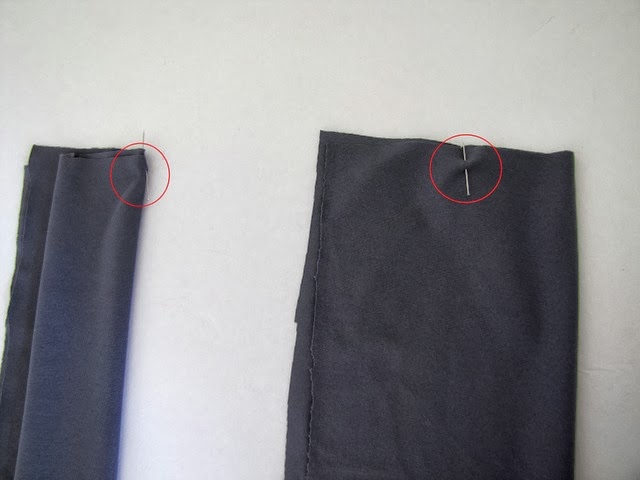
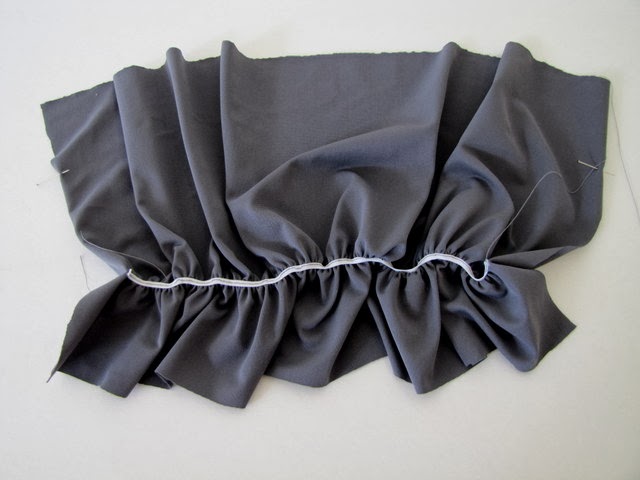
Step 6: Sew a straight line across the bottom of the heel to close this section and cut off the excess.

Step 7: Turn your socks right side out and lay them flat placing the “heel” seam on the underside. This will ensure that the seam isn’t on top of their arm when they wear the warmers. Cut a small slit for the thumb. **One slit on the right inside and one slit on the left inside.

Cut your slits on opposite side of each other so the heel seams remain on the underside.

diy armwarmers for kids - BrassyApple.com

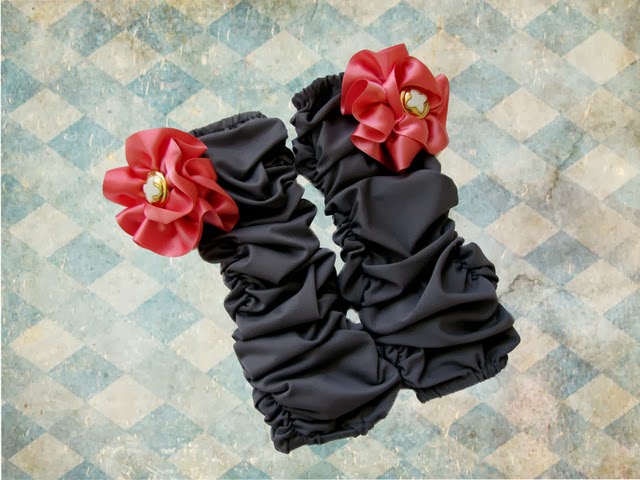
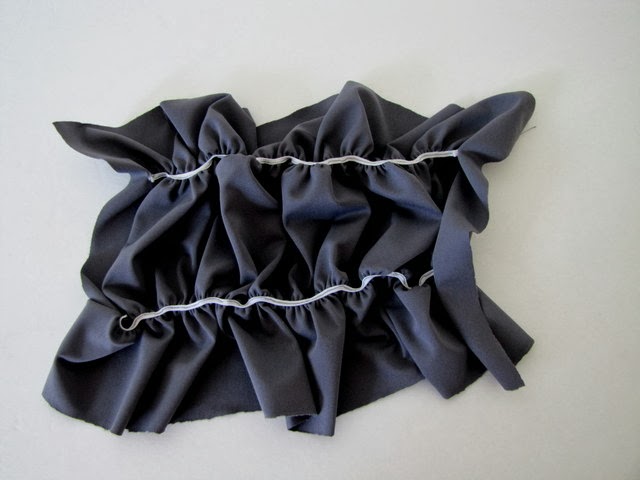
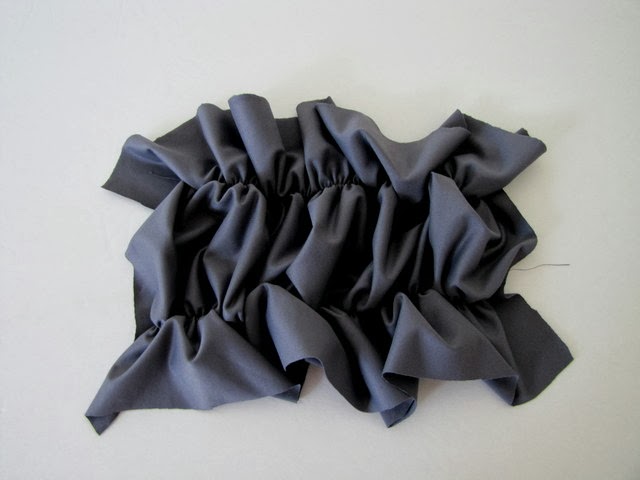
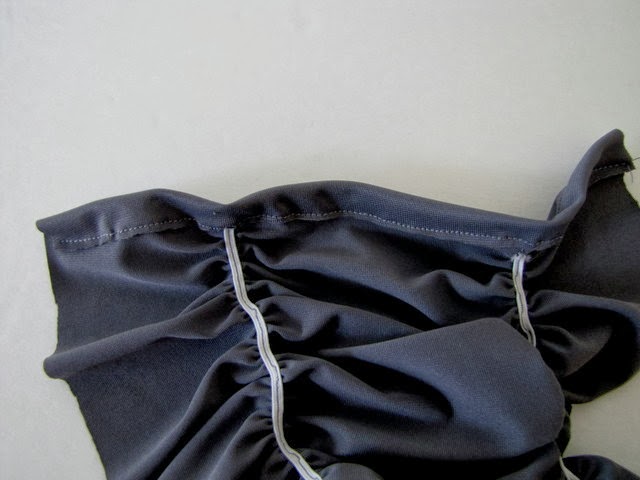
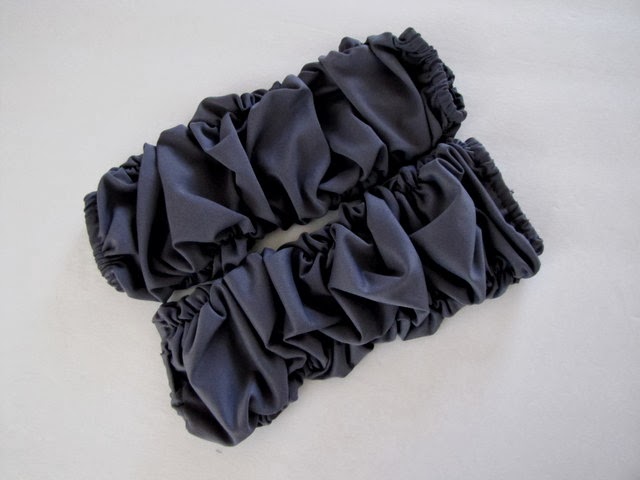
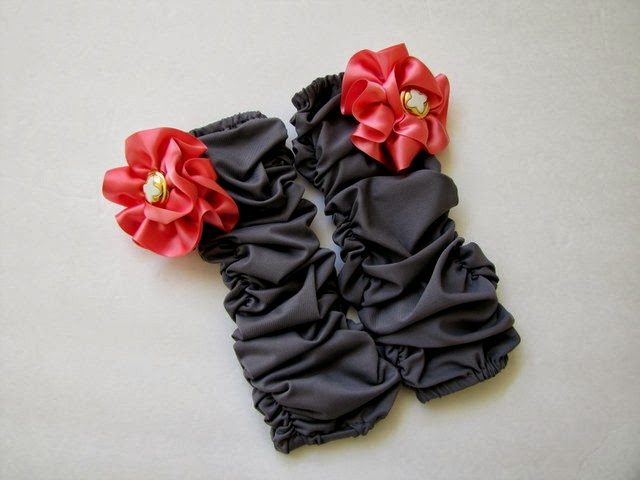
The basic shape and function of the arm warmers is done. Now it’s time to EMBELLISH!!! (if you want to) You can add embellishments to any part of the arm warmers you’d like to – the top, the bottom, along the top or all over!!! Just have fun with it! This is a great project to do with your girls or a group of girls too! Here are photos of some I created to give you a jump start with your own ideas! If you create some – tag me on Instagram (@BrassyApple) so I see your creations!

diy embellished arm warmers or kids - brassyApple.com

Make them Different lengths too! Full length, 3/4 sleeve and even wrist cuffs!

DIY arm warmers for kids - BrassyApple.com

And these make great baby LEG warmers!

DIY baby leg warmers - BrassyApple.com

Your girls will be the trend setters and look adorable in their chic yet inexpensive new accessory!

DIY girls arm warmers from socks - BrassyApple.com

Check out my other RE-fashion tutorials plus lots of NO SEW options too on BrassyApple.com!

Refashion tutorials - BrassyApple.com

Holiday Ornament Appliqued Kitchen Towel

November 19, 2013 By Michelle Barneck 1 Comment

Hi everybody.  Ali here from HouseVintage.  I have a great little project to share with you today.  It only takes a few hours and would make a special handmade holiday gift.

See full holiday towel tutorial.

Here is what you need:
  1. Ornament template- I used this one from Martha Stewart.  Print it and cut it out.
  2. Buttons- I used some vintage buttons from my stash, but whatever you have on hand will work.
  3. Felt- This is a great use up for a scrap of felt.
  4. Kitchen Towel- Feel free to sew your own.  I bought this one from IKEA.

I decided to line up my three cutouts.  I then used a zigzag stitch on my machine to sew around the outside edge.  Go slow, and make adjustments, so you stay close to the edge.  If you don’t have a sewing machine, you could use an iron-on adhesive and skip the sewing all together.  
Position and hand sew on your buttons.
You are done!  Iron your towel, and it is ready to display or give as a gift.


———————————————————————-

Thanks Ali! These are the perfect way to spruce up your holiday kitchen or such a fun neighbor gift!

We have decided to truncate our feed to help protect against stolen content. I apologize for any inconvenience. Please love us anyway. 🙂

Fall Fashion for Girls

October 22, 2013 By Michelle Barneck Leave a Comment

Hello everyone! I’m Sumo, from Sumo’s Sweet Stuff!
sumo intro
I’m so excited to be visiting with you today. I absolutely adore Michelle, and am so thrilled she invited me over. If you don’t know me, my blog is a little bit crafts, and a whole lotta sewing. I’ve got three little girls that I enjoy sewing for.
girls collage
Michelle asked me to share about little girls fashion, so I’ll share a bit about what works for us and our style.
One thing I absolutely love are bright, bold prints. I am often drawn to fabric that is big and colorful. Sometimes, when you find a print that you really, really like, you might consider using it on a larger scale. In my post about the Sally dresses that I made for my girls, you can see that I let the bolder, busier prints be the main part of the dress, and let a more subtle print stick around for the pockets.
Little Girl Fashion - Sally Dresses by www.SumosSweetStuff.com
Now, with that being said, I am also a huge fan of pattern mixing. I think it is fun to throw some patterns together, as long as it is in a more controlled way; basically not too over the top. On a smaller scale item, like this Ruffled Bustle Top, you can mix the patterns without it being way too overpowering with all of the different prints. Especially when paired with a simple, solid colored shorts or pants.
Little Girl Fashion - Ruffled Bustle Top by www.SumosSweetStuff.com
There is also a Bustle Skirt, if you prefer to go that route. Again, paired with something simple and plain on top helps to balance it out!
Little Girl Fashion - Bustle Skirt by www.SumosSweetStuff.com
A great staple for a fall wardrobe (or any season really!) is a maxi skirt. They are so versatile, and can be paired with just about anything. Fall and winter? Let’s throw it together with a sweater, tights, and boots. Spring and summer? A t-shirt and flip flops is perfect! If you can sew, this 30 Minute Maxi Skirt might be just the thing for you. And if you don’t, check the stores! Maxi skirts are super trendy right now!
Little Girl Fashion - 30 Minute Maxi Skirts by www.SumosSweetStuff.com
Now, with three girls, I have a love for coordinating. I call it coordinating, not matching. Coordinating is different, you see. Coordinating is when you find the same item, but have it as many different ways as you need, which in my case is three. These Beachy Boatneck shirts that I made are a good example of coordinating. Same shirt, different prints. You can do this easily with store bought items as well! I am always on the lookout for shirts in different color ways. And I know what you might be thinking about that maxi skirt picture above. Those skirts are totally matching! But their tops aren’t, which I think is another great way to coordinate.
Little Girl Fashion - Beachy Boatnecks by www.SumosSweetStuff.com
Here’s another example of coordinating from our recent family pictures (taken by Your Vantage Photography). All in the same color scheme, all peplum style tops, and my girls’ shirts are all store bought. Same style of shirts, but all totally different.
Little Girl Fashion by www.SumosSweetStuff.com - Photo by www.YourVantagePhoto.com
Those are just a few of the things I go by when I’m planning out things for my girls to wear. I hope you’ve enjoyed what I’ve shared, and can’t wait to see you over at Sumo’s Sweet Stuff!

——————————————————————-

Thanks Summer! Aren’t her girls adorable?! We went to lunch one day and I couldn’t believe how many people stopped to comment on how cute her girls and their outfits were! Be sure to check out her site for tons of adorable patterns and ways to dress up your cute girlies!
We have decided to truncate our feed to help protect against stolen content. I apologize for any inconvenience. Please love us anyway. 🙂

Ruched Rosette Legwarmers

October 1, 2013 By Michelle Barneck 4 Comments

Hi again! This is Terra from mama says sew with another sewing tutorial for you today. Its some ruched leg warmers. I originally pinned them about a year ago, and now that they are no longer available for sale, I thought I’d make my own.

They are really pretty simple, and I love them paired with her striped ruffle skirt.

Continue for the full tutorial…

I also made a rosette by gathering some wide satin ribbon into a rosette and then sewing a button in the middle. I am really loving the combination of gold and coral lately.
To make these, you will need:
  • Knit fabric (very important-it must stretch!)
  • Elastic-both 1/4 inch and 1/8 inch wide
  • Sewing supplies-thread, scissors, your machine
  • Optional: Rosettes (or supplies to make them)

First, start by cutting the fabric for your leg warmers. I used a pair of leggings for a guide. You want your fabric to be at least twice as long as the length you want the finished leggings to be (in this case, knee to ankle). My fabric is also folded in half the long way, to make it wide enough to go all the way around the leg.
Make sure your fabric stretches from side to side (the short way).
  
Mark where you want your ruching to start. You will do two rows of ruching per leg warmer. I folded in half, then folded in half again, leaving room for a seam allowance (shown on the left). I put two pins, one in the top layer of fabric and one in the bottom layer of fabric (shown on the right-just imagine you have x-ray vision and can see the other pin).
Pin at the same place at the other end of the leg warmers so you know where to end up. You can draw a line from the top of the leg warmers straight down to the pin in the bottom of the legwarmers if you want.

Sew a 1/8 inch elastic from a top pin to a bottom pin, stretching the elastic as far as you can as you sew. Backstitch a couple of times at the beginning so the elastic stays in place when you stretch it. {Look at the next step before completing this one}.

Leave a space at the top and the bottom with no elastic so you can make a casing.

Repeat on the other side, so that you have two rows of elastic.

This is what it looks like on the other side.

Sew a casing on the top of the leg warmer wide enough for the 1/4 inch elastic.

Insert your elastic and stitch at both ends to secure. You want it to be snug fitting but not too tight. Repeat for the bottom of the leg warmer so that you have elastic at the top and the bottom.

Fold it in half with right sides together and stitch up the back.

Turn it right side out and this is what you should have.

Don’t forget to make another one the same way!

 You can add some embellishments if you want. I recommend attaching them with a pin, like a brooch. That way you can take them off to wash the leg warmers and you can also switch out the flowers so you can have one pair of legwarmers that matches everything.

I hope you enjoyed this tutorial. Please visit me over at mama says sew for more!

—————————————————————
These are the times I wish I had a girl! These are adorable Terra!

We have decided to truncate our feed to help protect against stolen content. I apologize for any inconvenience. Please love us anyway. 🙂
Next Page »

  • Bloglovin
  • Facebook
  • Google+
  • Instagram
  • Pinterest
  • RSS
  • Twitter

Hi there! I'm Michelle. Mother of three little boys and one little princess. Welcome to A Little Tipsy, a place for exploring creativity and sharing inspiration.

Follow on Bloglovin


Visit Michelle Barneck {A Little Tipsy}'s profile on Pinterest.

Tutorials by Category


15 Family Reunion Games

Family Reunion Games Collage

15 Sprinkle Party Ideas

Sprinkle Birthday Party
Creative Commons License

© Copyright 2014 A Little Tipsy · Site Designed by The Fairy Blogmother · Web Hosting by RFE Hosting

This website uses cookies to improve your experience. We'll assume you're ok with this, but you can opt-out if you wish.Accept Read More
Privacy & Cookies Policy