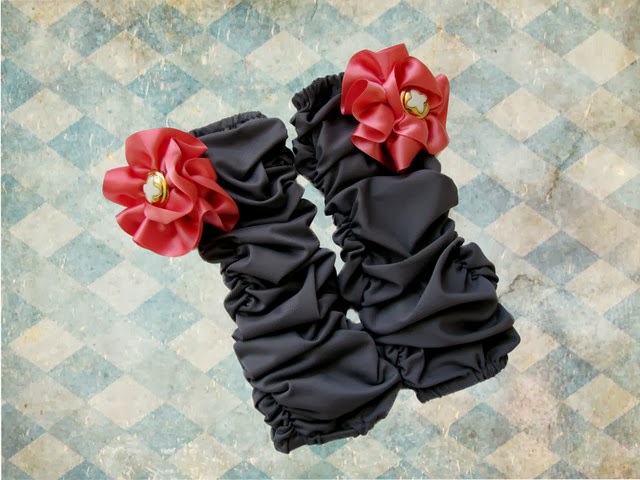
Hi again! This is Terra from mama says sew with another sewing tutorial for you today. Its some ruched leg warmers. I originally pinned them about a year ago, and now that they are no longer available for sale, I thought I’d make my own.
They are really pretty simple, and I love them paired with her striped ruffle skirt.
I also made a rosette by gathering some wide satin ribbon into a rosette and then sewing a button in the middle. I am really loving the combination of gold and coral lately.
To make these, you will need:
- Knit fabric (very important-it must stretch!)
- Elastic-both 1/4 inch and 1/8 inch wide
- Sewing supplies-thread, scissors, your machine
- Optional: Rosettes (or supplies to make them)
First, start by cutting the fabric for your leg warmers. I used a pair of leggings for a guide. You want your fabric to be at least twice as long as the length you want the finished leggings to be (in this case, knee to ankle). My fabric is also folded in half the long way, to make it wide enough to go all the way around the leg.
Make sure your fabric stretches from side to side (the short way).
Mark where you want your ruching to start. You will do two rows of ruching per leg warmer. I folded in half, then folded in half again, leaving room for a seam allowance (shown on the left). I put two pins, one in the top layer of fabric and one in the bottom layer of fabric (shown on the right-just imagine you have x-ray vision and can see the other pin).
Pin at the same place at the other end of the leg warmers so you know where to end up. You can draw a line from the top of the leg warmers straight down to the pin in the bottom of the legwarmers if you want.
Sew a 1/8 inch elastic from a top pin to a bottom pin, stretching the elastic as far as you can as you sew. Backstitch a couple of times at the beginning so the elastic stays in place when you stretch it. {Look at the next step before completing this one}.
Leave a space at the top and the bottom with no elastic so you can make a casing.
Repeat on the other side, so that you have two rows of elastic.
This is what it looks like on the other side.
Sew a casing on the top of the leg warmer wide enough for the 1/4 inch elastic.
Insert your elastic and stitch at both ends to secure. You want it to be snug fitting but not too tight. Repeat for the bottom of the leg warmer so that you have elastic at the top and the bottom.
Fold it in half with right sides together and stitch up the back.
Turn it right side out and this is what you should have.
Don’t forget to make another one the same way!
You can add some embellishments if you want. I recommend attaching them with a pin, like a brooch. That way you can take them off to wash the leg warmers and you can also switch out the flowers so you can have one pair of legwarmers that matches everything.
I hope you enjoyed this tutorial. Please visit me over at mama says sew for more!

—————————————————————
These are the times I wish I had a girl! These are adorable Terra!
We have decided to truncate our feed to help protect against stolen content. I apologize for any inconvenience. Please love us anyway. 🙂


So much fun! I soooo wish I had a little girl for which to sew cute little things like this. We’ll be featuring this over at Someday Crafts tomorrow 🙂
These are absolutely adorable!
Beautiful! Wish I had a sewing machine 😉 pinning it!
These are darling!! I’m thinking my daughter needs a bunch of them for this winter