A Little Tipsy

Creative Tips & Ideas

  • home
  • About Me
  • the tipsy top
  • press
  • projects
  • contact me
[print_thumbnail_slider]

Frosted Glass Jar Lanterns

August 3, 2010 By Michelle Barneck 9 Comments

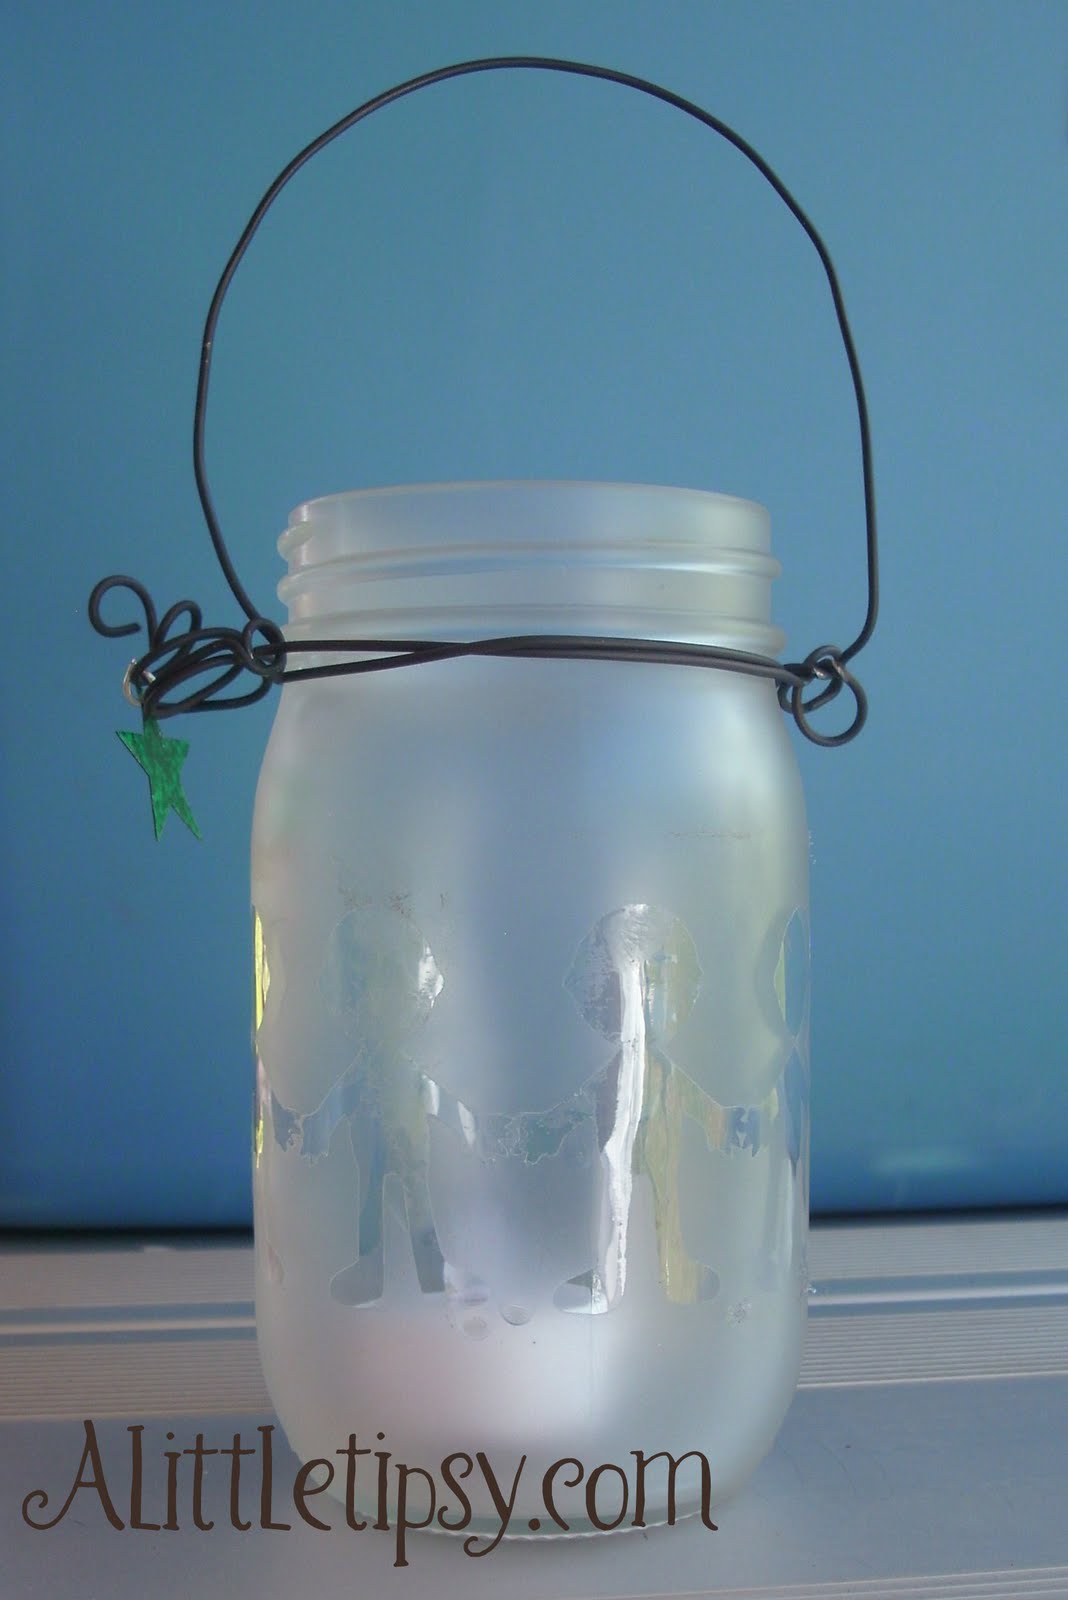
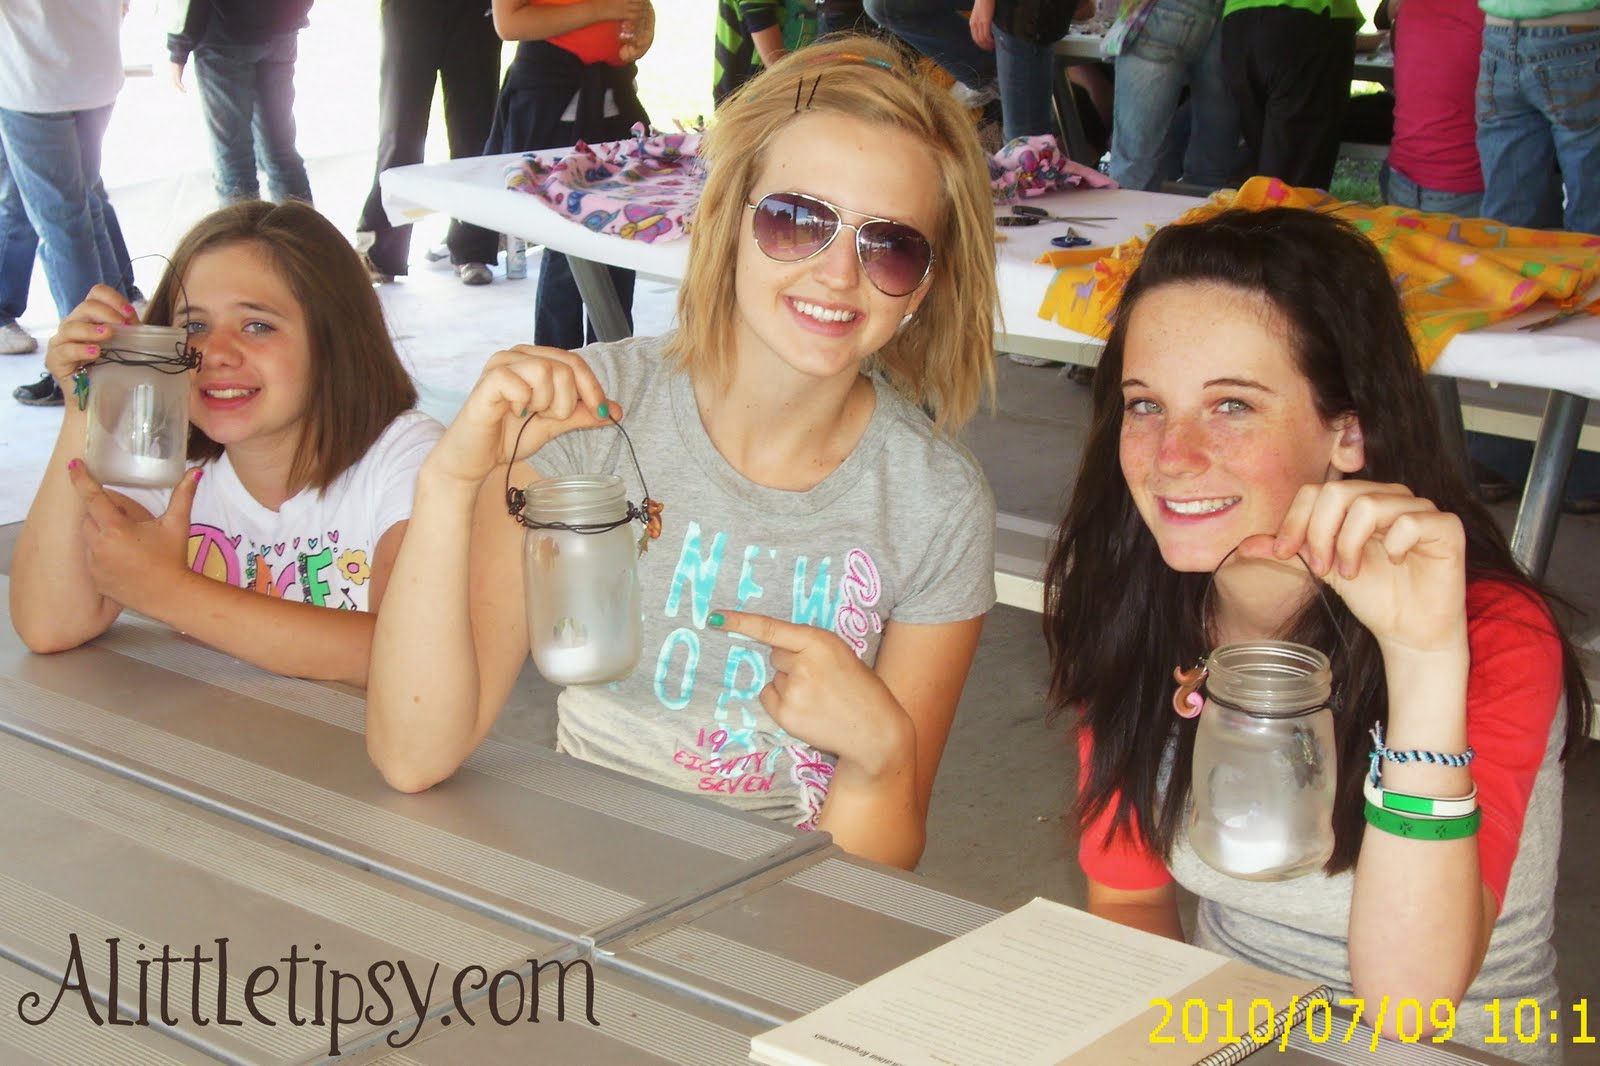
This is a craft we did at LDS Girl’s Camp that I just loved. We turned pint glass jars in to little lanterns. They turned out adorable. I am going to be putting mine in my little guy’s new paleontology room. Stay tuned for deets on that. Now for the how to on to the Frosted Glass Jar Lantern Tutorial…

Supplies needed:
Pint jar
Stickers (or contact paper cut by Cricut)
Heavy Wire
Pliers
Flat clear spray paint
Tea light (real or battery operated)

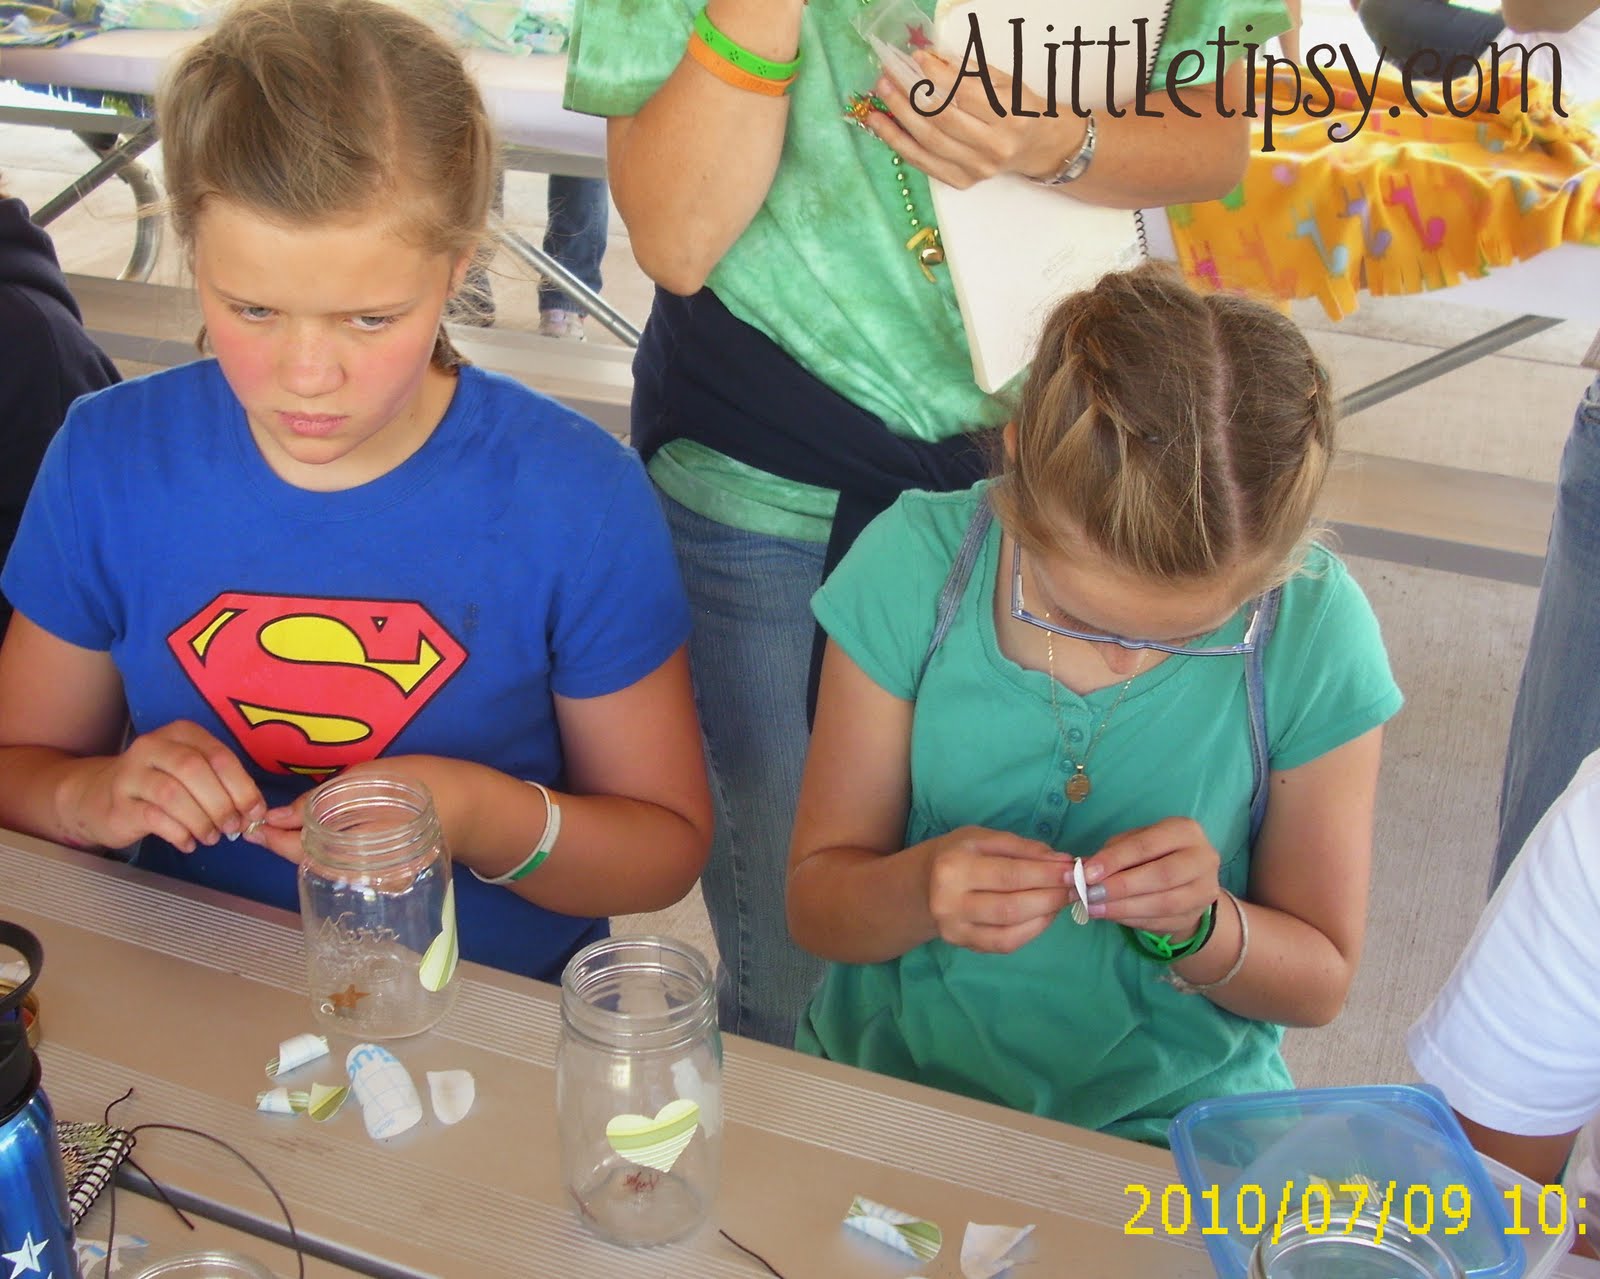
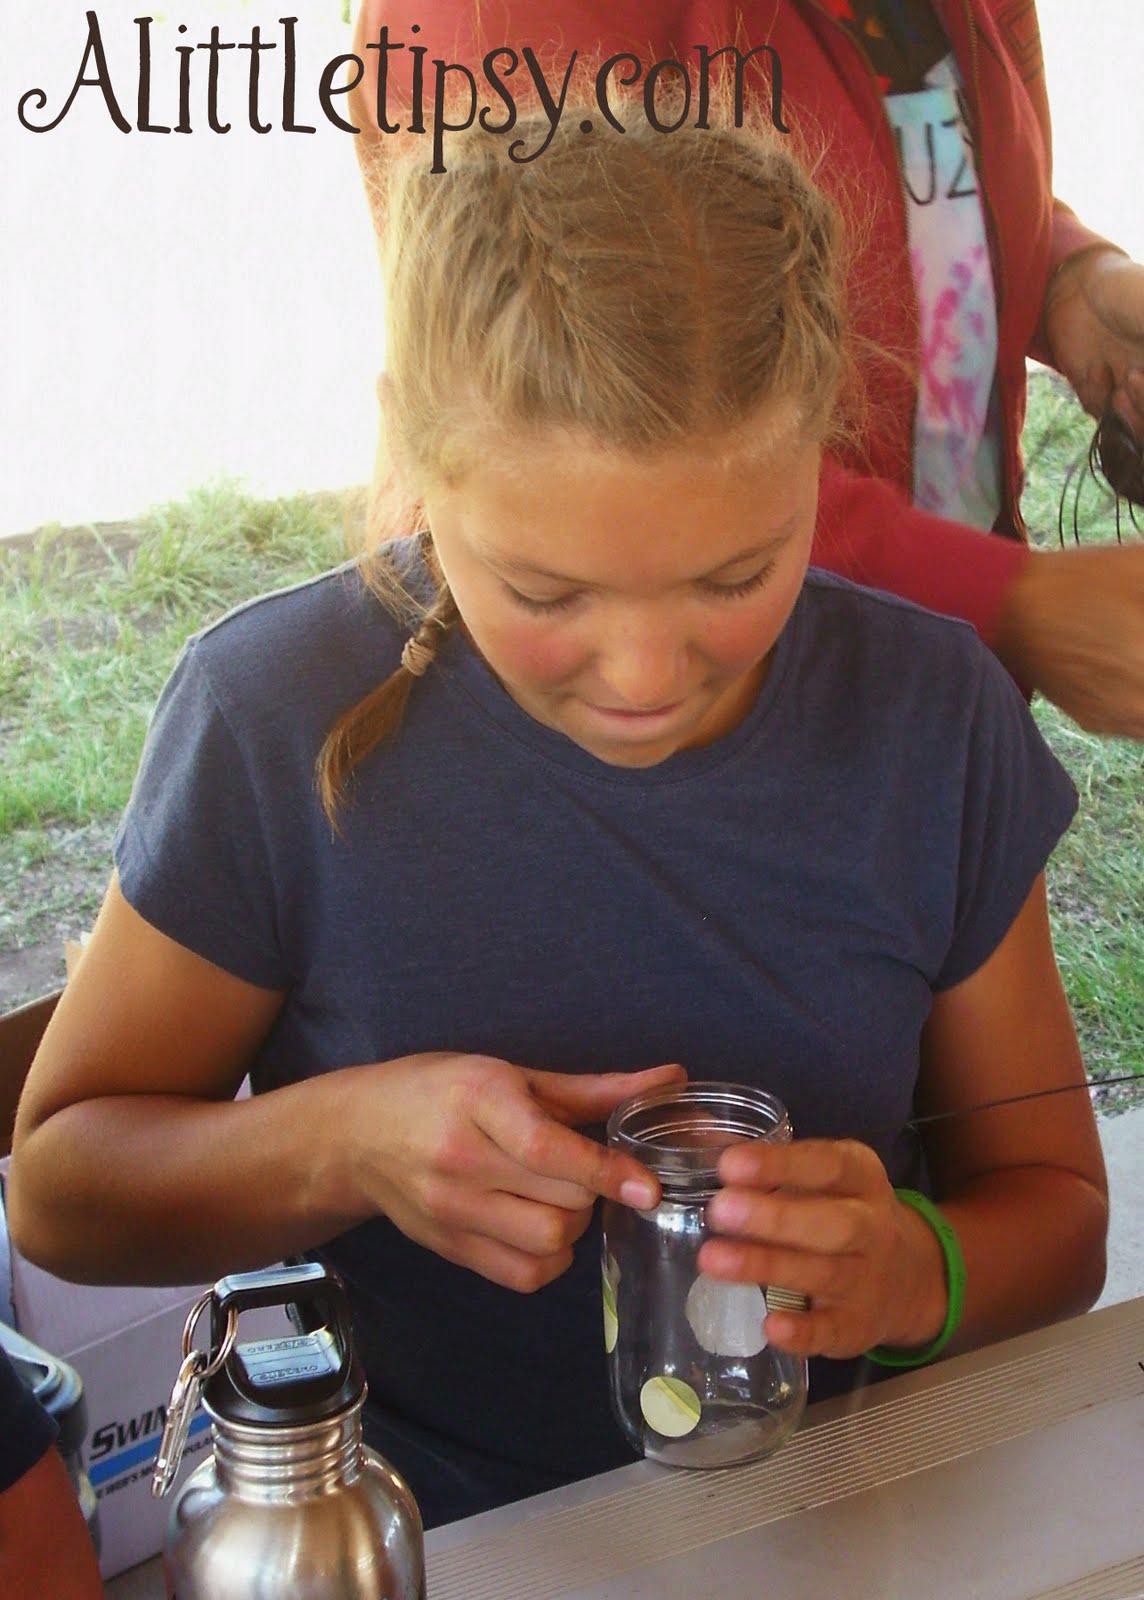
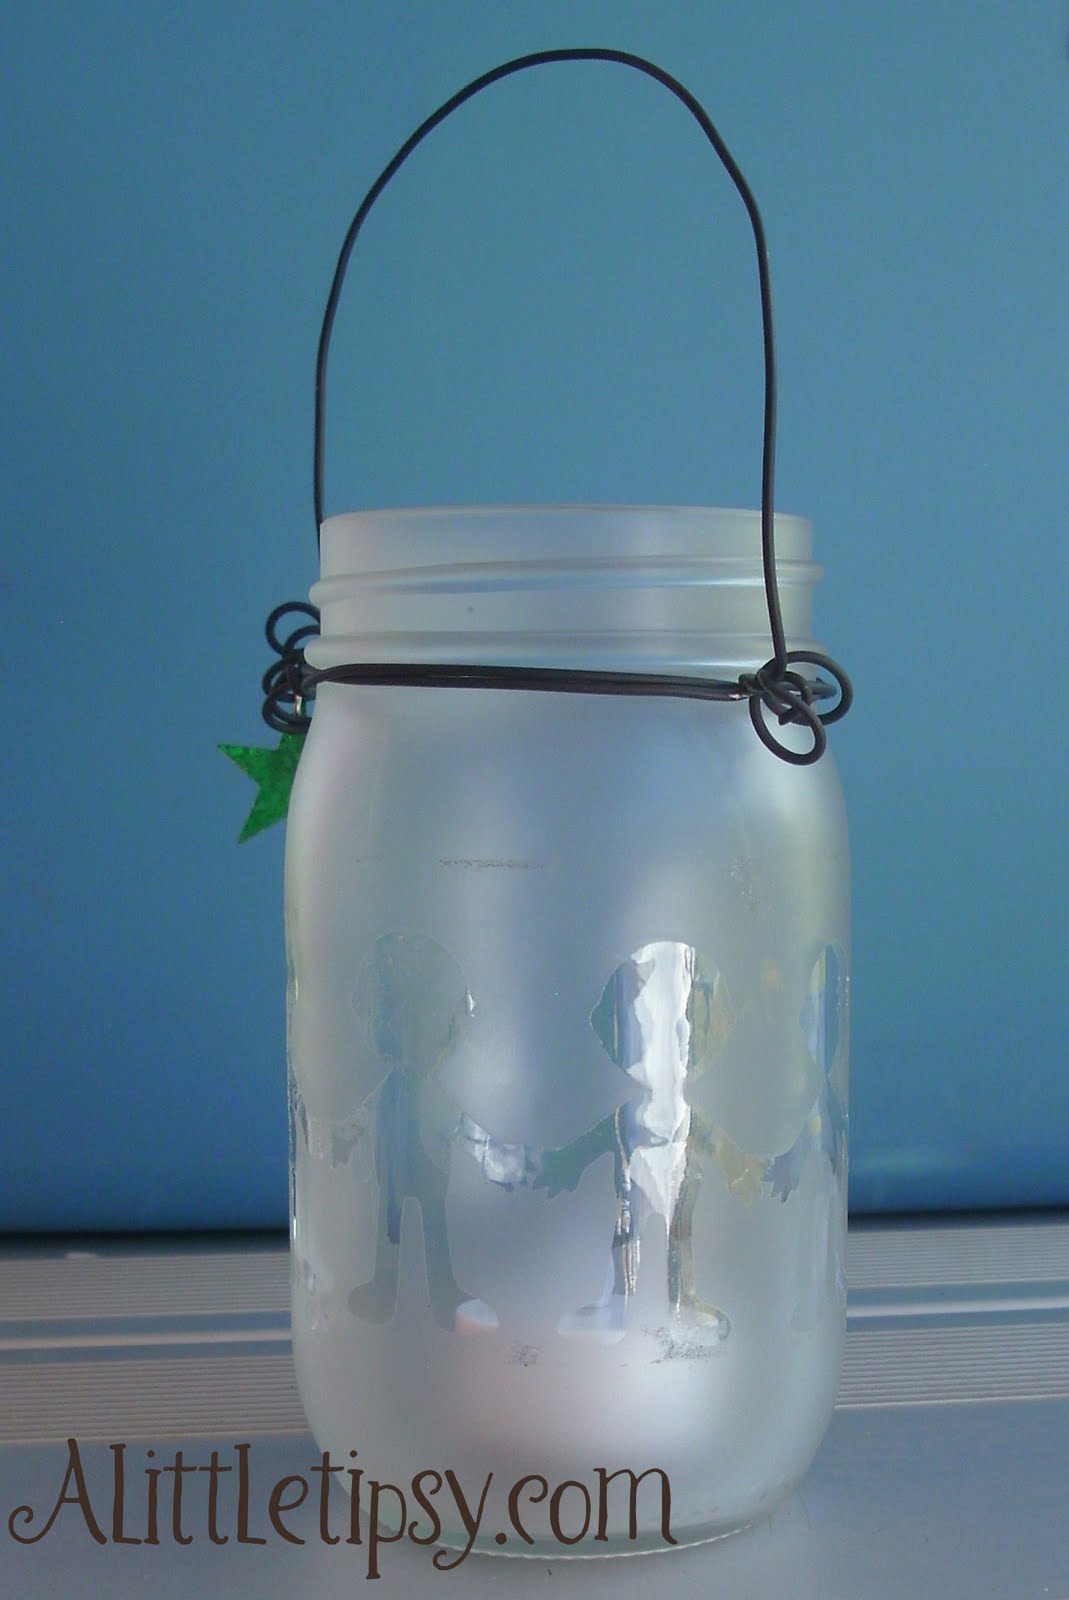
1. Choose stickers and place them on the jar. These will be the spots left clear in the end.

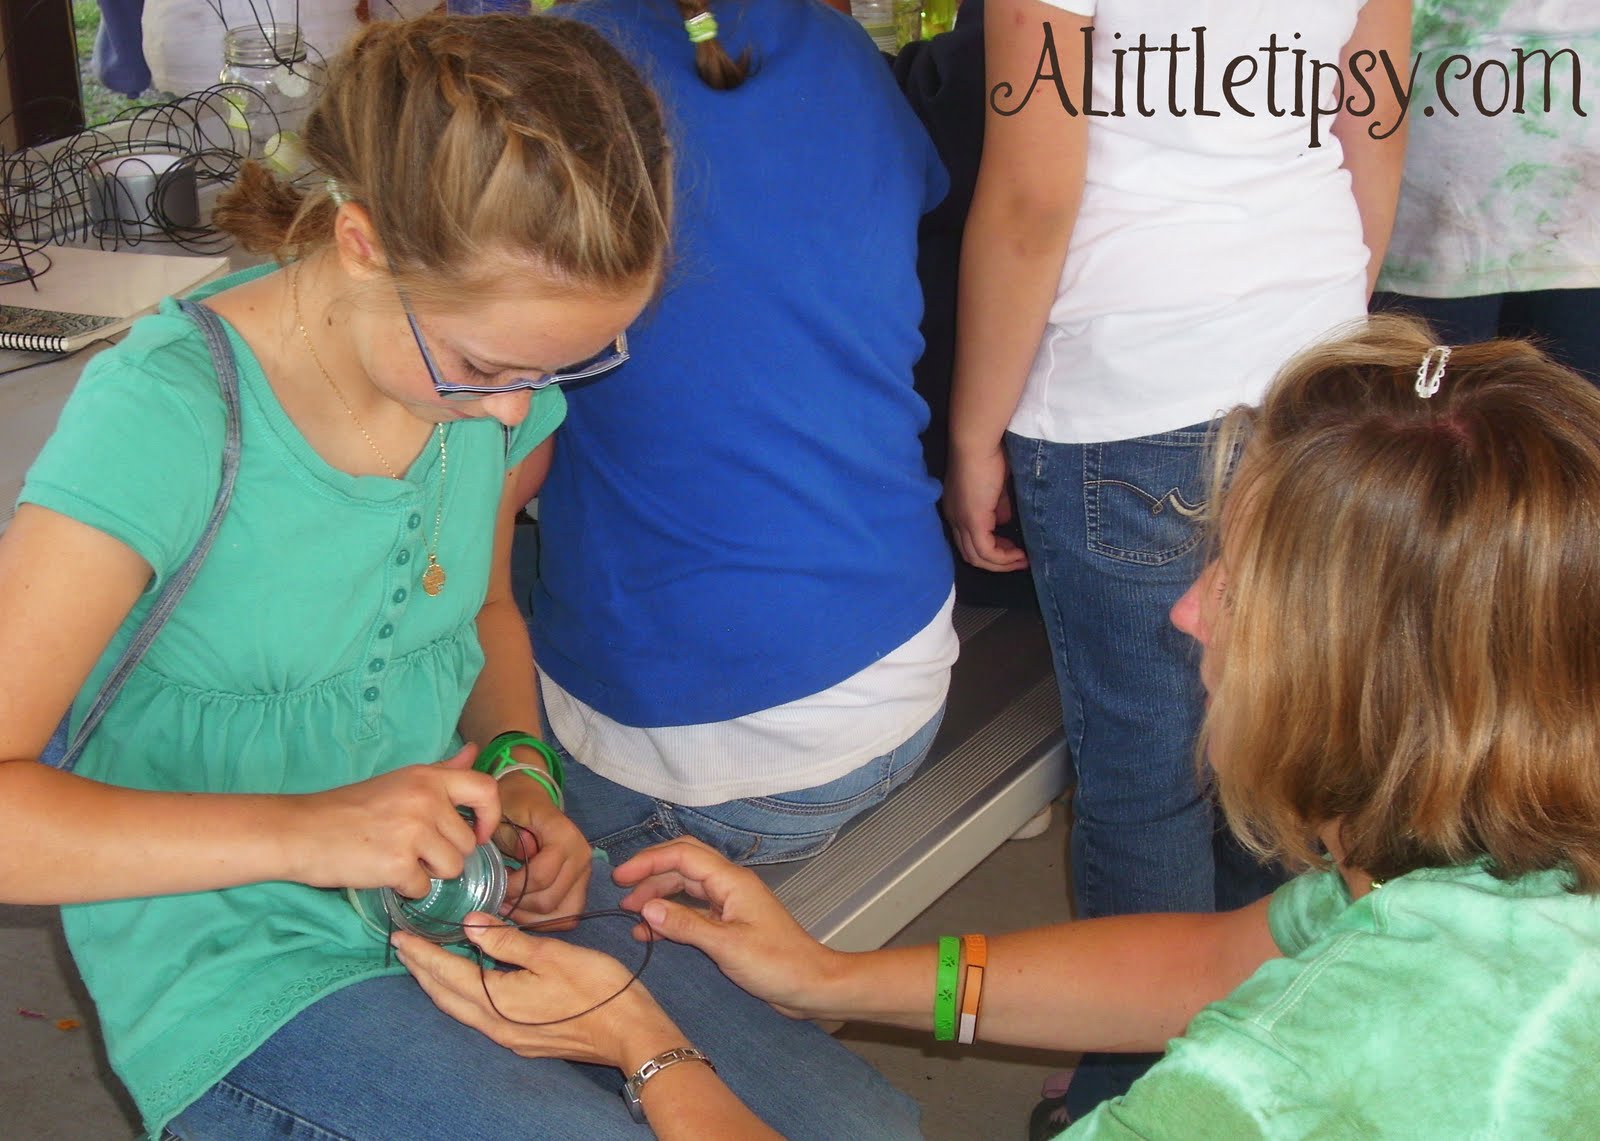
2. Take a long piece of wire (2 or 3 ft depending on how many times you want to wrap it) and wrap it around the neck of the jar under the lip where you would screw on the lid. Leave it loose enough to fit a piece of the wire through for the handle. Use the pliers to pull the remaining wire around and up through the wire around the neck to make the handle. Make an arc of wire over the jar for the handle and secure on the other side. You can make a second arc or wrap the remaining wire all around the first handle to make it thicker if you like.

3. Hold the handle and spray the jar all around with two light coats of flat clear spray paint. If you spray too much at once it will drip. It will not look frosted until it starts to dry.

4. Let the paint dry for a few minutes and spray more if you want it more frosted. If it is too hot leave it in the shade to dry or the stickers will melt and leave residue on the jar.

5. Once the paint is dry peel off the stickers and put the tea light inside. We used the battery operated kind. You can get them at Dollar Tree.

The girls also got charms from different activities they participated in to add to their lanterns.

I found out from the lady in charge of our craft at camp that the original idea came from Under My Umbrella via Sugardoodle. They have a tutorial, but their background was missing so you could see the pics but could not read the words. Thus, I made this tutorial.

Linking Up:
Toot your Horn Tuesday
Anything Related
Topsy Turvy Tuesdays

P.S. Don’t forget to sign up for free Tipsy updates via RSS or email.

We have decided to truncate our feed to help protect against stolen content. I apologize for any inconvenience. Please love us anyway. 🙂

Girls Camp Craft Idea: Ribbon Bracelets

June 14, 2010 By Michelle Barneck 12 Comments

My YW and I made these bracelets a few months ago to give at New Beginnings, but they would be a super easy craft for girls camp too!

We wanted the bracelets to have a message to tie in with this year’s mutual theme so the girls chose to have them say “find the courage within.”

Supplies needed:
Ribbon-YW value colors
Brad (optional)
Adhesive velcro
Label Maker with tape
Scissors
Lighter (to melt the ribbon ends)

This ribbon bracelet was adapted from a bracelet on I Never Grew Up. She has a tutorial.

I had a hard time finding ribbon with the YW colors. There was rainbow ribbon, but I spent a summer in San Francisco and did not the girls running around giving the wrong idea (the rainbow is the universal sign for gay). I took creative license and bought a ribbon that had most of the colors and then bought a brad that filled in the missing colors (Purple, Sparkles used for gold). I liked the extra bling the brad added.

Then, we just printed the saying on labels and stuck them on the inside of the ribbon bracelet. We had to trim them a little to get them to fit just right.

Easy peasy, economical, cute!

I got my ribbon in the Robert’s Craft gift wrap section. The brads were from Robert’s too.

Linking Up:
Market Yourself Monday
Just Whipped Something Up
Making the World Cuter
It’s So Very Creative
Making Monday Marvelous
Motivate Me Monday
Mad Skills

P.S. Don’t forget to sign up for free Tipsy updates via RSS or email.

We have decided to truncate our feed to help protect against stolen content. I apologize for any inconvenience. Please love us anyway. 🙂

YW Read Scriptures 5 Minutes/Day Incentive Program

May 17, 2010 By Michelle Barneck 3 Comments

Last year the youth were asked by the YM/YW General Presidents to read their scriptures for at least 5 minutes per day. We loved this idea and decided it would be nice to have a little accountability and recognition for those who were doing it. We brought in this giant candy jar and and each week we let everyone who read 5 minutes every single day that week come up and get a piece of candy. This way those who did it were recognized and those who did not might be motivated to do it next week.

This year we wanted to continue the program, but felt it needed a little extra something to keep it fresh. We wanted something to show the progress, that we could add to each week. We decided it would be great to also incorporate a service aspect. We came up with the idea to make a chart where they would put a sticker each week they read every day. This would show the progress, but each sticker also represents a quarter. At the end of the year, all the money that was earned throughout the year will be donated to a family in need of the girls’ choice.

We still let them take a piece of candy, as an immediate reward, but now they can watch their progress and know that they are not only helping themselves by reading their scriptures, but also helping someone in need.

Let me tell you, this works. At least for me, a little accountability goes a long way for motivation. I have only missed going up two weeks since we instituted this program last year. I don’t want to ask my girls to do something that I am not doing myself.

P.S. Don’t forget to sign up for free Tipsy updates via RSS or email.

We have decided to truncate our feed to help protect against stolen content. I apologize for any inconvenience. Please love us anyway. 🙂

Young Women Personal Progress Basket

May 1, 2010 By Michelle Barneck 7 Comments

This is an idea we started in YW last year to recognize those who are working on their personal progress. Each week we invite those who have completed an experience or project to come to the front during opening exercises and tell what they did. It is a great way to recognize those making progress and to motivate those who may not be as excited about it.

Those who stand up to report also get to take a “treat” out of the basket. It is full of things we find for under a $1 like, vinyl cutouts, nail polish, candy, notepads, shower gel, etc.

Each month we change the ribbon on the front of the basket to match the color of the value for that month. We used to coordinate all the gifts in the basket to match that color also, but have since given up on it so we could use up our stock.

I think the girls really like it and it is really fun to see what people have been working on. When girls complete the entire value they are presented with the new scripture marker ribbons too.

http://americajanespeaks.net/wp-content/uploads/2010/02/yw-ribbons.jpg

P.S. Don’t forget to sign up for free Tipsy updates via RSS or email.

We have decided to truncate our feed to help protect against stolen content. I apologize for any inconvenience. Please love us anyway. 🙂
« Previous Page
Next Page »

  • Bloglovin
  • Facebook
  • Google+
  • Instagram
  • Pinterest
  • RSS
  • Twitter

Hi there! I'm Michelle. Mother of three little boys and one little princess. Welcome to A Little Tipsy, a place for exploring creativity and sharing inspiration.

Follow on Bloglovin


Visit Michelle Barneck {A Little Tipsy}'s profile on Pinterest.

Tutorials by Category


15 Family Reunion Games

Family Reunion Games Collage

15 Sprinkle Party Ideas

Sprinkle Birthday Party
Creative Commons License

© Copyright 2014 A Little Tipsy · Site Designed by The Fairy Blogmother · Web Hosting by RFE Hosting

This website uses cookies to improve your experience. We'll assume you're ok with this, but you can opt-out if you wish.Accept Read More
Privacy & Cookies Policy