A Little Tipsy

Creative Tips & Ideas

  • home
  • About Me
  • the tipsy top
  • press
  • projects
  • contact me
[print_thumbnail_slider]

Archives for May 2010

Cute Bean Bags from Worn Out Socks

May 24, 2010 By Michelle Barneck 24 Comments

Am I a hoarder? Maybe, but sometimes I just can’t seem to get rid of things. Like my cute socks that are perfectly good accept for the heels and the toes. A little pathetic that I did not just send them to their landfill grave, but I just knew I could do something with them, someday. Well, today is that day. I introduce to you the Sock Bean Bag.

The fun patterns make me oh so happy and the recycling is a total bonus!
(See honey, another craft using only what I had.)

Items needed:

  • Worn out socks
  • Scissors
  • Sewing Machine
  • Pinto beans (or any other cheap filler) I used 4 lbs for 21 small bean bags.
  • Card stock
  • Bowl
  • Needle & Thread

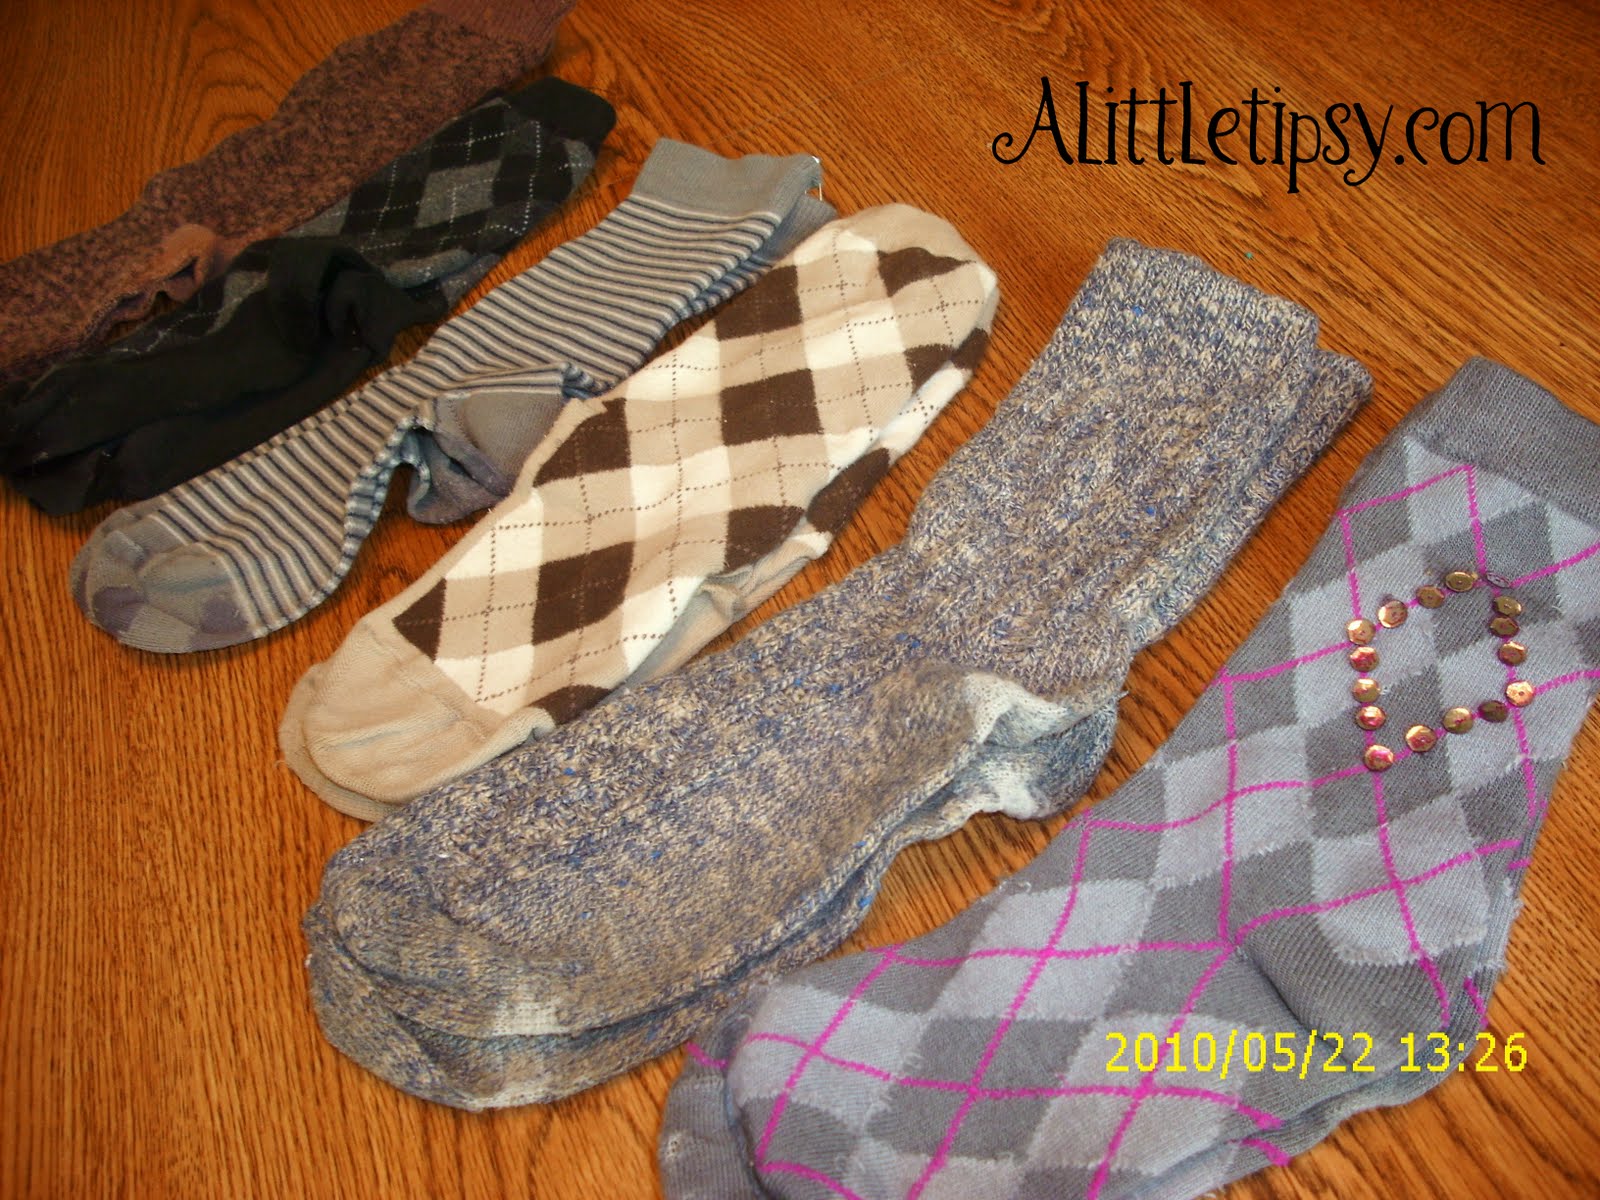
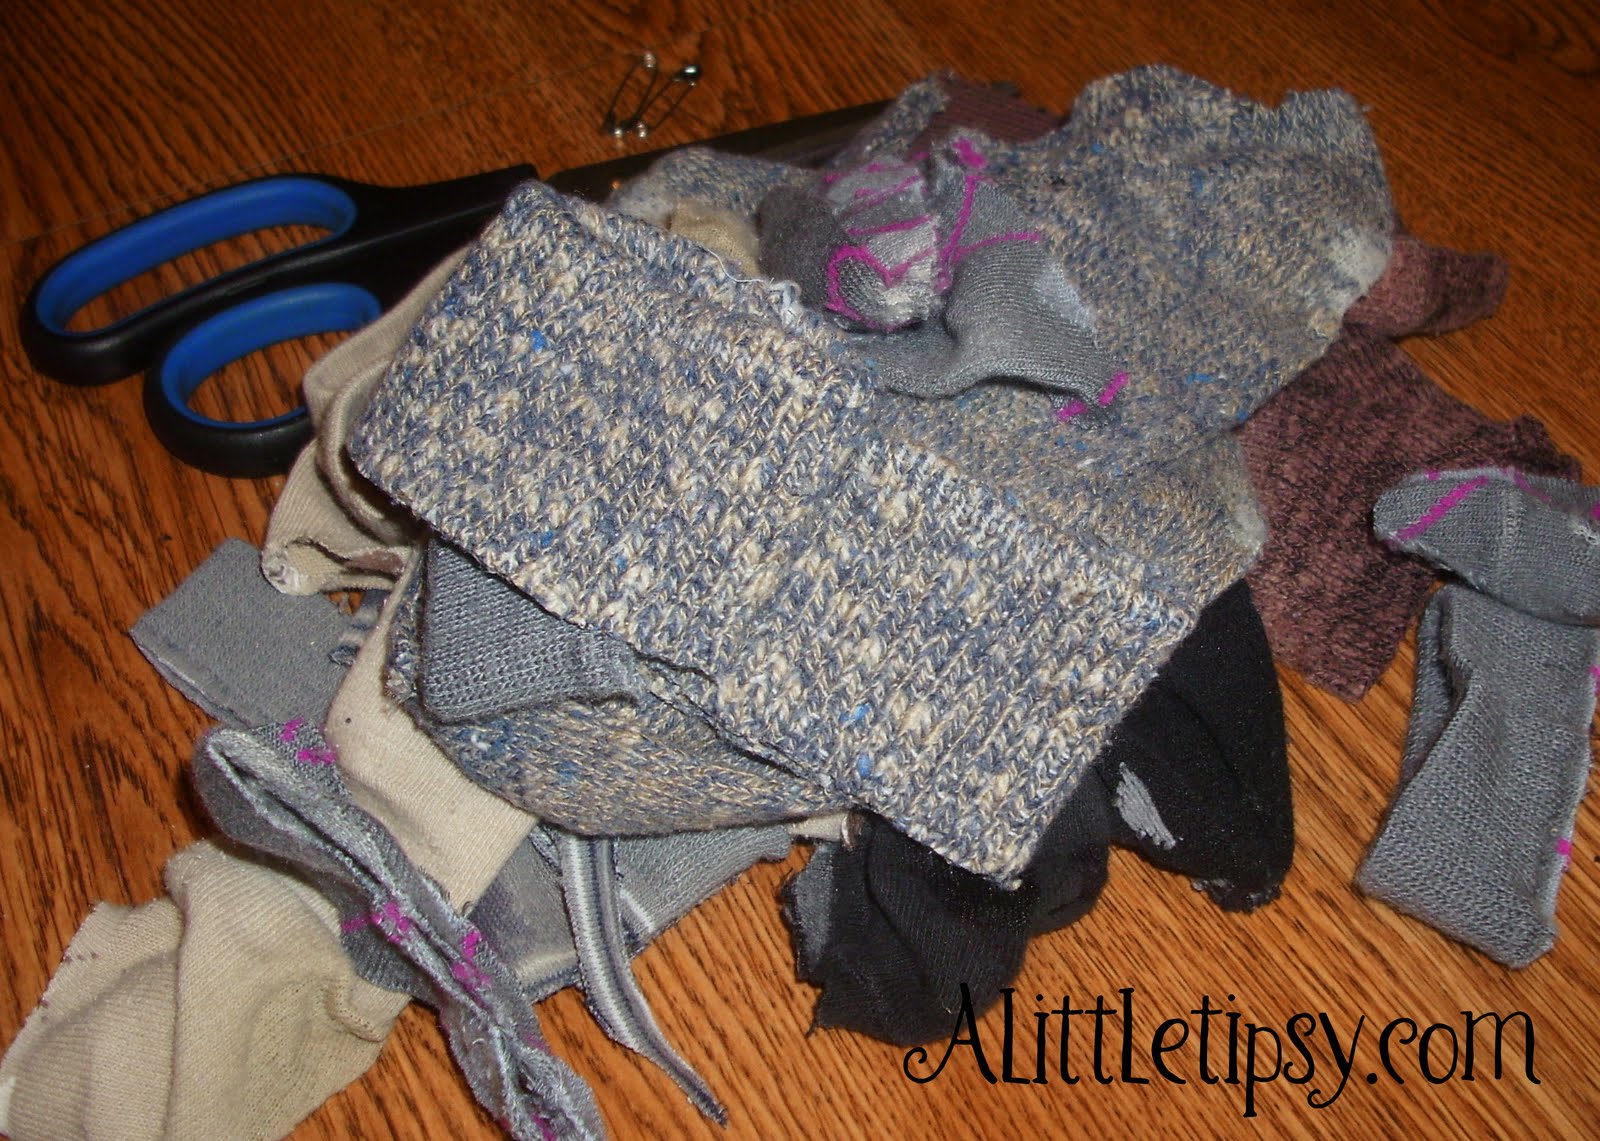
1. Cut the usable material from your socks. I used the ankle tube part and the top of the foot from most. You will have a big pile of scraps that don’t make the cut. (Notice the pins, they are from my sock matching system)

2. With the sock inside out, sew the edges using a straight stitch on your sewing machine. Be sure to leave a 1 1/2 inch open to turn them right side out and put the beans in.

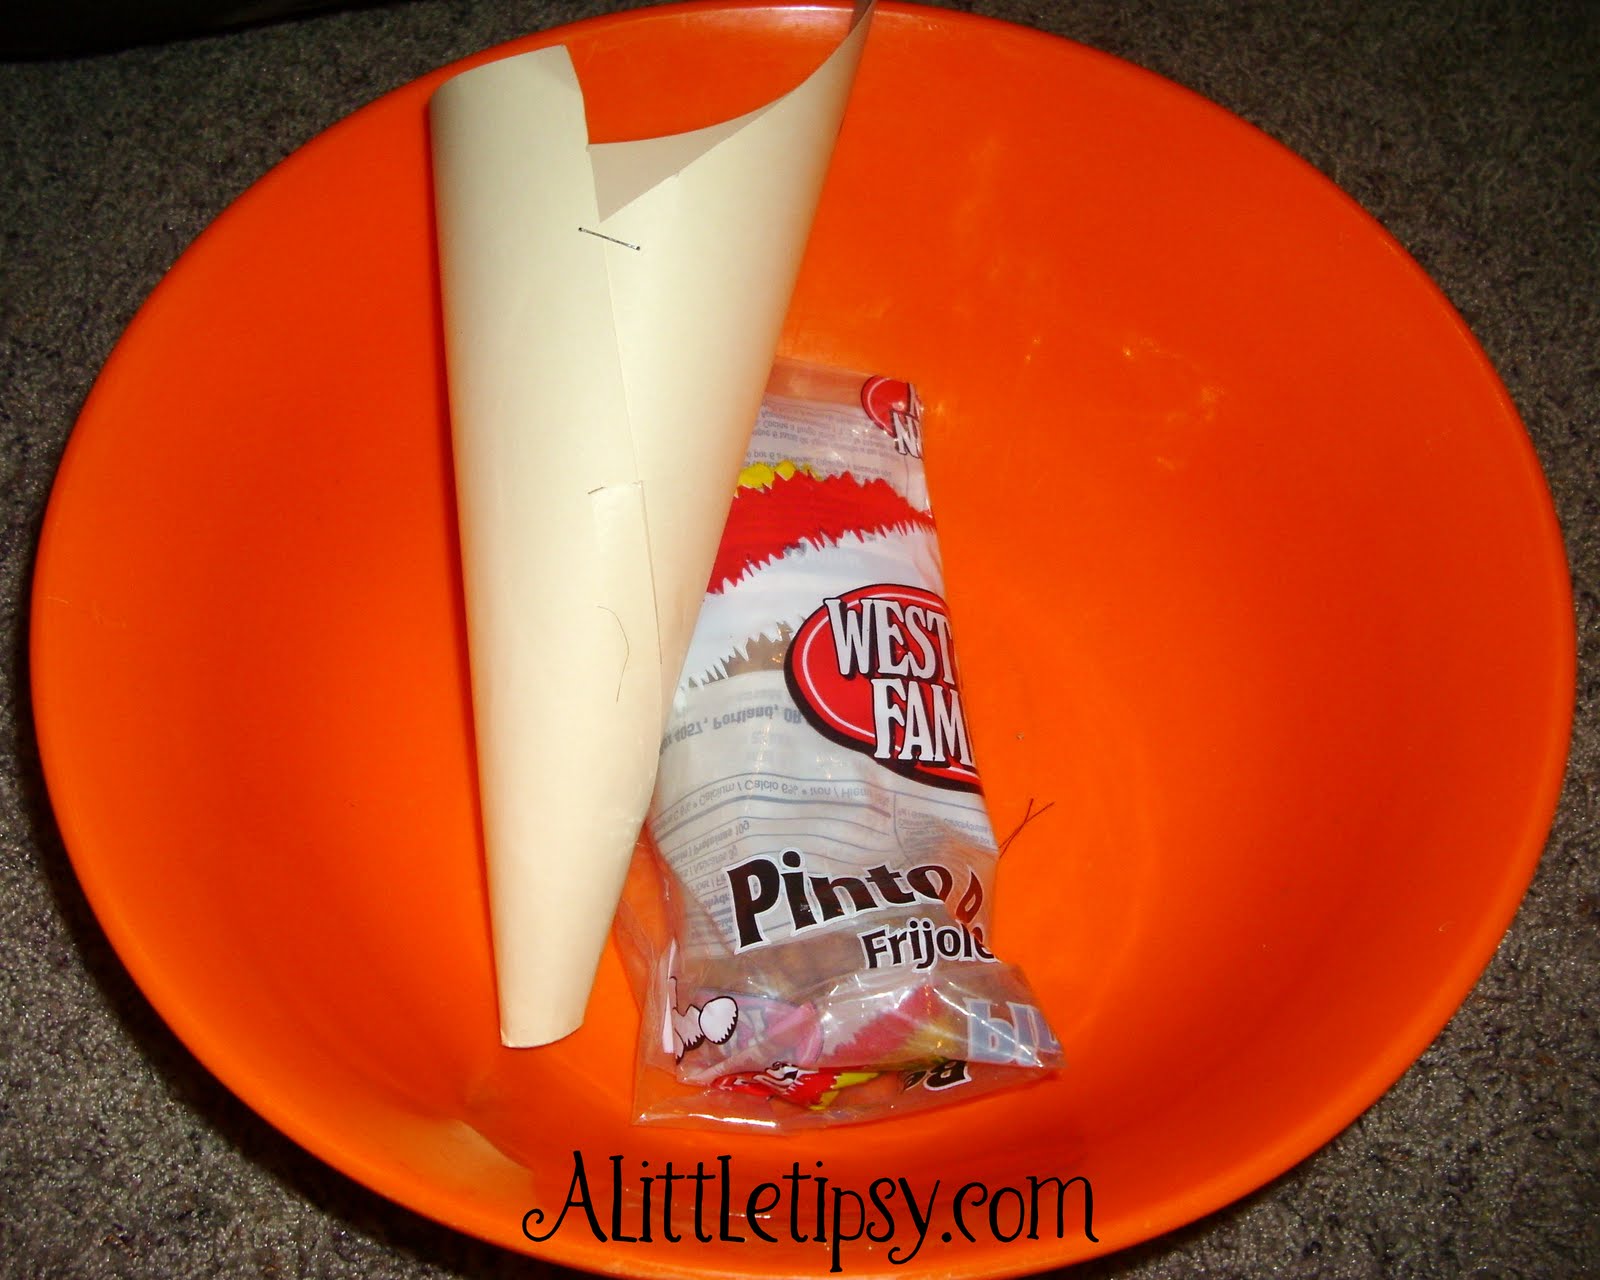
3. Make a cone with your card stock to help you pour in the beans. (My funnel’s hole was too small) I did this over a bowl so any beans that spilled would not scatter. I found the easiest way to get them really full was to keep pulling the funnel in and out so it pushed the beans down while it poured more in.

4. Sew the hole shut by either using your machine (if you don’t mind the change in seam) or whip stitching it with a needle and thread.

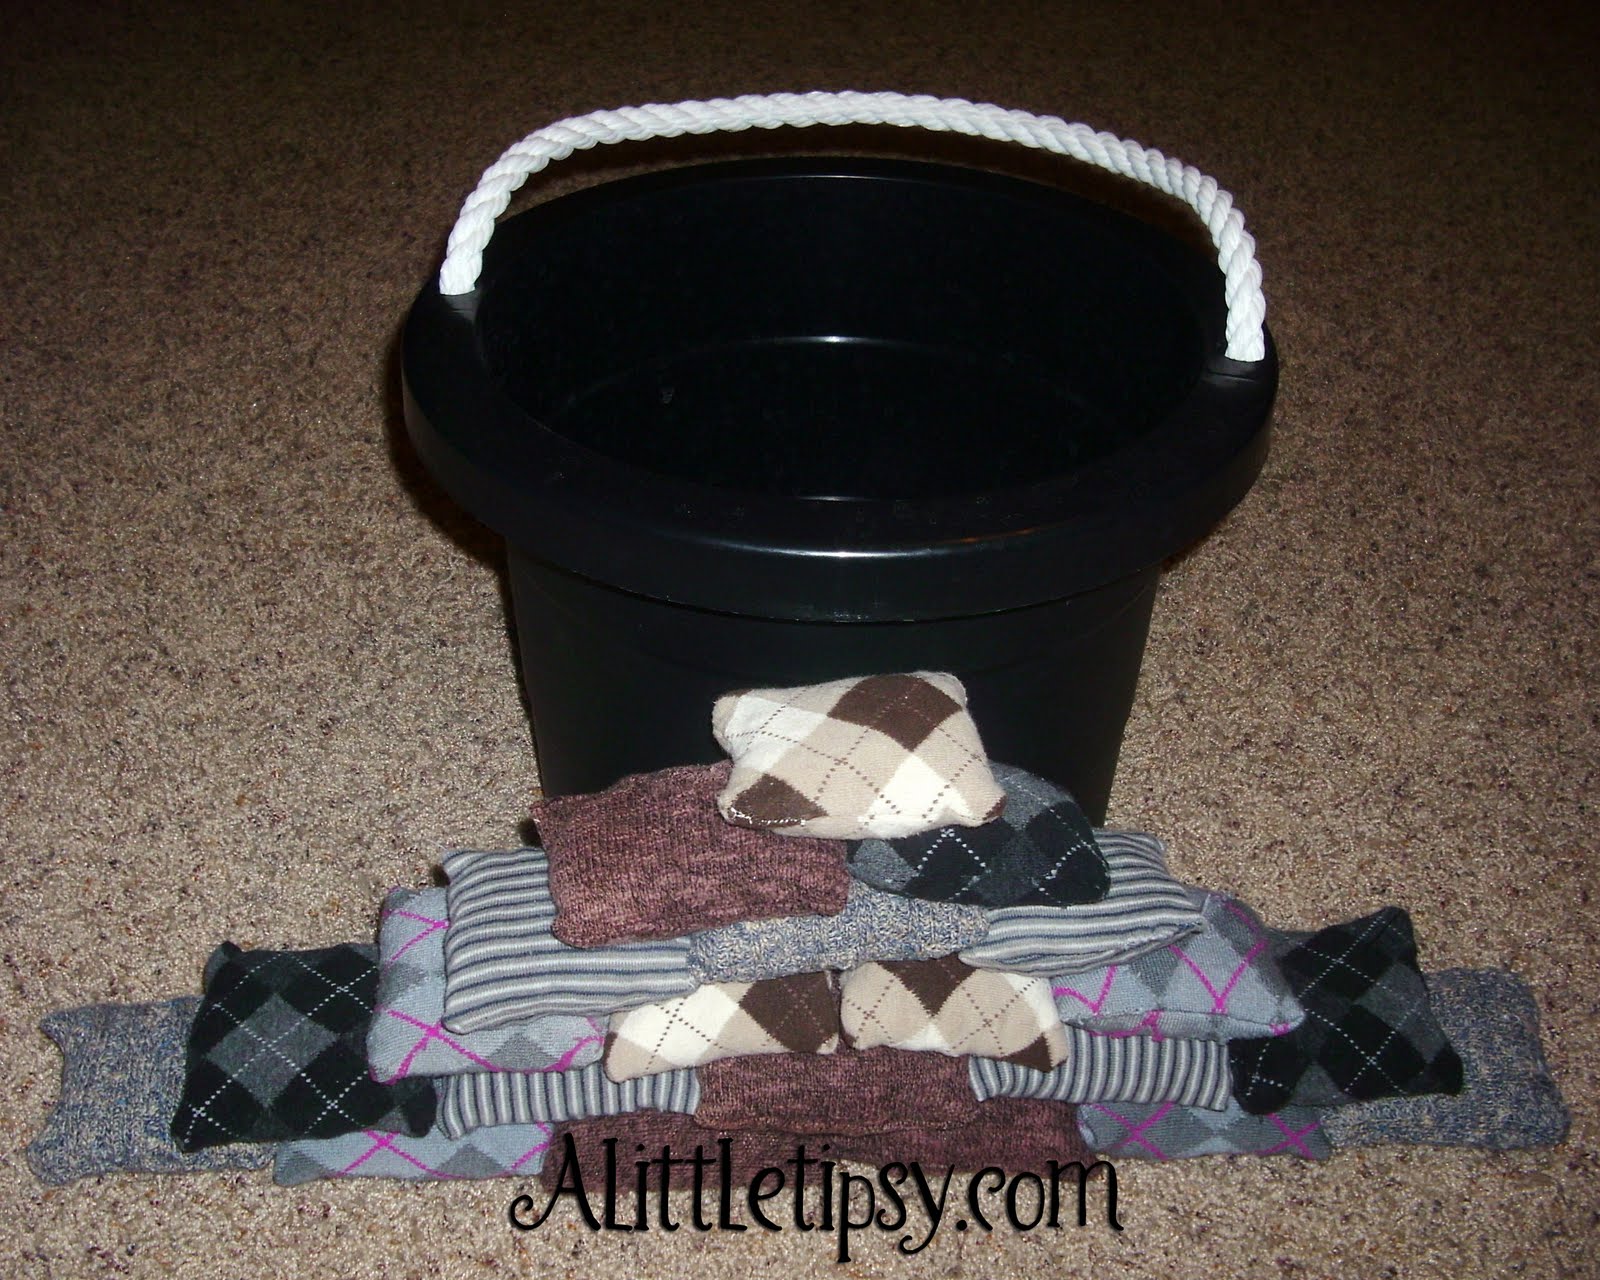
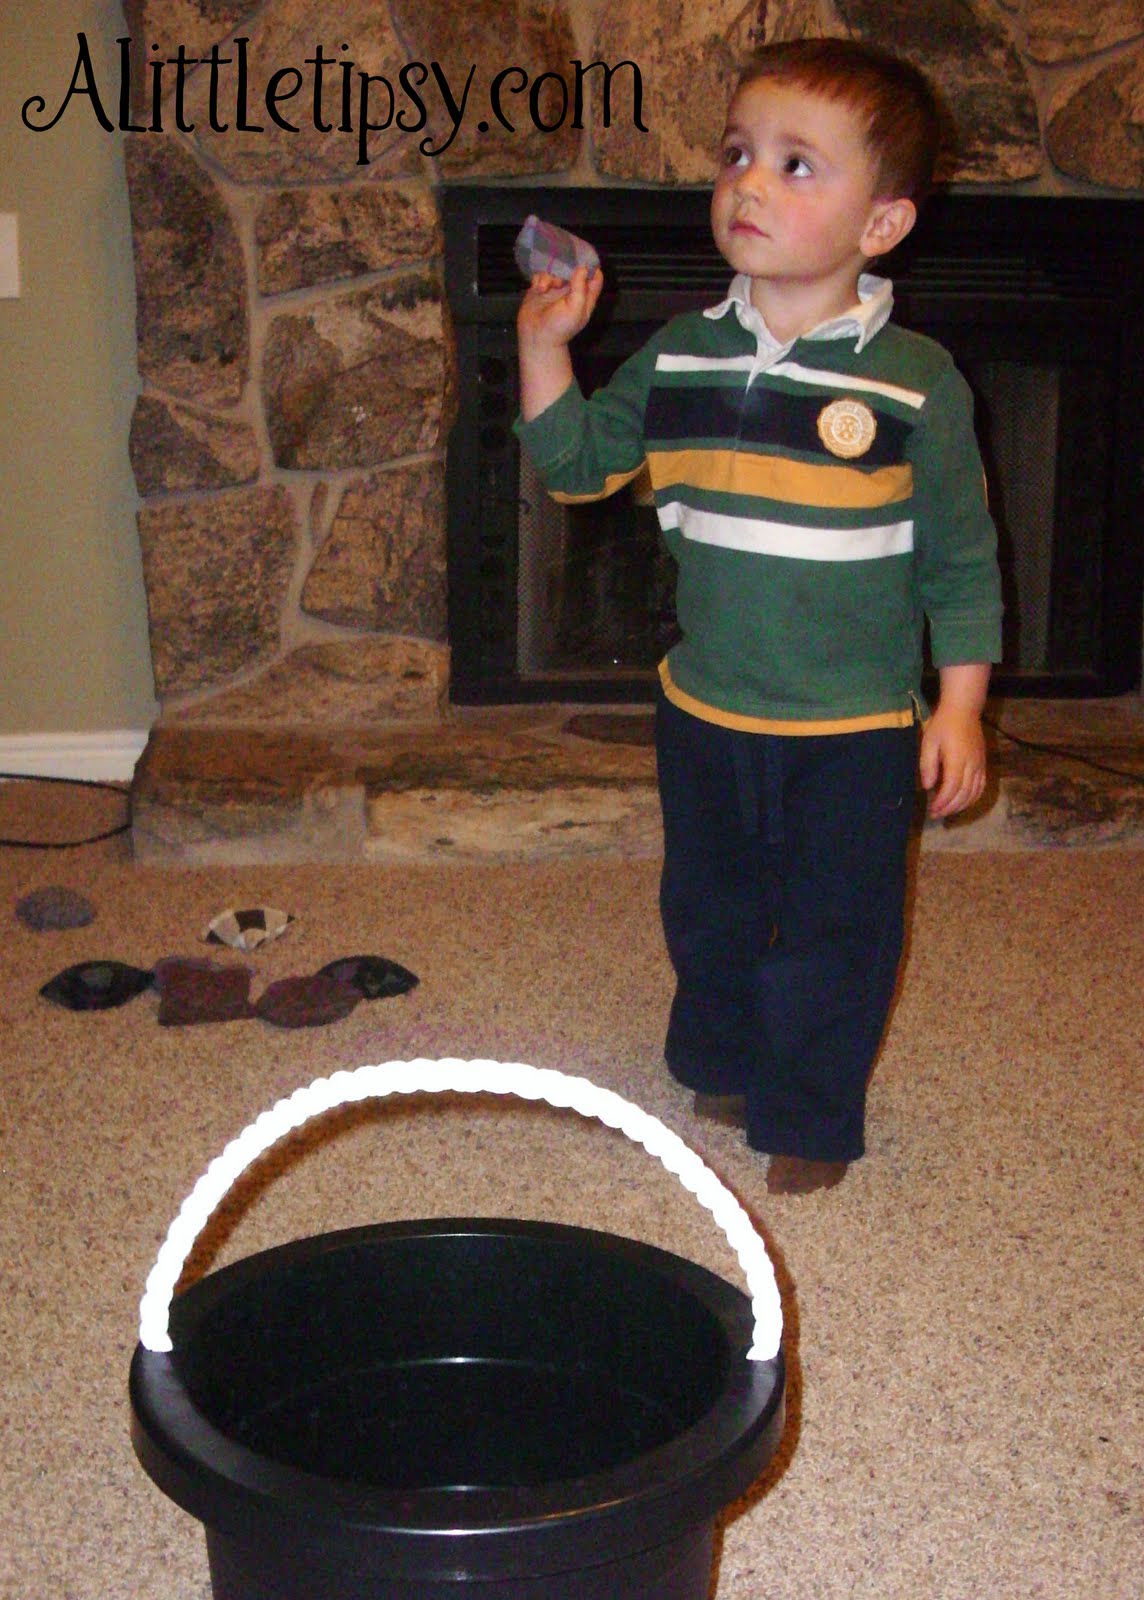
5. Now grab a bucket and practice your throw!

Linking up with:
Made By You Monday
Just Whipped Something Up
Making the World Cuter
Market Yourself Monday
Make Your Monday
Motivate Me Monday
It’s So Very Creative

P.S. Don’t forget to sign up for free Tipsy updates via RSS or email.

We have decided to truncate our feed to help protect against stolen content. I apologize for any inconvenience. Please love us anyway. 🙂

Feature Friday-Blog Swap with Seven Thirty Three

May 21, 2010 By Michelle Barneck Leave a Comment


Hello to all you creative ladies! I am Kim from seven thirty three – – – a creative blog and I want to take a moment to thank Michelle for letting me take over her blog today.

Michelle sent me three questions so that you can get to know me a little better, so here you go:
  1. What is your favorite crafting tool or secret weapon? Of course my Cricut is one of my favorite tools… and could be considered a weapon with that sharp blade! But I also love my scallop paper punch! Perfect for making tags, cupcake toppers and more!

  2. What is your favorite color of eyeshadow? I like to use golden browns. I have hazel eyes that tend toward green so these shades really make my eyes pop.

  3. What was your favorite childhood game? Hmmm… I don’t know the name of it but we would make a HUGE square in the snow and then put a big X in connecting the corners of the squares. There was a safety “box” that was put on one side. There was then one person who was it and you had to stay in the lines and try not to get tagged. LOTS OF FUN, hard to explain. But I was also a big tomboy so playing touch football, baseball and soccer with the neighborhood games was right at the top of my list!

Just a bit more personal info: I am a Marketing Director by day and a mommy blogger by night. I have three gorgeous kiddos that make me smile everyday and that I like to craft for and with. I also have a wonderful husband that supports my crafting outlet addicition <– I can admit that.

So you want to know more about the BLOG, huh? OK, well let’s see…

I host a Sugar & Spice Weekly Link Party every Wednesday for all of your adorable girl crafts and Thursdays are for our little men with the What are little boys made of? Weekly Party.


I like to pass out freebies, one of my most popular being a Weekly Meal Planner.

One of my newer obsessions is Freezer Paper Stencils! It is super easy and inexpensive. Check out this Gap knock-off I made for $3.50.

Looking for some helpful blog tips? I do that too! Every Sunday I post a tip to help you personalize your blog. Send me an email if you have a question you would like answered!

When I’m not crafting, chasing my kiddos or cleaning house, I also do Blog Design. I love to help people beautify their blogs. I work with you to meet your creative needs and to personalize your blog, because let’s face it, these monsters are our babies!

OK, enough about me. Look what I have in store for you today:

Can you tell what it is made from?

Tourist maps, scrapbook paper, coffee filters and jute!

I am hosting a camping themed baby shower for my SIL in June and wanted a rustic banner to hang above the food table. As I was brainstorming I was wishing I had a map because I thought it would lend itself perfectly to the camping theme… then it hit me! I drive past a Rest Area EVERY DAY. They would have FREE maps. So I stopped on my way home from work and picked up a few maps. The rest of the items I had in my home.

I used my Cricut to cut the maps into 5.5″ circles. The brown scrapbook paper was cut into 4″ circles. I used my Make the Cut software to cut the letters on my Cricut. I punched two holes in the top of each set of circles so that they could be threaded onto the jute. Following me? All pretty standard, right?

Now onto the coffee filter “flowers”.

Flatten the coffee filter.

Fold it in half and then fold it in half again (see the arrow?). This will give you the center point of the filter.

This was hard to get a picture to describe, but basically pinch the center and push everything up, and then fluff it out into a circle shape continuing to pinch the center. I then twisted the center “nub”.

When you come over to visit you will see I do most of my crafting at night or during naps so I have limited time. I tend to use whatever is around me – so although I used a piece of pipe cleaner to secure my “nub” (ewww! I don’t like that word!) you can most certainly use tape.

Here is how it will look when you are done with it. Now punch two holes in the top so you can string it onto the jute (do this carefully so as not to tear it).

And here is the finished product:

I hope you guys were inspired today and will stop by to say hi!

You can also find me on Facebook!

—————————————————————-

I am a big fan of the little boy link up! It seems that little girl ideas are plentiful, but little boy ideas are few are far between. Thanks for swappin‘ it up Kim.

P.S. Don’t forget to sign up for free Tipsy updates via RSS or email.

We have decided to truncate our feed to help protect against stolen content. I apologize for any inconvenience. Please love us anyway. 🙂

Wordless Wednesday-Nothing Like the Wind in Your Hair

May 19, 2010 By Michelle Barneck 6 Comments

Linking up with 5 Minutes for Mom.

P.S. Don’t forget to sign up for free Tipsy updates via RSS or email.

We have decided to truncate our feed to help protect against stolen content. I apologize for any inconvenience. Please love us anyway. 🙂

Make Your Own $6 Berry Wreath

May 18, 2010 By Michelle Barneck 24 Comments

I always loved those cute berry wreaths, but like many other things I thought “I can make that.” So when I found stems of purple and white berries at the Dollar Tree, I had to do it, and I love it! Behold the $6 Spring Berry Wreath.

Items needed:

  • 5 Stems of Berries in various colors ($1 each, I had 2 purple & 3 white)
  • Small Grapevine wreath (50 cents at the thrift store, stash busting again)
  • Ribbon Scrap (on hand)
  • Wire cutters (on hand)

1. Start by cutting each little group of berries off the stem, leaving the stick long. I left the leaves on the purple and pulled them off the white. I wanted a little green, but not too much.
2. Start spacing your dominant color and attach by winding the wire stem through the wreath. If you want it more secure you can hot glue.

3. Continue placing the stems, alternating colors until the wreath is full.

4. Attach a coordinating ribbon to the grapevine on the back and tie in to a bow to hang. I adore this sparkly paisley ribbon from Michael’s!

5. Enjoy your new wreath that cost $6 and took 15 minutes! It rounds out my $5 Spring Porch Decor just perfectly! Hello $11 makeover.


Plain & Boring…Springified

I am giving you fair warning about these rogue berries that will inevitably fall off and get everywhere. They are the perfect size for little nostrils. They made their way in to my little guys like three times before I got them all cleaned up and thrown away. Luckily they are shot out easily by plugging the other nostril and blowing. Get rid of them ASAP!

Linking up with:
Get Your Craft On
Do It Yourself Day
Trash to Treasure
2nd Time Around Tuesday
Toot Your Horn Tuesday
Visit thecsiproject.com


P.S. Don’t forget to sign up for free Tipsy updates
via RSS or email.

We have decided to truncate our feed to help protect against stolen content. I apologize for any inconvenience. Please love us anyway. 🙂
« Previous Page
Next Page »

  • Bloglovin
  • Facebook
  • Google+
  • Instagram
  • Pinterest
  • RSS
  • Twitter

Hi there! I'm Michelle. Mother of three little boys and one little princess. Welcome to A Little Tipsy, a place for exploring creativity and sharing inspiration.

Follow on Bloglovin


Visit Michelle Barneck {A Little Tipsy}'s profile on Pinterest.

Tutorials by Category


15 Family Reunion Games

Family Reunion Games Collage

15 Sprinkle Party Ideas

Sprinkle Birthday Party
Creative Commons License

© Copyright 2014 A Little Tipsy · Site Designed by The Fairy Blogmother · Web Hosting by RFE Hosting

This website uses cookies to improve your experience. We'll assume you're ok with this, but you can opt-out if you wish.Accept Read More
Privacy & Cookies Policy