Here is another addition to the Baby Shower Gift Basket series of tutorials. This little teddy bear hooded towel turned out so precious and so easy! I could not keep it from my little guy he loved it so much. I started out just making hooded towels for a baby shower, but once I saw my little one wrap up in the fluffy brown fabric I just had to add some little teddy ears! You could make it a dog or cat too, if that is your preference.

Supplies Needed:
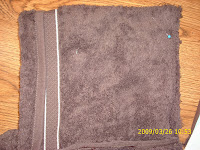
- Hand Towel
- Bath Towel
- Thread
- Sewing Machine
- Pins
Let me start off by letting you know that this is the first thing I had sewn since 7th grade home ec (15 years ago) so that tells you two things: it is super easy and I will not be using technical sewing terms in my descriptions. 🙂
- Cut the hand towel in half.
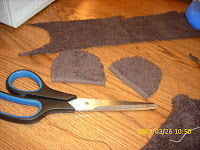
- Trim about 2 inches from the unfinished edge of each half so the hood won’t be huge. Hold on to this extra fabric. You will need it later for the ears.
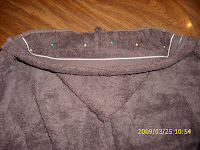
- Fold over the finished edge of the hand towel to the edge of the ribbing. Pin it and stitch it in to place.
- Sew a straight stitch down the edge of the unfinished edge to seal the hood.
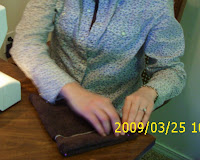
- Fold the bath towel in half. Measure out about 4 inches from the center (on the top of the towel) on each side and mark with a pin. Fold each pin back to the center mark and pin the layers together. Stitch across all layers to secure the pleat (no idea if that is the right terminology).
- Line up the center of bath towel and center of the hood making sure you are putting the right sides together so you don’t end up with one inside out. Pin the hood to the towel. Stitch across the entire hood. Don’t forget to back stitch when starting and stopping to strengthen the seam.
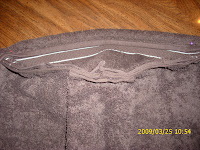
- I did not like the cone head look, so I turned the hood inside out and stitched a diagonal line along the corner. Then, I cut off the corner and turned the hood right side out. This gave it a more rounded look. (When I did it, this step was actually after the ears, but it does not matter.)
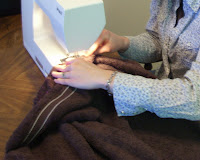
- Cut out ear shapes from the leftover fabric. Stitch around the edge in about 1/4 inch to prevent fraying. This also makes them look more like ears.
- Pin them on to the hood about an inch out from the center and stitch them on laying back.
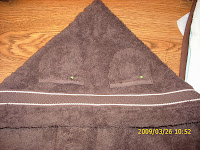
- Then, fold the ears forward and stitch them again. This reinforces them and helps them to stand up a bit more.


That’s it! You have made the cutest towel ever for a sweet little bundle of joy! how cute would it be to sew a little bow between the ears for a girl!


I folded it up with a ribbon and tucked the bottom in to the hood so you could see the little ears.
We have decided to truncate our feed to help protect against stolen content. I apologize for any inconvenience. Please love us anyway. 🙂
You have the cutest ideas! I love the hooded towel.
Thanks for the towel lesson!! I have wanted to learn how to make these for some time now! If I get too confused I am going to call you!!
I hope you had a fun Easter!!
That’s so cute!
Adorable towel!
Thanks so much for directing me to this tutorial! I LOVE it!!! My husband was just wondering if we could make our own because our petite little 13 month old has outgrown his baby ones, but we still use them. Now I need to find a sewing machine to borrow…
This comment has been removed by a blog administrator.
I love it! I can’t wait to try this project! Thanks for the great tutorial!