A Little Tipsy

Creative Tips & Ideas

  • home
  • About Me
  • the tipsy top
  • press
  • projects
  • contact me
[print_thumbnail_slider]

4th of July Decorations: Flag Canvas

June 20, 2013 By Michelle Barneck 30 Comments

Disclosure: I am a Cricut affiliate and received vinyl to use as I pleased. Here’s what I did with it.
Being in scouts I get to recite the Pledge of Allegiance once a week so when I was thinking of patriotic decor for the 4th my mind naturally gravitated towards it. I had a picture in my mind of what I wanted, to create the American flag out of the words of the pledge. I love how it turned out!

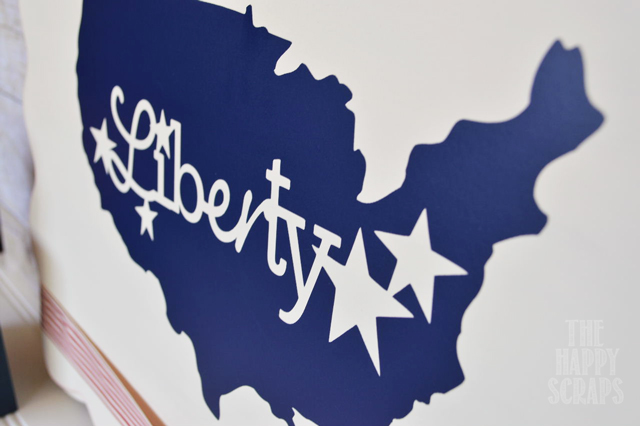
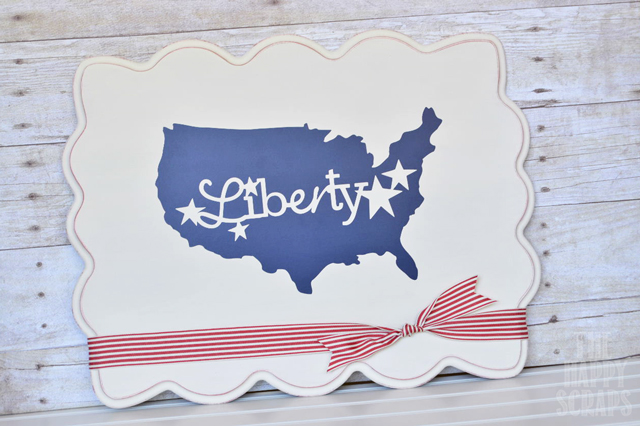
I designed the typography flag using Cricut Craft Room and cut it out of Cricut Vinyl using my Cricut Mini. I used transfer tape to place the vinyl on a canvas to create one of a kind 4th of July decor.

I like to be a good friend, so if you would like to make one for yourself here’s the template…
Download the free Pledge of Allegiance Flag Cricut template

I am a sucker for 4th of July crafts. See my American Stars and Stripes Pillow, 4th of July kids craft, and Patriotic Burlap Ruffle Table Runner.

What’s your favorite patriotic design, stars or stripes?

We have decided to truncate our feed to help protect against stolen content. I apologize for any inconvenience. Please love us anyway. 🙂

Independence Day Liberty Board

June 18, 2013 By Michelle Barneck 5 Comments

Hi, it’s Amy, here again from The Happy Scraps.  I’m excited to be here sharing this fun Independence Day Liberty board.  This was a really simple project, but it makes a statement and I’m so excited to have it up in my home for the 4th of July!

Click here for the full picture tutorial.

I had my shaped board and partially painted the edges red.  Then I gave it 3-4 good coats of white, including the red edges.  

Once it was all painted and dry, I distressed the edges, revealing the red, just a little bit.

Using my Cricut and Cricut Craft Room, I designed and cut out this outline of the US with the “Liberty” in the center of it.  With transfer tape I put it on the board. 

To finish it off, I tied this fun striped ribbon around the bottom. I think it was the perfect finishing touch.  

What kind of 4th of July decorations do you have?  I think this one is my new favorite. 

—————————————————————————
Thanks Amy! I think I need one of these at my house! The striped ribbon is the perfect touch.

We have decided to truncate our feed to help protect against stolen content. I apologize for any inconvenience. Please love us anyway. 🙂

Gender Reveal Pouch

June 11, 2013 By Michelle Barneck Leave a Comment

Are you planning a gender reveal baby shower? Or, are you eagerly waiting to tell your friends and family whether you are having a boy or a girl? Well, I have THE most adorable gender reveal craft to share with you today! It’s super simple, super duper cute, and is SO fun to use for the BIG moment when the secret of the baby’s gender is revealed!
Read the how-to…

A paper pouch is filled with a pretty tag and coordinating clothespin. You can pass out the pouches (which are completely sealed) to your guests or family. Then, when you are ready to reveal the baby’s gender, each person tears off one end of the pouch too see if it is a girl or a boy! This is what it would look like if you are revealing the gender of a baby girl:
To get started, you will need to find some cute blue and pink tags. You also need blue and pink clothespins. You can paint plain clothespins or you can purchase some that are already colored. I found allllll of these pretty supplies at my local craft store (pssst: and they were totally affordable, which makes it even more fun to do!). 
I don’t know about you, but Kraft paper is my favorite thing right now. It kind of has a rustic-pretty look to it, don’t you think? Plus, mixed with the shabby chic feel of these pink and blue tags and I think the look is so stylish! Kraft paper is thick, just like card stock. You will need to cut your paper into an 8×8 square:
Then, roll the square up to form a cylinder. Seal the sides together using a hot glue gun. You DO NOT want this puppy to come apart!
Next, you press the end of the cylinder together to make the shape of a sugar cone. Then, you seal the edge with a thick strip of hot glue. 
Now, you insert the gender reveal tag and pin like so:
After that, you press the other end together at a 90 degree angle from the first seal. That’s how you achieve the cute triangular shape to the pouch:) Again, you want to seal it closed with a thick line of hot glue. I adorned this end of my gender reveal pouch with a yellow baker’s twine bow. That part is optional, but it helps point out the end where you want your guests to rip. Baker’s twine can also be found at any craft store these days. 
All done! In about 10 minutes flat you’ve created a Gender Reveal Pouch that is perfect for a baby shower.
Aren’t these the most adorable little pouches to reveal the gender of a precious little bun in the oven? 
If you are looking for more baby shower ideas, check out my Sleepy Baby Sugar Scrub:
—————————————————————————–
Thanks for an adorable idea Kelly! Gender reveal is all the rage right now and I too am a huge fan of the kraft paper. It’s the perfect blank canvas!
We have decided to truncate our feed to help protect against stolen content. I apologize for any inconvenience. Please love us anyway. 🙂

Bling It On Flower Sash #12MonthsofMartha

June 3, 2013 By Michelle Barneck 2 Comments

This month Martha Stewart sent me a big box of jewelry supplies including more rhinestones than I had ever seen in my house. Being a house full of boys we don’t see much sparkle and shine, but I was up for the challenge. I spotted these hematite rhinestones and instantly fell in love with the dark gray. I knew I had to use them. I love the combination of gray and teal (as you can see in my master bedroom) and remembering I had a teal satin sash I knew just what to do…

I love that the flower sash is so simple, but makes a big statement. It is perfect to take a dress up a notch or even throw on with casual clothes for a little extra something. Versatility at its finest!

It’s so fast to pull together. Here’s the how-to:

Bling It On Flower Sash

SUPPLIES:

  • Satin Sash or Wide Ribbon
  • Large Silk Flower
  • Martha Stewart Hematite Rhinestones
  • Martha Stewart Jewelry Glue
  • Hair Clips

DIRECTIONS:

1. Take the flower off the long stem and remove any large plastic embellishments in the center leaving the little plastic part that holds the flower together.
2. Glue the rhinestones in place. I used 7 rhinestones in something of a circular flower pattern. Let the glue dry overnight.
3. I wanted my flower to be removable so I could make more and swap them out so I attached the flower to the sash with two hair clips.

It’s such a simple way to dress up any kind of outfit! I can wait to put some more flowers together and make some matching accessories with the rest of my box!

Disclosure: I was provided product for this post.

We have decided to truncate our feed to help protect against stolen content. I apologize for any inconvenience. Please love us anyway. 🙂
« Previous Page
Next Page »

  • Bloglovin
  • Facebook
  • Google+
  • Instagram
  • Pinterest
  • RSS
  • Twitter

Hi there! I'm Michelle. Mother of three little boys and one little princess. Welcome to A Little Tipsy, a place for exploring creativity and sharing inspiration.

Follow on Bloglovin


Visit Michelle Barneck {A Little Tipsy}'s profile on Pinterest.

Tutorials by Category


15 Family Reunion Games

Family Reunion Games Collage

15 Sprinkle Party Ideas

Sprinkle Birthday Party
Creative Commons License

© Copyright 2014 A Little Tipsy · Site Designed by The Fairy Blogmother · Web Hosting by RFE Hosting

This website uses cookies to improve your experience. We'll assume you're ok with this, but you can opt-out if you wish.Accept Read More
Privacy & Cookies Policy