A Little Tipsy

Creative Tips & Ideas

  • home
  • About Me
  • the tipsy top
  • press
  • projects
  • contact me
[print_thumbnail_slider]

Recognizing Bullying

July 25, 2012 By Michelle Barneck Leave a Comment

This post is sponsored by Chase — a strong supporter of the Bully Project, a program committed to ending bullying and ultimately transforming society. Learn more here.

This last year was my oldest son’s first year in preschool. I was the eager parent so excited for him to start this social milestone with dreams of cute little friends and how much fun he would have. I always pictured the perfect situation, little Mr. popular whom everyone adored and wanted to be friends with. Now don’t get me wrong, he LOVES school and is excited to go back this year, but I had concerns. 

Mid-year I noticed a trend. Each time I would pick him up from school the kids would be playing tag and my son would be “it.” At first I didn’t think much of it, but after a few days of the same thing I asked him about it and if he always wanted to be “it.” He told me how all the kids always said he was it and that’s how it was. He said sometimes he didn’t want to be it, but they would make him. We talked about it and role played a little about how he could nicely ask his peers if they could take turns being “it” because he would prefer not to have that role every time. 


This is such a small situation, but it got me to thinking about what may be coming. Could he be susceptible to bullying or for that matter being a bully? I wanted to know more about what is considered bullying and when childhood banter has gone too far. I was excited to see that there are some really great resources out there to help educate parents, kids and teachers alike on exactly what bullying is and how we can recognize it.

There are so many bullying resources out there, but here are a few I really liked: 

  • Signs Your Child is Being Bullied
  • Signs Your Child May be a Bully
  • Cartoon webisodes to help recognize bullying
  • Teaching Kids about bullies using Disney

Have you or your child ever been bullied? 

What did you do to positively resolve the issue? 

Do you know of good resources for those being bullied or for parents raising a bully?

I would love to hear any personal experiences or recommendations in the comments or by email (tipsyblog@gmail.com) if you prefer.
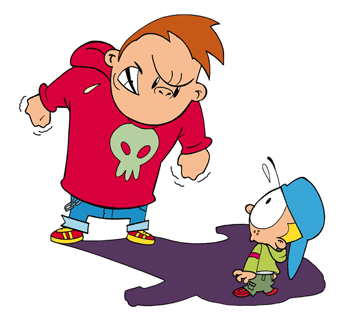
Image source

P.S. Don’t forget to sign up for free Tipsy updates via RSS or email.

We have decided to truncate our feed to help protect against stolen content. I apologize for any inconvenience. Please love us anyway. 🙂

How to Curl Hair Without Heat

May 21, 2012 By Michelle Barneck 7 Comments

Here’s a little tip I picked up from Deidra in the make up and hair tip class at the Breathing Space Retreat that has been a life changer, no heat curls. No really, this is one of my go to styles now. It’s super easy, takes next to no time and gives you natural, beachy looking curls with no curling or straightening iron needed. Seriously, these pics are from the very first time I tried it!!
All you need for no heat curls is an elastic headband and barely damp hair. This is important, if it is too wet, it will never dry. You basically just wrap all your hair around the headband wear it for a few hours until it dries and then pull out and smooth. Easy peasy! I don’t wash my hear everyday, so this lasts a few days for me with some touch ups. I actually like it better the second day when it has relaxed and is loose wavy curls.
Here’s my instagram pics from my first try…
(beware the scary buggin eyes, sorry folks haven’t mastered the phone self-portrait yet.)


Here’s a video tutorial with exactly how to do curl hair without heat. It’s much easier then trying to explain it in writing. It’s kinda long because it has the before and after how-to’s, but I’ll let you in on all the tricks on how to make it work. This tutorial was on my second try. It is truly that easy.
My stylist friend Jami tried wearing it overnight and said it was a mess in the morning. I think the no heat curl key is putting it in barely damp in the morning and taking it out a few hours later after lunchtime. Then, use your favorite products to tame the beast. Also, I have naturally wavy hair, so that may contribute to the working well for me, but Deidra who taught the class has stick straight and it works for her so I think it should be pretty universal.
I hope you try it! I have done it four or five times now which is saying something since the retreat was less than a month ago.

P.S. Don’t forget to sign up for free Tipsy updates via RSS or email.

We have decided to truncate our feed to help protect against stolen content. I apologize for any inconvenience. Please love us anyway. 🙂

Breathing Space Blogger Retreat

May 14, 2012 By Michelle Barneck 7 Comments

Warning: long post with oodles of tips that I learned while at the Breathing Space Blogger Retreat at Daybreak.
Warning #2: Many of these pics were taken using Instagram so sorry if they are dark or grainy or you get the picture.

So, what is Breathing Space you say? Well, it was…cute bloggers, fun classes, awesome sponsors, theme dinners, salon trip, swag galore and a GNO sleepover in Daybreak‘s model homes. Fun? YES! Educational? Yes sirree.
The very first day I started out with class from a little someone you may have seen on Cupcake Wars.
Baking Tips from The Sweet Tooth Fairy {Megan Faulkner Brown}
I just love it when someone as successful as her is so down to earth and humble!
-Line measuring cups with plastic wrap when measuring things like shortening, peanut butter, syrup, etc to avoid sticky/messy cups
-Substitute: Graham Cracker Crust: crushed corn flakes in place of graham cracker crumbs. 
Recipe for crust: 2 cups crushed, non-sugared corn flakes, 1/3 cup melted butter, 2 Tbs Sugar. Gradually add the melted butter to the corn flaked and sugar. Mix well and press into pie plate. Bake at 350 degrees for 10 minutes. (add 1/8 cup cocoa to substitute for Oreo crust)
-Equipment: Use ice cream scoops to scoop cake batter and cookie dough. Use the end of a big frosting tip to core out a cupcake so you can fill it.
She also taught us how they frost the cupcakes in the shop. Hold the bag perpendicular to the cupcake. Pretend it is a clock. Start frosting at 12, then do a circle moving in for a second circle at 11, then move in for a third circle. Ta da! 
Then it was on to…
Make-up and Hair Tips by Deidra
-For dry hair, put 2 Tbs Olive Oil in hair once a week.
-For DIY stick curling iron, take off the rest foot and unscrew the clamp arm on a regular curling iron
-To make lip gloss stay, wear nude liner under
-Shiny hair smoothie recipe: 1 Avocado, 1 Banana, 1 egg, 2-3 Tbs Olive Oil
Mix in blender until smooth. Put in hair for 10 minutes then wash like usual.
Store excess in fridge.
Watch for a video tutorial on No Heat Curls!
That night we had a Stepford Wives themed dinner. Here are my roomies and I in front of our adorable model home. Don’t you just love the big porch with the rockers?!

Leanne, Whitney, Staci, Me, Amanda, Kaysi
My roomies and I even did a group post involving polka dot plates inspired by a late night snack run.
Polka Dot Fruit Stand
At the dinner, they had a big announcement about a DIY blogger house at Daybreak! Cool huh?! I’ll let one of the featured bloggers (and one of my favorite people ever) Ms. Char tell you more about it!
Isn’t Amanda so cute on that bike with the basket. 
After dinner it was home to get cozy. 
Anyone else feel like bursting in to “The hills are alive with the sound of music.”

 And wearing that shirt is about as close as I will ever get to a 5k. I am not a runner. Though if I were going to run, it would have to be the Dirty Dash or Color Me Rad because let’s face it if I must run it may as well be with some spectacular mess making theme.

Morning came early considering we gabby girls had gone to bed oh, a good four hours prior. I had an exciting shower in our model home with no blinds. 😉 Luckily, there was a surprisingly scrumptious breakfast provided by Chick-fil-a. Who knew they had such good breakfast?! We’re talking biscuits, breakfast burritos, fruit, cinnamon clusters, yogurt parfaits and Simply Orange Juice. Num.

First class of the day…

Interior Design with Brian Clark 
-The secret of design is that it means something to you.
-Design using your past, present, and future
  • Bring your past in to your home ex: use family stories as themes, project handwriting from grandma’s journal on the wall
  • What do you want to be reminded of today? ex: family, big family photo surrounded by antique frames that you will fill one by one with memories
  • Future goals: what do you want to accomplish? ex: you want money so you can help people. Put a crystal chandelier in your room for a touch of glamour.
-We shape our dwellings and our dwellings shape us. -Winston Churchill
Interior Design was sponsored by Soelberg Industries and you will die when you see why. They create the most amazing 3d textures for screens, headboards, wall art and more. Oh how I would love to have some of this in my house!!
Alveare DividerForbici Divider
Bellino -Impressions
Fiore - Impressions

A little manicure, a lovely lunch from my friends at San Gelato Cafe (Hi Robert!), a little surprise delivery from Plum District…

And then on to…
Style with Becki From Whippycake
{even her coke has style}
Becki gave awesome tips on how to figure out your style, dress your body type and skin tone. It was quite eye opening for many of us. I found that my style is romantic which means that I love girly things like ruffles, lace, basically anything with feminine detail. Pair it with a pair of jeans and that sounds about right.
Speaking of jeans, I was through the moon that I won a drawing for a pair of jeans from Vault Denim from the style class. Rocked the cute shorts for date night on Friday!
Then on to…
Photography with Emilie from Photo by Emilie.
She is brilliant and can explain things so even the babies in the photography world like me can understand. I think she convinced me to splurge for a big girl camera for my birthday coming up so let me know if you have any recommendations.

Isn’t that collection of cameras behind her awesome? 
Our last theme dinner was to celebrate Cinco de Mayo. Aly and I were really in the spirit of things.

All in all, it was a great time and I would totally do it again!
Thanks for making it all the way to the bottom of this monologue.

P.S. Don’t forget to sign up for free Tipsy updates via RSS or email.

We have decided to truncate our feed to help protect against stolen content. I apologize for any inconvenience. Please love us anyway. 🙂

Pine Car Scout Awards

April 18, 2012 By Michelle Barneck 4 Comments

It’s derby time! We just had our Cub Scout Pine Wood Derby and as one of the leaders, I was asked to make the awards. I am still new to Cub Scouts, but here’s what I came up with.
Pine Car Scout Awards
They turned out pretty cute and were quite simple to make!
Supplies:
Small Wooden Crate (Michael’s)
Sandpaper
Yellow Cardstock
Blue Cardstock
Checkered Paper
Double-sided Tape
14 Gauge Utility Wire (Lowe’s)
Pliers
Scissors

Toothpicks
Checkered Duck Tape
Elmer’s White Glue
Matchbox Cars
E-6000

I was going to spray paint the cars silver, but the ones I got ended up matching really well.

1. I got the “crates” which were more like little baskets with handles from Michael’s for $1 each. Break off the handles and sand flat. You can see the little circles where I broke the handles off. 
2. Make a circle from the yellow cardstock and a slightly larger circle from the blue cardstock. Make an even larger circle from the checkered paper (it will be about 4 inches across). Tape them all together.
3. Cut 1/4-1/8 inch slits all around the checkered paper to fringe. Give it a more 3D look by bending the fringe toward the circles having some strips bending ore than others.
4. Use your pliers and fingers to bend pieces of the utility wire in to 1, 2, 3, and S (for sportsmanship).
5. Snip one of the end of the toothpicks. Cover the other end by folding a strip of checkered duct tape around the toothpick to look like a flag.
6. Glue the wire numbers to the paper circles with little dots of E-6000.
7. Glue the paper circle badge to the crate with the Elmer’s white glue.
8. Cut a rectangle out of the blue cardstock and round one end.   Glue it to the crate as the backdrop for the car. Lay it down to dry and glue the flags on while the backdrop is laying horizontal.
9. Once dry, stand it up and glue the car on the top of the crate using dots of E-6000 on the wheels.

We did the sportsmanship slightly different. It get’s the paper badge, but then instead of a car on top, we filled the crate with the candy and closed it in with the checkered duck tape. Candy is a great motivator with boys this age.
Is anyone else involved with Cub Scouts? I’d love to share ideas!

P.S. Don’t forget to sign up for free Tipsy updates via RSS or email.


We have decided to truncate our feed to help protect against stolen content. I apologize for any inconvenience. Please love us anyway. 🙂
« Previous Page
Next Page »

  • Bloglovin
  • Facebook
  • Google+
  • Instagram
  • Pinterest
  • RSS
  • Twitter

Hi there! I'm Michelle. Mother of three little boys and one little princess. Welcome to A Little Tipsy, a place for exploring creativity and sharing inspiration.

Follow on Bloglovin


Visit Michelle Barneck {A Little Tipsy}'s profile on Pinterest.

Tutorials by Category


15 Family Reunion Games

Family Reunion Games Collage

15 Sprinkle Party Ideas

Sprinkle Birthday Party
Creative Commons License

© Copyright 2014 A Little Tipsy · Site Designed by The Fairy Blogmother · Web Hosting by RFE Hosting

This website uses cookies to improve your experience. We'll assume you're ok with this, but you can opt-out if you wish.Accept Read More
Privacy & Cookies Policy