A Little Tipsy

Creative Tips & Ideas

  • home
  • About Me
  • the tipsy top
  • press
  • projects
  • contact me
[print_thumbnail_slider]

Sherlock Holmes Date from Dating Divas

September 27, 2012 By Michelle Barneck 2 Comments

Hi, my name is Cami, and I am one of The Dating Divas. We are dedicated to strengthening marriages, one DATE at a time! I am SO excited to be doing this blog swap with A Little Tipsy. Michelle is just AH-MA-ZING!!!! Anyway, I planned this fun date for my cute hubby, the movie buff. Hope you enjoy!
Is it just me, or did anyone else marry into a TOTAL movie buff family? I’m talking all family functions everyone is quoting movies, watching movie trailers, and we HAVE to go see the latest movie that just came out! After 7 years, I am still lost as to what everyone is laughing about (because I have NO clue what movie they are quoting), inside jokes, etc. I can’t be the only Diva that is in this situation :)! We love the Sherlock Holmes movies with Robert Downey Jr. so I thought it would be fun to build a date night around this theme.
Here’s what you’ll need to make this date outstanding – invite (provided below), Sherlock Holmes’ attire, candles (optional), and a computer. If you need some help with the attire, I found some amazing items for very little money! I found a Detective Kit for under $9 that includes a hat, magnifying glass, and pipe. If you are just wanting a magnifying glass or pipe I found those, too! If you want to spice this up even more, check out Stephanie’s Clue date where they had SO much mystery fun for a night!
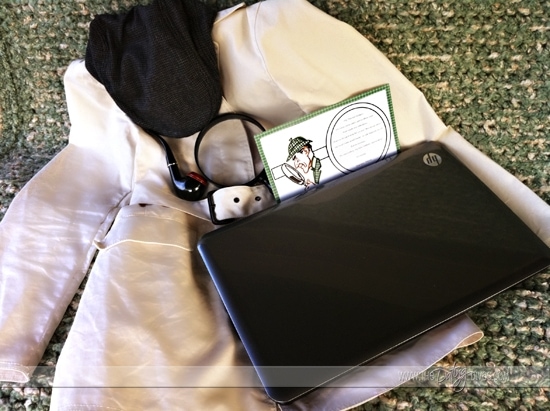
I started by leaving my hubby this cute invite with some awesome Sherlock Holmes’ attire as he left for work. If you want to spice your invite up like I did, feel free to add some color to the detective with markers, and then glue the invite to some cute scrapbook paper. It’s super easy with great results to make it that much better! 
 The invite reads:
“My Dearest Watson,
We have come upon yet another case that needs our attention.
Meet me tonight at 6:30 in our “thinking room”.
We must make great haste! A life depends on it!
But as always…
“It’s elementary, my dear Watson, elementary”.
Sincerely,
Sherlock Holmes”
I was so excited! Now, you might be wondering what I meant by “thinking room”. I tried to make the invite as generic as possible for all you readers, and this was my solution. For MY date the “thinking room” was going to be our bedroom. I was able to ‘quarantine’ it off from the kids, and had everything ready for our date once our kiddos went to sleep. However, you can make your “thinking room” whatever you might want: family room, bedroom, living room, TV room, etc. Anywhere you will be comfortable and have everything ready.
Before your date starts, you will need to prepare a few things. You will need to download a video game which will be your first activity of the night (see below), and a Sherlock Holmes recording (see below). You might want to get ‘the mood’ ready by lighting candles around your room as you are listening to the story.
When we were ready for our date (once our kids were asleep) we went to our “thinking room”. I found an interactive Sherlock Holmes video game that we downloaded and played for a while. We had a lot of fun trying to figure out the mystery as we were going through the game, and it was great to be able to bounce ideas off each other as we were going.
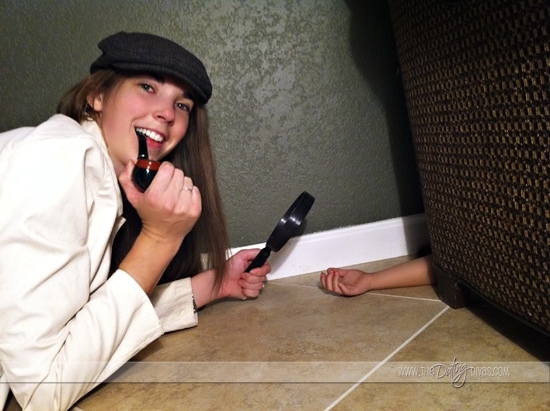
After the game, we listened to a recording of a Sherlock Holmes story. I absolutely love listening to old radio recordings and feel they give such great authenticity to the story! I found a list of different stories and recordings to choose from and then checked on my local library site to see which ones were available to download and listen to. My library has on-line books/stories on ‘cd’ where you can download to your computer, ipod, MP3 player, or whatever you wish. It’s great and I love that it’s FREE! I chose to light candles and dressed up in my Sherlock Holmes attire so I could channel the Holmes inside me! πŸ˜‰ I even pretended to solve a real crime while wearing my outfit! It was fun!
While you are listening it would be fun to have some yummy strawberries or other kind of fruit that you can snack on. Of course popcorn is always great, too.
We of course finished off the night by watching the original Sherlock Holmes. We had a BLAST being Sherlock Holmes and Dr. Watson for the night. I hope you have fun recreating this date, too!

——————————————————————————–

What a fun idea! Thanks Cami, I love creative dates you can do at home!

We have decided to truncate our feed to help protect against stolen content. I apologize for any inconvenience. Please love us anyway. πŸ™‚

5 Tips for Getting Kids to Drink Water

September 20, 2012 By Michelle Barneck Leave a Comment

Water is awesome. It’s cost free, calorie free, sugar free, and life sustaining. Now how do we convince reluctant kiddos to dive in and drink? Here are 5 tips to help get your kids to drink water instead of their sugary counterparts.

1. Make it fun!
Let kids choose a fun water bottle or cup with a favorite color or character. They will drink more if it has a cool container. You tend to drink more with a straw so buy a big pack of disposable or a few funky re-usable and get to sipping! Adding a slice of lemon or orange can make flavor it without loads of sugar. Teach kids fun facts about water.
2. Make it easy!
Have water easily available at all times. If you fridge does not have a dispenser, put a dispenser in the fridge so it’s always ready to go. Have a stash of water bottles ready to grab on the go for practices or school.
3. Make it cold!
Kids tend to like water better when it’s cold. Keep water in the fridge and have fun shaped ice cubes to add in. Consider freezing fun non-toxic toys (small enough to fit but not to swallow) inside so they get a little reward when they finish their bottle. 
4. Make it clear!
As much as we don’t like to admit it, kids love to talk about pee. Take advantage of it and tell them about the pee test. Dark needs more water and near clear is good to go. Make it seem like a game.
5. Make it happen!
Kids learn by example. If they don’t see you drinking water they are not likely to. We can’t drink soda all day and expect them to be content with water. Show them the importance by being a fan of water yourself. 
We had a chat about water and shared some fun facts:


I polled our Tipsy Facebook fans and they had some fabulous ideas:


  • Our kids are allowed 1 glass of juice at breakfast and 1 glass of milk with supper – the rest of the day the only option is water. 
  • Crystal lite. Start with a full pack then gradually do less! Eventually you’ll need none.
  • I have a mug of ice water that I carry around the house and my kids see it and always want to share it with me. They think it is fun to drink “mommy’s water!”
  • I add one drop lemon, grapefruit, tangerine or lime essential oil. Not only are the as natural as can be, but they are also natural antioxidants and natural detoxers. Oh and they taste yummy. (so say my kids).
  • Juice is a special and rare treat and I still mix it with water for her anyway! She’s just grown up loving it.
  • She does love to drink from my water bottle though and thinks its somehow more special than her own water! So sometimes I give her my bottle as a treat! Lol
  • My kids like it REALLY cold. So I freeze half a bottle and then add water. That way the cold lasts πŸ™‚

  • That’s how we helped we kids discover the wonders of water. Brita’s new product, the Brita Bottle for Kids, now provides an easy and fun way to have clean, filtered H2O on the go.

    Now I’m curious… 
    How do you encourage your kids to drink more water? 
    Reply below and one of my readers will win a $50 Visa gift card!


    This is a sponsored conversation written by me on behalf of Brita. The opinions and text are all mine. Official Sweepstakes Rules.>

    We have decided to truncate our feed to help protect against stolen content. I apologize for any inconvenience. Please love us anyway. πŸ™‚

    How to Refinish a Deck in One Day

    September 6, 2012 By Michelle Barneck 1 Comment

    Refinish a deck in one day? Seems like a myth right. Not so, you can for reals. You just need the right tools, the right weather and the right help. Two of us completed this project in about 11 hours including 4 hours of wait time between steps.

    We actually split it up and did two hours of the work with the deck cleaner (and the two hour wait time) the night before so that we could make use of the cooler hours. The next morning we started at 7:30 am and were done at 2:30 pm (that’s counting one of us driving/feeding kids for couple of hours) so you could still easily do it all in one day. We also knew that with both my husband and I having strong personalities in tiring situations it might be good to break it up a bit. πŸ˜‰
    Keep in mind that most of our deck stain had worn off. If your deck is painted or has thick stain this process may be different for you and you may want to refer to our other deck tutorial when we stripped awful cracked barn red paint.

    First off, research what deck cleaner and stain/waterproofer will be best for the look you want. Thompson’s has a fantastic project planner guide that will help you find what is right for you based on your deck’s existing condition and how you want it to look.

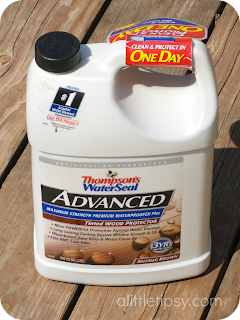
    Since the stain on my deck was mostly gone I used Thompson’s Heavy Duty Deck Cleaner to strip and clean without sanding. I wanted a semi-transparent look with good wear that could be done the same day as cleaning so I chose Thompson’s WaterSeal Advanced Tinted Wood Protector.


    SUPPLIES:
    Read the instructions on your bottles thoroughly and decide what tools will work best for you:
    • Long sleeves, pants and shoes (cover as much skin as possible)
    • Eye protection
    • Rubber Gloves
    • Masks (for spraying cleaner)
    • Deck sprayer (designed for decks with multiple sized nozzles for cleaner and stain, mine was about $13 at Lowe’s)
    • Synthetic bristle brush
    • Thompson’s Heavy Duty Deck Cleaner
    • Hose with spray nozzle head
    • Plastic drop cloths (dollar store ones are fine, I used about 5)
    • Painter’s tape
    • Thompson’s WaterSeal Advanced Tinted Wood Protector
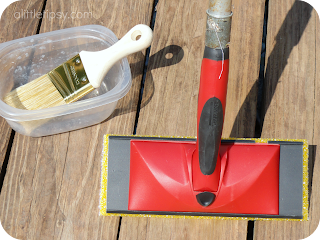
    • Paint pads (thought I’d use the pole & handle, but just used the pad itself)
    • Paint brush meant for stain
    • Small plastic container
    • Knee pads (optional)
    • Babysitter (easier with small kiddos gone and away from hazardous items)

    DIRECTIONS:
    1. Check the weather and make sure there is no rain planned for the next 2 or 3 days.
    2. Start as early in the morning as possible so you can make use of the cooler temperatures. 
    3. Gather all your supplies and put the cleaner nozzle on the sprayer.
    4. Clear everything off the deck and sweep off large debris. Drench surrounding plants and grass with water and cover with plastic drop cloths. It will kill your grass if you aren’t careful. Trust.
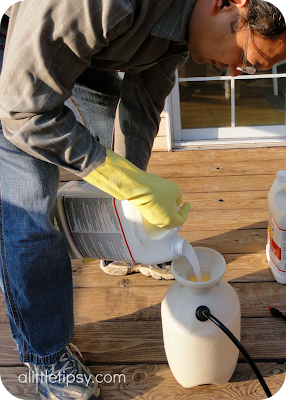
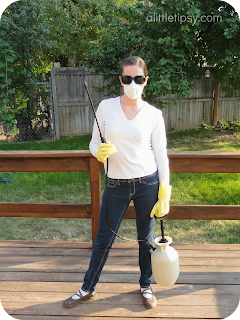
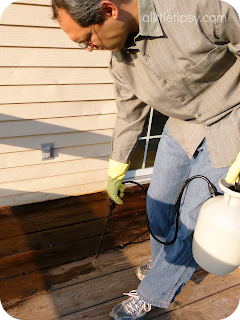
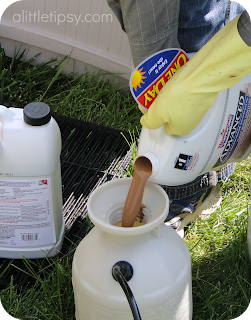
    5. Don your eye protection, gloves, mask, etc. and pour the cleaner in to the sprayer.
    Aren’t you loving my white socks with these shoes? Grubbies + Safety = Awesomeness
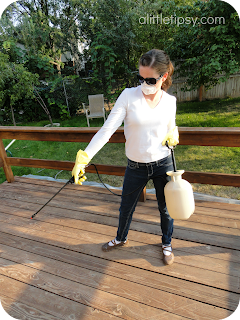
    6. Start spraying in small sections. Let the cleaner work its magic for about 10 minutes and scrub with the synthetic bristle brush if needed to get any residue loose. Only spray as much as you can keep up with without letting it dry completely. It dries fast when it is hot, so start small.
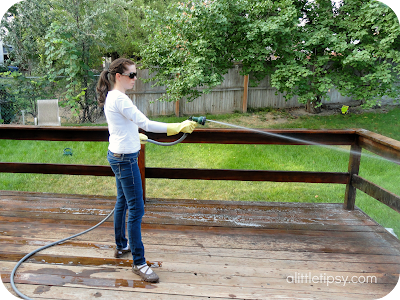
    7. Once it has soaked and been scrubbed if necessary, spray off all the residue. Rinse it really well.
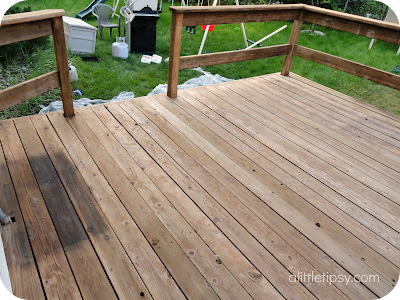
    8. Once it dries a bit you can see if places need more work. You can see we had a spot where a storage bin sat that needed some extra care. Also, the railing on the left got scrubbed really well, but those on the right did not. They were the last to be done and we got lazy. Don’t get lazy. We did the cleaning process on the storage bin spot and half of the railings a second time. 

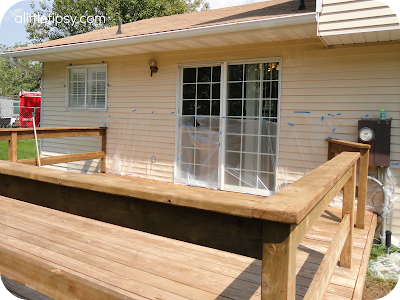
    9. Let the cleaner dry for two hours. While it is drying, rinse your tools and tape up your plastic drop cloths to protect the house and anything else from the tinted waterproofer.

    10. Change the sprayer nozzle to the largest one and pour the waterproofer in to the sprayer.
    There is a lack of waterproofer application pics because it dried so fast there was literally no time for pictures.
    11. Start with the railings so you don’t have to walk over wet stain later. Putting the stain directly on the paint pads to smooth it on worked best for this part. Work fast over small areas because the hotter it is, the faster it dries. Use the brush to get in the corners and nooks. Watch for drips and wipe them up quickly.
    12. Now begin the floor area. Work in a pattern that will have you finishing where you can step off the deck. We tried to use the paint pads with the handle and the pole so we could do it standing but it broke on me three times in the first two minutes so we gave up and used the pad on our hands and knees without the attachments. If it isn’t 90 degrees out so it dries almost instantly you may be able to use them. We found that working so that your shadow is shading the part you are working on was massively helpful. If you have a big canopy you can put over the deck for shade, even better! Spray a small about 2′ x 1′ section and wipe smooth with the paint pad. Do not leave it too thick or it will end up sticky. Also, more coats will not darken the color it will just make it sticky. 
    13. Let it dry for at least a day without traffic praying it doesn’t rain. Remember to turn off auto sprinklers. Clean up all tools and dispose of hazardous leftovers properly. Be sure to carefully drench your grass and plants surrounding with a hose to rinse. Once the deck is dry, move everything back in to place and enjoy!
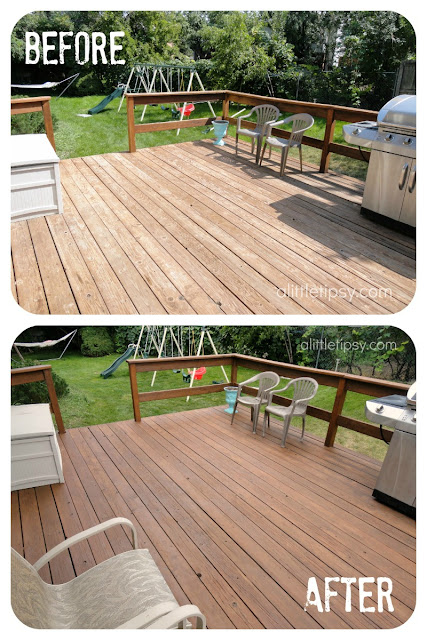
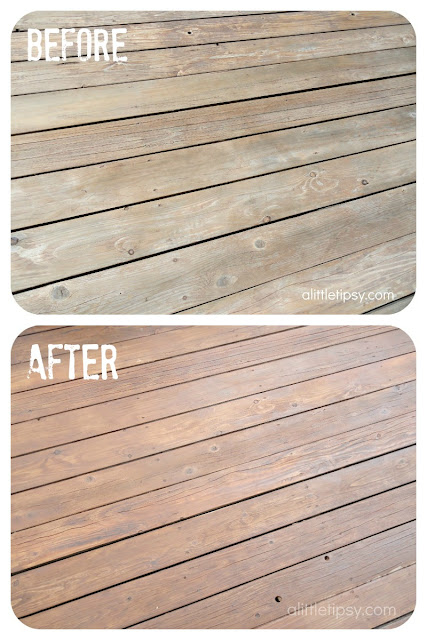
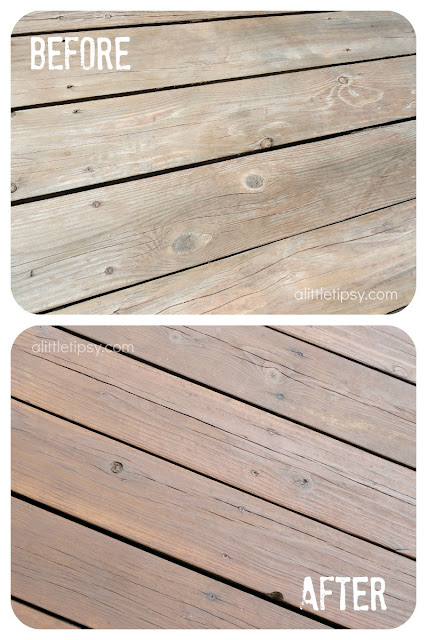
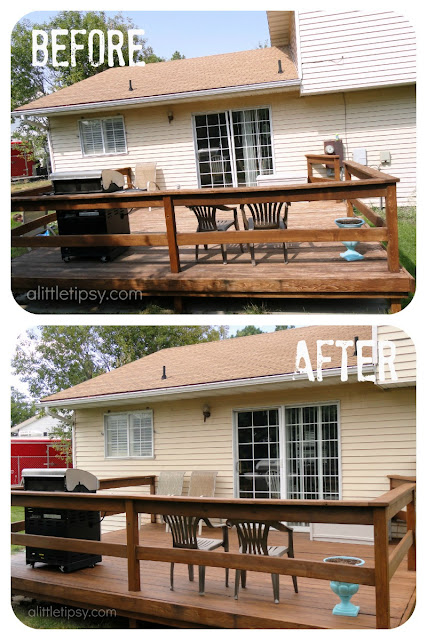
    We used Nutmeg Brown waterproofer and I will admit I was nervous when we got it on. It was WAY more orange than I expected. Luckily, once I got the furniture back on and it sat for a few days the color toned down and so did my nerves.
     
    It looks sooo much better and I am happy that it is protected from the looming Utah weather this fall and winter. 
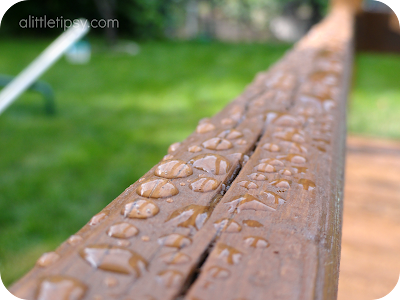
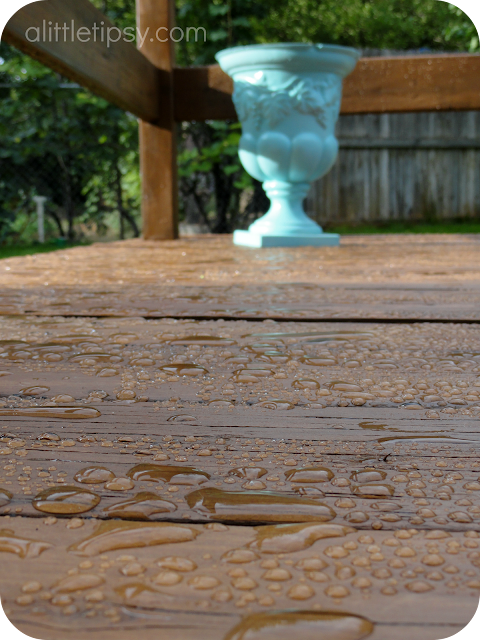
    I can tell you it doesn’t lie when it says waterproofer. It rained nearly every day the week after we put it on and it proved itself right away. We have hard water so you could even see water marks in the spots where big puddles dried.
    One of my kids new favorite activities is to push water off the deck with the rubber squeegee broom.
    I am loving my “new” deck!
    Do have a project looming before fall and winter come?
    Thompson’s provided the product for use and a stipend to cover my costs and time. The work, comments, and sweat were all my own.

    P.S. Don’t forget to sign up for free Tipsy updates via RSS or email.

    We have decided to truncate our feed to help protect against stolen content. I apologize for any inconvenience. Please love us anyway. πŸ™‚

    Bullying

    August 8, 2012 By Michelle Barneck 1 Comment

     
    This post is sponsored by Chase — a strong supporter of the Bully Project, a program committed to ending bullying and ultimately transforming society.  Learn more here.


    Over 13 million American kids will be bullied this year, making it the most common form of harassment experienced by young people in the nation. 

    160,000 kids in the US stay home every day because of bullying. source

    The stories are heartbreaking. Kids being bullied not only by their peers, but some even by teachers.

    So, what can we do? How can we help?

    The good news is there are tons of great resources for ourselves, schools and communities to get involved for change.

    image source


    Bullying Resources:

    Community Strategies to stop bullying – Stopbullying.gov

    New York Teacher Paper Object Lesson

    Anonymous tip line for schools – Safetotalk.org

    Kidpower.org:

    • Bullying Facts and Solutions
    • Face Bullying with Confidence: Eight Skills Kids Can Use Right Away
    Stompoutbullying.com
    • tip sheets for caregivers and teachers
    • hotline for bullied kids
    • pledge to stomp out bullying
        
    Image source
    Help where you can. Use your voice. Be the good. 
    Keep kids safe.

    We have decided to truncate our feed to help protect against stolen content. I apologize for any inconvenience. Please love us anyway. πŸ™‚
    « Previous Page
    Next Page »

    • Bloglovin
    • Facebook
    • Google+
    • Instagram
    • Pinterest
    • RSS
    • Twitter

    Hi there! I'm Michelle. Mother of three little boys and one little princess. Welcome to A Little Tipsy, a place for exploring creativity and sharing inspiration.

    Follow on Bloglovin


    Visit Michelle Barneck {A Little Tipsy}'s profile on Pinterest.

    Tutorials by Category


    15 Family Reunion Games

    Family Reunion Games Collage

    15 Sprinkle Party Ideas

    Sprinkle Birthday Party
    Creative Commons License

    © Copyright 2014 A Little Tipsy · Site Designed by The Fairy Blogmother · Web Hosting by RFE Hosting

    This website uses cookies to improve your experience. We'll assume you're ok with this, but you can opt-out if you wish.Accept Read More
    Privacy & Cookies Policy