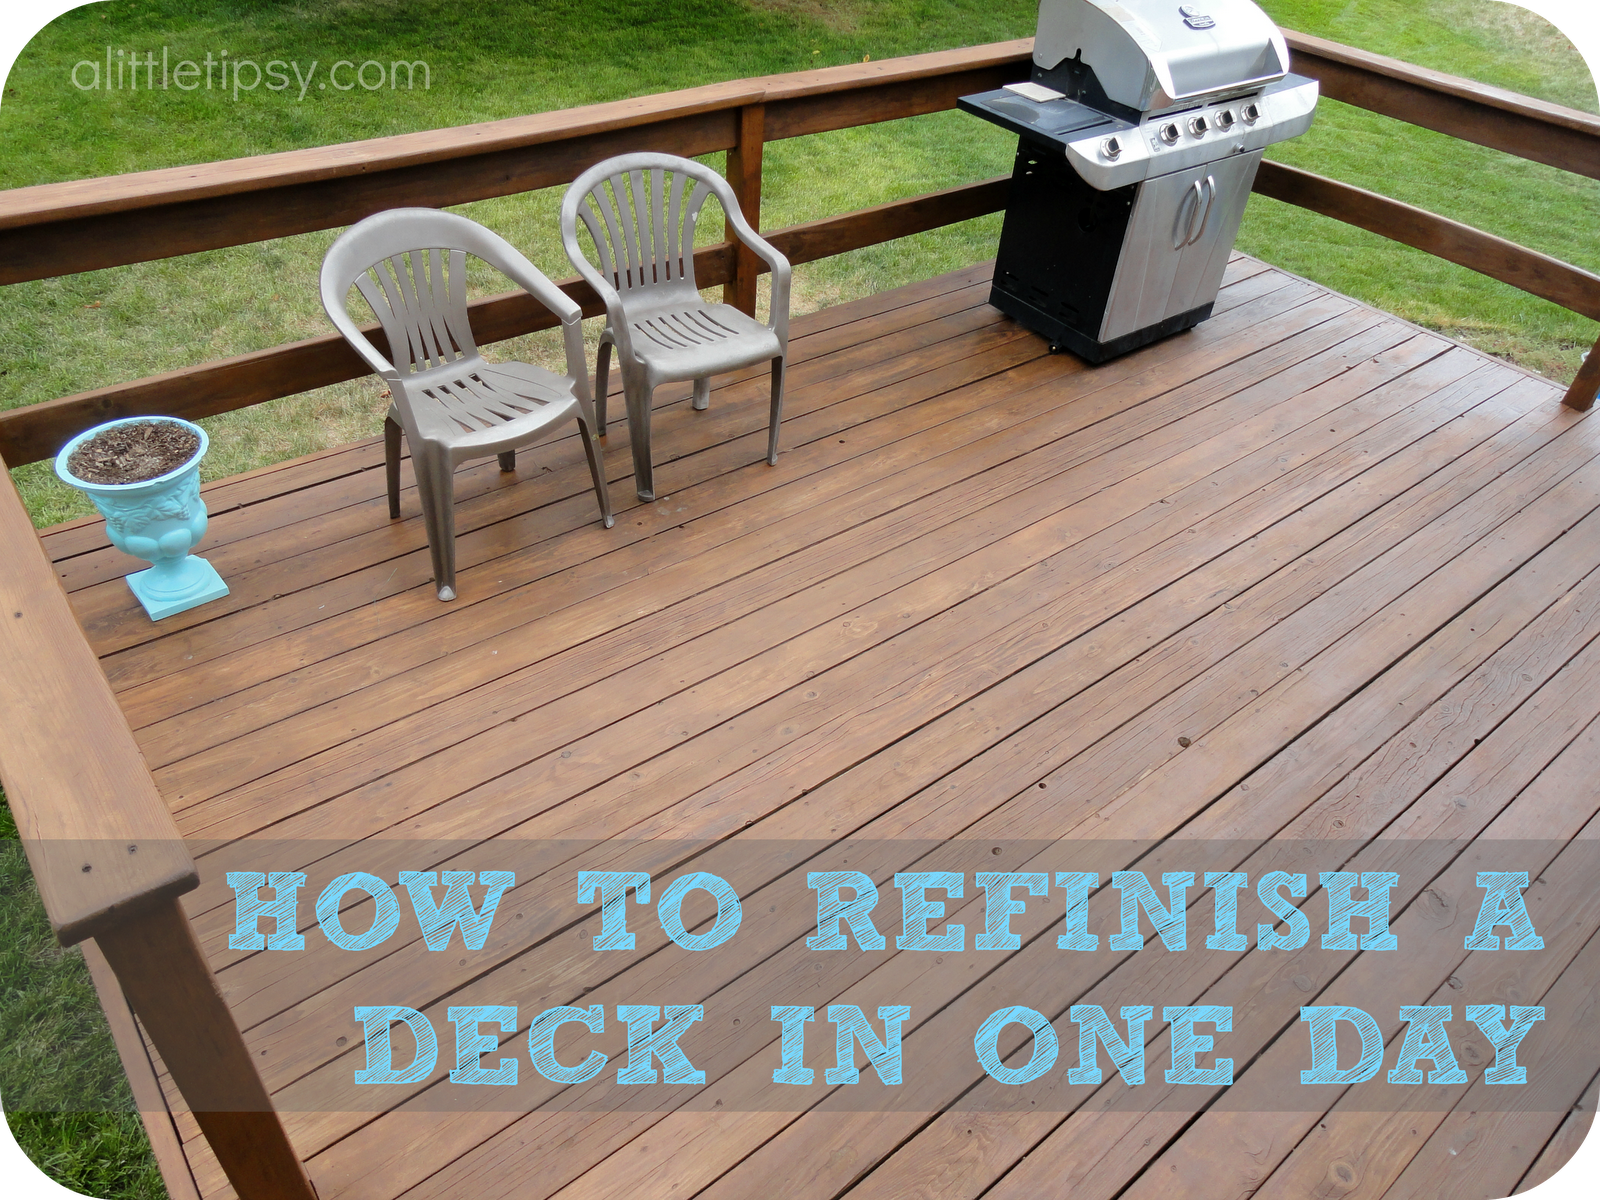
Refinish a deck in one day? Seems like a myth right. Not so, you can for reals. You just need the right tools, the right weather and the right help. Two of us completed this project in about 11 hours including 4 hours of wait time between steps.
We actually split it up and did two hours of the work with the deck cleaner (and the two hour wait time) the night before so that we could make use of the cooler hours. The next morning we started at 7:30 am and were done at 2:30 pm (that’s counting one of us driving/feeding kids for couple of hours) so you could still easily do it all in one day. We also knew that with both my husband and I having strong personalities in tiring situations it might be good to break it up a bit. 😉
Keep in mind that most of our deck stain had worn off. If your deck is painted or has thick stain this process may be different for you and you may want to refer to our other deck tutorial when we stripped awful cracked barn red paint.

First off, research what deck cleaner and stain/waterproofer will be best for the look you want. Thompson’s has a fantastic project planner guide that will help you find what is right for you based on your deck’s existing condition and how you want it to look.
Since the stain on my deck was mostly gone I used Thompson’s Heavy Duty Deck Cleaner to strip and clean without sanding. I wanted a semi-transparent look with good wear that could be done the same day as cleaning so I chose Thompson’s WaterSeal Advanced Tinted Wood Protector.


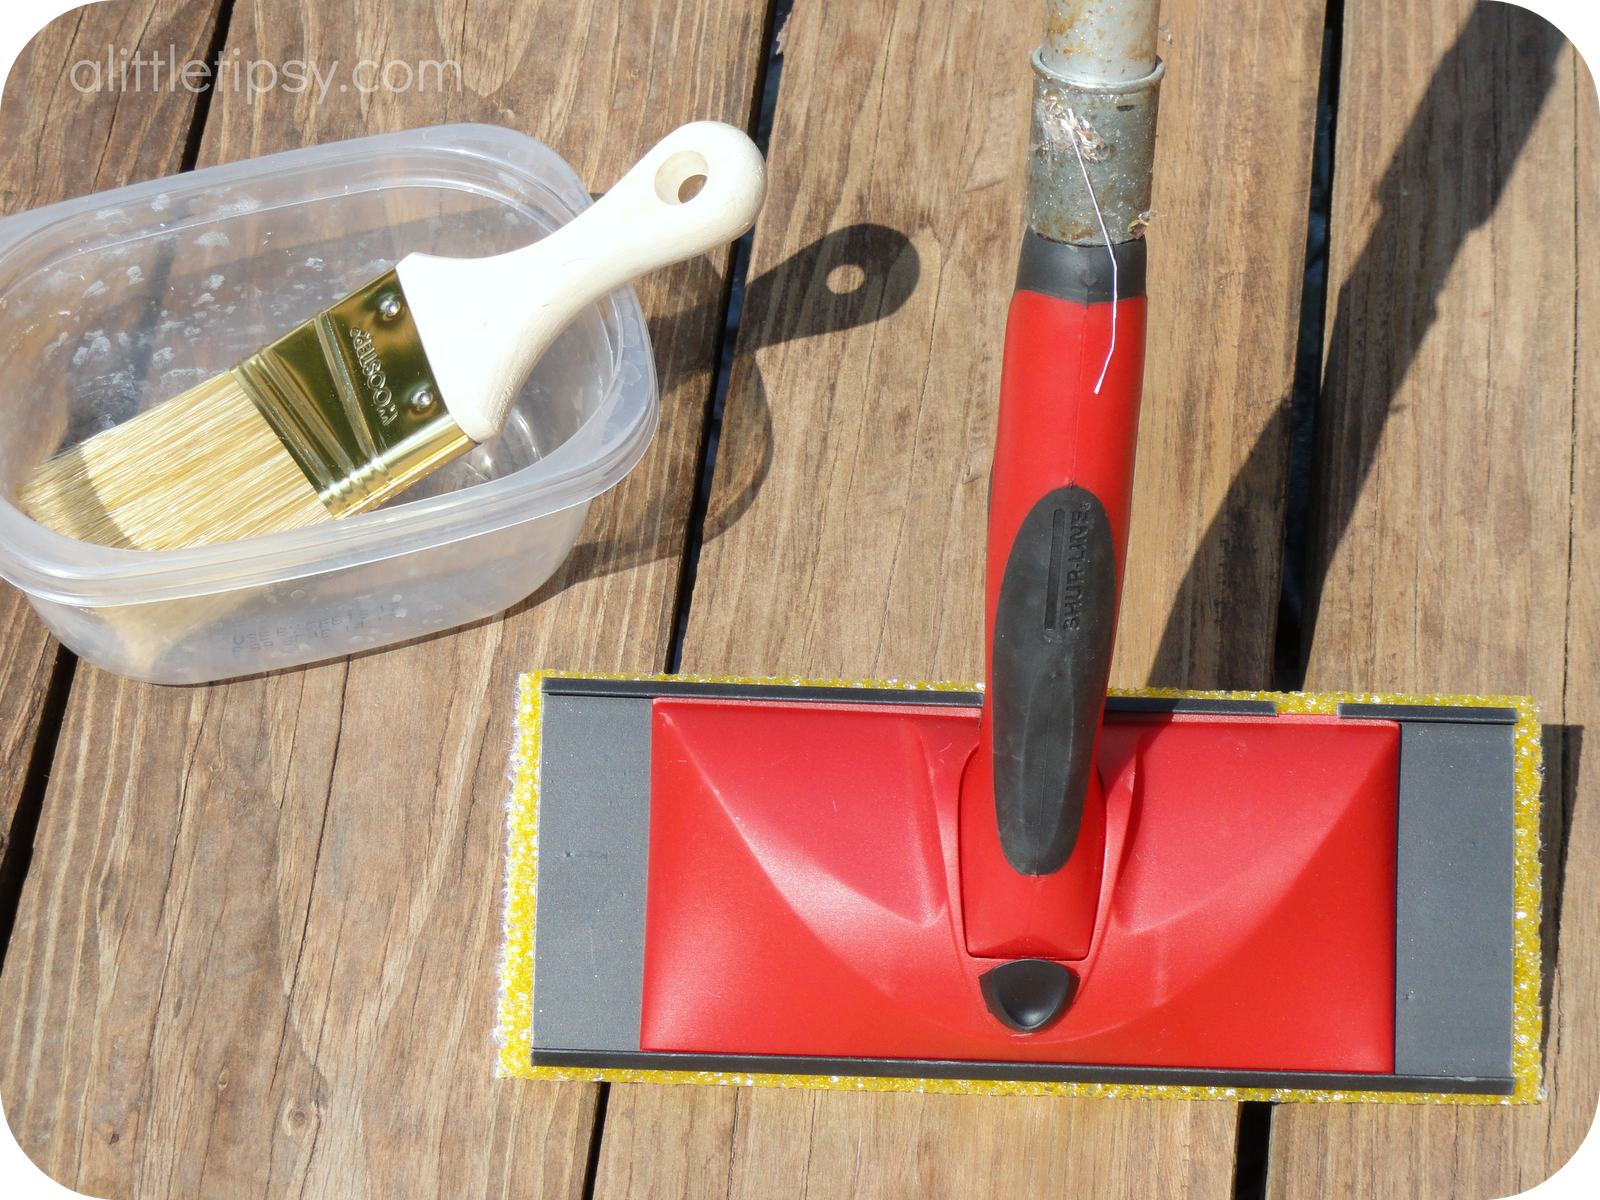
SUPPLIES:
Read the instructions on your bottles thoroughly and decide what tools will work best for you:
- Long sleeves, pants and shoes (cover as much skin as possible)
- Eye protection
- Rubber Gloves
- Masks (for spraying cleaner)
- Deck sprayer (designed for decks with multiple sized nozzles for cleaner and stain, mine was about $13 at Lowe’s)
- Synthetic bristle brush
- Thompson’s Heavy Duty Deck Cleaner
- Hose with spray nozzle head
- Plastic drop cloths (dollar store ones are fine, I used about 5)
- Painter’s tape
- Thompson’s WaterSeal Advanced Tinted Wood Protector
- Paint pads (thought I’d use the pole & handle, but just used the pad itself)
- Paint brush meant for stain
- Small plastic container
- Knee pads (optional)
- Babysitter (easier with small kiddos gone and away from hazardous items)
DIRECTIONS:
1. Check the weather and make sure there is no rain planned for the next 2 or 3 days.
2. Start as early in the morning as possible so you can make use of the cooler temperatures.
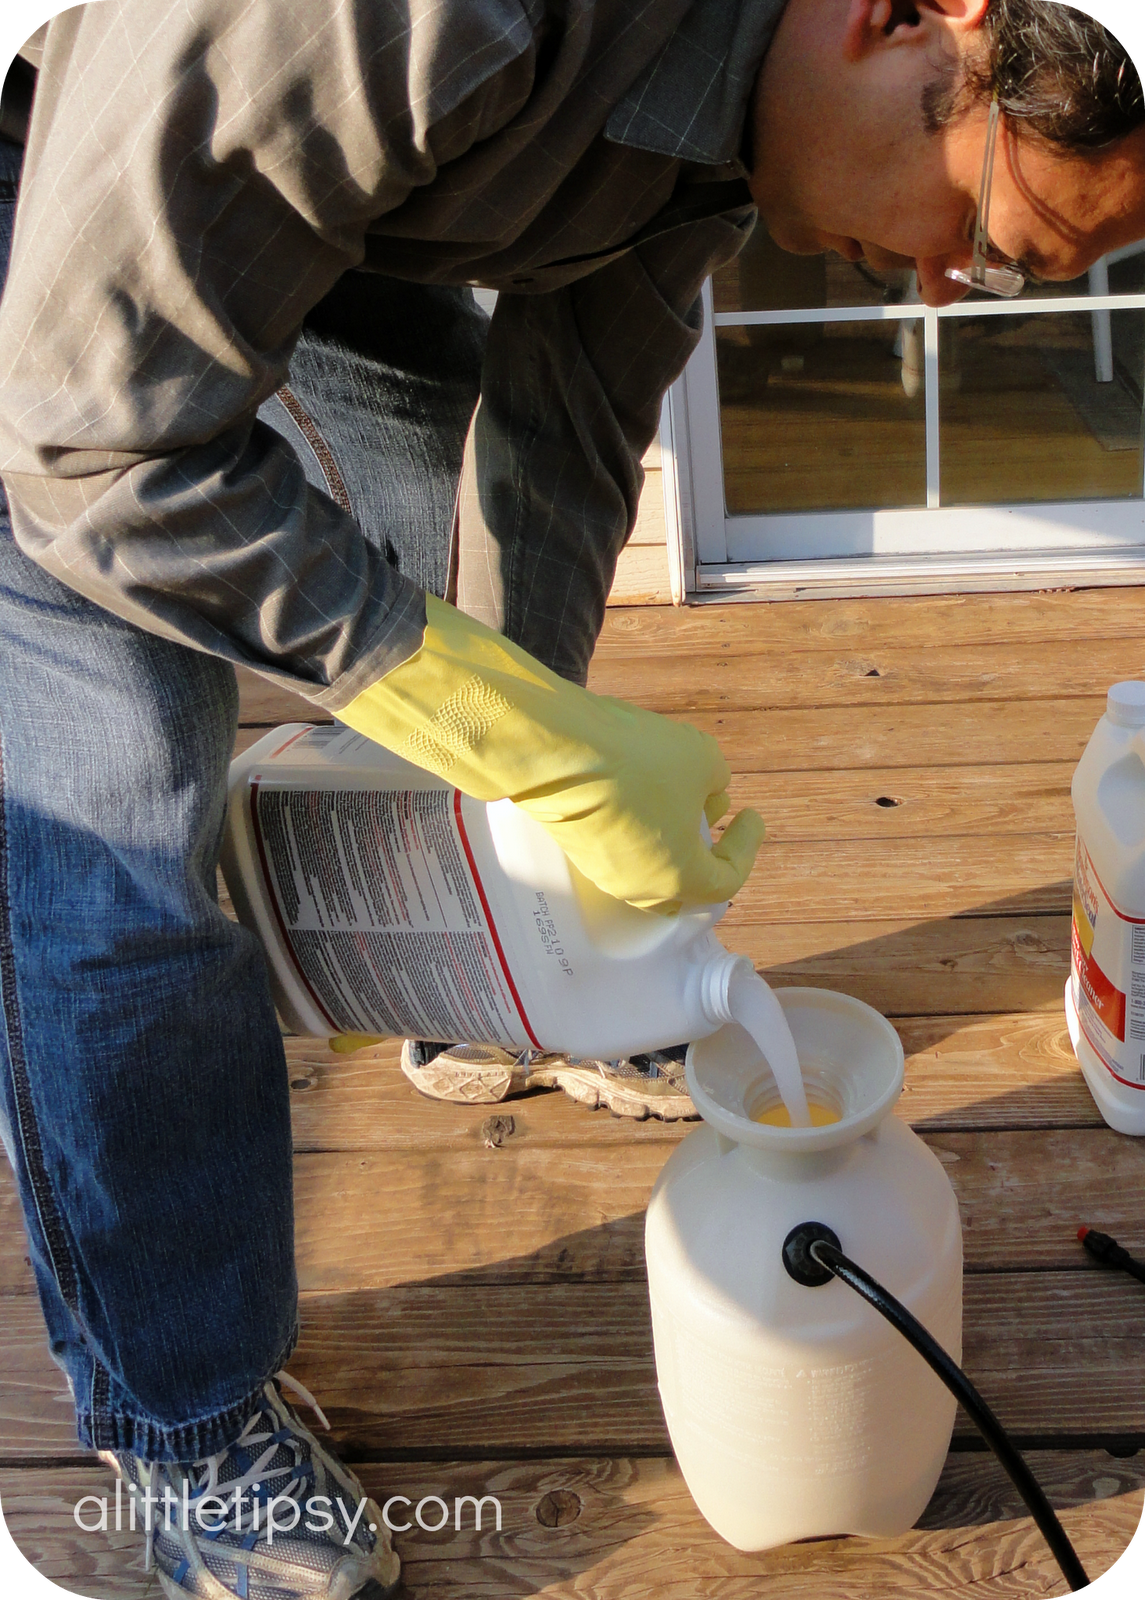
3. Gather all your supplies and put the cleaner nozzle on the sprayer.
4. Clear everything off the deck and sweep off large debris. Drench surrounding plants and grass with water and cover with plastic drop cloths. It will kill your grass if you aren’t careful. Trust.
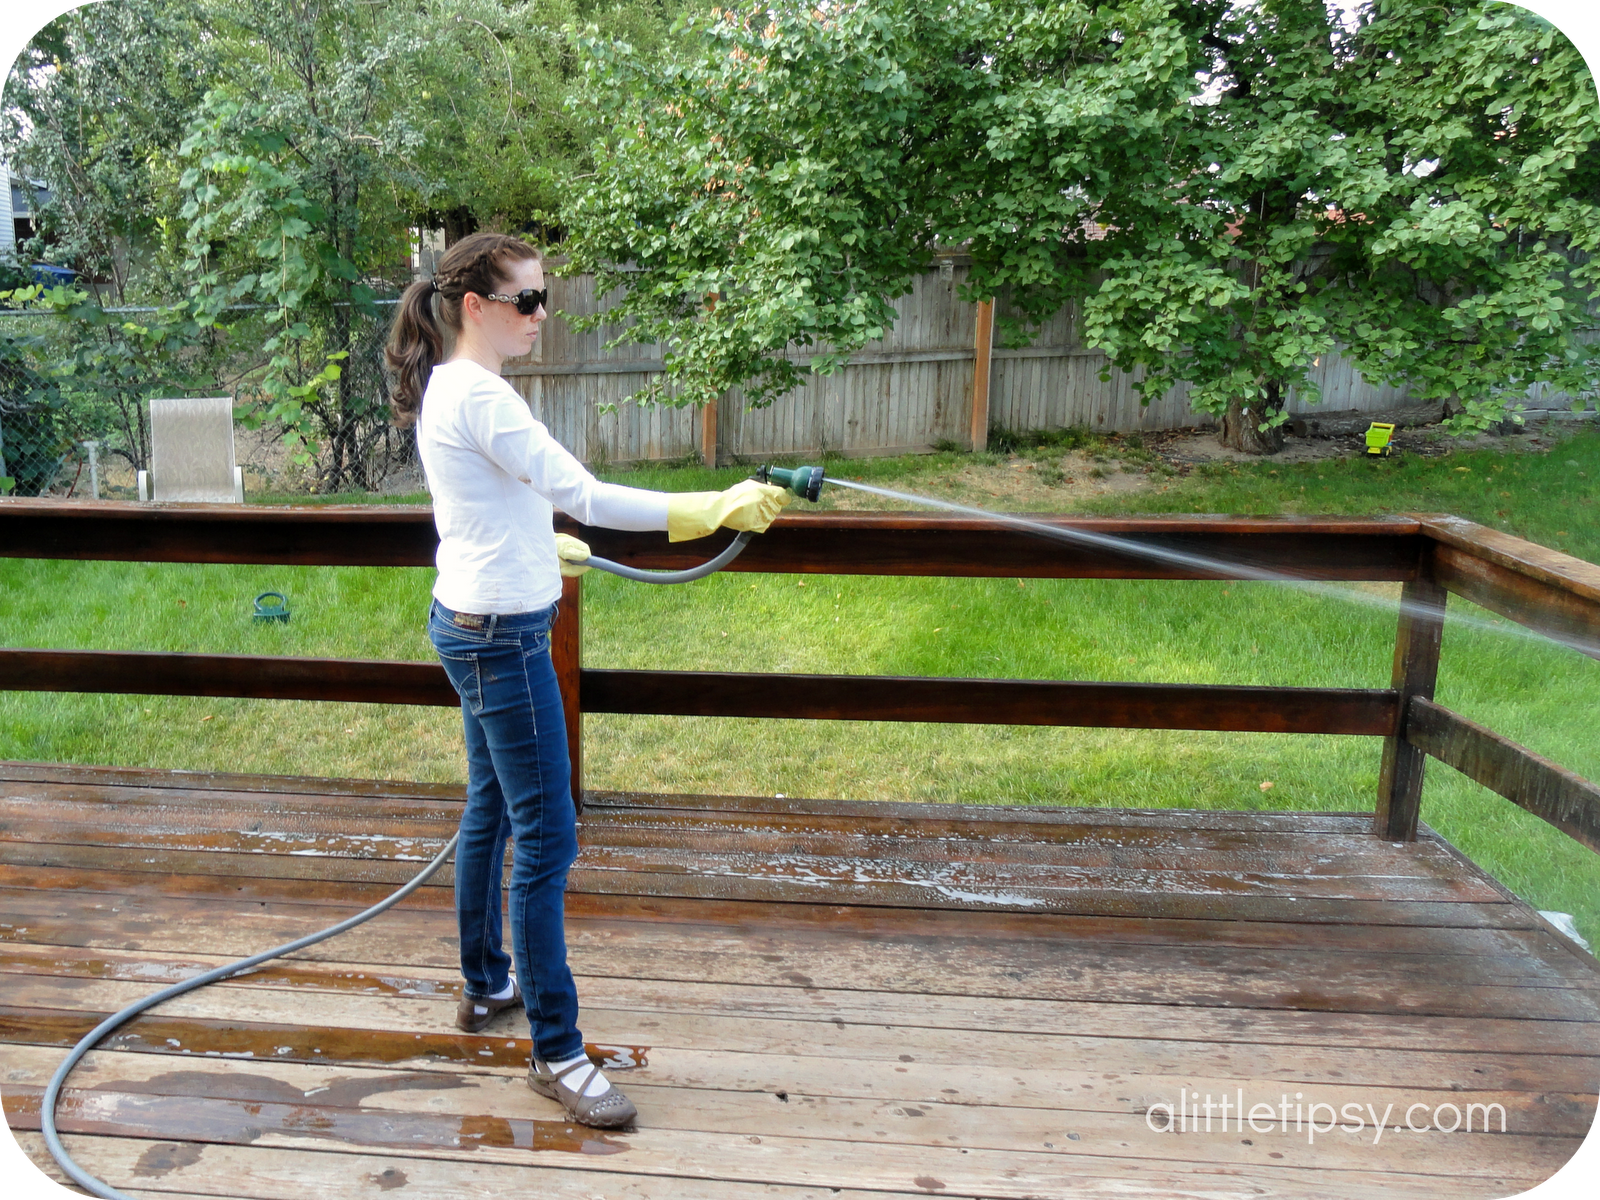
5. Don your eye protection, gloves, mask, etc. and pour the cleaner in to the sprayer.
Aren’t you loving my white socks with these shoes? Grubbies + Safety = Awesomeness


6. Start spraying in small sections. Let the cleaner work its magic for about 10 minutes and scrub with the synthetic bristle brush if needed to get any residue loose. Only spray as much as you can keep up with without letting it dry completely. It dries fast when it is hot, so start small.
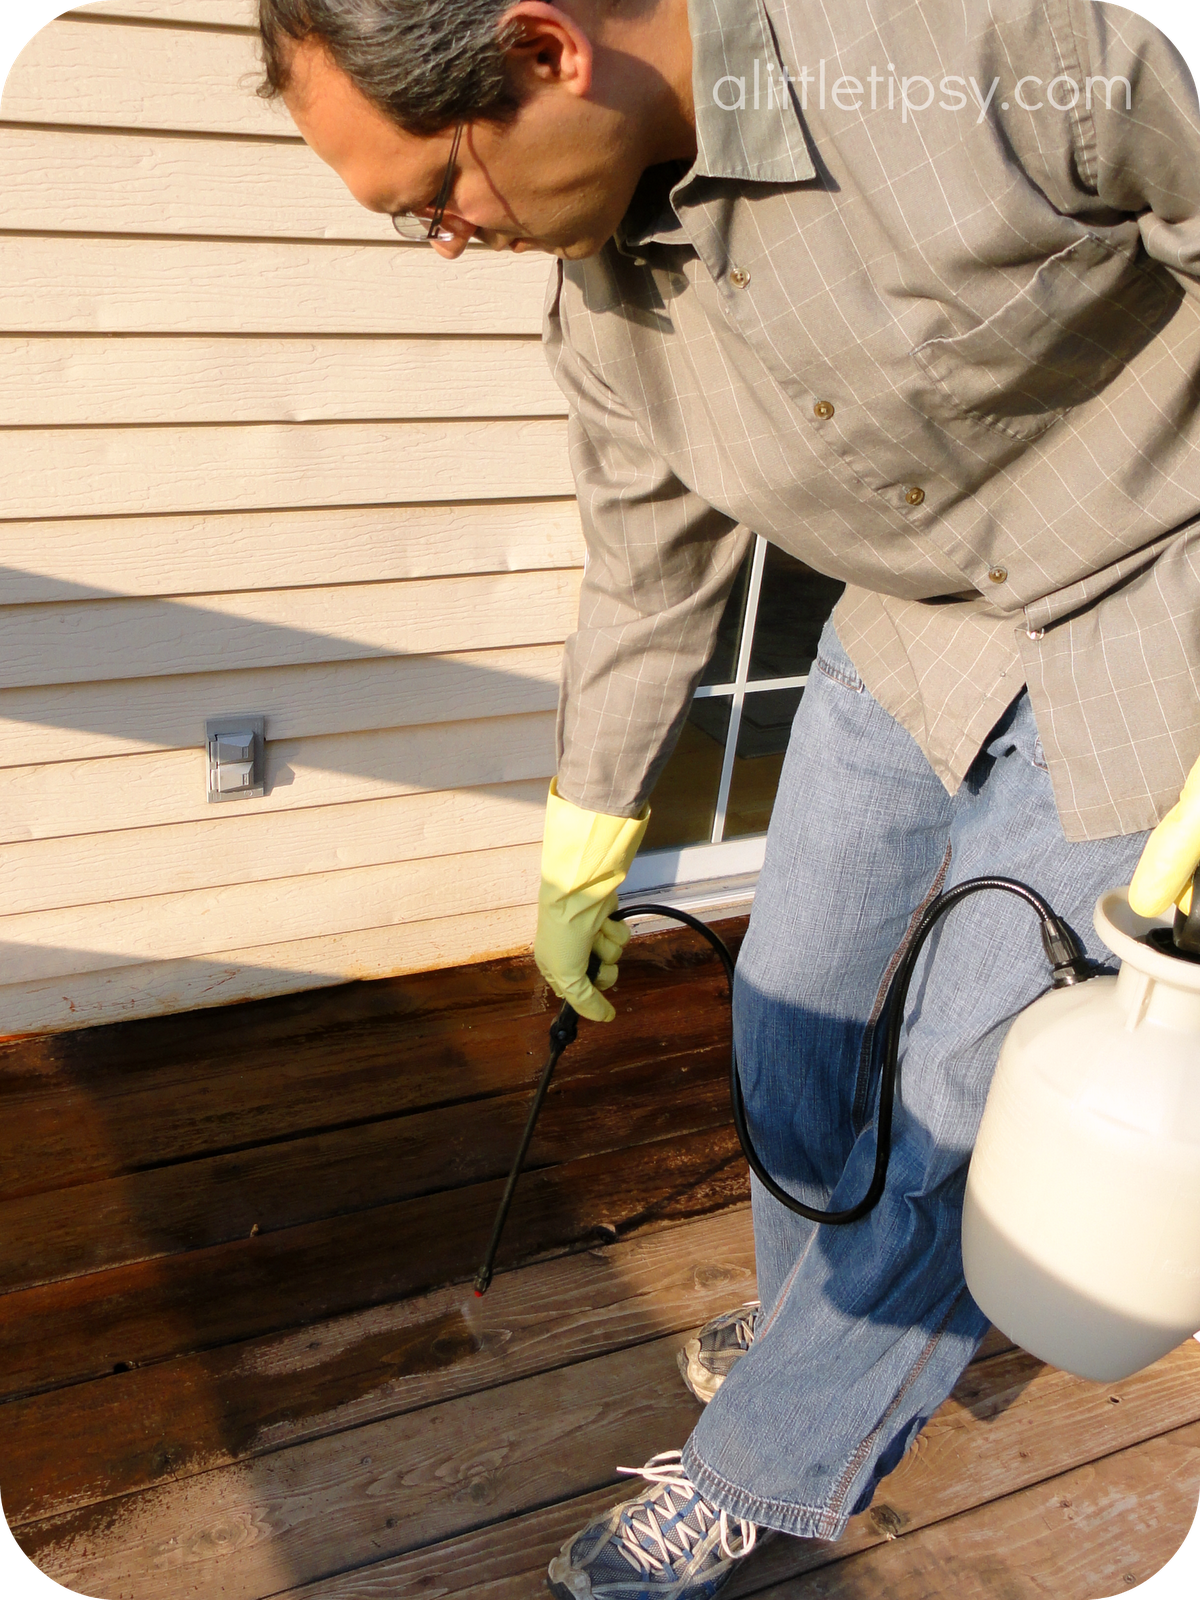
7. Once it has soaked and been scrubbed if necessary, spray off all the residue. Rinse it really well.
8. Once it dries a bit you can see if places need more work. You can see we had a spot where a storage bin sat that needed some extra care. Also, the railing on the left got scrubbed really well, but those on the right did not. They were the last to be done and we got lazy. Don’t get lazy. We did the cleaning process on the storage bin spot and half of the railings a second time.
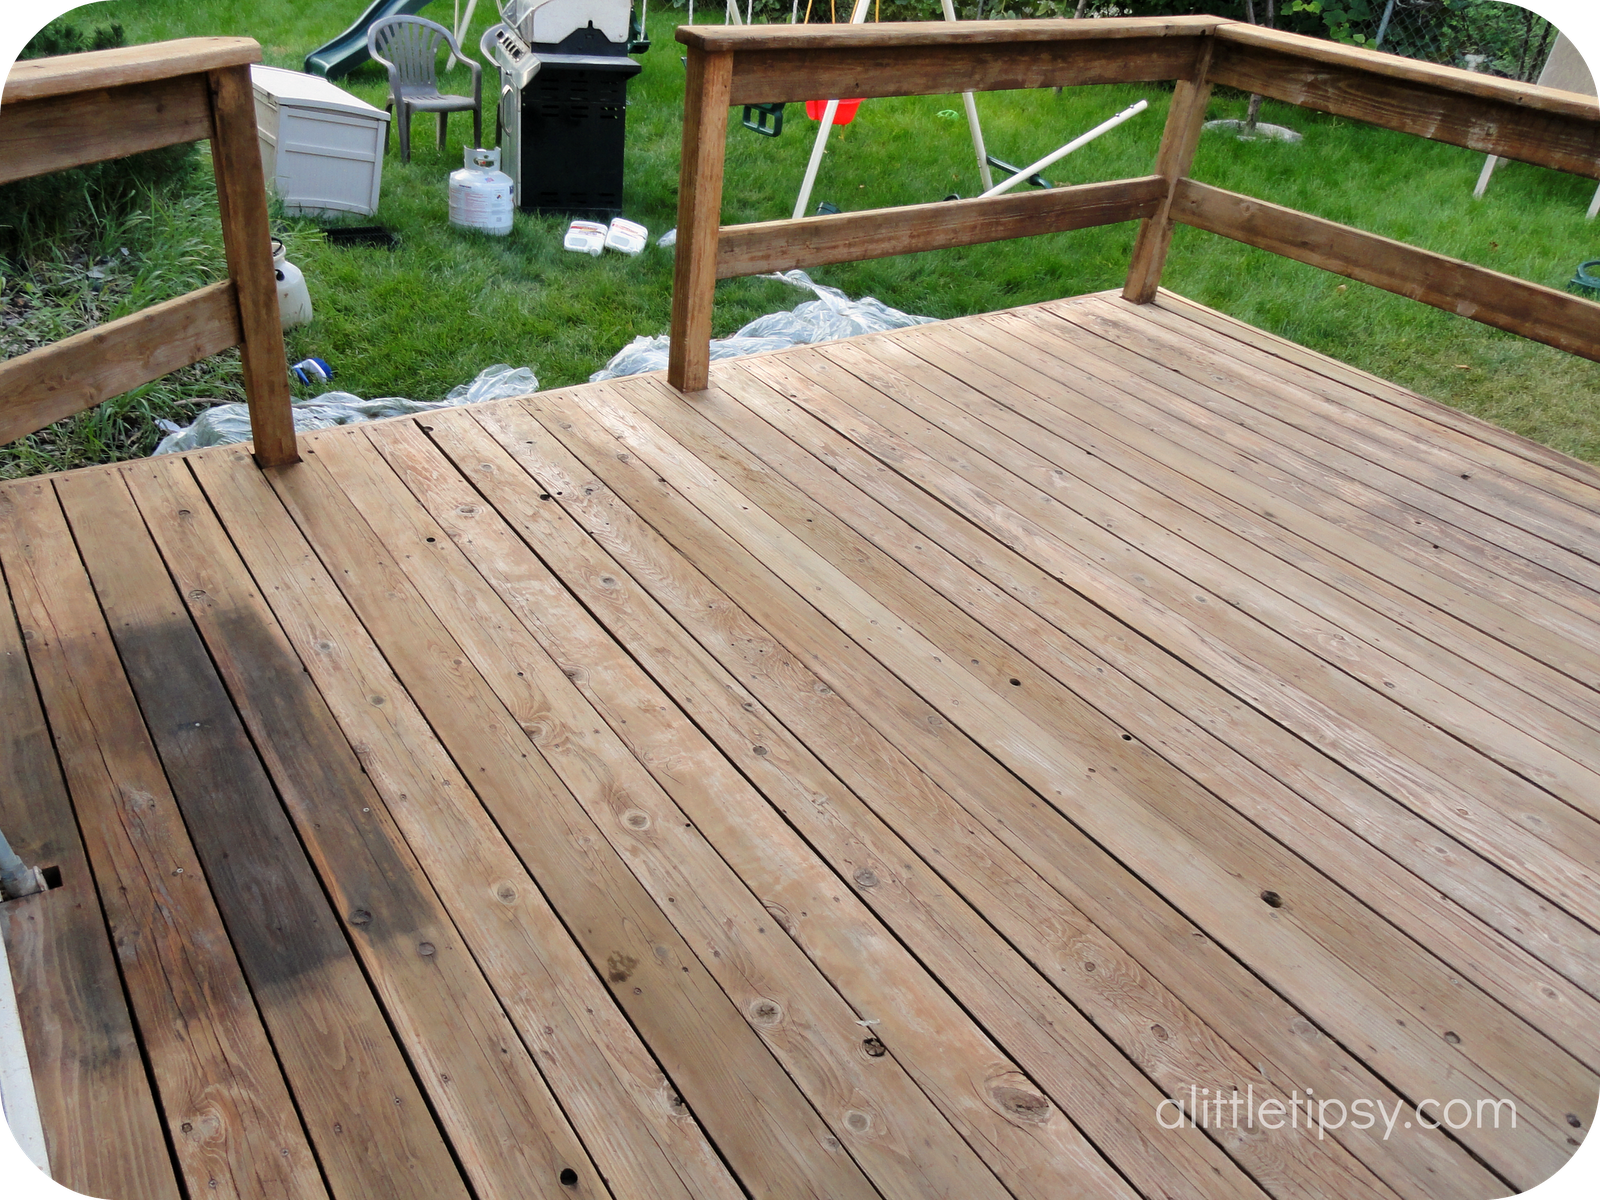
9. Let the cleaner dry for two hours. While it is drying, rinse your tools and tape up your plastic drop cloths to protect the house and anything else from the tinted waterproofer.
10. Change the sprayer nozzle to the largest one and pour the waterproofer in to the sprayer.
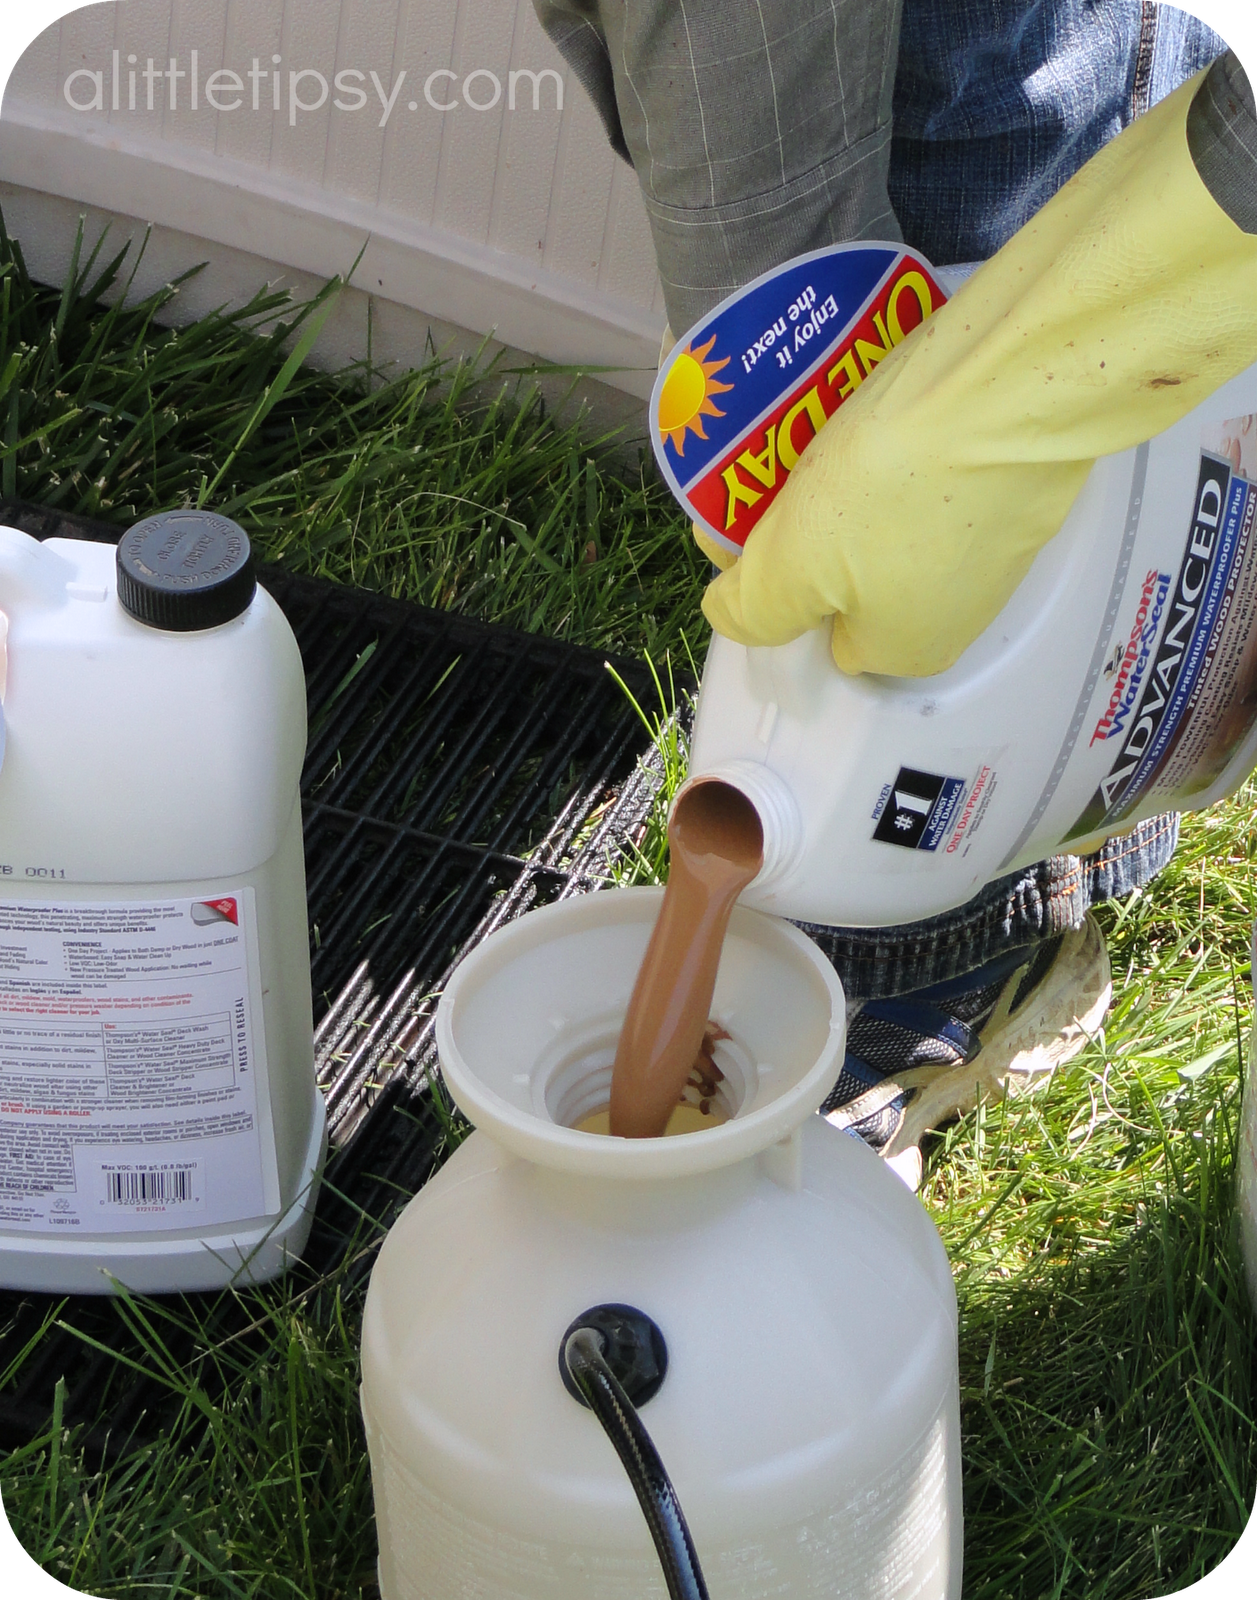
There is a lack of waterproofer application pics because it dried so fast there was literally no time for pictures.
11. Start with the railings so you don’t have to walk over wet stain later. Putting the stain directly on the paint pads to smooth it on worked best for this part. Work fast over small areas because the hotter it is, the faster it dries. Use the brush to get in the corners and nooks. Watch for drips and wipe them up quickly.
12. Now begin the floor area. Work in a pattern that will have you finishing where you can step off the deck. We tried to use the paint pads with the handle and the pole so we could do it standing but it broke on me three times in the first two minutes so we gave up and used the pad on our hands and knees without the attachments. If it isn’t 90 degrees out so it dries almost instantly you may be able to use them. We found that working so that your shadow is shading the part you are working on was massively helpful. If you have a big canopy you can put over the deck for shade, even better! Spray a small about 2′ x 1′ section and wipe smooth with the paint pad. Do not leave it too thick or it will end up sticky. Also, more coats will not darken the color it will just make it sticky.
13. Let it dry for at least a day without traffic praying it doesn’t rain. Remember to turn off auto sprinklers. Clean up all tools and dispose of hazardous leftovers properly. Be sure to carefully drench your grass and plants surrounding with a hose to rinse. Once the deck is dry, move everything back in to place and enjoy!
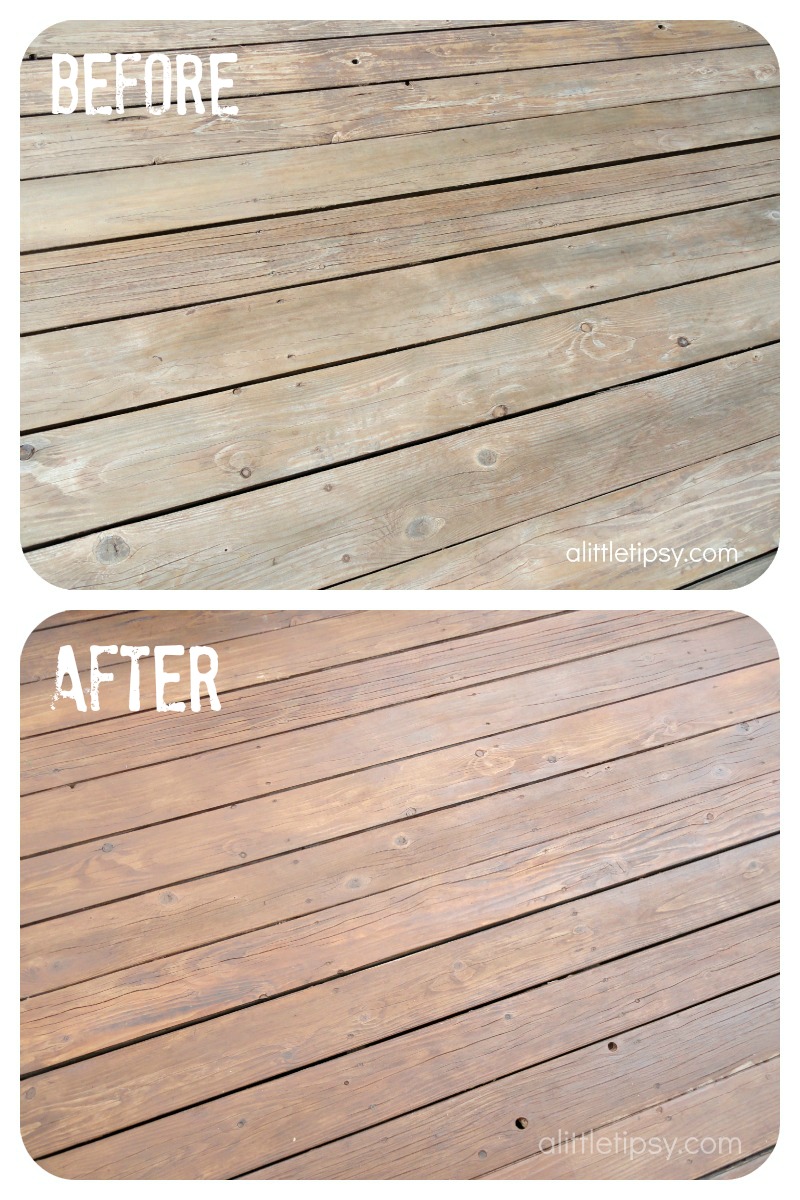
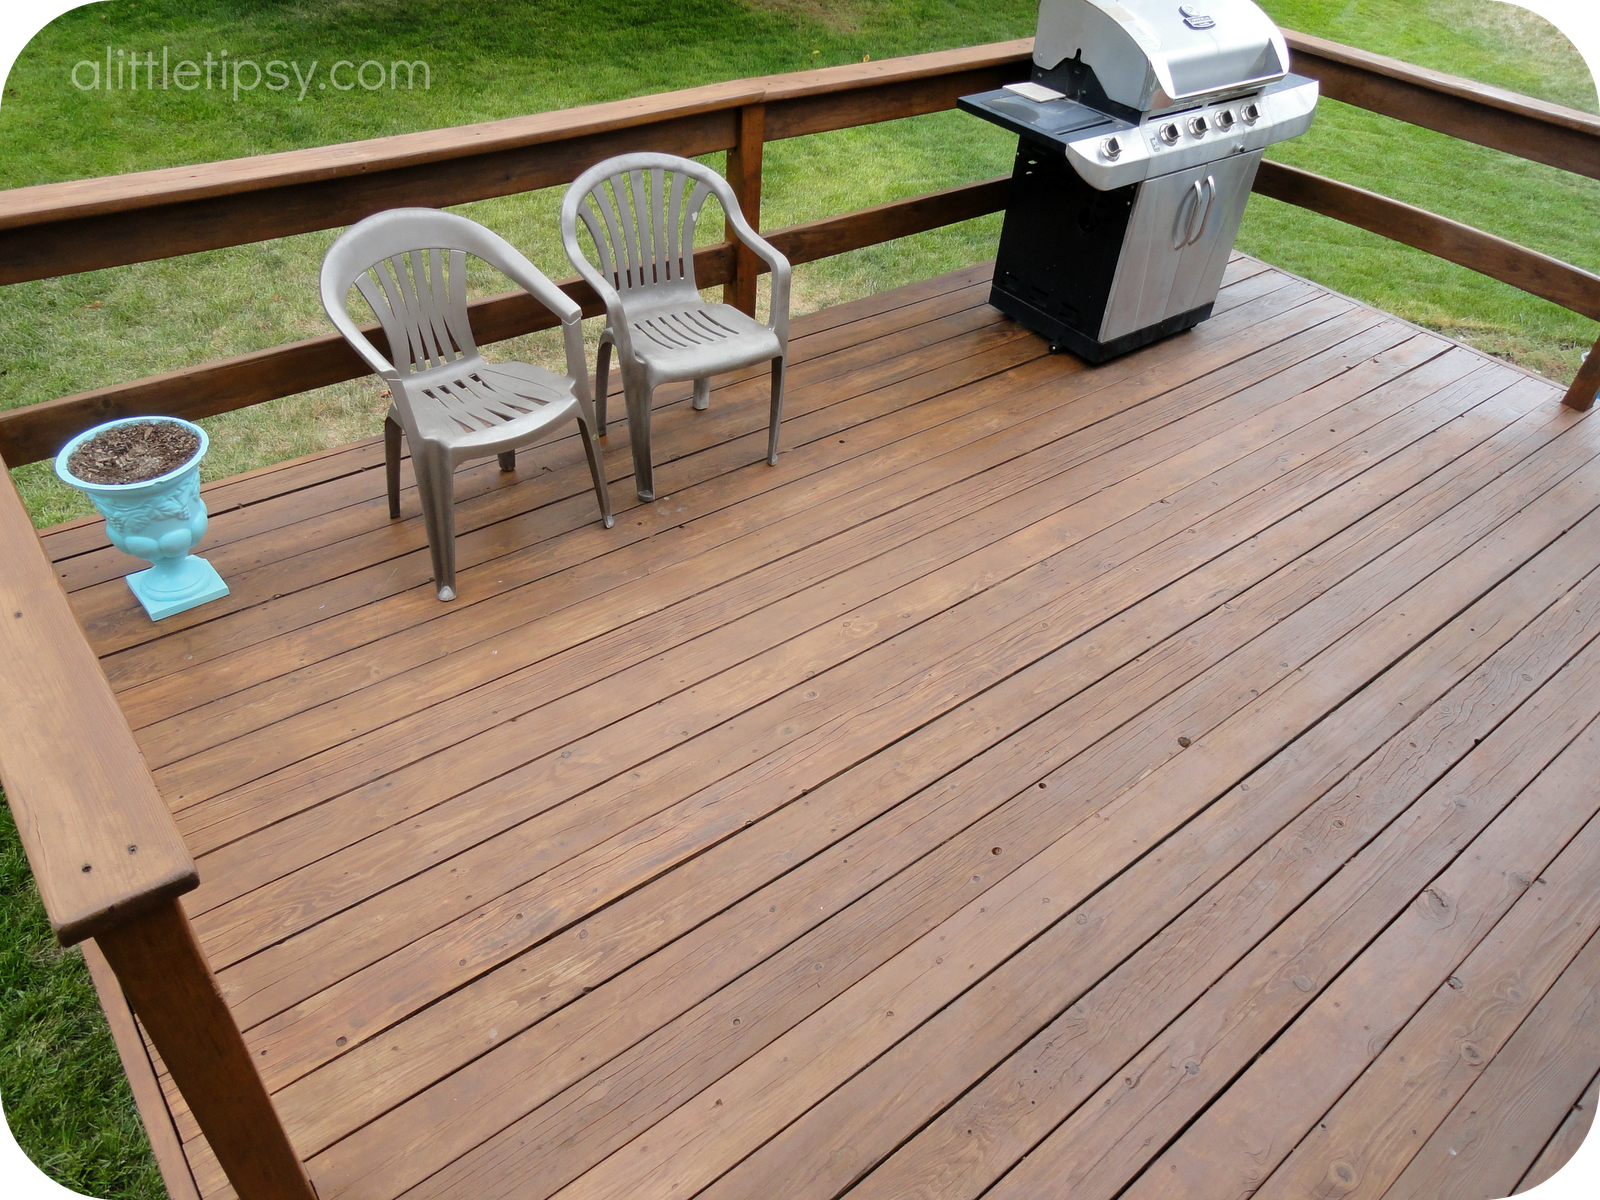
We used Nutmeg Brown waterproofer and I will admit I was nervous when we got it on. It was WAY more orange than I expected. Luckily, once I got the furniture back on and it sat for a few days the color toned down and so did my nerves.
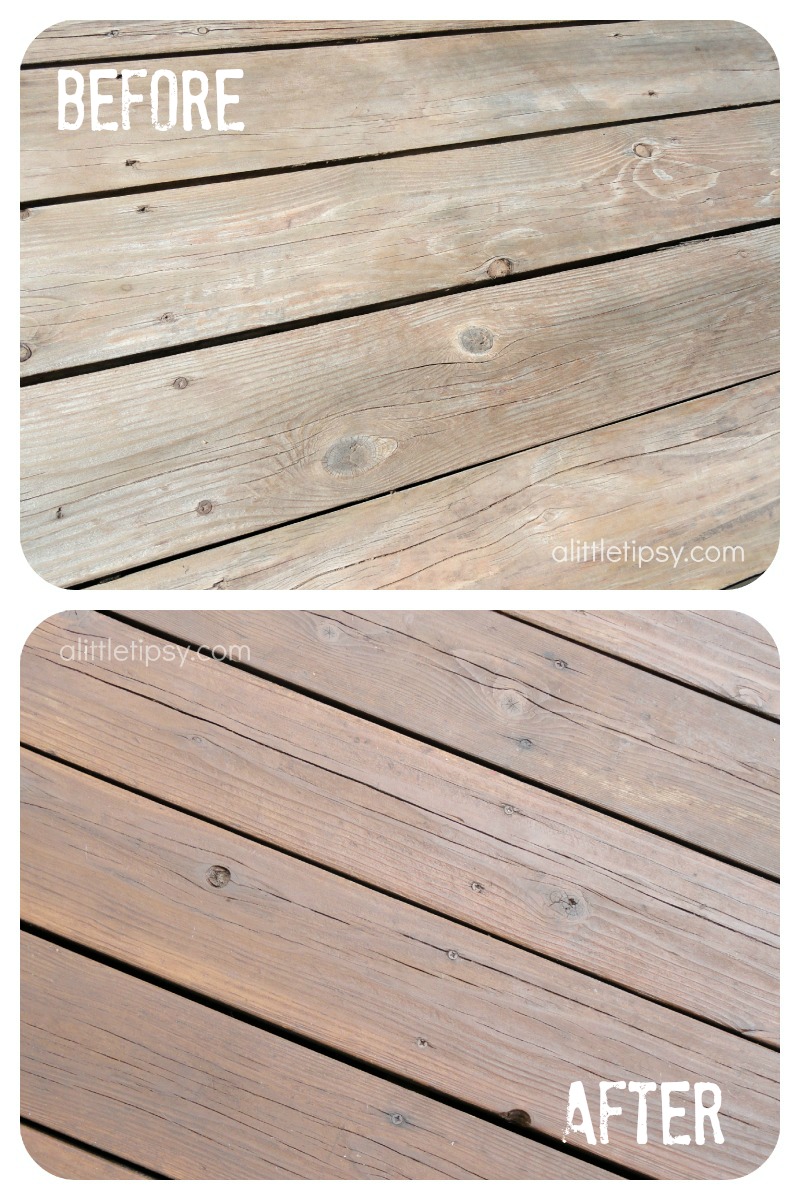
It looks sooo much better and I am happy that it is protected from the looming Utah weather this fall and winter.

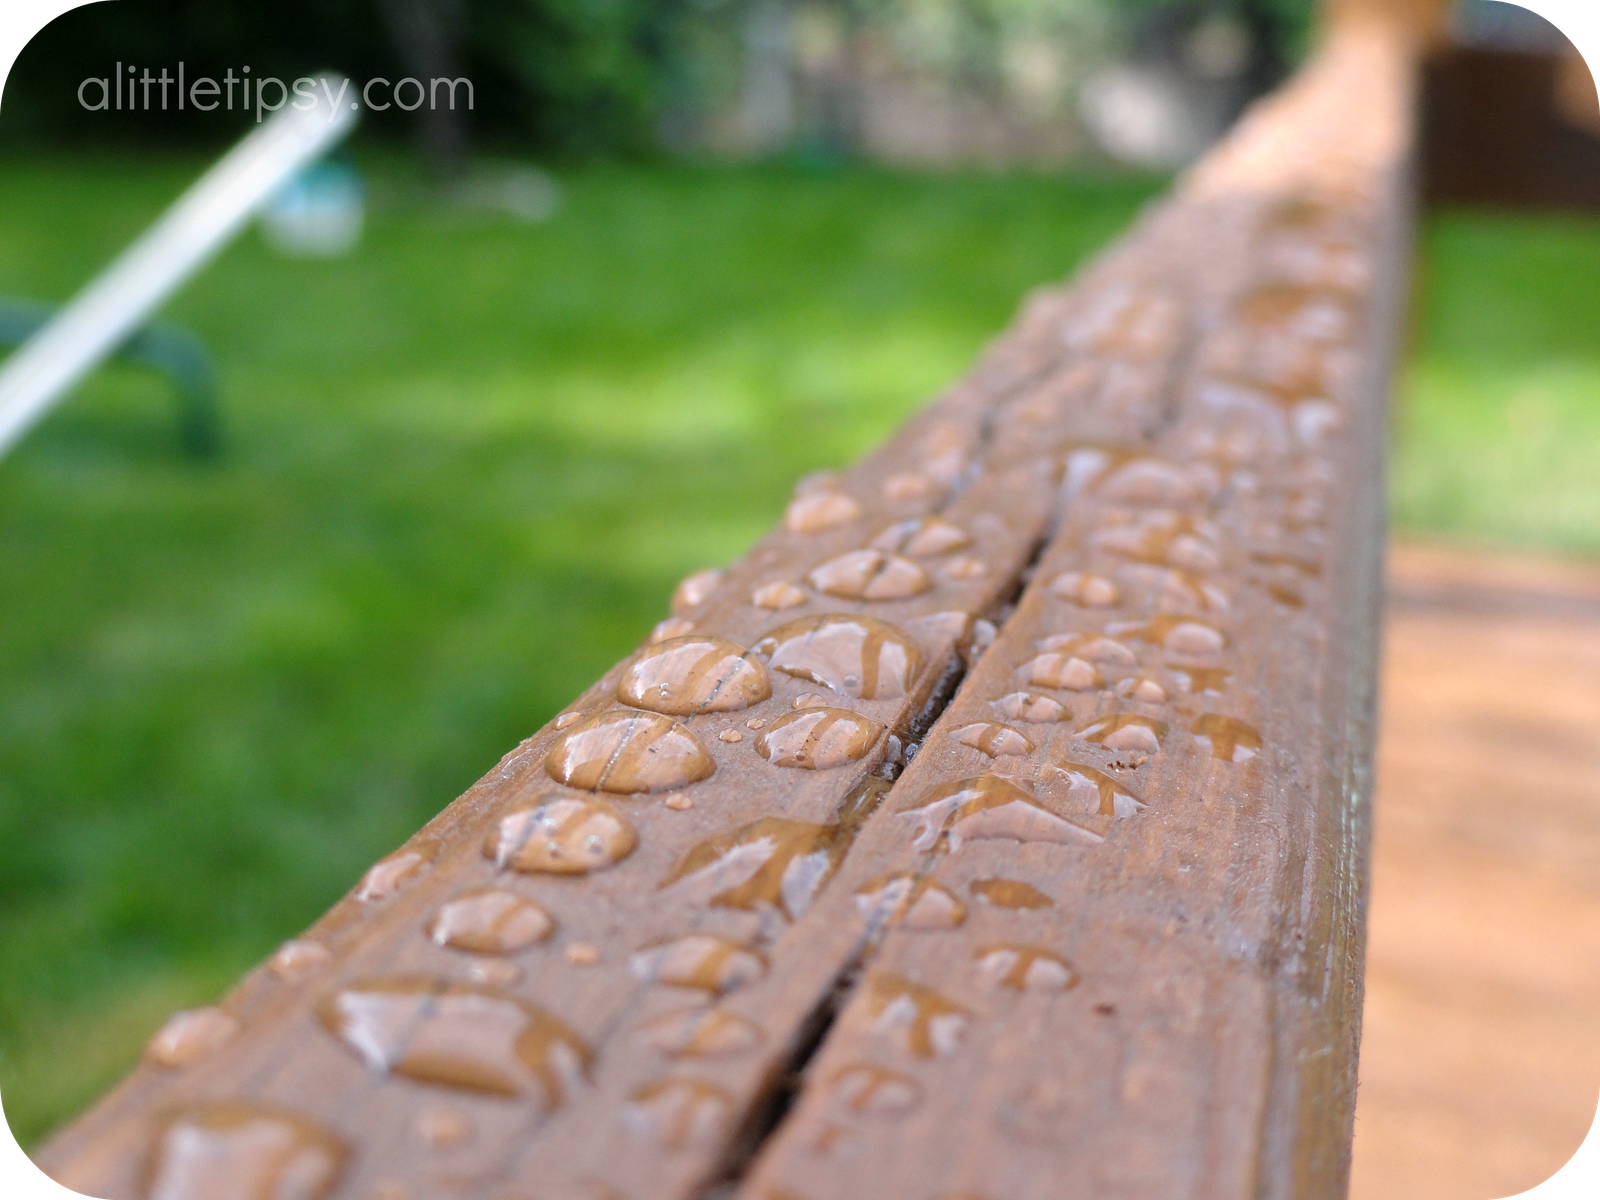
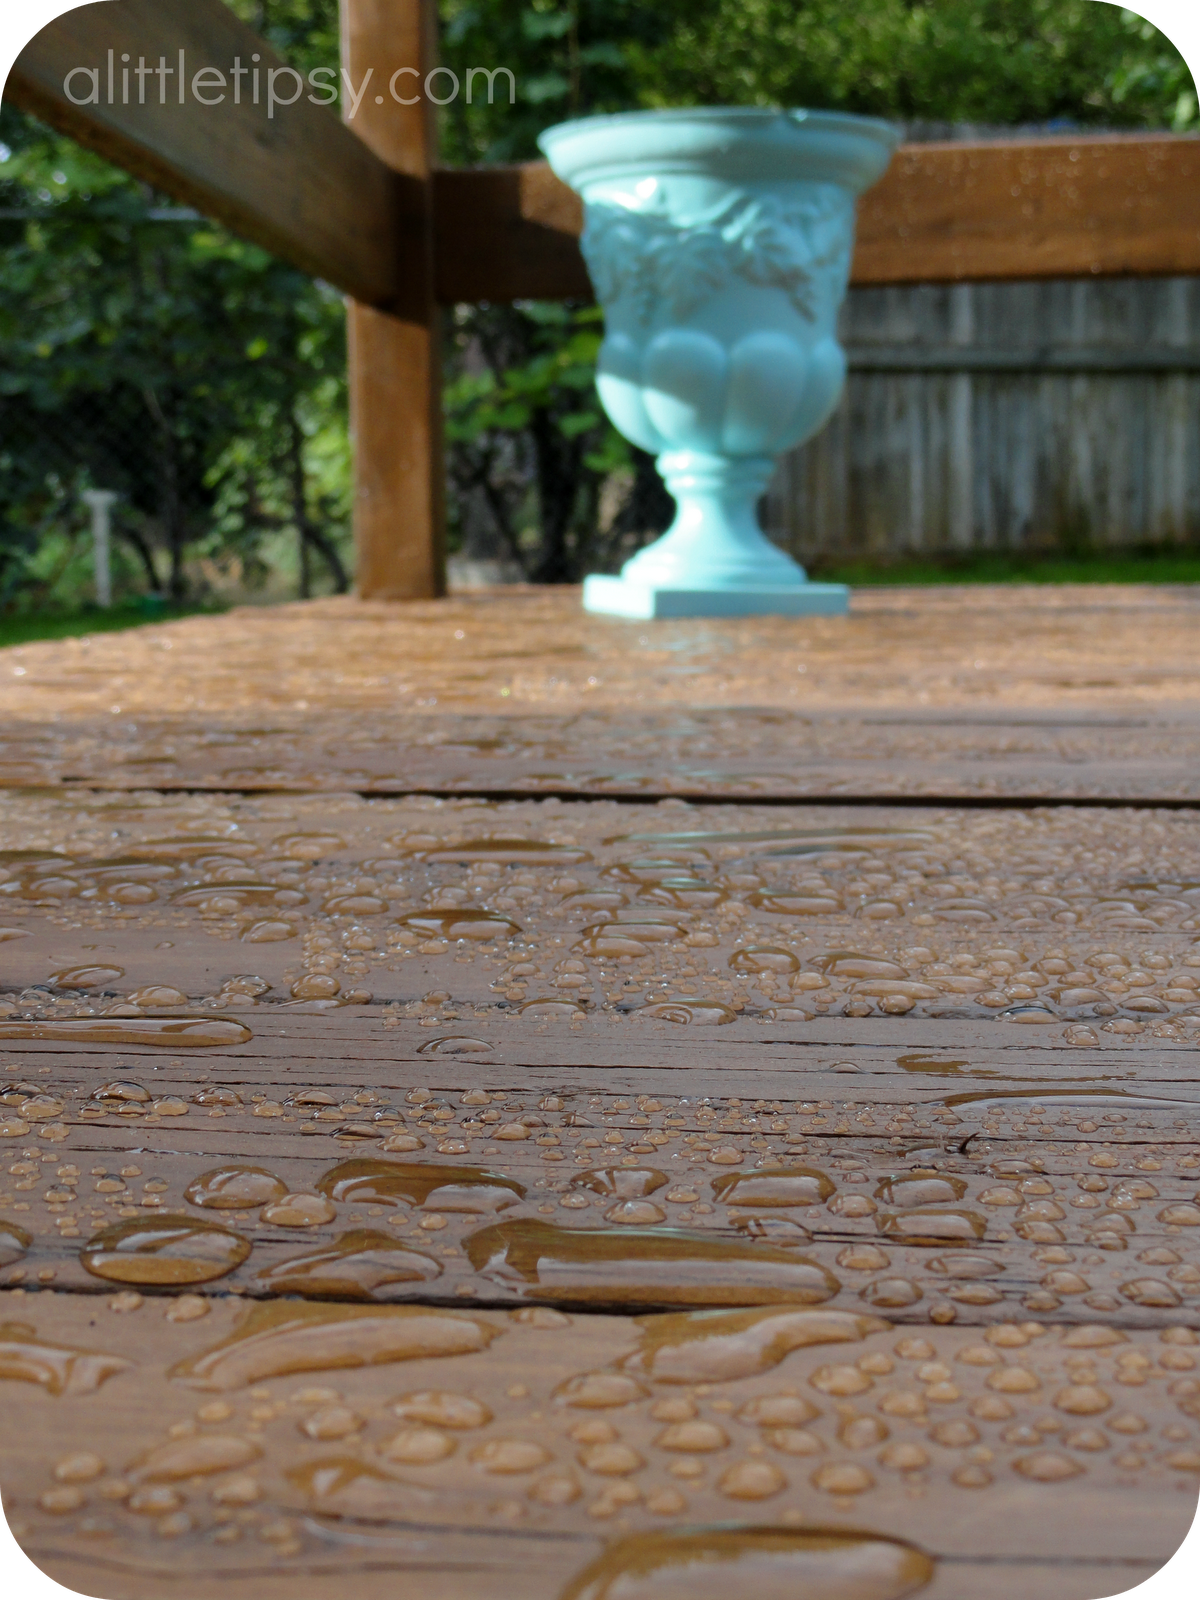
I can tell you it doesn’t lie when it says waterproofer. It rained nearly every day the week after we put it on and it proved itself right away. We have hard water so you could even see water marks in the spots where big puddles dried.
One of my kids new favorite activities is to push water off the deck with the rubber squeegee broom.
I am loving my “new” deck!
Do have a project looming before fall and winter come?
Thompson’s provided the product for use and a stipend to cover my costs and time. The work, comments, and sweat were all my own.
P.S. Don’t forget to sign up for free Tipsy updates via RSS or email.
We have decided to truncate our feed to help protect against stolen content. I apologize for any inconvenience. Please love us anyway. 🙂
Very cool, and you look cool to hun.xxx I think your blog is very inspiring, i enjoyed reading it. Lets follow each other! I am dreaming of having more followers. I wold really appreciate it xxx
http://babyemilycloset.blogspot.co.uk/