A Little Tipsy

Creative Tips & Ideas

  • home
  • About Me
  • the tipsy top
  • press
  • projects
  • contact me
[print_thumbnail_slider]

YW lesson 36: Importance of Truth Object Lesson & Handout

September 16, 2009 By Michelle Barneck 7 Comments

YW lesson 36 talks a lot about how truth does not change and teaches us how to know what is truth and what are Satan’s lies. To demonstrate this I brought a rock to represent truth and a balloon to represent Satan. I talked about how the rock is solid and does not change if I drop it or the wind and rain fall upon on it. Then, I got out the balloon to demonstrate how Satan will start small and catch us with something that does not seem so bad. Then, I blew in to the balloon once. My example was lying to your parents about knowing what time it was when you came in past curfew. I then continued to list things it could lead to (bigger lies) until I had a big full balloon. Then I talked about how eventually Satan’s bubble will pop and I poked the balloon with a pin.

I made the following Importance of Truth handout to go along with it. I used the little chart from the lesson and put a little rock next to God’s plan and a stapled balloon next to Satan’s to help them to remember the analogy.

YW lesson 36: Importance of truth handouts
Click thumbnail to print four to a page

P.S. Don’t forget to sign up for free Tipsy updates via RSS or email.

We have decided to truncate our feed to help protect against stolen content. I apologize for any inconvenience. Please love us anyway. 🙂

YW Leadership Idea

August 17, 2009 By Michelle Barneck 2 Comments

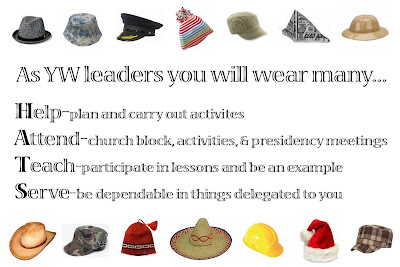
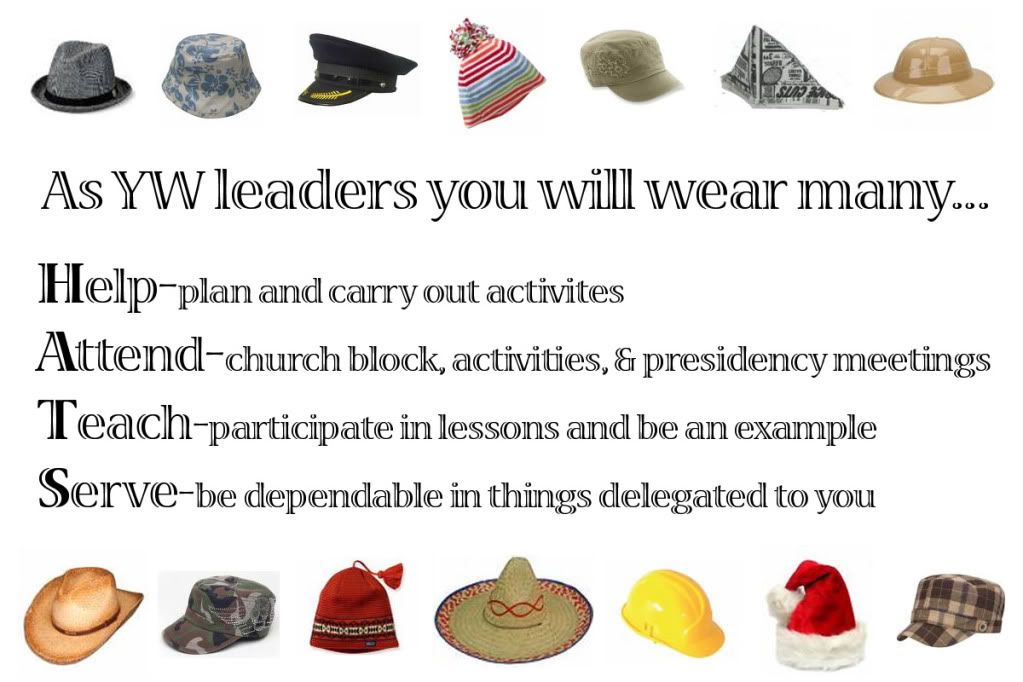
Each month at our Young Women activity planning meeting we have a Leadership moment to teach the girls different aspects of a leader. I used this idea a few months ago when the meeting was at my house.

I had a coat rack with like 20 different hats (luckily between my son and I we had quite a few, then I borrowed more from family) for them to choose from. I had each of the girls pick a hat to wear, then read a description that corresponded with each hat of a quality they as a Young Women Presidency member would need to possess.

For instance:

  • Fireman hat-calming an argument
  • Construction hat-building people up
  • Sombrero-fiesta, enjoy yourself
  • Pirate-take control in rough seas
  • Tiara-make decisions
  • Mafia (plastic fedora)-have each others back
  • Wheaties baseball cap-wholesome thoughts and activities
  • Visor-helps us see clearly
  • Snow hat-help others have a warm snugly feeling
  • Roots hat from the Olympics-coming together with one goal
  • Easter hat-not being afraid to show spiritual side
  • Sparkly winter hat-let your personality sparkle
  • Beach hat-sunny, good attitude

You can make something up for any hat.

I then printed each girl the following hat handout to take home.

<span class=

Click the thumbnail to print as 4×6


BTW, it is my 5 year wedding anniversary today! Love you babe!


P.S. Don’t forget to sign up for free Tipsy updates via RSS or email.
We have decided to truncate our feed to help protect against stolen content. I apologize for any inconvenience. Please love us anyway. 🙂

YW lesson 32 Personal Purity through Self-Discipline Handout

August 8, 2009 By Michelle Barneck 3 Comments

This is a handout idea for anyone who has to teach the Young Women lesson 32 on Personal Purity through Self-Discipline. It is to go along with Ann’s great object lesson I found by way of Sugardoodle (they have a ton of other ideas for this lesson too).

“As an object lesson/handout for this lesson, I gave each of the girls a couple of plain Vanilla wafers at the beginning of class – I told them if they wanted to, they could eat the cookies, but they would be “rewarded” if they didn’t eat them (none of them ate them). At the end of the lesson I handed each girl a big heart sugar cookie that I had frosted with pink frosting, and wrapped in saran wrap – I had a tag attached with a ribbon which read “when we exercise self control, we will receive “sweet” rewards”. The girls LOVED this (they would love anything that was food related actually ) but this was a successful object lesson and handout.” (Idea by Ann)

We are changing it up a little bit and giving chocolate chip cookies at the end instead. Here is the YW lesson 32 handout that we attached to the bags:


Free Font: http://www.kevinandamanda.com/fonts/freescrapbookfonts/hiccups/

Cookie pic: Madbaker

Free Digiscrap items: Carrie Stephens Spontaneous Delight


Put together with Photoshop

<span class=

Click thumbnail to print four to a page.

P.S. Don’t forget to sign up for free Tipsy updates via RSS or email.
We have decided to truncate our feed to help protect against stolen content. I apologize for any inconvenience. Please love us anyway. 🙂

Decorate Your Flip Flops/Seaside Cupcakes

May 26, 2009 By Michelle Barneck 5 Comments

Summer is on the horizon! It is time to put away your boots and break out your flip flops! I am a big flip flop fan and have them in every color. So, why not add a little flair to your flip flop wardrobe and decorate them. Personalize your flip flops into something great that only you have! This is a great activity to do with girls of all ages. You get to be creative and it is really easy! As long as you can tie a knot you can make most of the flops shown here!

We did this for a Young Women activity and had about 20 girls making them all at once. We bought flip flops for $1 at Michael’s and brought all sorts of things to decorate with including: water balloons, fabric, ribbon, beads, buttons, silk flowers, glitter glue, hot glue, river rocks, etc.

These were made by hot gluing ribbon wrapped around the straps and then hot gluing flowers on in the middle.

It was so fun to see what everyone came up with! I think the water balloons and the fabric were definitely the most popular. All you do is tie them on with a knot (be sure the knots are all on the outside and do not touch your foot) and then scoot them close together on the strap.

For the fabric flops, cut the fabric in strips about 1 inch by 6 inches. You want them long enough that you can tie them around and in a knot, but then you can vary depending on how fluffy you want them. Test a strip to make sure you have the length you want before cutting them all! Then just keep tying them on in knots until you get the look you want.

One of our YW got creative with the supplies. It was fun to see what everyone came up with.

To give the activity a message we gave a thought at the end with quote from Elder Holland on Appropriate Sunday Dress and how we should not look like we are on the way to the beach. Then, we read the footprints poem and gave them a bookmark with the poem on it.

We decorated with a Hawaiian luau theme. Please keep in mind that I found out I would need to do refreshments like 4 hours before the activity. (The other leader was going out of town and could not find anyone home to drop them off with.) I forgot to take pics of most of it, but here are a few.

I froze silk flowers in circle tupperwares full of water to have some fancy floating ice. There were limes in the bowl too, but they sunk.
Did you know that cucumber water is fantastic too! I kid you not! Put a few slices of fresh cucumber in a pitcher of water and try it. It is amazingly refreshing! I had it at a Bridal Fair at the Joseph Smith Memorial Building.

I tied a belt with shells on it around the punch bowl for a little extra flair.

This was a totally off the wall idea because I needed to figure out a treat that I could make with what I had at my house. They are supposed to be little bears lying on the beach. Thankfully most of the YW got it right off.

Items needed for Bears on the Beach Cupcakes:

  • Cupcake liners (I used the foil ones)
  • Chocolate cake mix and ingredients to make it
  • Vanilla frosting
  • Blue food coloring
  • Sticks of gum (I had Extra Bubblegum)
  • Teddy Grahams
  • Graham Crackers

Prepare the cupcakes as directed on the cake box and let them cool. Mix a few drops (I used like 10 because I wanted it pretty bright) of food coloring with the frosting and frost the cupcakes. Crush some graham crackers in a Ziploc to use as sand. I put it on a small plate and dipped the top of the cupcake in it. Unwrap the gum and cut each stick in half. Secure a piece of gum to each cupcake by putting a little drop of frosting on the back. Place a dab of frosting on the back of the bear and place it on the gum “towel.”

Ta da! If only they were as relaxing as a real trip to the beach!

P.S. Don’t forget to sign up for free Tipsy updates via RSS or email.

We have decided to truncate our feed to help protect against stolen content. I apologize for any inconvenience. Please love us anyway. 🙂
« Previous Page
Next Page »

  • Bloglovin
  • Facebook
  • Google+
  • Instagram
  • Pinterest
  • RSS
  • Twitter

Hi there! I'm Michelle. Mother of three little boys and one little princess. Welcome to A Little Tipsy, a place for exploring creativity and sharing inspiration.

Follow on Bloglovin


Visit Michelle Barneck {A Little Tipsy}'s profile on Pinterest.

Tutorials by Category


15 Family Reunion Games

Family Reunion Games Collage

15 Sprinkle Party Ideas

Sprinkle Birthday Party
Creative Commons License

© Copyright 2014 A Little Tipsy · Site Designed by The Fairy Blogmother · Web Hosting by RFE Hosting

This website uses cookies to improve your experience. We'll assume you're ok with this, but you can opt-out if you wish.Accept Read More
Privacy & Cookies Policy