A Little Tipsy

Creative Tips & Ideas

  • home
  • About Me
  • the tipsy top
  • press
  • projects
  • contact me
[print_thumbnail_slider]

DIY Under $5: Ruching Shirt Refashion in 10 Minutes

April 6, 2011 By Michelle Barneck 21 Comments

Do you have a shirt that is a little too big, too long, or just needs a little flavor? You are gonna love this little 10 minute shirt ruching refashion.

Did I mention that it will cost you $1.50?!

Supplies:
  • shirt
  • coordinating thread
  • elastic thread ($1.50)
  • sewing machine

All you do is hand wind the elastic thread on the bobbin. Put the coordinating thread on the machine and through the needle as usual, turn your shirt inside out and sew using a large baste stitch along the existing seams. I stitched from 4 inches down from the arm pit to the bottom. Be sure to back stitch at the top and bottom to keep it more secure. It is sooo easy!

I got the elastic thread idea from my friend Amanda, who was awesome enough to let me borrow hers. She has a more detailed tutorial on how to use it to make a cute ruffly scarf.
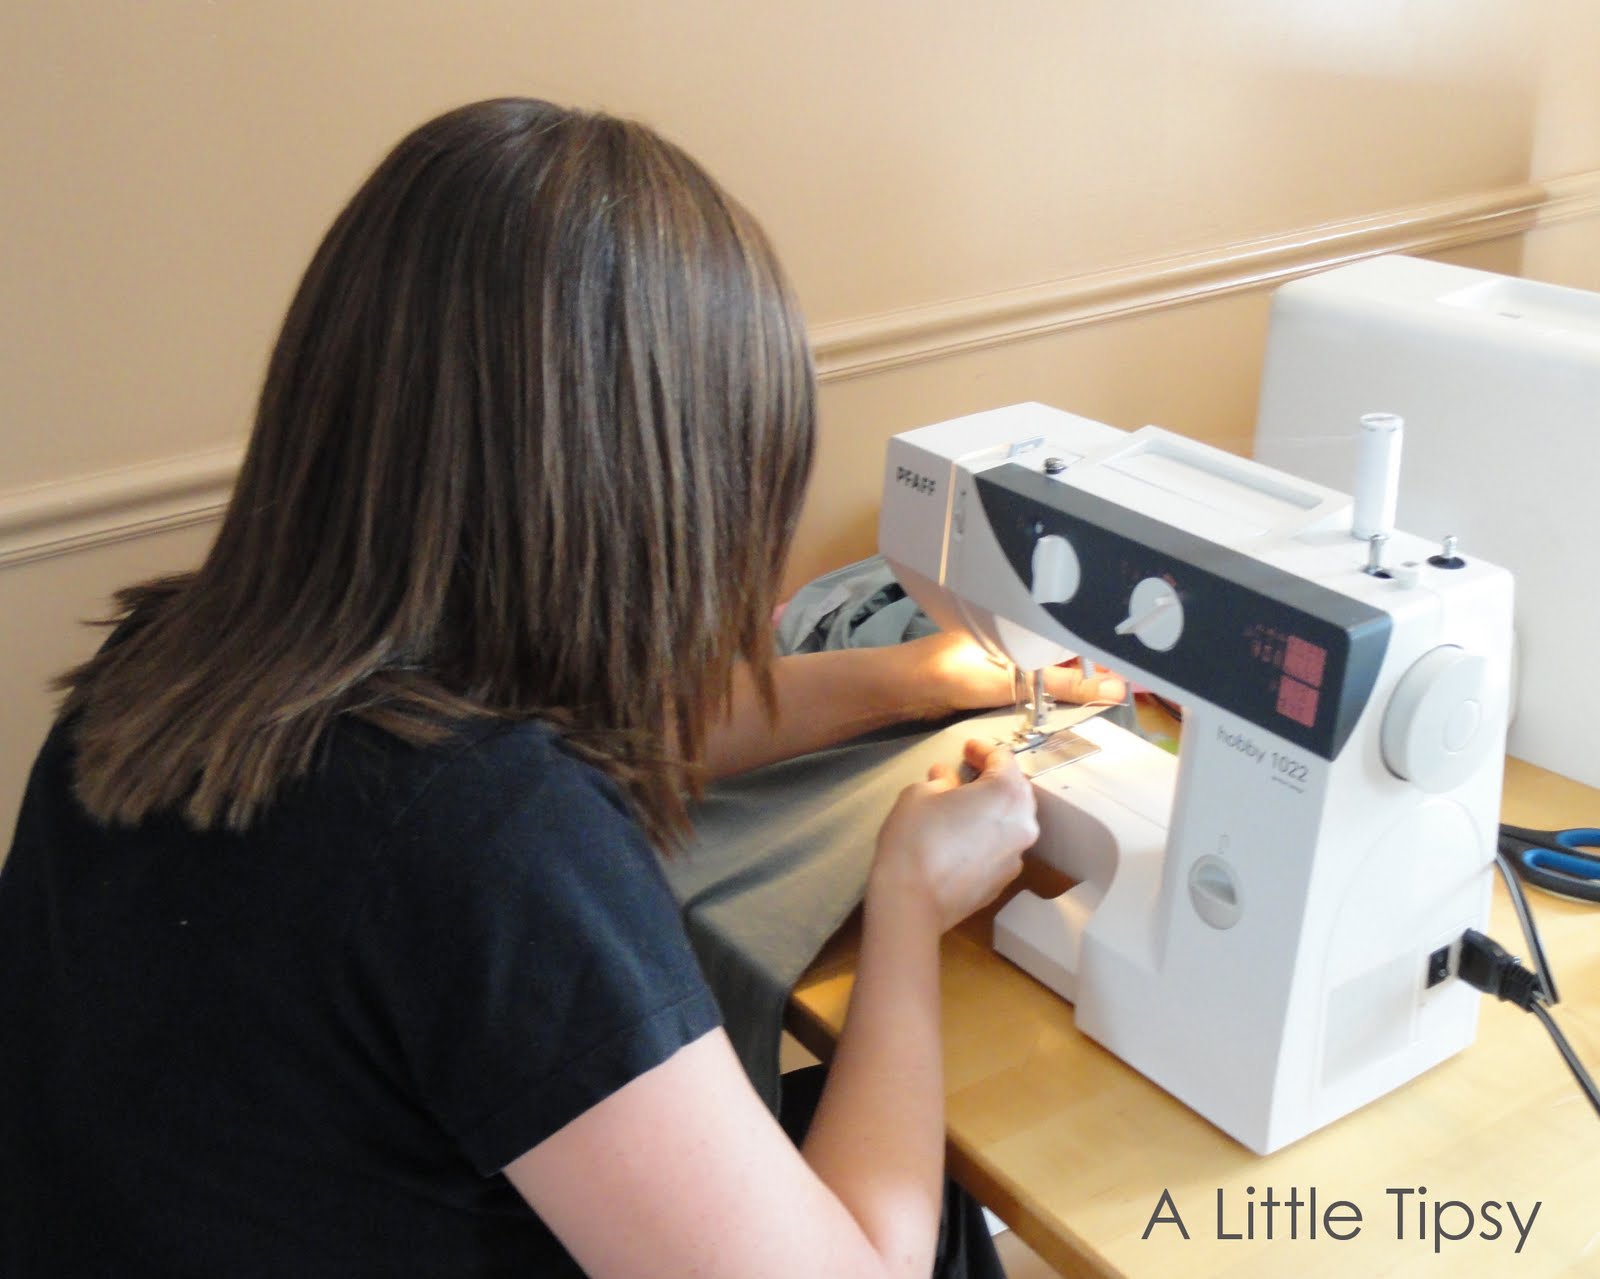

My sweet sis Jen sewing away. 🙂

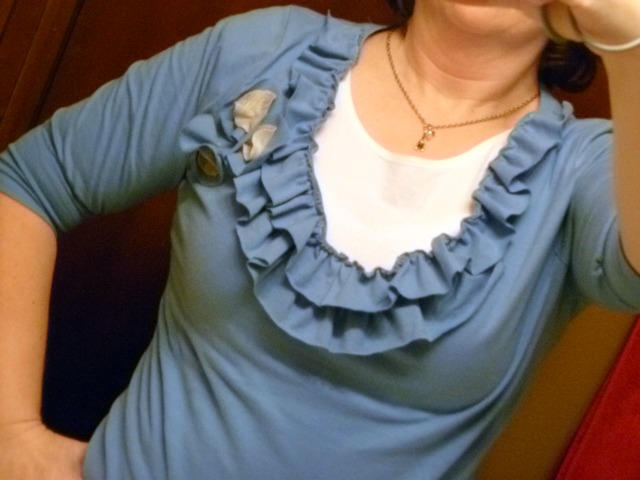
Before<————————–> After

It made it a few inches shorter and more fitted. I love that it hides the things I don’t want to display (namely post baby bulges and that odd poker from my jeans’s waistband that makes me look like I have an outie belly button.) and made my super long shirt a more flattering length (look at my elbows in both pics for a reference point on how much shorter). I’ll totally be debuting this baby at the Creative Estates conference this weekend.

I have not washed it yet, so I’m not sure how that will go, but this shirt is hand wash only so I’m sure it will be fine.

So now it’s time to link up!

Please remember:

  • Only link to your own projects that cost you $5 or less (price does not have to include items you had on hand)
  • You can link past projects that fit the dollar limit
  • Please link back so others can join the party

DIY under $5

P.S. Don’t forget to sign up for free Tipsy updates via RSS or email.

We have decided to truncate our feed to help protect against stolen content. I apologize for any inconvenience. Please love us anyway. 🙂

Feature Friday-DIY Under $5

April 1, 2011 By Michelle Barneck 12 Comments

There have been so many great project linked up for the DIY Under $5!! I wanted to share some from our first three link ups! I will be featuring the link from each week with the highest clicks and then a few of my favorites.

Week 1

Most Clicks: Recipe Command Station from Creating Our Cozy Home

My Faves:

Monogram with Book Page Flowers from Creations with Kara

Dress to Skirt by A Law Student’s Journey

Week 2

Most Clicks: T-Shirt Makeover from Pocket Full of Pink (also one of my faves!)

My Faves:

Loving Every Second’s Bird Nest


Dictionary Page Butterflies
by Organize and Decorate Everything

Week 3

Most clicks: Spring banner for $0 from Lotte Lu and Brother Too

My Faves:

Fleece Flower Pillows by Come Together Kids


Reversible Spring Skirt
by Dew This

There were so many great projects to choose from! Be sure to link up your $5 or less project every Wednesday! I will be featuring people from the linky each week.

Although I will say one thing, I was surprised how many people did not link back to the party. I remember Kim From Today’s Creative Blog warning me about this! Shame, that is all.

If you were featured today feel free to grab the featured button!

P.S. Don’t forget to sign up for free Tipsy updates via RSS or email.

We have decided to truncate our feed to help protect against stolen content. I apologize for any inconvenience. Please love us anyway. 🙂

Point of View Skirt Features

March 31, 2011 By Michelle Barneck 2 Comments

Did you link up your skirt with Point of View? Here are a couple of my faves…

Amanda from Every Crafty Endeavor linked up her Ruffle Knit Skirt. We are totally on the same wavelength with this one! Comfy, stylish and slimming?! Yes, please!

April from Wildflowers & Whimsy made this adorable feather skirt for her little one!

April and Amanda, you can grab your Point of View featured button.

We have another fun theme coming up soon! Remember Point of View on every 4th Friday. The theme for April 22nd is SPRING so be thinking of a fun project to link up!

P.S. Don’t forget to sign up for free Tipsy updates via RSS or email.

We have decided to truncate our feed to help protect against stolen content. I apologize for any inconvenience. Please love us anyway. 🙂

Boy Week: Turkey Craft

November 17, 2010 By Michelle Barneck 3 Comments

Hi. I’m Tauni from It’s a Tradition. I am so excited to be guest posting on A Little Tipsy today.

Its a Tradition

Like Michelle, I am surrounded by boys. I am always looking for fun things to create with them…Some of them, like the Halloween cookie house we created, fall flat. Others, like this fun turkey hat, are such a hit they become a tradition…

I think the kids table is more fun than ever with this playful turkey hat, with brightly colored feathers and the ever popular googly eyes!

Pottery Barn inspired turkey hat

This is a simple project that takes about an hour at most. Not only that, but most of the items can probably be found around the house…

Pottery Barn inspired turkey hat supplies

Start with a piece of fabric that wont fray. In the photo of the finished turkey hat above, I used brown felt. For this tutorial however, I used yellow fleece. The best thing about fleece is that it has a bit of stretch in it – you can make a one size fits all!

Pottery Barn inspired turkey hat Step 1

With your fabric folded, cut out a strip of fabric. For my headbands I cut the fleece a little big – 18 inches long – because I couldn’t measure all of the kids heads…I went with three inches wide.

Pottery Barn inspired turkey hat Step 2

Once your fabric is trimmed, sew around all of the edges. I went with a straight 1/4 inch seam (but I have also used a zig zag stitch). When finished, it should look like this:

Pottery Barn inspired turkey hat Step 3

Next, prepare the body of the turkey. I’ve tried this two ways. I created a pattern for the first set I made. You can pick it up over on my blog It’s a Tradition. For this set of hats however, I decided to wing it and see how hard it would be…

For the body of the turkey, I used two sides of a class as a guide.

Pottery Barn inspired turkey hat Step 4

Pottery Barn inspired turkey hat Step 5

Next up, the feathers. Again, I winged it 🙂 Just sketched the feathers out on some felt, but the patter is available over on my blog.

Pottery Barn inspired turkey hat Step 5

With felt, I like to do a lot of the sewing before I cut the shapes out. Sew around the edges of the body, leaving a little room at the bottom for stuffing. Sew all the way around the edge of the feathers and then straight up the center…

Once the items are sewn up, go a head and cut them out with scissors (don’t worry if the shapes aren’t perfect, it all works out).

Pottery Barn inspired turkey hat Step 6

Once everything is cut out, arrange the feathers on the headband.

Pottery Barn inspired turkey hat Step 7

I pinned the feathers down and then stitched along the bottom of each to secure them (with the bigger feathers in the pattern, it may be helpful to tack them down up higher as well).

Once the feathers are stitched on, go ahead and add the body. I simply stitched around the outside of the turkey’s body again. Glue on googly eyes, gobble gobble and beak (yes, I forgot the beak in this case).

Next, add a little velcro to the edges of the hat so that it can be adjusted and secured. You just need to use the rough side, as it will stick directly to the fleece.

Pottery Barn inspired turkey hat Step 8

Super great! You’re all done. Unless you want to add some embellishments…We added names to ours.

Pottery Barn inspired turkey hat Step 9

Even with the embellishments, these aren’t as fancy as some of Pottery Barn’s hats, but hey we’re talking boys here. Cutesy just doesn’t fly!

If you like this project stop by my blog. This week, I am posting alternate versions of the Thanksgiving hat. And, though I don’t have any girls, I’ve even come up with a girls hat…

Thanks Michelle. It was fun participating in your boys week!

————————————————————————

Thanks Tauni for such a fun turkey craft just in time for Turkey day!

P.S. Don’t forget to sign up for free Tipsy updates via RSS or email.
We have decided to truncate our feed to help protect against stolen content. I apologize for any inconvenience. Please love us anyway. 🙂
« Previous Page
Next Page »

  • Bloglovin
  • Facebook
  • Google+
  • Instagram
  • Pinterest
  • RSS
  • Twitter

Hi there! I'm Michelle. Mother of three little boys and one little princess. Welcome to A Little Tipsy, a place for exploring creativity and sharing inspiration.

Follow on Bloglovin


Visit Michelle Barneck {A Little Tipsy}'s profile on Pinterest.

Tutorials by Category


15 Family Reunion Games

Family Reunion Games Collage

15 Sprinkle Party Ideas

Sprinkle Birthday Party
Creative Commons License

© Copyright 2014 A Little Tipsy · Site Designed by The Fairy Blogmother · Web Hosting by RFE Hosting

This website uses cookies to improve your experience. We'll assume you're ok with this, but you can opt-out if you wish.Accept Read More
Privacy & Cookies Policy