A Little Tipsy

Creative Tips & Ideas

  • home
  • About Me
  • the tipsy top
  • press
  • projects
  • contact me
[print_thumbnail_slider]

Feature Friday-Blog Swap with Sew Dang Cute

March 5, 2010 By Michelle Barneck 7 Comments

Hello all you “A Little Tipsy” readers! I’m really excited to be with you today on my first-ever blog swap! Michelle is such a fun girl. I love her vlog! WOW!!! Not to mention she is really good friends with my SIL, Amanda, the creative mind behind “Every Crafty Endeavor” (another great craft blog to check out…hint, hint!)
I’m Tam from Sew Dang Cute. Wife to my best friend, and SAHM to three beautiful children. Two girls and one boy, ages 4, 3, and 9 months. I’m a cycle and group fitness instructor, addicted triathlete, and am currently training for my first half IronMan in June.

Michelle wanted me to answer some questions for the one minute interview so here you go:

What is your favorite crafting tool or secret weapon?

  • Favorite crafting tool is my sewing machine. I’m fairly new to “crafting” so I don’t know much about the different tools, but I love to sew.

If you were a dessert, what would you be and why?

  • In the words of my husband (since I couldn’t think of anything for the life of me): “A banana split. Sweet, healthy (the banana part), and a little bit of everything.”

What is your best ultra beginner sewing tip?

  • I recommend reading through the instructions completely before beginning and mentally walking through each step. This helps me see where I’m going and has saved me from making mistakes.

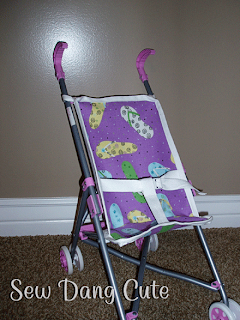
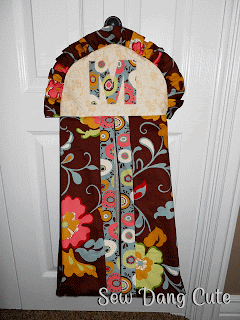
Whenever I can, I like to fit in some craft time. I recently became a “chef” over at Moda Bake Shop, and get to post “recipes”, like this Valentine’s Day Bubble Skirt over there every now and then. I love sharing tutorials with my readers. You can find sewing ones like this Diaper Stacker or Doll Stroller Cover.
I’ve also got some crafty tutorials like this Proclamation to the Family Photo Overlay:

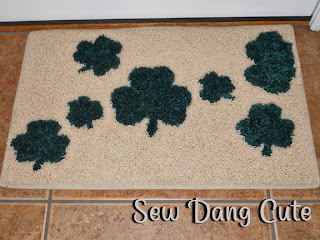
Or in the spirit of St. Patrick’s Day, this Shamrock Doormat.
I also offer a variety of products that are available for purchase.

If you don’t see exactly what you are looking for, I would love to do a custom order for you.
Maybe all you need is fabric? I am now a retailer of Moda Fabric and have just started selling, including the beautiful line Blush. Another of my loves is cooking. Come join me in 2010 as I review 100 recipes, in an attempt to organize my recipe drawer and weed out the worthy and not-so-much.

Hop on over to check me out and be sure to sign up as a follower, so you don’t miss anything! Thanks Michelle for blog swapping with me today!!!

——————————————————————-

Wait, I am still stuck on the half Iron Man. Girl, are you crazy? I would give myself major props for completing a 5k. 😉 Thanks Tam for swappin’ it up today!

P.S. Don’t forget to sign up for free Tipsy updates via RSS or email.

We have decided to truncate our feed to help protect against stolen content. I apologize for any inconvenience. Please love us anyway. 🙂

Baby Week: Make Your Own Baby Legs with Matching Hair Accessories

February 23, 2010 By Michelle Barneck 6 Comments

Run, don’t walk out to buy some girls knee socks. Making your own baby legs is truly a snap and they are so adorable. I found a great DIY baby legs tutorial on Flickr (via Little Birdie Secrets) and got to sewing. Trust me, even the least experienced seamstress can pull this one off! I did. I mad two pair and then couldn’t stand to waste what was left so made some matching hair accessories out of it. Isn’t my niece going to be stylin’?! When she grows in to them that is. 😉

The only thing different from the tutorial is the “ruffle” on the camouflage pair. This was ironically born from a mistake of sewing them wrong on my first try. I turned them right side out and said, “dang it” until I looked closer. I loved the little deconstructed ruffle that had resulted. It gave it a little sass and edge. And with her red hair you know that girl is going to have a little sass!

Here they are modeled on my arm. I was thinking sweet Annie would be more like my nephew who is a total chunk so she may have to wear them in the fall, but we’ll see how fast she grows.

Now, when I was finished with the little leg warmers there were little scraps from the heels and toes of the socks left. Most people would have just scrapped them, but for some reason I couldn’t. I sat and looked at them for a long time and then I came up with these.

Aren’t they adorable! I guess I have a thing for the deconstructed as demonstrated by the bow. I took four of the heels/toes, layered them with the pointy part pointed to the middle and then hot glued them together. Then, I wrapped a piece of material around the center and glued it on. The flower is just two circles cut out with the edges singed to curl slightly sewn together with a button.

I am loving my scrappy hair accessories!

Linking up:


DIY Day @ ASPTL
Photobucket

P.S. Don’t forget to sign up for free Tipsy updates via RSS or email.

We have decided to truncate our feed to help protect against stolen content. I apologize for any inconvenience. Please love us anyway. 🙂

Feature Friday-Needle In A Haystack (Free patterns and giveaway)

August 7, 2009 By Michelle Barneck 1 Comment

Our Feature Friday today is Shelli from
Needle in a Haystack

I met Shelli (a contributor to youcanmakethis.com and swakembroidery.com) at the Mom’s Who Make It Conference a few weeks ago (which was amazing by the way, thanks Quinn!). Someone asked me what my blog was and when I said “A Little Tipsy”, she said “You are the Tipsy girl?!” I was so excited to actually meet one of my followers in person! And come to find out I had bookmarked some of her cute ideas too! Small world! So I got to know her over lunch, but here’s your chance to acquaint yourself with the one-minute interview (It was Shelli’s idea to spice it up with some photos. Great idea!):

  • What is your favorite crafting tool or secret weapon? Hmmm…tough question. I have so many, but for my stitchery business in particular, one of my favorite tools has to be my light box. When I first started my business years ago, I used to tape my patterns to a sunny window to develop and trace them, and it worked just fine. But for my birthday one year, my sweet friends pitched in and bought me a “Light Tracer”. It changed my world! It’s a flat *box* with a hard surface and a light inside that allows me to trace my patterns right on top of it. I use it multiple times a day when I’m developing new patterns or when I’m tracing them onto fabric. It’s a super simple tool, but a lifesaver for me.
  • Where is your favorite vacation spot? Well, we just returned from the Oregon Coast this summer, and that is currently at the top of my list. The beach is incredibly beautiful and unique, as well as the forest that fringes it. There are so many extraordinary places to explore, that we couldn’t even get to them all in the time we had. Beach-combing, skim surfing, kite flying, hiking, and exploring the tide pools were some of the things we enjoyed the most. My family already wants to go back. I highly recommend it. It was amazing!
  • How do you come up with your cute patterns? Good question! Wow. I have to think about that. I guess truthfully, I’m inspired by several things, but really, I try to soak in what’s around me and turn it into something on paper that makes me happy. Most of the time, a quote or phrase that I like inspires me to begin a new pattern and is the jumping off point for me. I then build my art work and lettering around it to add emphasis to the feeling or meaning of the words.
  • When I created, “No Greater Joy,” I simply began because I loved the scripture from 3 John 1:4 that stated, “I have no greater joy than to hear that my children walk in truth.” I wanted to create something for my home that could be a part of our furnishings and something my children could read and be reminded of frequently. I wanted to embellish the words with something that felt solid and strong, and pine trees came to mind. I drew two trees to one side to represent my husband and myself, and then four more along the other side to represent each of my children. It is such a simple design, but I wanted the emphasis to be on the words, and the whole image is meaningful for me and my little brood, and that’s what I was shooting for. It’s completely customizable for your family as well.

  • Often I’ll see a new line of fabric that reminds me of something or stirs up some creative thoughts. When I created the “Groovy Love” pattern, it was totally inspired by a line of fabric by Amy Butler. I was trying to come up with a pattern for Valentine’s Day, and when I saw this fabric it was so fresh and funky, it got me thinking of all the affectionate and sometimes crazy terms of endearment we call our loved ones at times. I experimented with a variety of writing styles and sizes, and “Groovy Love” was born.

  • How many pairs of shoes do you own? This is a question I’ve never been asked before, so until now, I’ve never actually known. But I can now say, I have 23 pairs of shoes.

To learn more about Shelli, read the *s in this post. I am totally creeped out my earwigs too, Shelli!!

These adorable burp cloths and receiving blankets were displayed at the Mom’s Who Make It Conference and guess what…Shelli has the patterns FOR FREE. You luckys. What I love the most is they have the cute fabric on one side and the ever absorbant cloth diaper on the other. She’s got smarts!She’s showing me up with the burp cloths, but c’mon my ribbon burp cloths are still good for not sewing in 15 years right?!

Back to school is here and we all end up with that one giant pic in the package of school pictures. Go ahead, take them out of the package this year and display those school pics on clipboards like Shelli. What a fun simple idea and so easy to update with new pics or art projects!

In this next post, Shelli shares a touching story she learned from her Father about recognizing the special things surrounding us. The story is titled The Golden Windows. It is short and sweet, but a really good reminder. I hope I can leave lasting memories and values like this for my kids.

Speaking of fathers, I had to share this idea because I am IN LOVE WITH IT!! I wish I had time to do it for my Dad’s bday next week because it is…well there is not a word to describe, that is how much I love it. See for yourself.

This Father frame is the perfect portrait of how I think of my Dad. He was an LDS seminary teacher, Bishop and now Stake President so I saw my Dad in a white shirt and tie most of my life.

Shelli celebrated Christmas in July (we’re a little late… blame it on the rain, ya ya) and is sharing two free patterns, a free e-book, and a backstitching tutorial with us. Phew, that is a lot of free. I love a good tutorial especially for something I think is so cute, but I am so inept at. Get your needles ready!

Lucky for us, Shelli is also doing a Christmas in July giveaway right now (ok, so it is august now, just count yourself lucky that it is still open for entries)! Head over and leave a comment by Sunday, August 9th at midnight to win this adorable Christmas Pillow!

The one thing I love more than a good tutorial is winning something already made for me. And yes, I entered, and I’m going back to enter again since I believe this counts as posting about it on my blog. he he.

Great ideas and free stuff Shelli! You are now entered in to the Hall of Fame as Tipster of the Week!

P.S. Don’t forget to sign up for free Tipsy updates via RSS or email.

We have decided to truncate our feed to help protect against stolen content. I apologize for any inconvenience. Please love us anyway. 🙂

Girly Skirt Instructions

May 7, 2009 By Michelle Barneck 3 Comments

Remember these cute skirts from my sister Jen’s Feature Friday post?


It only took me a month or so, but I got the instructions for these cute little girl skirts. There is no pattern, but here is an explanation of what she did.

“This is what I did…

Her waist is 22 inches. The top piece of fabric was 22″ (her waist) plus 6″, so 28″ long and 6″ wide.

The second layer is 28″ plus half of that, so 28″ + 14″=42″ long and 6″ wide.

The third is 42″ plus half of that, so 42″+21″=63″ long and 6″ wide.

You can make the top layer a little wider to account for the elastic if you want to.

You just sew the layers together, gathering the lower layer as you go along and then add the waistband. “

I hope that is helpful and sorry it took so long for me to post a little more detail!

We have decided to truncate our feed to help protect against stolen content. I apologize for any inconvenience. Please love us anyway. 🙂
« Previous Page
Next Page »

  • Bloglovin
  • Facebook
  • Google+
  • Instagram
  • Pinterest
  • RSS
  • Twitter

Hi there! I'm Michelle. Mother of three little boys and one little princess. Welcome to A Little Tipsy, a place for exploring creativity and sharing inspiration.

Follow on Bloglovin


Visit Michelle Barneck {A Little Tipsy}'s profile on Pinterest.

Tutorials by Category


15 Family Reunion Games

Family Reunion Games Collage

15 Sprinkle Party Ideas

Sprinkle Birthday Party
Creative Commons License

© Copyright 2014 A Little Tipsy · Site Designed by The Fairy Blogmother · Web Hosting by RFE Hosting

This website uses cookies to improve your experience. We'll assume you're ok with this, but you can opt-out if you wish.Accept Read More
Privacy & Cookies Policy