A Little Tipsy

Creative Tips & Ideas

  • home
  • About Me
  • the tipsy top
  • press
  • projects
  • contact me
[print_thumbnail_slider]

Purse Organization, Applying Vinyl, & a Door Prize

February 16, 2011 By Michelle Barneck 15 Comments

There’s a super cute blogiversary freebie door prize at the end of the post, so stick around! Now on to my latest project…

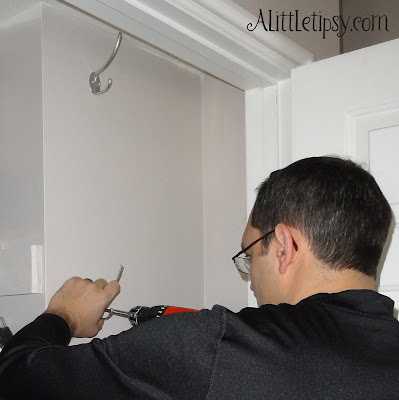
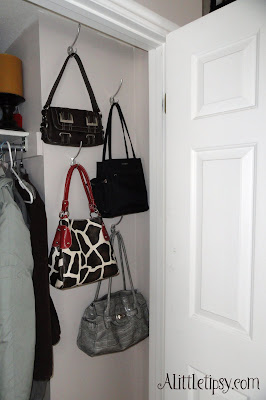
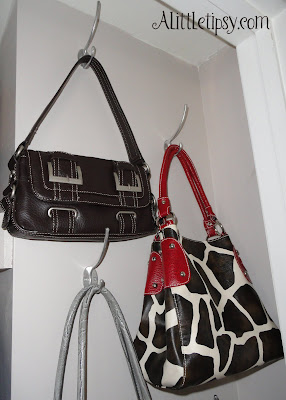
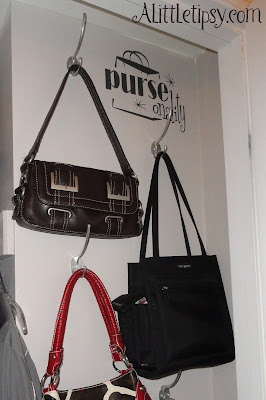
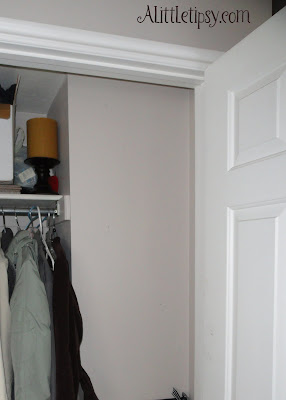
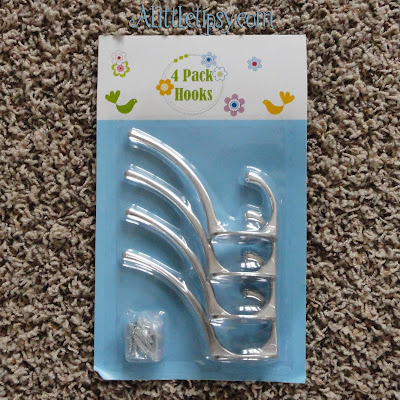
I had a bunch of bags sitting around since I am back on diaper bag duty. I hated having them in piles and needed another option. Lucky for me I have a totally odd space in my coat closet that was such a wasted space. I got some hooks, borrowed my handy husband and that was that. My bags are empty so they are light enough to hang straight in the drywall. If they were full, I would need to attach my hooks to studs.


I had a vision to add some “purseonality” with vinyl. My vision came to life with the help of My Vinyl Designer. I told them what I was thinking and they came up with the most adorable design! You got a sneak peek in the pic up top. I absolutely love how it turned out!

Purse-onality 2Purse-onality 1

Remember how I mentioned the door prize? You can download either of these adorable purseonality designs from my fabulous sponsor My Vinyl Designer for FREE to cut with your cricut, silhouette, or other fabulous tool. You heard it free! Just one more reason why they totally rock! Click over to My Vinyl Designer to get one.

My Vinyl Designer is also giving away one of the swirly purseonality designs in dark gray vinyl, like mine.

To enter:

  • Leave a comment on this post with your email saying you want it.

I’m sure you have all used vinyl before, but if you have not, here is the how to for applying vinyl to a wall.

Linking up:
We’re Organized Wednesday
Look What I Made
Whatever Goes Wednesday
Sugar & Spice & Everything Nice
Transformation Thursday
Strut Your Stuff
Show Off Your Stuff

P.S. Don’t forget to sign up for free Tipsy updates via RSS or email.
We have decided to truncate our feed to help protect against stolen content. I apologize for any inconvenience. Please love us anyway. 🙂

Spice Cupboard Organization

August 5, 2010 By Michelle Barneck 4 Comments

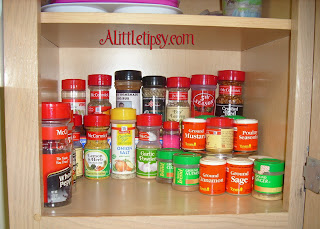
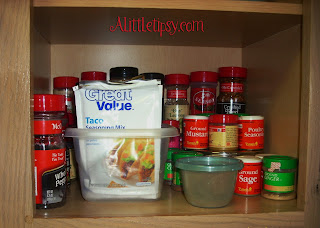
Here’s a couple of quick tips for organizing your spice cupboard.

  • Use a box of matches (or other small boxes you don’t use very often) on it’s side to make the spices in the back visible.
  • Use a tupperware (we all have some laying around that have lost their lids) to corral mixes and packets.
  • Put the things you use the most in the front working toward what you use least in the back.

P.S. Don’t forget to sign up for free Tipsy updates via RSS or email.
We have decided to truncate our feed to help protect against stolen content. I apologize for any inconvenience. Please love us anyway. 🙂

Make Your Own Key Hanger

May 31, 2010 By Michelle Barneck 40 Comments

I wanted to get all of our keys out of a jumbled pile, but could not find a cute key hanger I liked so I decided to make my own. I like the sheet music and Typewriter trends out there right now, so I decided I would incorporate all 3 types of keys: music keys, typewriter keys, and car keys.

And of course being the kind and generous person that I am, I made you a tutorial because good things are meant to be shared right?!

Supplies needed:

  • 9×12 wood board (Wal-Mart)
  • Black & Brown Craft Paint
  • Mod Podge
  • Foam Brush
  • Sand Paper
  • A few old sheets of music (D.I.)
  • 8-1″ hooks
  • 8-1 1/4 inch Washers
  • 4-1 3/4 inch Washers
  • Oil rubbed bronze spray paint
  • E-6000 or other industrial glue
  • Little letter stickers (Robert’s)
  • Cream and black card stock
  • Free Typewriter font
  • Picture hangers (Robert’s)

How to Make a Key Hanger:

1. Sand the edges of the board smooth. Mix the black and brown to somewhat match oil rubbed bronze paint. Apply to the edges of the board with a foam brush. It will probably need a couple coats. Rough up the edges a little with the sand paper.

2. My sheet music was not as wide as the board, so I cut it in strips and used 5 strips (about 1 3/4 inch) across to cover the board. Just line up the music and you can barely tell it came from another page. I left a 2 1/4 inch space at the top of the board for the label. My sheet music had a nice break where I wanted to add the hooks for my keys. Mod podge the strips to the board one at a time to cover the board. I left the black/brown paint residue in the container I put the mod podge in so it would give it a antiqued tint.

3. Cut a strip of black card stock (about 2 1/4 in tall) to cover the top for the label where it will says “KEYS.” Mod podge it on. Cut a strip of cream card stock slightly smaller to create a black frame and mod podge it on.

4. Screw the tiny hooks into the top of a box for easy spray painting. Cover your area and spray paint the hooks and washers with a few coats according to the directions on the paint can. Let dry.

5. Attach the 8 small washers where you want the hooks with industrial glue. Let set.
6. Add tiny letter stickers to those spots you want labeled. I name our cars Tuck (Hyundai Tuscon) and Tepid (97 Dodge Intrepid that someone needs to haul out of our driveway). I left the top shorter hanging area spots unlabeled for random church keys, relatives house keys, etc.
7. Screw the tiny hooks in with your sheer strength and bare hands.

8. Print out “KEYS” using the free typewriter font on cream card stock. I think I used 90 pt font to get it the right size. You’ll want them to fit on about 1 1/2 inch circles. Trace the circles around the letters and cut them out.

9. Glue the letters to the big washers. Then, glue the big washers to the label area on top of the board.

10. Attach some picture hangers to the back and hang.

Now I can grab my keys off the hanger as I head out to the garage and not have to sift through a pile on a shelf. Yay!

Linking up with:
Made By You Monday
Just Whipped Something Up
Making the World Cuter
It’s So Very Creative
Making Monday Marvelous
Visit thecsiproject.com


P.S. Don’t forget to sign up for free Tipsy updates
via RSS or email.

We have decided to truncate our feed to help protect against stolen content. I apologize for any inconvenience. Please love us anyway. 🙂

Four Tips for Making Goals for the New Year

December 30, 2009 By Michelle Barneck 6 Comments

The new year is almost here and what does that mean? A sense of renewed motivation to better myself, time to make a goal list for 2010. Here are a few tips to help you make a goal list that is realistic and reachable.

http://www.thealexandergroup.com/cmsimages/goals.jpg

1. Sort. Break down the areas of your life into categories and choose one or two goals for each area. My categories were:

  • Physical Health
  • Spiritual
  • Family-one for hubs, one for son
  • Personal-something just for me
  • Home-aka housework
  • Work-my blog and online marketing consulting since I am a SAHM

2. Specific. Don’t say “eat better”, say the exact action you want to achieve, like “eat two servings of vegetables everyday”. You need something concrete that cannot be argued or justified.
3. Simple. Pick something realistic to achieve. No really. For instance, I don’t do organized exercise. I don’t go to the gym, so I should not make a goal to workout for an hour five days a week. Make it easy enough that you will stay motivated to do it past the first week of the year.
4. State. Write down your goals and post them where you will see them everyday. I am probably turn mine in to a dry erase check list. It is also helpful to tell someone your goals so they can help keep you on track.

Monday we had a family home evening lesson on goals, but rather than bore our poor two year old by making personal lists of goals at the end we decided to head to the playroom for a few minutes of hardcore fun before pj time. So today while he entertained himself with building boats out of blocks I decided to reflect on things I would like to change for the New Year.

http://api.ning.com/files/O0VmfBMQfMSEpywQc6x37YNJ9pxC79JwzazAkhOtulgw4*qmLm977asCXX12Nc-V-WNIcOpLlfS8KR3YEwgOhR*t8JA4*C-G/Goals.JPG

There are always hundreds of things I could list. I literally went through once and wrote down the time it would take to do all the things I would like to be routine in my household. It added up to about twice as much time as I actually have. This was a nice eye opener that I will never achieve my goals unless they are realistic.

Here are some of the things I came up with (see I am stating them so you can hold me accountable. 😉 )

  • Health: organized exercise 30 minutes 3x per week (turning it in to a Biggest Loser type competition with hubs to keep motivated)
  • Spiritual: Go to the temple once a month, Read scripture 5 minutes per day (already doing these as goals from last year so this will just be upkeep)
  • Family: 1 planned date per month with hubs, 15 min uninterrupted play time with son each day (Again, I will have hubs and son to keep me on track)
  • Personal: 1 non due date project per week
  • House: 30 minutes cleaning in a non-regular use area per week
  • Work: Double my blog readers

I am excited for the new year and can’t wait to get started on my new list of goals! What’s on your goal list for 2010?

Goal blocks photo source: http://www.thealexandergroup.com/cmsimages/goals.jpg
Goal poster photo source: http://api.ning.com/files/O0VmfBMQfMSEpywQc6x37YNJ9pxC79JwzazAkhOtulgw4*qmLm977asCXX12Nc-V-WNIcOpLlfS8KR3YEwgOhR*t8JA4*C-G/Goals.JPG

P.S. Don’t forget to sign up for free Tipsy updates via RSS or email.
We have decided to truncate our feed to help protect against stolen content. I apologize for any inconvenience. Please love us anyway. 🙂
« Previous Page
Next Page »

  • Bloglovin
  • Facebook
  • Google+
  • Instagram
  • Pinterest
  • RSS
  • Twitter

Hi there! I'm Michelle. Mother of three little boys and one little princess. Welcome to A Little Tipsy, a place for exploring creativity and sharing inspiration.

Follow on Bloglovin


Visit Michelle Barneck {A Little Tipsy}'s profile on Pinterest.

Tutorials by Category


15 Family Reunion Games

Family Reunion Games Collage

15 Sprinkle Party Ideas

Sprinkle Birthday Party
Creative Commons License

© Copyright 2014 A Little Tipsy · Site Designed by The Fairy Blogmother · Web Hosting by RFE Hosting

This website uses cookies to improve your experience. We'll assume you're ok with this, but you can opt-out if you wish.Accept Read More
Privacy & Cookies Policy