A Little Tipsy

Creative Tips & Ideas

  • home
  • About Me
  • the tipsy top
  • press
  • projects
  • contact me
[print_thumbnail_slider]

Circus Theme Birthday Party

January 4, 2010 By Michelle Barneck 7 Comments

This year for my son’s 2 year old birthday party we decided to go with a Circus theme. I had a grandiose vision of a giant rainbow parachute, a clown making balloon animals, and pony rides. Then, I realized that my son’s birthday falls between Thanksgiving and Christmas and frankly, I wanted to take the easy way out. And let me tell you, I don’t regret it one bit!

Edit* Here is the invite I sent out with some selective info left out. 😉 I made it using some free digital scrapbooking supplies found online. I could not find where they were from, please tell me if you know! I printed them on 4×6 photo paper.

I decided I would take them to Bouncin’ Off the Walls (a bounce house near our house) for a couple of hours. This place is as fun for the parents as it is for the kids and you get a serious work out chasing around the rug rats! What kind of circus would it be if we didn’t have a bunch of “animals” running around?! All the kids loved it and I loved the price!

To rent it out for a private birthday party with the works it is $200. I was not about to spend that on my 2 year old’s party so I called and said I wanted to do his party there, but could not afford it. After talking for a few minutes, they offered to let me have it for $100 ($10 per kid with a minimum of 10 kids) if I brought my own stuff (cake, favors, etc)! What a deal! It never hurts to ask for a deal! But, when I realized the size of our guest list (9 if every guest showed, which they never do) I still couldn’t justify it.

So, lucky for me, they have a Mom n Me bounce for 5 years and under that is only $5 per kid and parents are free! I had been to this with my friend a few times and the most that were ever there were two other mom and kid duos. I decided this semi-private time would be just the ticket. Funny thing is another mom thought the exact same thing on the same day for her 2 year old son so we had a ring full of 2 year olds! It cost me $30 for everyone to bounce and play for 2 hours. There is no way I could have done a party at home with decor, cake, games, for that much!

I also chose this place because it is really close to the hubs office. He and another guest’s daddy were able to swing over during lunch to have some fun. Turns out we did have some clowns show up. 😉

Since I did not rent the party room, there was obviously no cake allowed, that makes it super easy one me! I just whipped up some party favors with some toys, stickers, and a snack to eat on the way home. It cost just over $2 each for the favors. I got the stuff at Zurchers (box, toy), Target (dough, crackers), and Shopko (stickers). The little guy would just open the presents as people came to get their party favor. Super easy, super fun!

Circus box, Circus stickers, Animal crackers, Play dough with stamp, Animal toy

Find your local kid fun spot and check out their deals. Most of them have a discount day. My sis had her little girl’s party at Classic Fun Center (skating, bounce house, jungle playground) on the $2 night. Usually all the activities are $7. She had her party with pizza, etc for like $50.

Seriously, let yourself take the easy, low stress road for once!


This little friend just moved to Denmark.
They will be great pen pals. We’ll miss you guys!!
We have decided to truncate our feed to help protect against stolen content. I apologize for any inconvenience. Please love us anyway. 🙂

Wordless Wednesday-Breakfast Invention

December 23, 2009 By Michelle Barneck Leave a Comment

That’s one way to have cereal and milk.
He put the cereal in the straw and then sipped the milk.

Head over to 5 Minutes for Mom for more Wordless Wednesday!

P.S. Don’t forget to sign up for free Tipsy updates via RSS or email.

We have decided to truncate our feed to help protect against stolen content. I apologize for any inconvenience. Please love us anyway. 🙂

Christmas Art Project

December 10, 2009 By Michelle Barneck 6 Comments

I love including the kiddos in holiday decorating. I wanted a fun Christmas art project that the family could do together and display for all to see. I love that this piece celebrates the season, but also celebrates our little family. In fact, you probably already have everything you need for this hand print pine tree painting. So here’s a little tutorial.

Supplies Needed:

  • Foam brush
  • Craft paint-brown, green (or mix navy, yellow & brown if you don’t have dark green & don’t want to run to the store )
  • 12×12 card stock (ours was a light gray with a slight shimmer)
  • Hands
1. Make a tree trunk by using the foam brush to paint a 4 inch area from your wrist to forearm brown. Then, stamp your arm on the paper. If you want it a little thicker, stamp again.
For us, my arm was the best size. Plus, the symbolism of me holding up the family is a bonus. 😉

2. Start with the person with the biggest hands, most likely Dad. Paint his hand with a light coat of green. If you use too much it will just ending up looking like a blob. Have him stamp his hand slightly right, then slightly left aligning the second stamp with the fingers filling in the gaps.

3. Paint the other family members hands from biggest to smallest and have each person do step two. We just have three people, so it went Dad, Mom, Son. You may have to adjust how much you stamp according to how big your family is.

4. I put my Christmas art project in the black wood frame I used for this fall art project and up on the wall it went. You could use fingertips dipped in white to add snow flakes falling or in red to add ornaments to the tree. I liked ours just the way it was. It could be really fun to make one for each member of the family and then let them decorate it. I feel an FHE coming on!

I would love to see your Christmas art project if you try it!

P.S. Don’t forget to sign up for free Tipsy updates via RSS or email.

We have decided to truncate our feed to help protect against stolen content. I apologize for any inconvenience. Please love us anyway. 🙂

Turkey Cookies

November 11, 2009 By Michelle Barneck 8 Comments

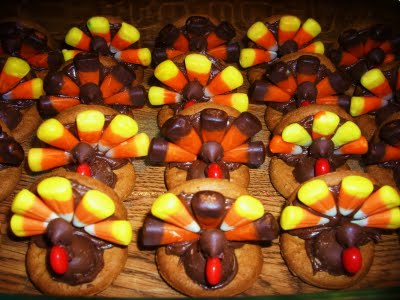
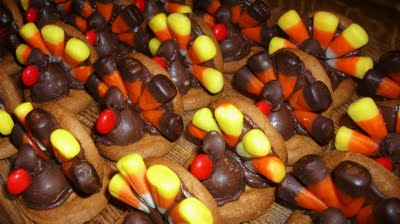
This has been a family Thanksgiving tradition of mine for a long time. These turkey cookies are really fun to make and the little ones love to help! They only take a few minutes to make, but have a BIG wow factor! Let’s get going with the Thanksgiving Turkey Cookie Tutorial!

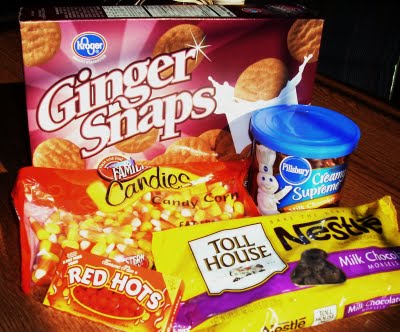
Ingredients needed for Turkey Cookies:
Ginger snaps
Chocolate Frosting
Candy Corns (get them soon, they are hard to find closer to Thanksgiving!)
Hershey Kisses (I used the almond ones just because I like them better)
Chocolate Chips
Red Hots

Tools:
Cutting board
Knives (one to trim cookies, one to spread frosting)

I like to put all the ingredients in bowls for easy access.

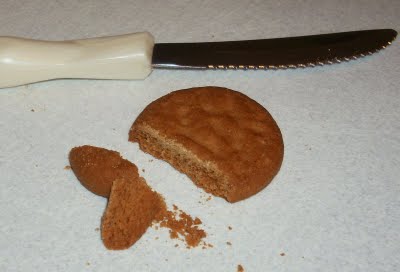
1. First, trim a ginger snap with a knife to make the tail. Make sure the cut is not angled or your tail will fall over.

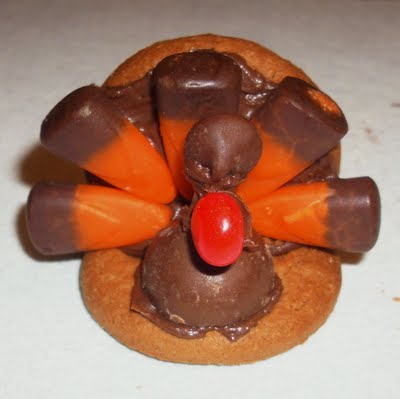
2. Spread frosting on cookie piece and add five candy corns for feathers.

3. Add some frosting to the flat edge of the cookie and stand it up on the edge of another ginger snap. (Tail)

4. Frost the bottom of a kiss and put it on the cookie in front of the tail. (Body) This will help hold up the tail while the frosting sets.

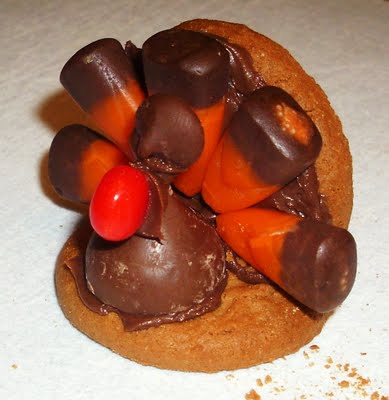
5. Dip the edge of a chocolate chip in frosting and place it near the top of the Hershey’s Kiss. (Head) Then, dip a red hot in frosting and place it below the chocolate chip on the kiss. (Gobble)

There you have it! One fantastic little turkey cookie!
Now, gobble til you wobble!

We love to use these as a Thanksgiving activity for the kids
while all the food is cooking.

Turkey cookies are a fun little treat for neighbors or would be really cute set at
each place on the Thanksgiving table!

P.S. Don’t forget to sign up for free Tipsy updates via RSS or email.

We have decided to truncate our feed to help protect against stolen content. I apologize for any inconvenience. Please love us anyway. 🙂
« Previous Page
Next Page »

  • Bloglovin
  • Facebook
  • Google+
  • Instagram
  • Pinterest
  • RSS
  • Twitter

Hi there! I'm Michelle. Mother of three little boys and one little princess. Welcome to A Little Tipsy, a place for exploring creativity and sharing inspiration.

Follow on Bloglovin


Visit Michelle Barneck {A Little Tipsy}'s profile on Pinterest.

Tutorials by Category


15 Family Reunion Games

Family Reunion Games Collage

15 Sprinkle Party Ideas

Sprinkle Birthday Party
Creative Commons License

© Copyright 2014 A Little Tipsy · Site Designed by The Fairy Blogmother · Web Hosting by RFE Hosting

This website uses cookies to improve your experience. We'll assume you're ok with this, but you can opt-out if you wish.Accept Read More
Privacy & Cookies Policy