A Little Tipsy

Creative Tips & Ideas

  • home
  • About Me
  • the tipsy top
  • press
  • projects
  • contact me
[print_thumbnail_slider]

Stamped Washer Necklace Tutorial: Courage

December 16, 2009 By Michelle Barneck 22 Comments

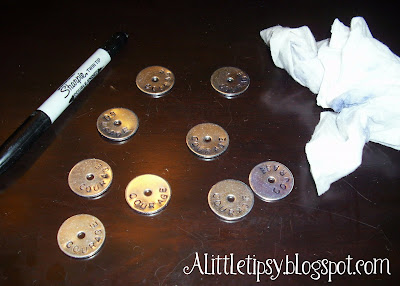
We always have a special Christmas lesson for our Young Women at one of our homes the Sunday before Christmas and wanted something special to give our Beehive class. My wonderful adviser and crafty girl extraordinaire, Amanda (from Every Crafty Endeavor), came up with the idea and the supplies to do stamped washer necklaces that say Courage to go along with next year’s mutual theme. I am so nice and took pics of the process so that you can do it too. I know, I know…too kind.

(Stay tuned for how we tie them in to the Christmas nativity lesson)

Supplies Needed:

  • Heavy Hammer (you can use a regular one, you will just have to hit harder)
  • Washers (ours were about an inch)
  • Alphabet stamp set
  • Black permanent marker
  • Baby wipe
  • Leather, ribbon, or a chain to put the charm on

Stamp sets are available on Amazon for $15 if you need one. *Update: I just bought a stamp set on sale from Harbor Freight for $10 including shipping!

1. Take your supplies to a concrete area so you don’t damage whatever is under your stamping. (We froze our little tushes on the porch in 30 degree weather, but the end result was well worth it and it really did not take that long.) Pull out the letters you will be using and put them in order. Place the first letter stamp equidistant from the hole in the middle and the edge. Now, with the other hand, whack the stamp with the hammer 3 or 4 times (depending on how hard you hit and the weight of your hammer).

See cute Amanda demonstrating her great skill.

2. Keep it going with the other letters. Place the next letter by aligning the edge of the stamp with the first letter and turning a hair so it follows the curve of the washer. This may take some getting used to. We had to redo some. Continue with each letter.

3. Once you have the letters stamped, get your permanent marker ready. Color over the letters so that the indentions are black. If you have a stubby marker like me this may take some doing. Once all the letters are covered, wipe with a baby wipe until you are left with black only in the letter indentions. I would do each washer one at a time. It is easy to wipe off when they have not been sitting.

4. Now just thread your “chain” of choice through the hole and you are good to go.

I love how they turned out! I love that they represent the theme so well! “Be strong and of a good courage.” Joshua 1:9

Now, for how they will be tied to the lesson. We are going to be talking about how each of the people in the Nativity Story had to have great courage. We will talk about each piece of the nativity as we place it on the table and also have a song to go with it.

  • Mary-to be the mother to God’s Son and to travel to Bethlehem 9 mos. pregnant and give birth in a stable
  • Joseph-to find out his wife to be will be giving birth to God’s Son
  • Jesus-to be the one to volunteer to come to earth and sacrifice himself for us
  • Shepherds-to have an angel come and then go to find the Christ child. Spreading the word to others.
  • Three Kings-followed a star to find the Christ child and did not tell Herod where He was

I am so excited for this lesson! It is so personal to have it in Amanda’s home with the fire crackling and everything so cozy. Last year, the Christmas lesson was AMAZING and I can only imagine this year will be the same!

P.S. Don’t forget to sign up for free Tipsy updates via RSS or email.

We have decided to truncate our feed to help protect against stolen content. I apologize for any inconvenience. Please love us anyway. 🙂

YW Birthday/Christmas Gift Ideas

November 23, 2009 By Michelle Barneck 14 Comments

Grandma (one of our readers, sorry I don’t know your real name.) wanted to know some ideas for birthday gifts for the Young Women for next year. Here are a few of the gifts we have done while I have been in the Presidency.

Last year for Christmas we gave them a little standing flip book with a thought for each week of the year.

Beaded bookmarks with “Be an Example” theme charm to encourage them to read their scriptures 5 minutes a day. You could do them with next year’s theme.

We recently had Elaine S. Dalton, General Young Women President, come speak at a fireside and we had encouraged all the girls to have the new Virtue value in their Personal Progress done. To celebrate those who did, and encourage those others to keep working we gave them a gold virtue charm to add to their bookmarks.


For Christmas this year, we are giving them the word “Courage” in vinyl lettering to put on their mirrors and remind them of this years theme.

http://www.christiangiftsplace.com/images/vwm03medcc.jpg

For birthdays next year, we are giving fun colorful socks with a thought about walking in the footsteps of Christ. (edit: see the saying and actual socks we used here)

http://www.comfykid.com/Shop%20By%20images/ZUTcrew-socks3.jpg

I hope these ideas help! Also, please feel free to share ideas you have in the comments!

Photos from:
http://www.christiangiftsplace.com/ScriptureForWalls.html
http://www.comfykid.com/Boy2-4-main.htm

P.S. Don’t forget to sign up for free Tipsy updates via RSS or email.
We have decided to truncate our feed to help protect against stolen content. I apologize for any inconvenience. Please love us anyway. 🙂

YW Leadership Idea-Don’t be a Turkey

November 19, 2009 By Michelle Barneck 3 Comments

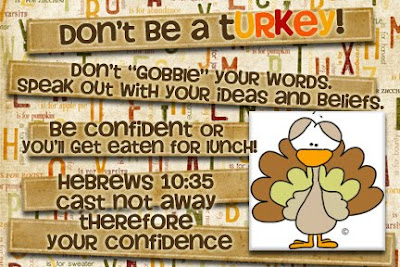
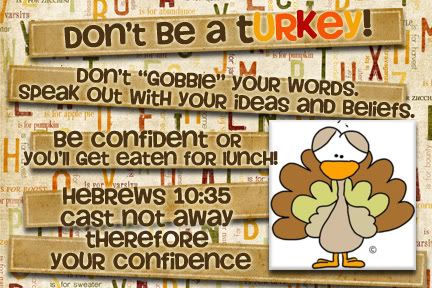
We had our Young Women presidency meeting at my house this month which means I was in charge of the leadership moment for the Young Women class presidencies. I wanted to focus on confidence and not being scared to share ideas and beliefs. I came up with this turkey handout since it is the month of Thanksgiving. It also goes along really well with nest year’s theme: “Be strong and of a good courage; be not afraid, neither be thou dismayed: for the Lord thy God is with thee whithersoever thou goest” Joshua 1:9.

<span class=

Click thumbnail to print 4×6

I talked about how they should not be scared or ashamed to speak out whether it be conducting at church or defending their beliefs at school. I read them the story of chicken little and how he was brave (one of my little guy’s faves) even when he felt alone.

Don't Be a Chicken! (Disney's Chicken Little)

Then, I gave them the turkey handouts and with my family’s traditional turkey cookies.


They loved the turkey cookies!

P.S. Don’t forget to sign up for free Tipsy updates via RSS or email.

We have decided to truncate our feed to help protect against stolen content. I apologize for any inconvenience. Please love us anyway. 🙂

Make Your Own Gourmet Caramel Apples

September 22, 2009 By Michelle Barneck 9 Comments

Every time we go to Park City we stop in The Village Candy Shoppe on Main Street to pick up a delicious caramel apple. Rocky Mountain Chocolate Factory sells them too. Want to know how to make your own? Here we go! I mean what is fall without a delicious caramel apple?

I taught my YW how to make Gourmet Caramel Apples for an activity. I wanted to make things super simple so they could remember how to do it and make them for their families, but you could definitely amp up the recipe with homemade caramel as long as it is a recipe that will stiffen over time.

Caramel Apple Basic Ingredients:
10 medium green apples (edit: Gma G suggests having them cold so the caramel sets up faster)
2 bags caramel bits (Love these! I bought them thinking they were regular caramels, but then opened them to find I did not have to unwrap them all. They are smaller balls so they melt easier too.)
Water
1 bag milk chocolate chips
1 bag white chips
Crisco

Optional ingredients: (these will be used for an additional coating depending on what flavor you want)
Cinnamon Sugar (used with white chocolate to make the apple pie flavor, my fav!)
Oreos
Butterfinger
Reese’s Pieces
Heath Bar
Chopped peanuts
anything else that you might like to try!

  1. Begin by washing the cold apples and removing the stem. Then insert the stick where the stem was. (The sticks come with the caramels.)
  2. Spread a good amount of wax paper on the counter and spray it with cooking spray so the apples won’t stick.
  3. Melt the caramel according to package instructions. I believe ours said something like add 2 T. of water and microwave for 90 seconds, stir and then melt until smooth. You want it pretty runny.
  4. Dip your apples in the caramel by tipping the bowl, holding the stick, and spinning the apple in it. (sorry forgot to take pics of all this) Cover all but about a 1 1/2 inch circle on the top. Continue turning the apple while the caramel drips off so that you have an even coat all around. Let it drip for quite a while, until it looks like a thin layer, otherwise you will have a huge puddle under your apple. Reheat caramel for additional apples as necessary to keep it runny.
  5. Place the apples on the sprayed wax paper and put in the fridge for about 20 minutes until the caramel is solid (I had them on a cookie sheet to make it easy to move them all at once).
  6. Get out two medium bowls and put each flavor of chocolate chips in each bowl. Add a Tablespoon of Crisco to each bowl. This will make the chocolate more viscous. Microwave until smooth, stirring at least once per minute.
  7. Repeat dipping step 4, but with the chocolate. Sprinkle with your Optional ingredient (oreos, butterfinger, etc.) so they stick to the chocolate.
  8. Place on sprayed wax paper and put in the fridge for 30 minutes.
  9. If you want to get really fancy, put the leftover chocolate in a ziploc, cut a tiny hole in the corner and drizzle over the apples.
  10. Enjoy! MmmMMmm! I like to cut mine up so it is easier to eat.

My Beehives with their apples. They LOVED this activity!

My little guy thought this was the best bedtime snack ever!

P.S. Don’t forget to sign up for free Tipsy updates via RSS or email.

We have decided to truncate our feed to help protect against stolen content. I apologize for any inconvenience. Please love us anyway. 🙂
« Previous Page
Next Page »

  • Bloglovin
  • Facebook
  • Google+
  • Instagram
  • Pinterest
  • RSS
  • Twitter

Hi there! I'm Michelle. Mother of three little boys and one little princess. Welcome to A Little Tipsy, a place for exploring creativity and sharing inspiration.

Follow on Bloglovin


Visit Michelle Barneck {A Little Tipsy}'s profile on Pinterest.

Tutorials by Category


15 Family Reunion Games

Family Reunion Games Collage

15 Sprinkle Party Ideas

Sprinkle Birthday Party
Creative Commons License

© Copyright 2014 A Little Tipsy · Site Designed by The Fairy Blogmother · Web Hosting by RFE Hosting

This website uses cookies to improve your experience. We'll assume you're ok with this, but you can opt-out if you wish.Accept Read More
Privacy & Cookies Policy