A Little Tipsy

Creative Tips & Ideas

  • home
  • About Me
  • the tipsy top
  • press
  • projects
  • contact me
[print_thumbnail_slider]

Elmer’s Craft & Tell Party: How to Make a Christmas Tree

November 17, 2011 By Michelle Barneck 179 Comments

Check out what showed up on my doorstep the other day…
Ya, it was pretty much like a crafty Christmas morning. Elmer’s sent me this insanely cool box (Did you see those cutouts, talk about great packaging!) filled to the brim with super cool Elmer’s and X-acto products to try out and share. I called a few of my creative friends over for a little crafty get together.
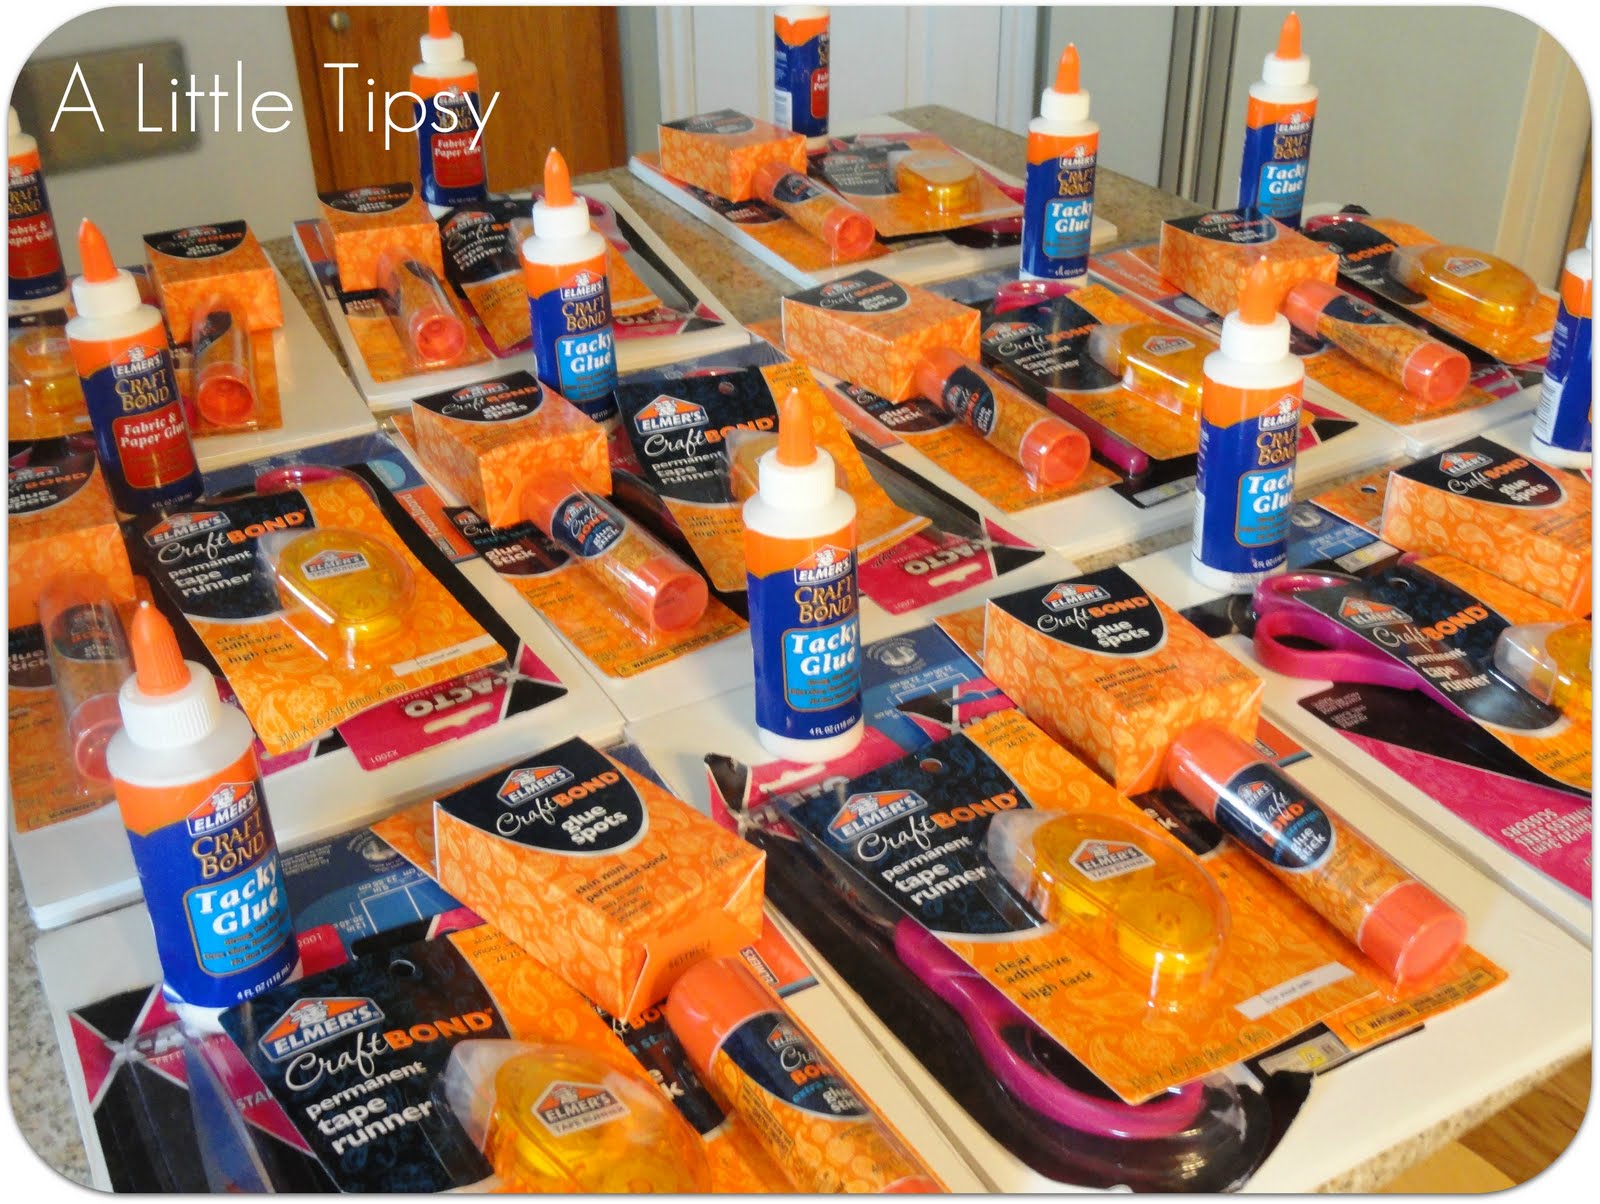
Everybody got an awesome goody bag full of Elmer’s crafty supplies like scissors, glue of all kinds (dots, runners, tacky, sticks), retractable x-acto knives, foam boards and self-healing cutting mats.
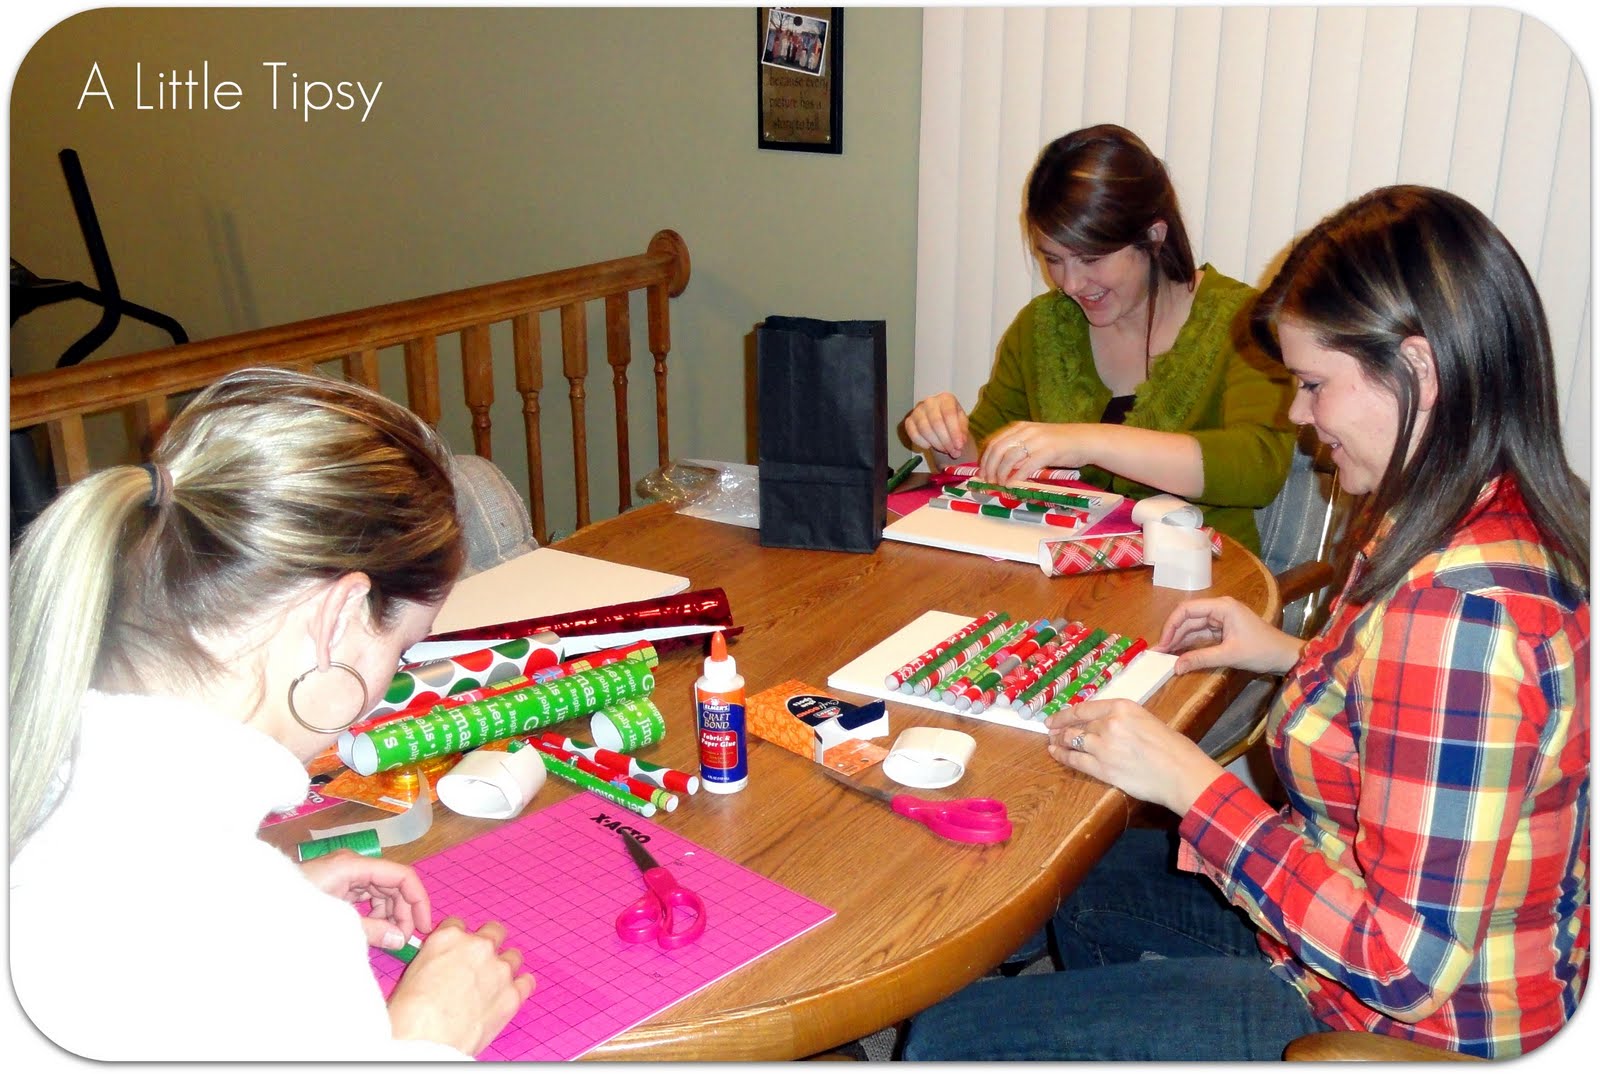
Hannah, Jen, Jonie
What GNO is complete without some delectible seasonal offerings?! This was a great excuse to whip up some Starbuck’s Caramel Apple Spice, Nutella hot chocolate and pumpkin pie cake.
Everyone brought a roll of wrapping paper and we got to work on a little Pinterest inspired Christmas decor project.
Jennifer
All of you couldn’t fit in my house, but that doesn’t mean you can’t do the make and take! And later you’ll have a chance to win a little party of your own!
{How to Make a Wrapping Paper Christmas Tree}
inspired by
Supplies:
  • Wrapping paper
  • Elmers Glue Spots
  • Elmers foam board (we used bifold, but you only need one side)
  • Scissors
  • Large Popsicle sticks
  • Heavy duty kitchen shears
  • Garden twine
  • Elmers tacky glue
  • Hot glue
  • Wood Star
  • Martha Stewart Glitter Paint
  • Buttons
Cut pieces of wrapping paper and roll them in to tubes securing with a few glue spots. Secure the glue spots to the foam board making the tubes progressively smaller.
Break a popsicle stick in half. Put the halves side by side cover in glue and wrap with twine.
Let the glue dry then trim off the ends of the sticks with the kitchen shears (I used Cutco). Glue in place under the tree.
Paint the star with a thick layer of glitter glue and let dry. Hot glue a button on the star and then glue in place at the top of the tree.
Use glue spots to secure button ornaments on the tree.
And that my friends is how to make a Christmas tree!
Now you have the make and take, let’s get you an Elmer’s goody bag!
Elmers is giving away two Elmer’s Craft & Tell Prize Packs so you can have a crafty GNO of your own including:
  • 3 X-ACTO Retract-a-Blade knives
  • 3 CraftBond Extra Strength Glue Sticks
  • 3 CraftBond Tape Runners
  • 3 Mini Bi-fold 9×12 Foam Board packs
  • 1 Painters Markers pack
  • 1 X-ACTO Decorative Edge Scissors pack
  • 1 Circle Cutter
  • 1 X-ACTO Self-Healing Mat
  • 1 Glue Dots pack
  • 2 Photo Corners packs (various colors)
  • 1 Gel Pens pack
  • 1 Tacky Glue bottle
It’s a sweet party in a box, just add friends and treats!
To enter: (leave a separate comment on this post for each entry)
  • What in the prize pack are you most excited about?
  • Like Elmer’s on Facebook on tell them hello from A Little Tipsy
  • Follow Elmer’s on Twitter
  • Follow A Little Tipsy
  • Tweet or Facebook about this giveaway Ex: I’m hoping to win the @elmers #craftandtell giveaway on @littletipsyblog!
Giveaway ends on Tuesday, November 22nd. Good luck!

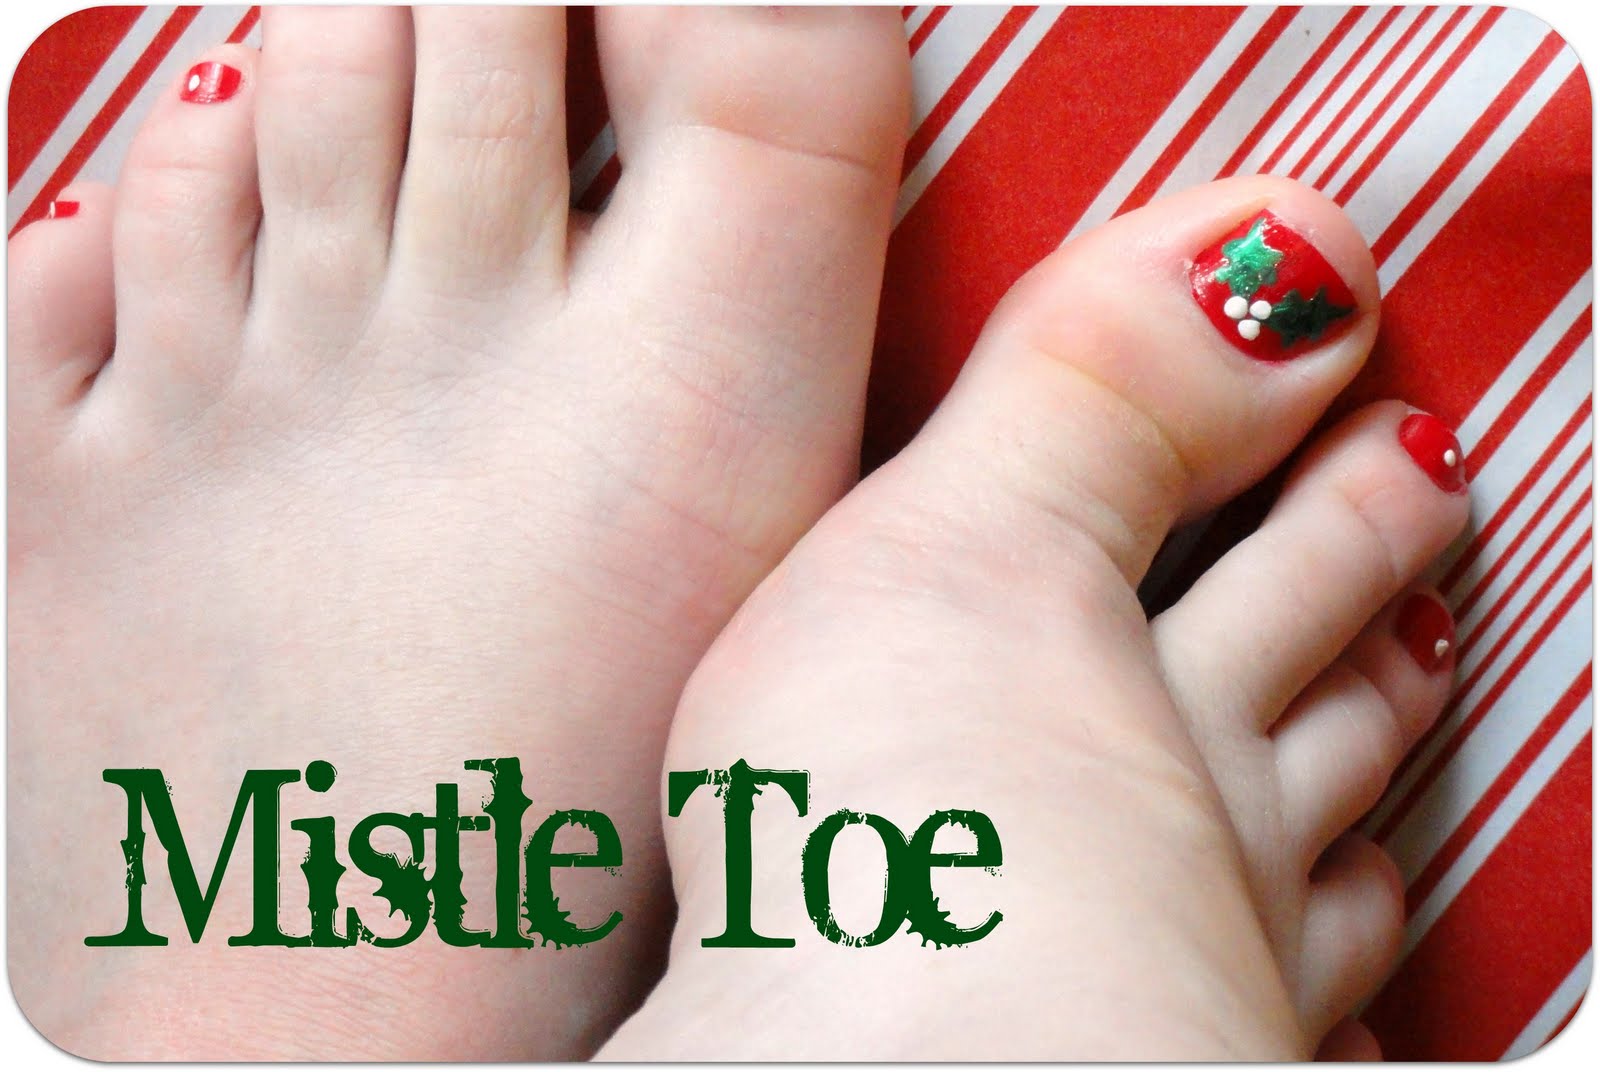
Mistle-toe

November 15, 2011 By Michelle Barneck 7 Comments

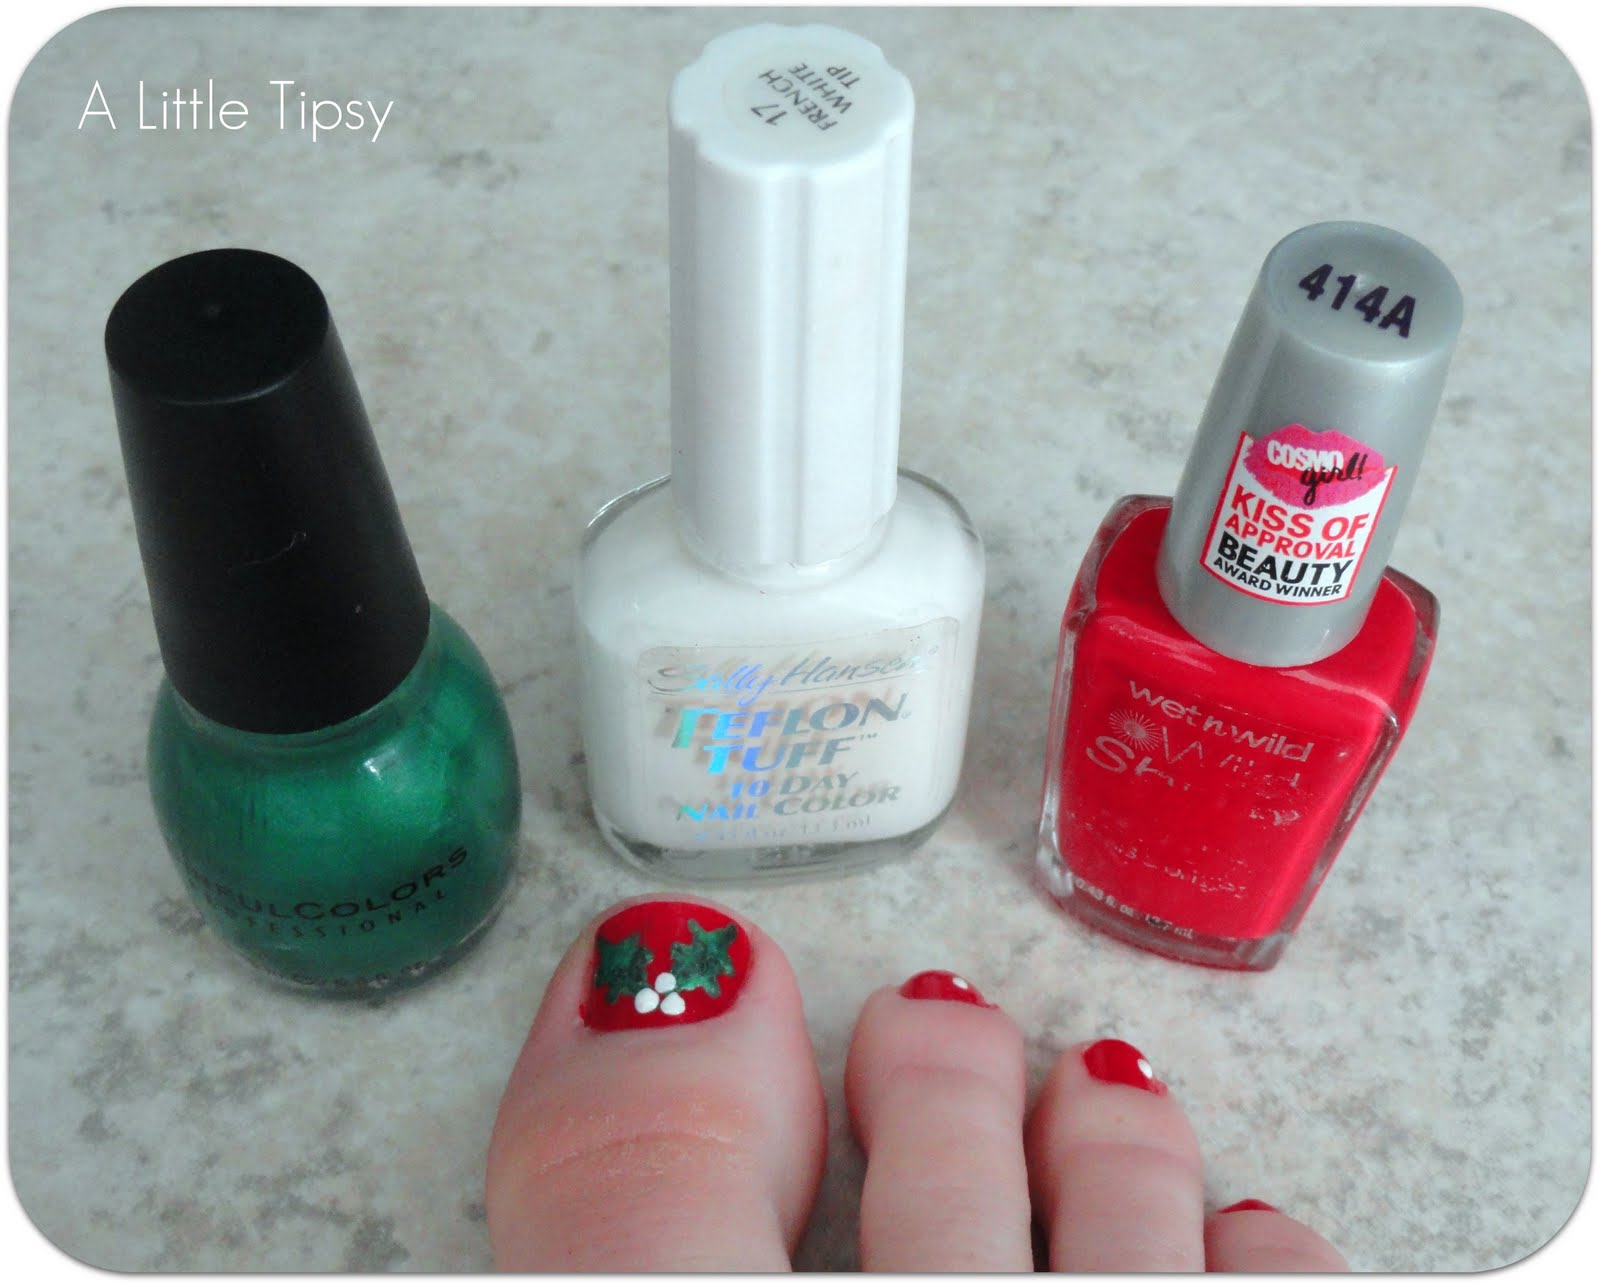
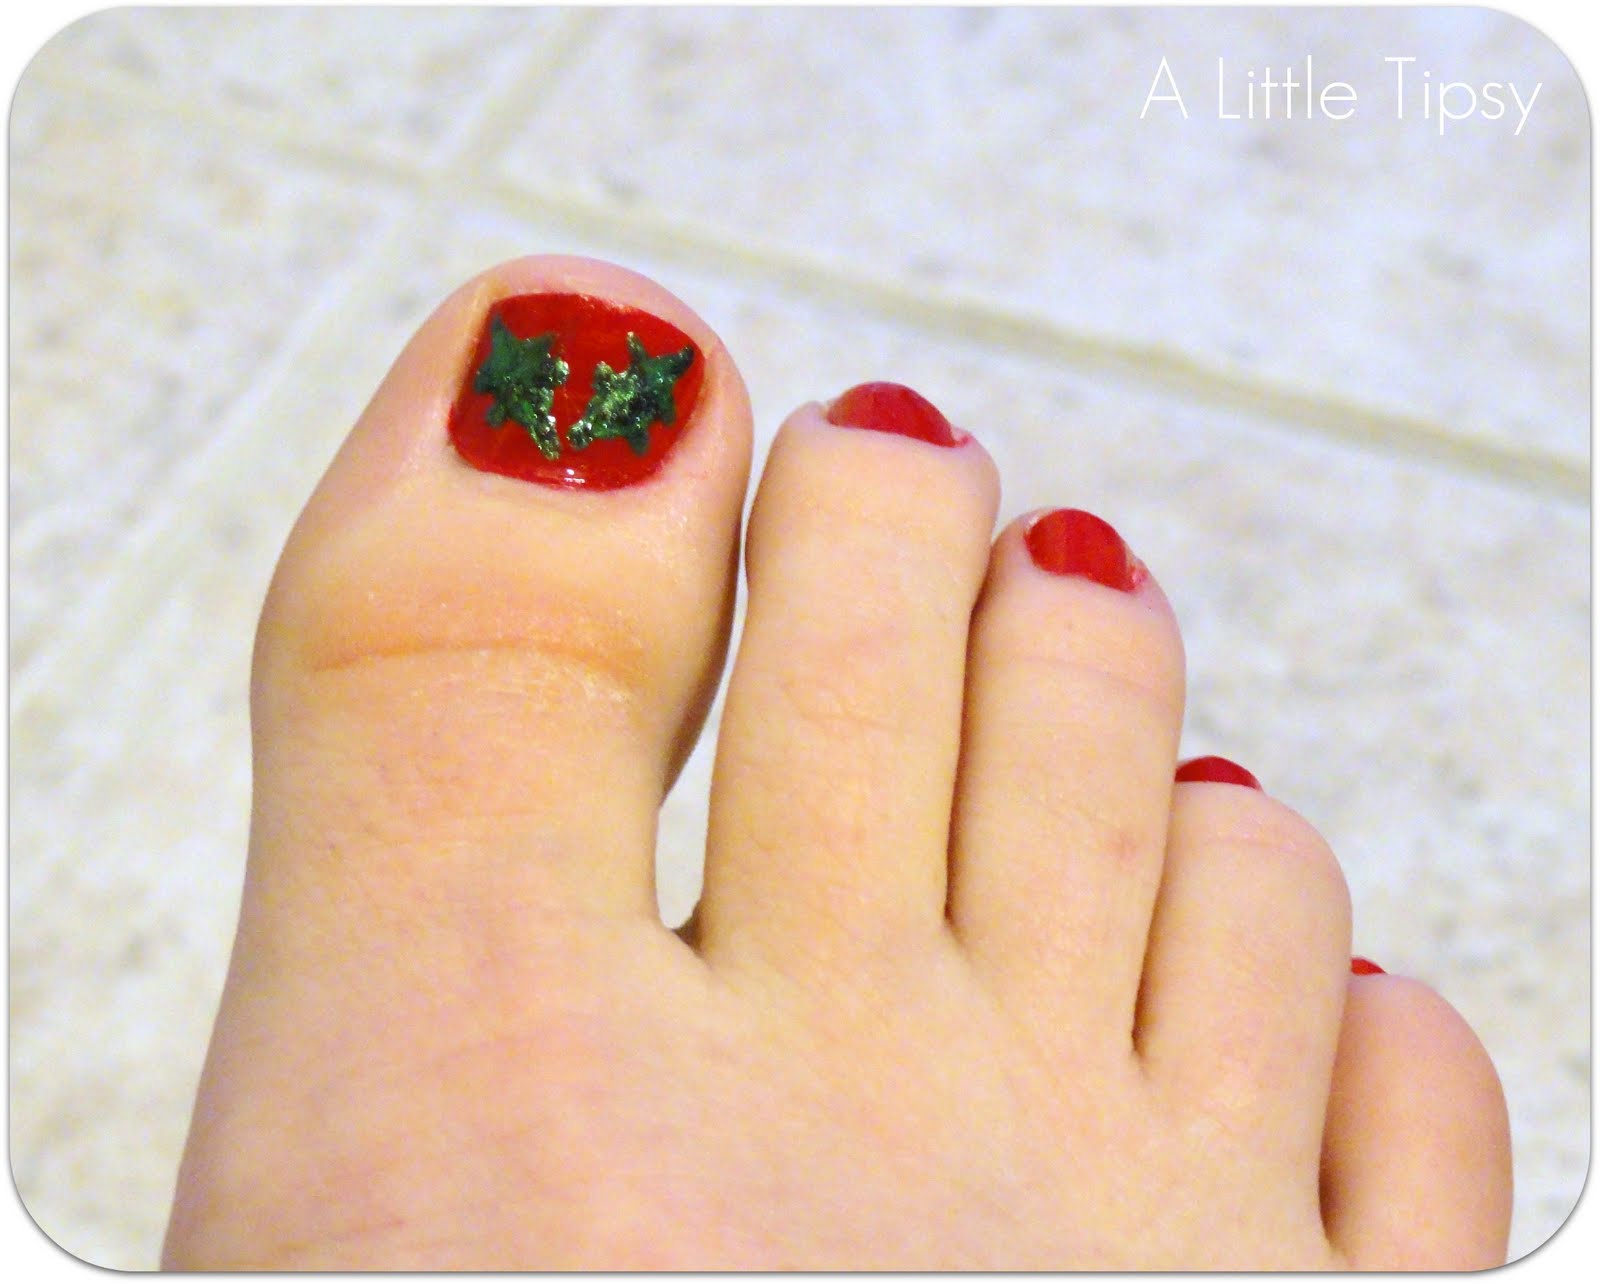
Time to spread a little holiday cheer…to your toes with a festive Mistle-toe pedicure!
p.s. I am well aware they are holly leaves, but mistletoe leaves are boring and I still wanted to use the cute name.
It’s pretty simple. Take a little bit of this…
and turn it in to this!
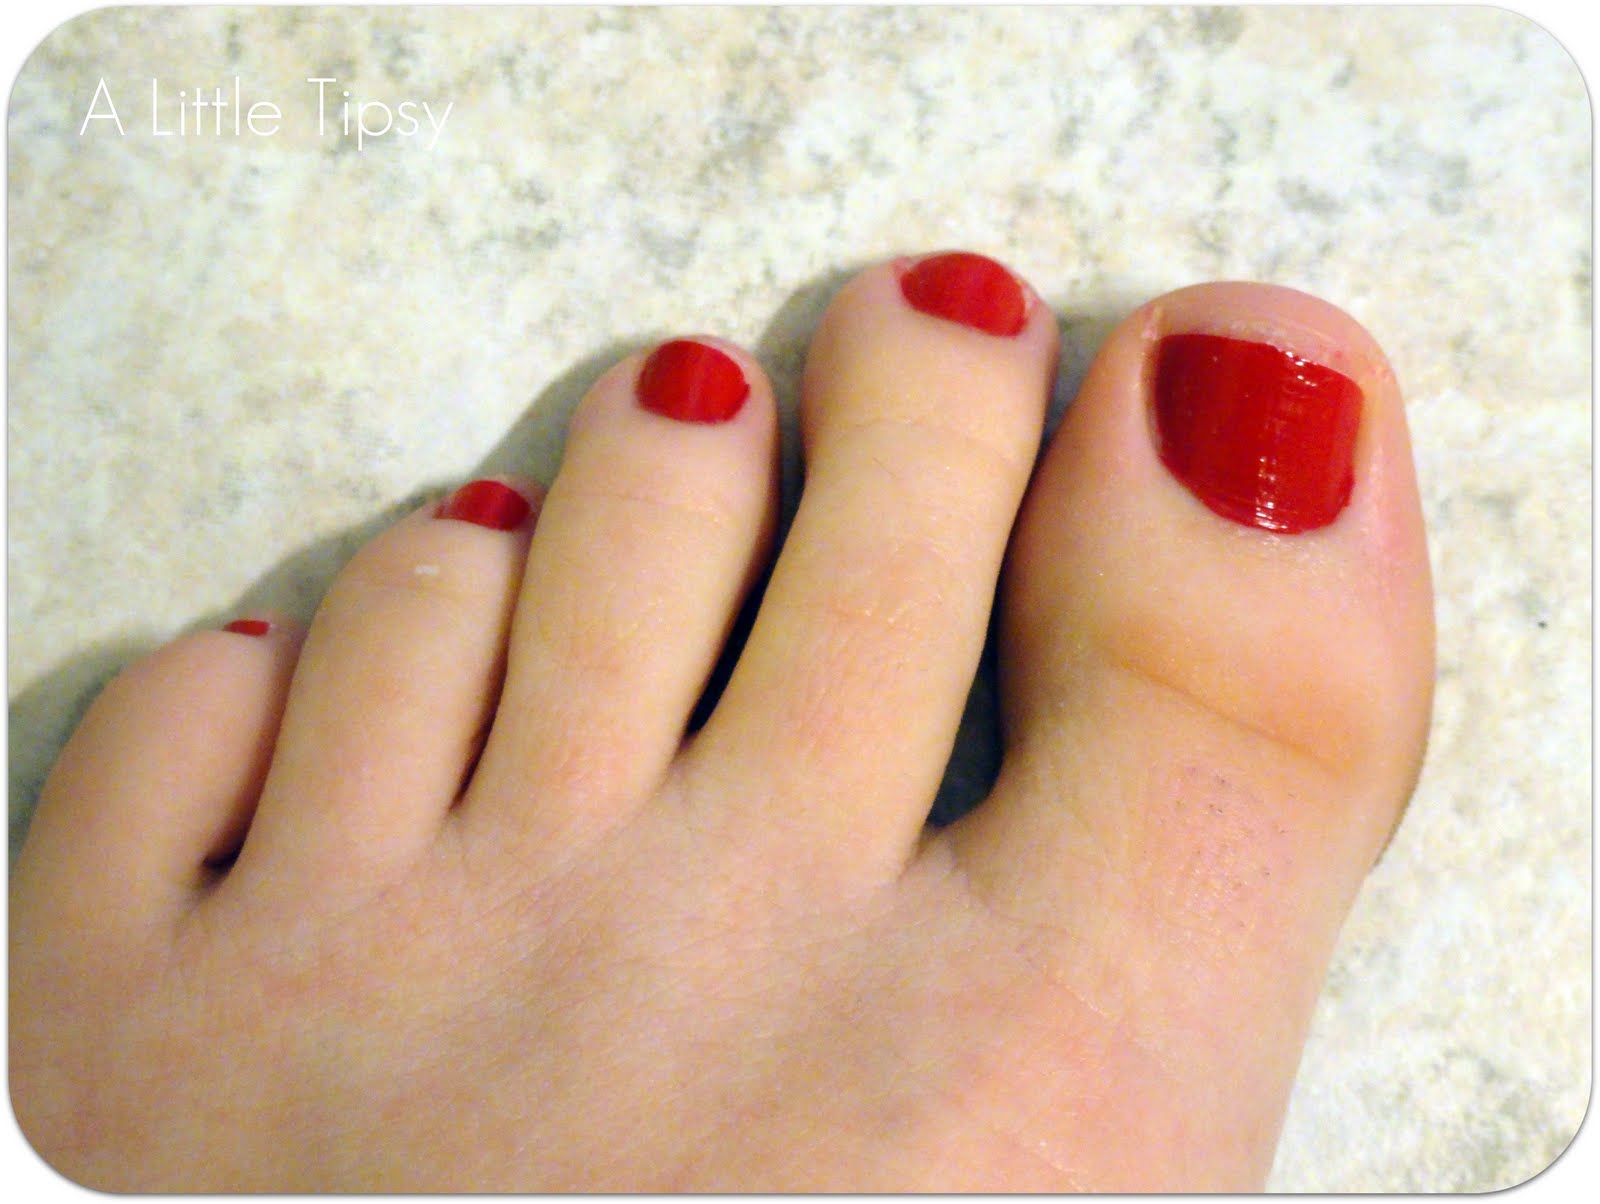
Step-by-step Mistle-toe:
Red coat.
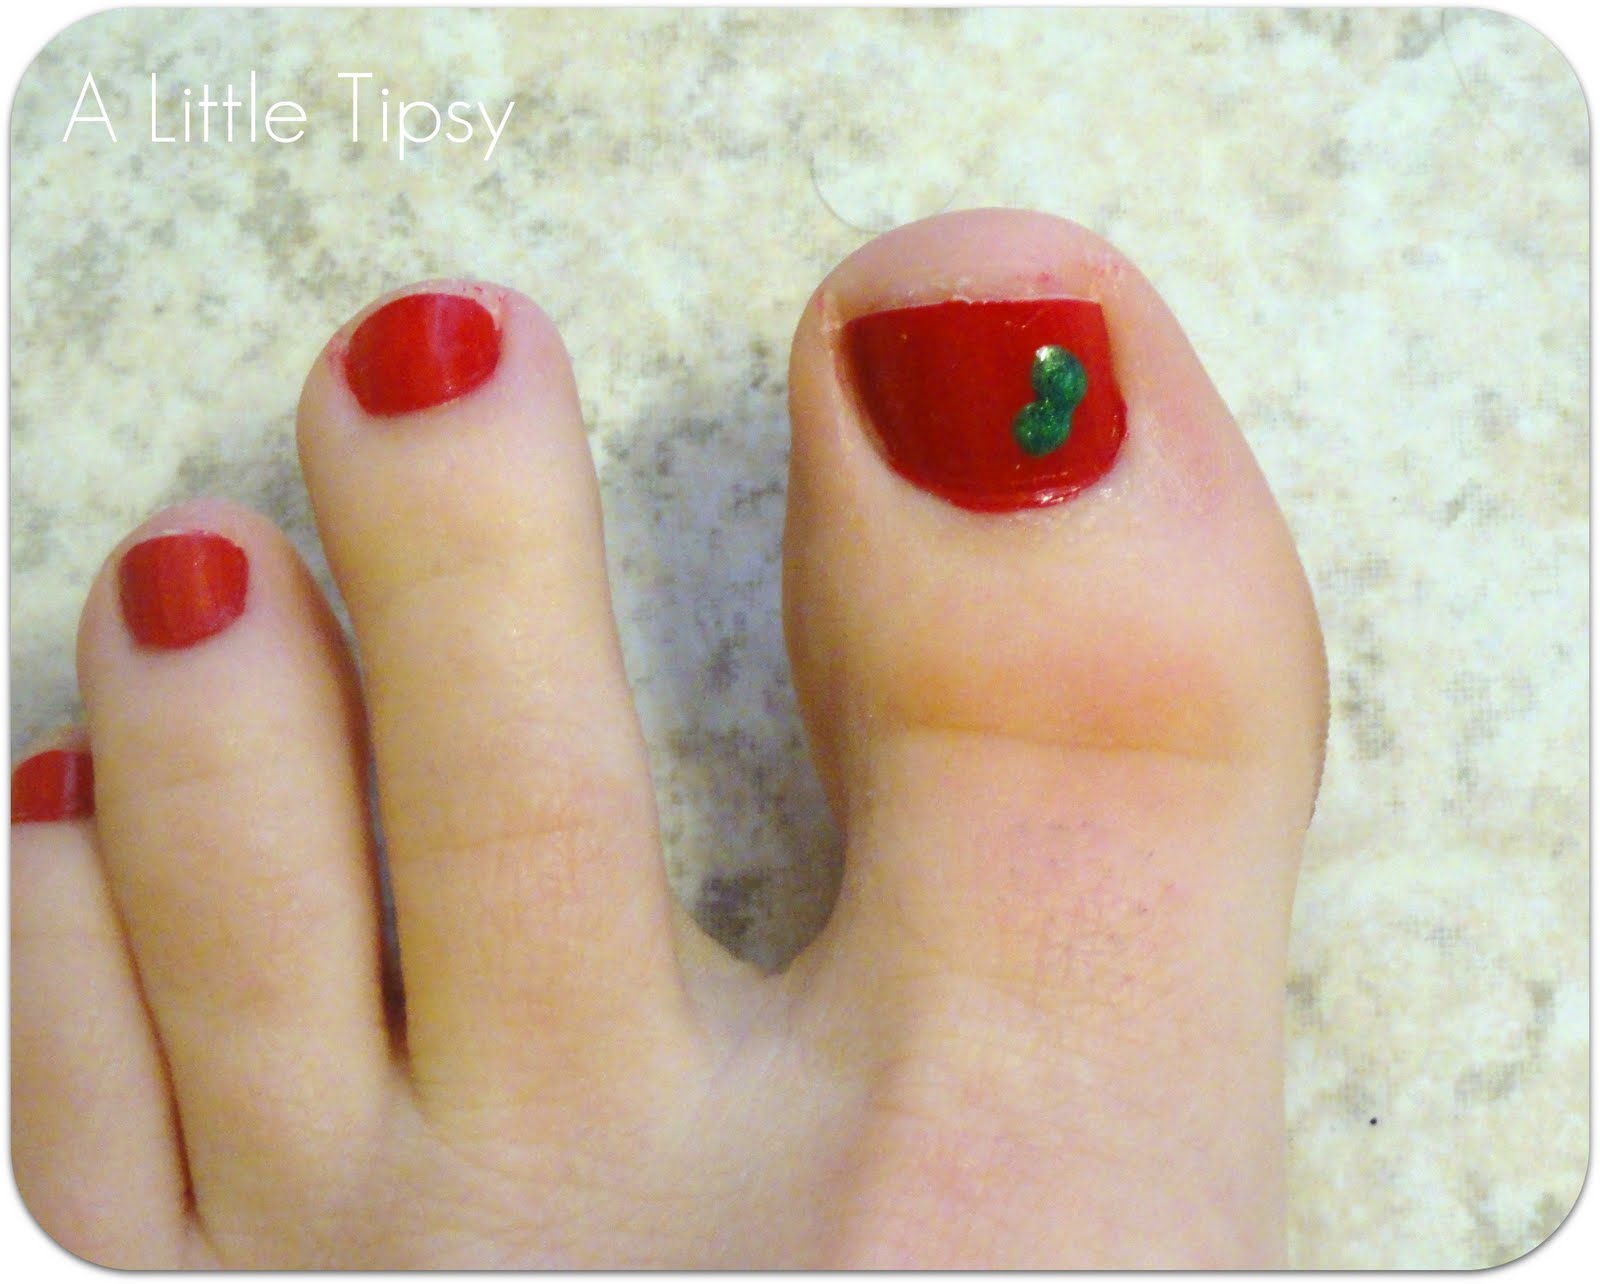
Two green dots.
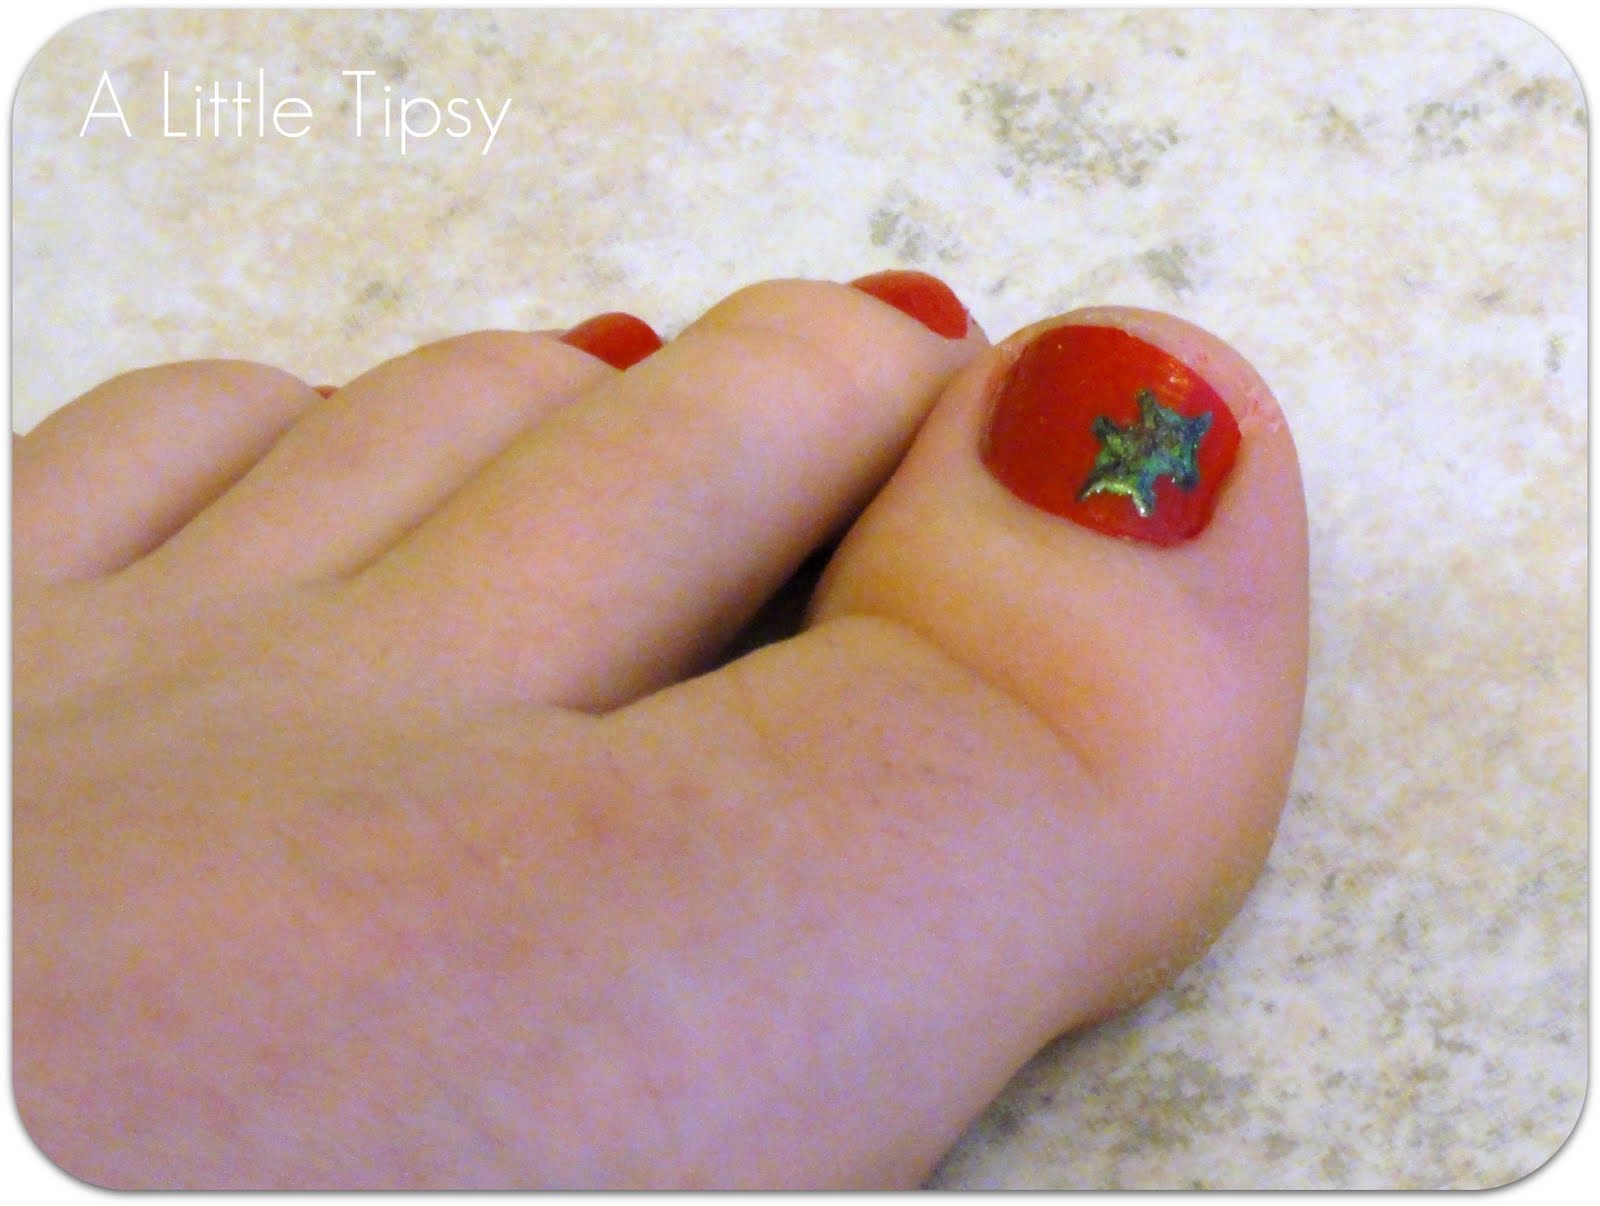
Use a toothpick to pull the polish to make 6 points. Move the polish around with the toothpick as needed to make it look right.

Two more green dots.
Make points with toothpick.
Dip toothpick in white and make three dots to complete your mistle-toe. Add a single dot to all other nails.
Cover with a clear coat and BAM. Super jolly Mistle-toe pedi!
P.S. Don’t forget to sign up for free Tipsy updates via RSS or email.
We have decided to truncate our feed to help protect against stolen content. I apologize for any inconvenience. Please love us anyway. šŸ™‚

Countdown to Xmas

November 11, 2011 By Michelle Barneck 4 Comments

I am SUPER excited to be doing a guest post for Michelle on her creative “A Little Tipsy” blog! I think she just comes up with the cutest ideas! I also LOVE that she caters to those living on a budget!! šŸ™‚ The hubster & I are on a little bit of a budget right now since he decided to go back to school….so any fun craft I can do for UNDER $20, I am all over! šŸ™‚

I am Tara, one of the *divas* blogging for the website, The Dating Divas.

I am married to my best friend, addicted to crafting & coming up with creative dates for my sweetie & me, AND I loooove blogging with some of my closest friends. Life is good! On The Dating Divas website, we are all about coming up with creative dates & crafty ideas that will help strengthen our relationships…and I have the PERFECT one to share with you. Michelle thought this crafty idea would be PERFECT for this time of year to share with her readers….and I have to agree! Ready for some fun?!?

The Spouse Countdown to Xmas

Are you ready for the hustle & bustle of Christmas to begin?? Oooohhh…I am! I absolutely LOVE Christmas time!! *sigh* OK….ā€observation timeā€ā€¦..I feel that when the Christmas season hits, we usually tend to focus more on the kids….don’t you agree?? Of course, the wonder and joy on their faces when they experience a FABULOUS Christmas…definitely HELPS. {lol}If you want to make sure your spouse knows how much you adore him/her during THIS holiday season…and doesn’t feel neglected….have I got an idea for you! Cuz ya know….Christmas isn’t JUST for the little ones…. ☺

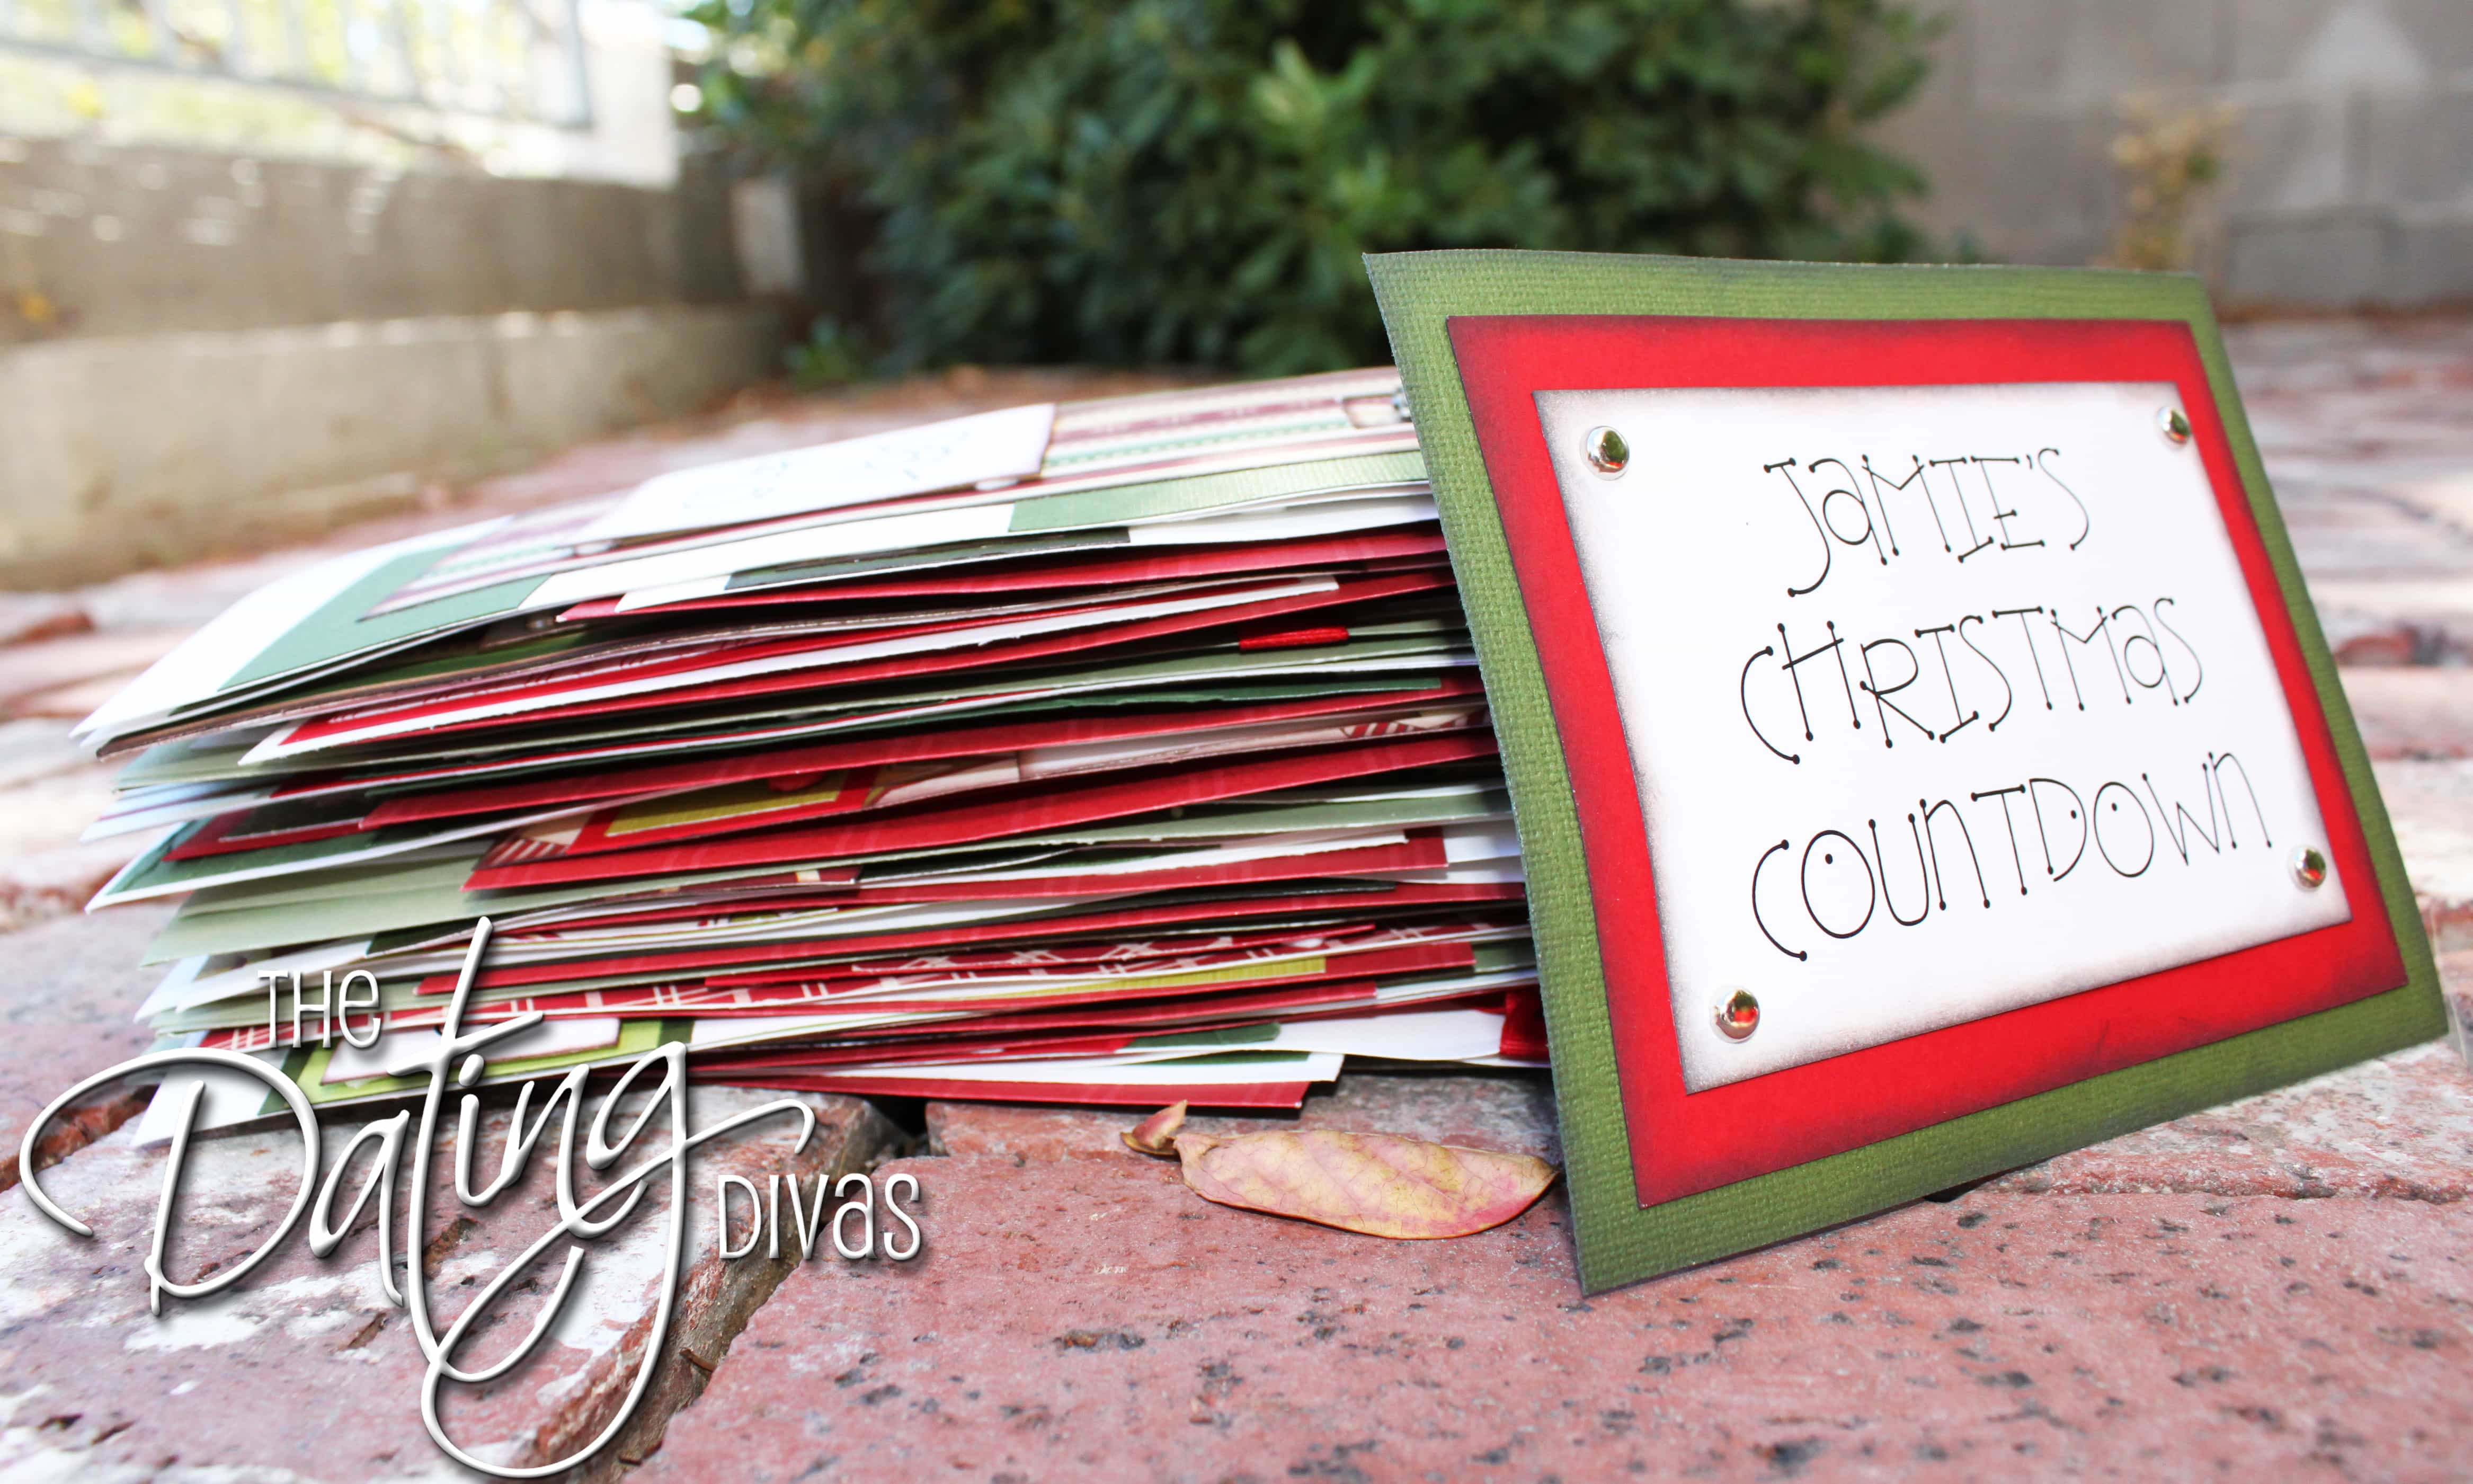
Two years ago, I decided I wanted my husband to have something FUN to look forward to when December hit….so I created the FIRST set of ā€œJamie’s Christmas Countdownā€. Twenty-five days of L.O.V.E. just for him! I am going to show you my original Countdown to xmas…and if you are SUPER busy…..{Who isn’t, right?!?}…..there is a ā€œquickā€ version that you can instantly download! šŸ™‚

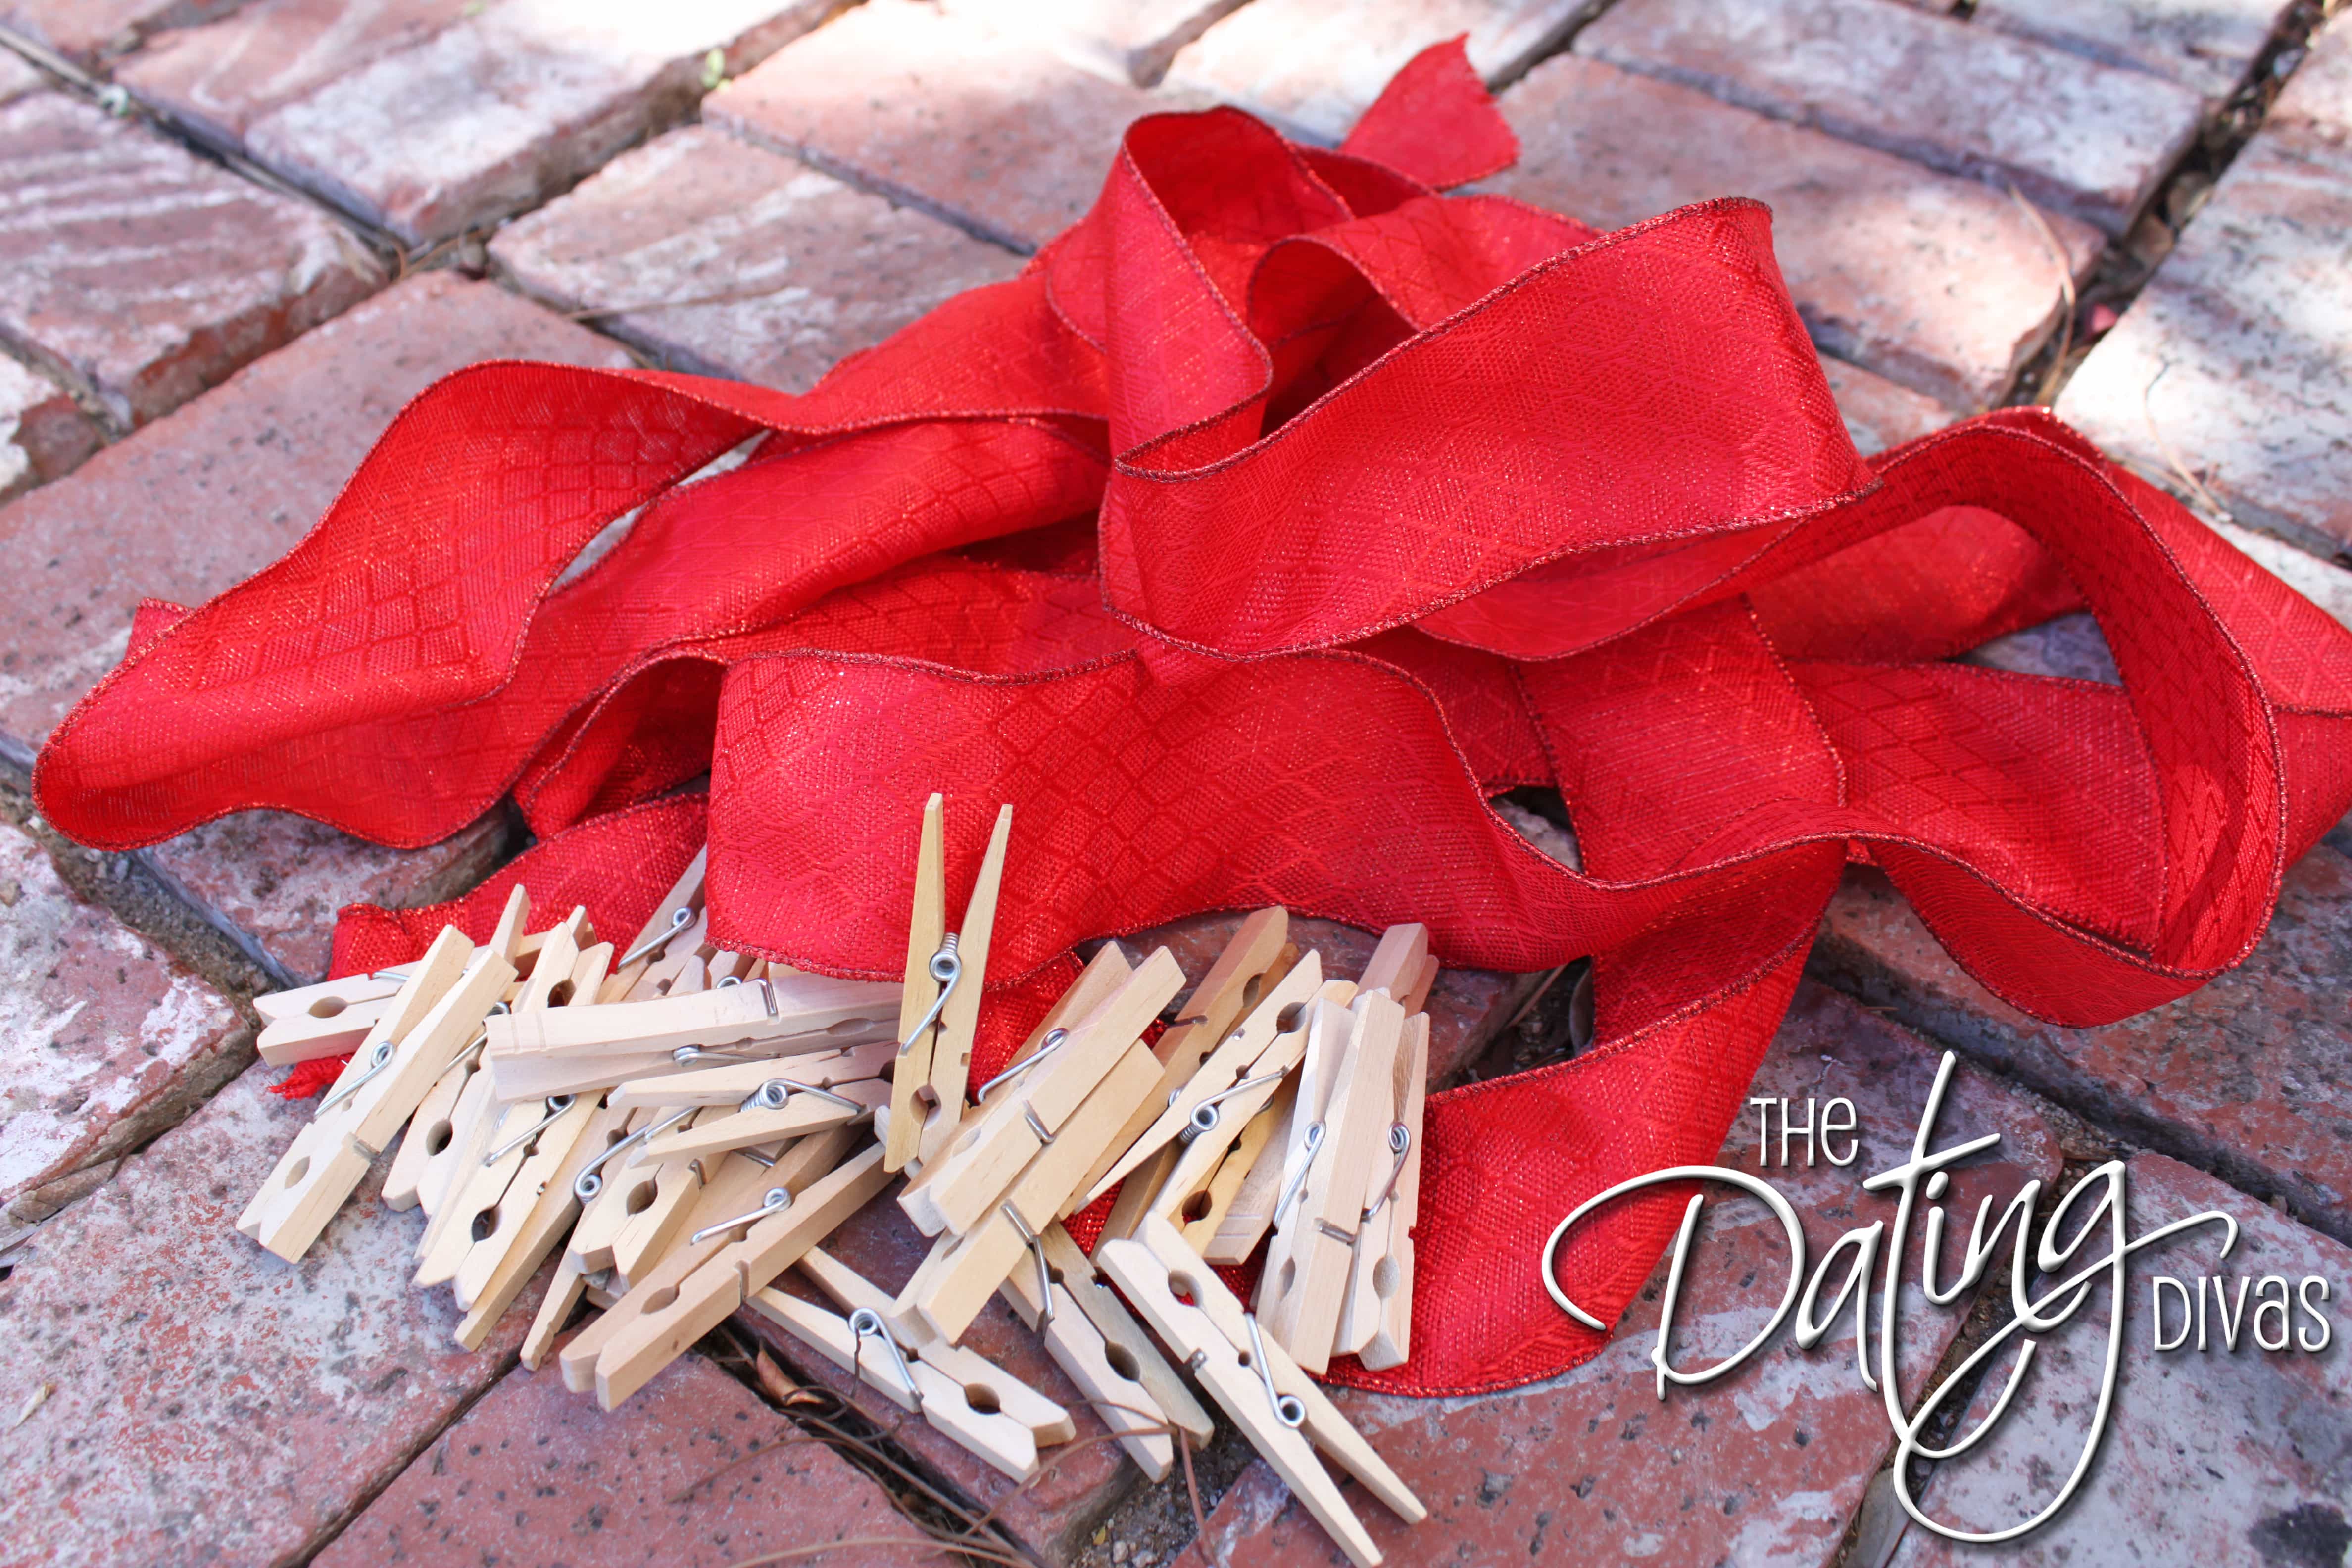
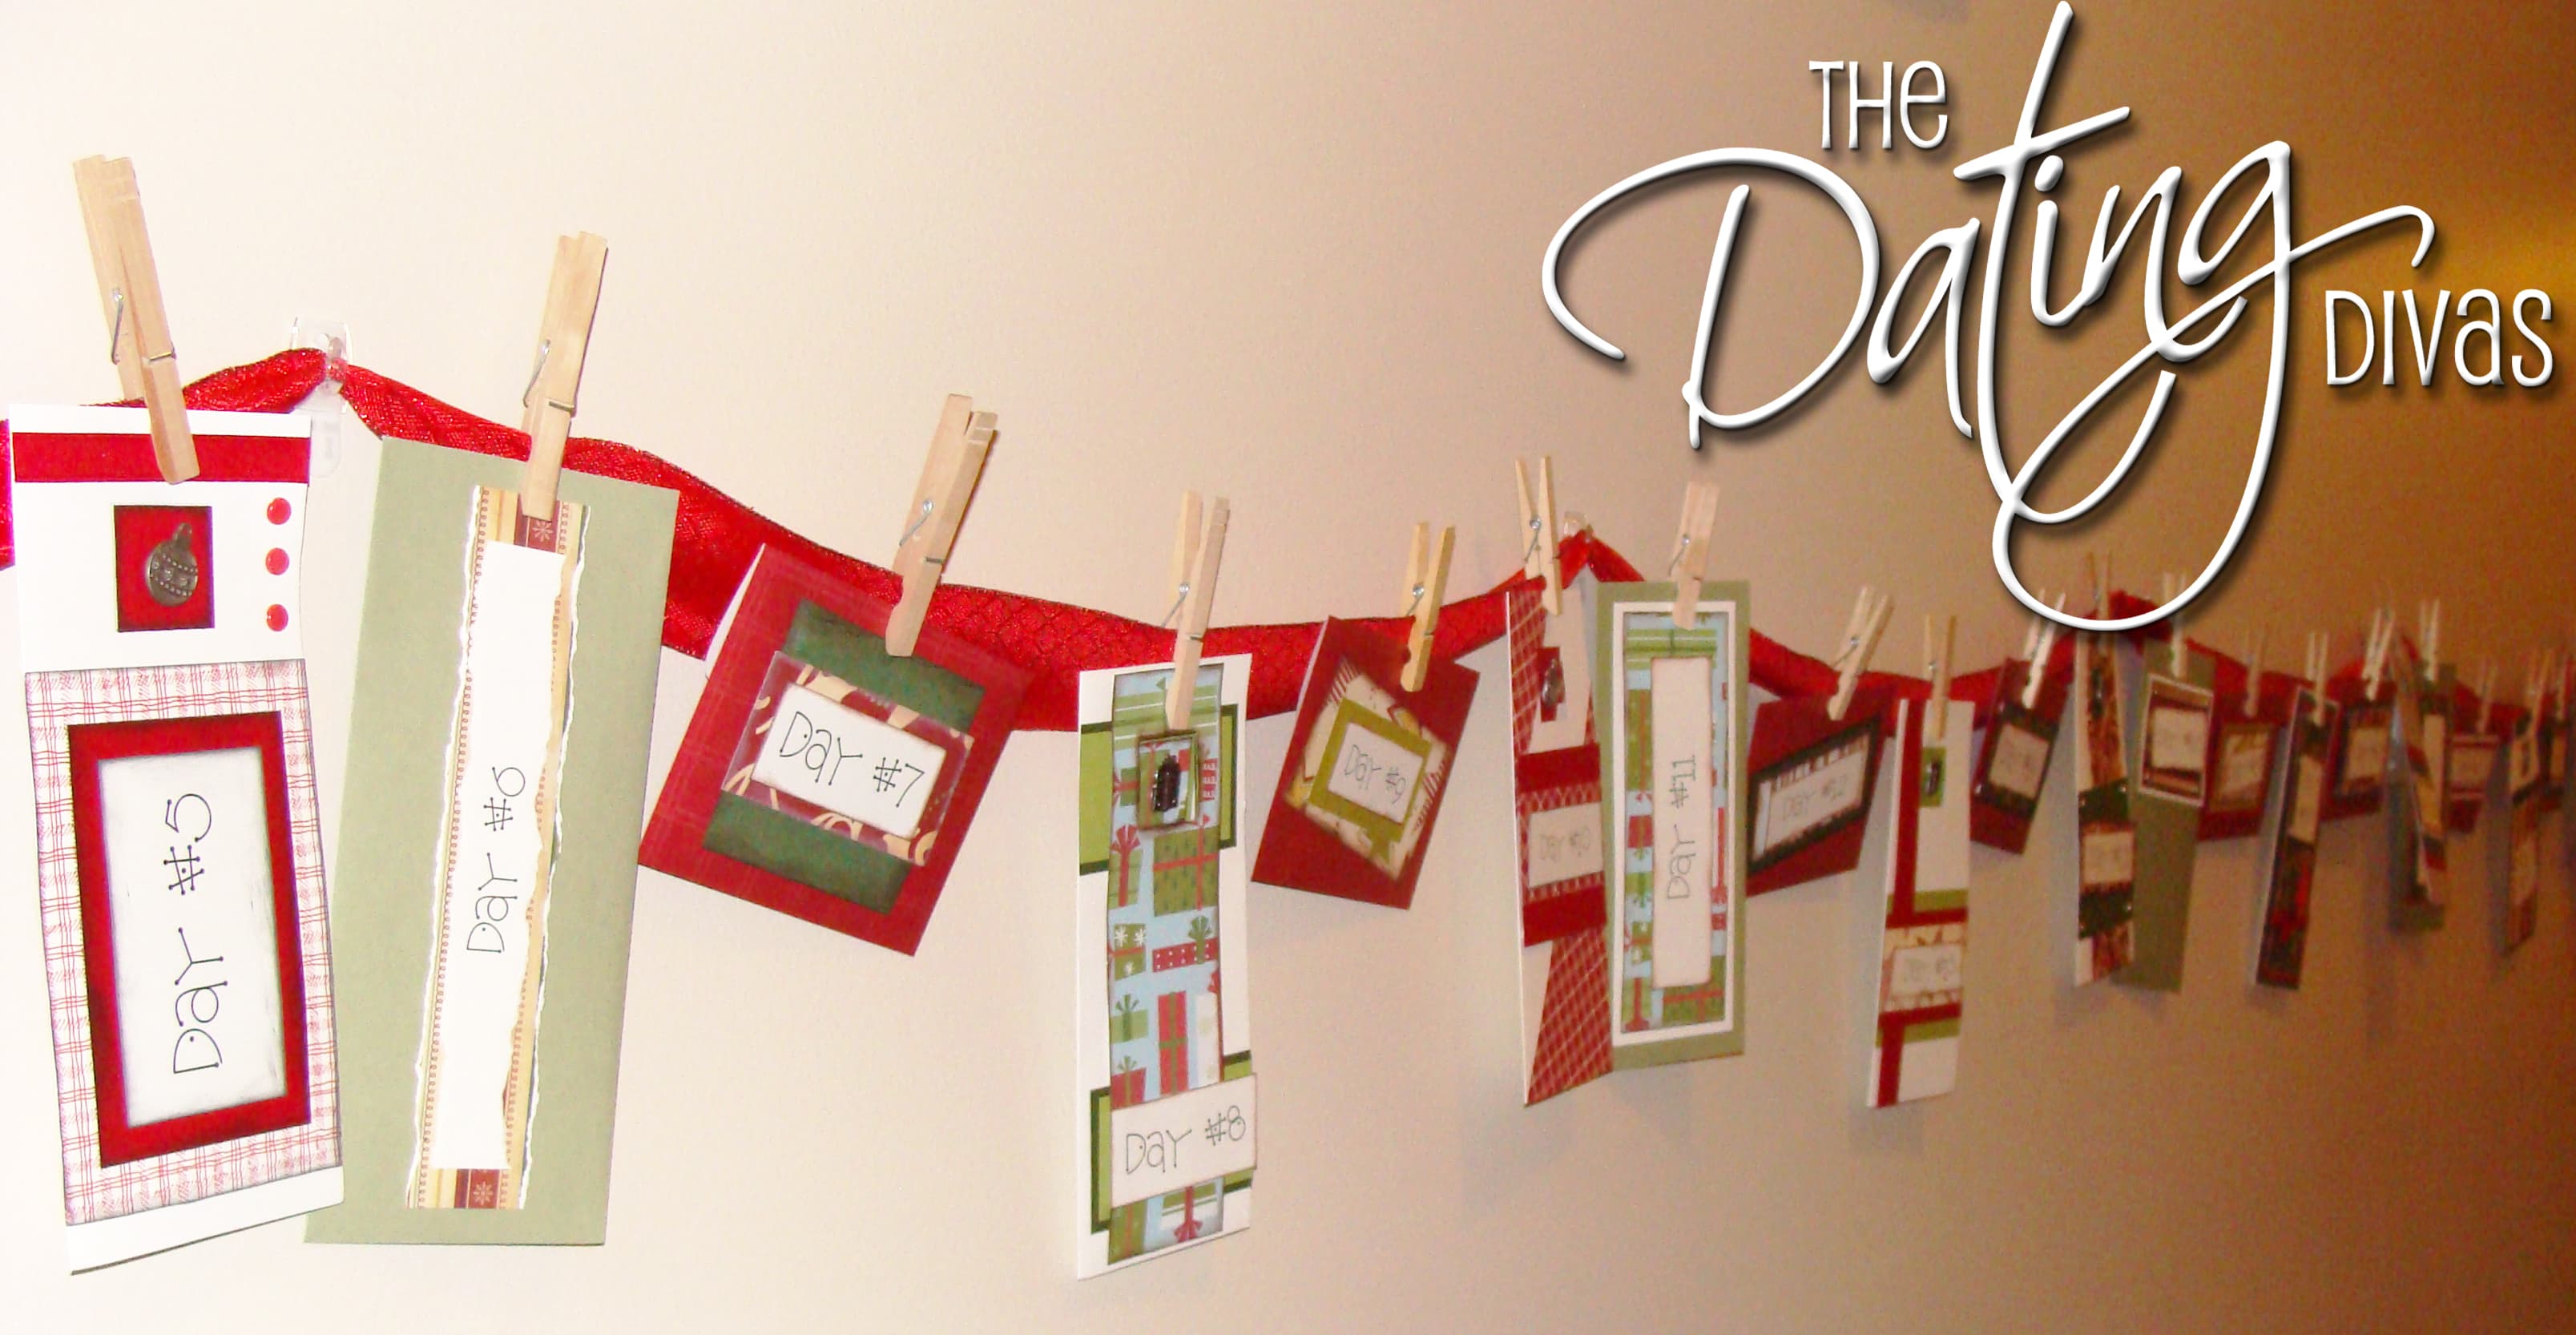
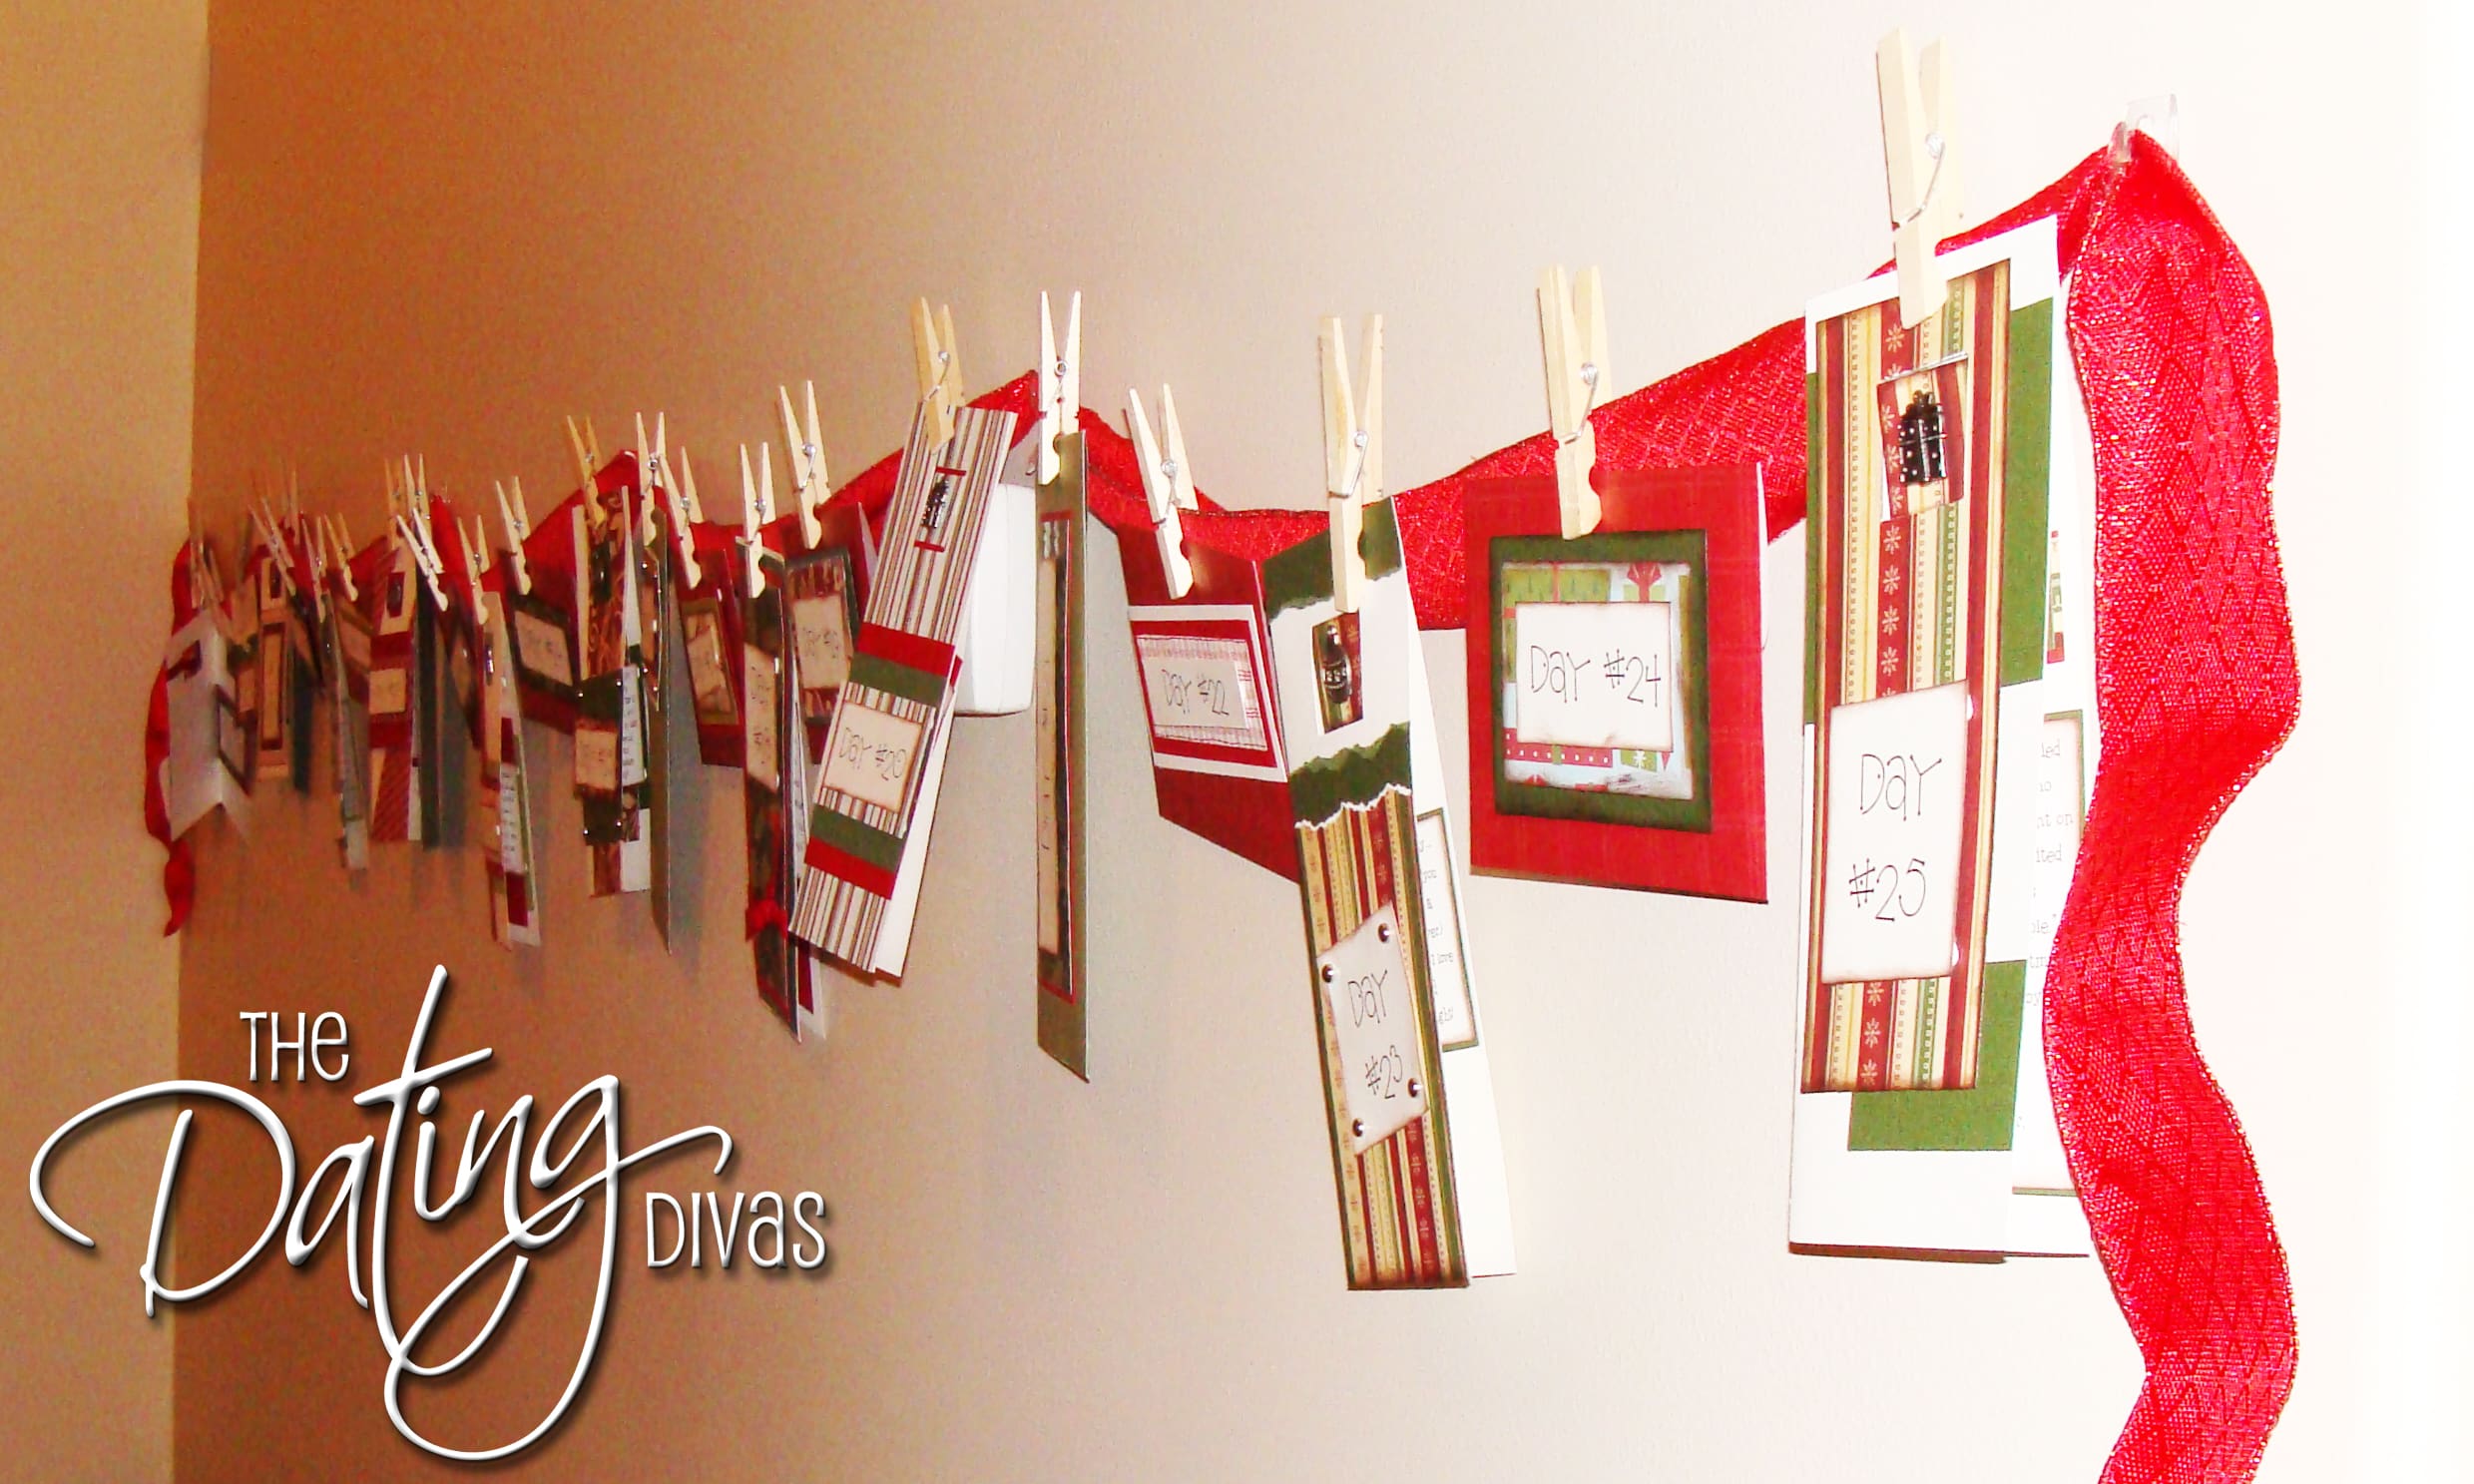
I grabbed a spool of beautiful cherry red ribbon, 25 clothespins, some removable clips that you can put on your walls….without ruining them. They are pretty cheap and you can purchase them anywhere – I got mine at Walmart.I then sat down….numbered a piece of paper from 1-25 and went to town planning my countdown! I put stars next to the nights that were Fridays & Saturdays….since those were the nights that I KNEW we would have time to either do a date night or stay up late. Next to each number I wrote one of three things:

  • A Compliment – something I LOVED about him {this made up 2/3 of the countdown}
  • A Service – something I was going to do for him {this was 1/2 of the last 1/3 of the countdown}
  • A FUN Christmas Activity – something we could go and do together….having to do with the season {this made up the remaining 1/2 of the last 1/3 of the countdown}

I made sure that they were ALL mixed up. BTW – don’t try to book every last weekend….things will come up, so make sure your schedule is flexible! Also – HE might secretly be planning fun things for you…so make sure to keep some of your weekend nights open. I would let him know in advance what particular nights you have ā€œsetā€ plans…..just mark put a heart on those days on your family calendar & tell him that those are nights he should keep open.

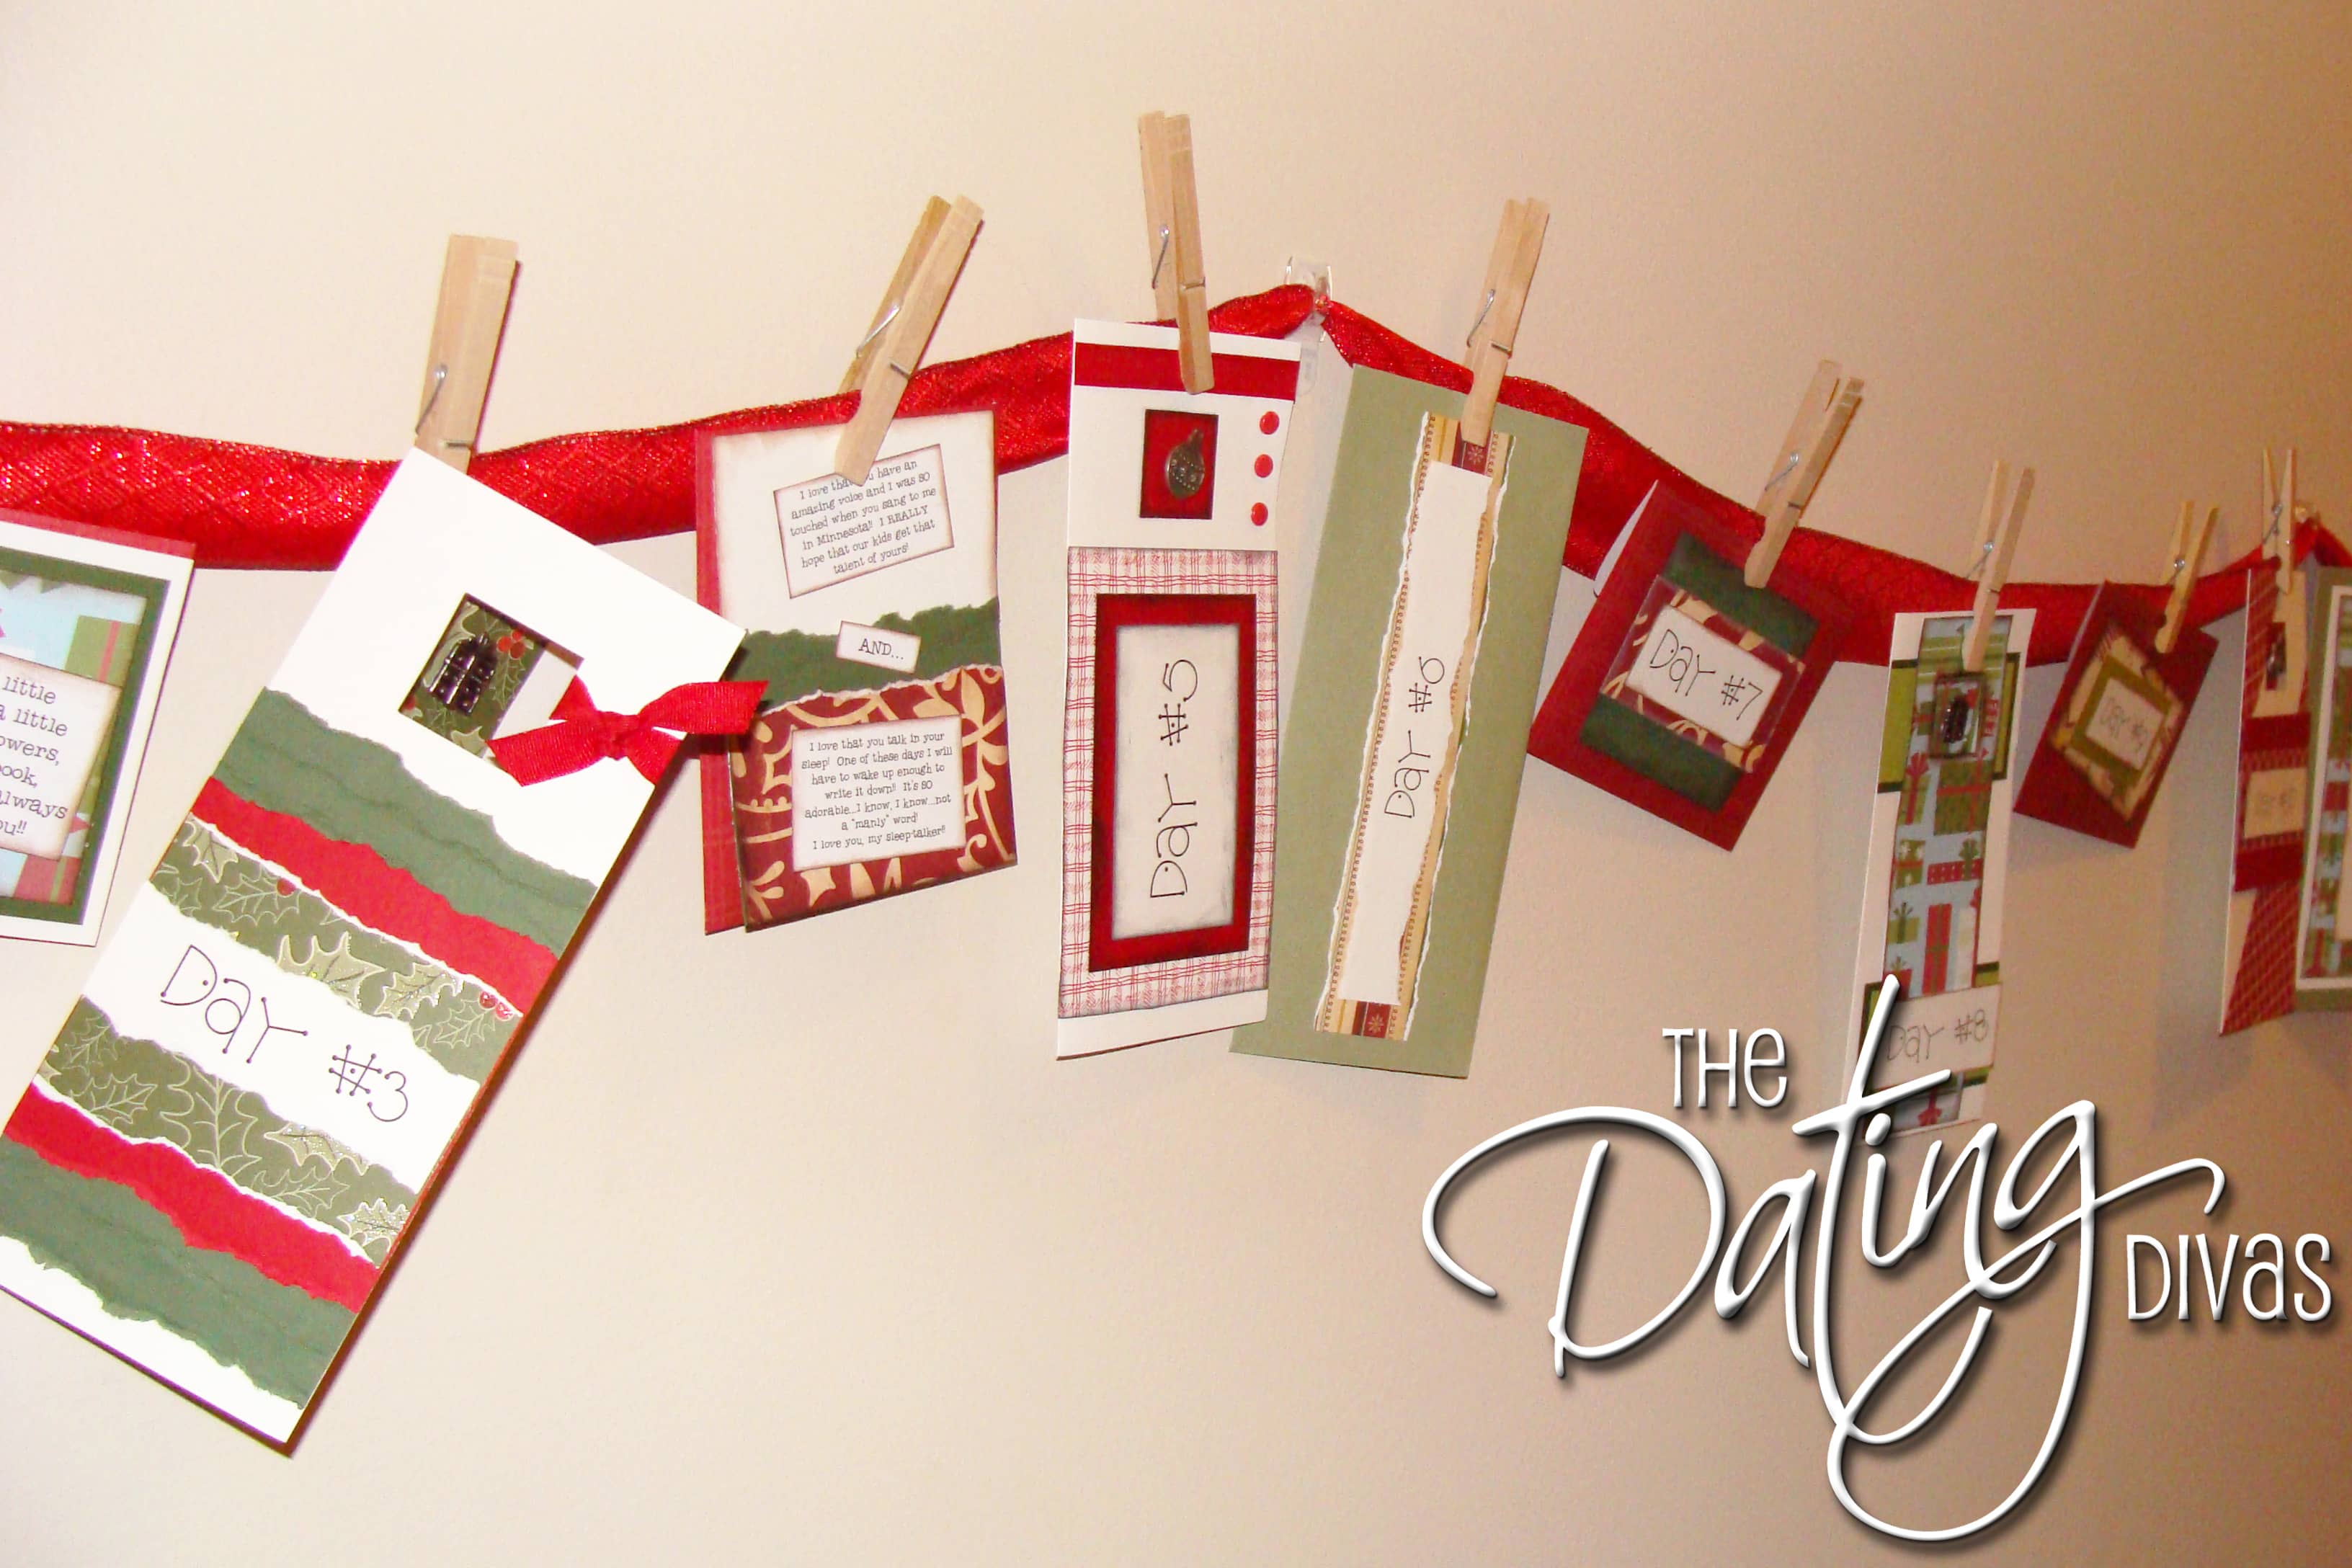
I typed up all of my different cards & scrapbooked each one. I went overboard that year and decided to do them ALL different themes/colors/sizes. Yep, I was crazy…in love! haha….I know, I know….cheesy….

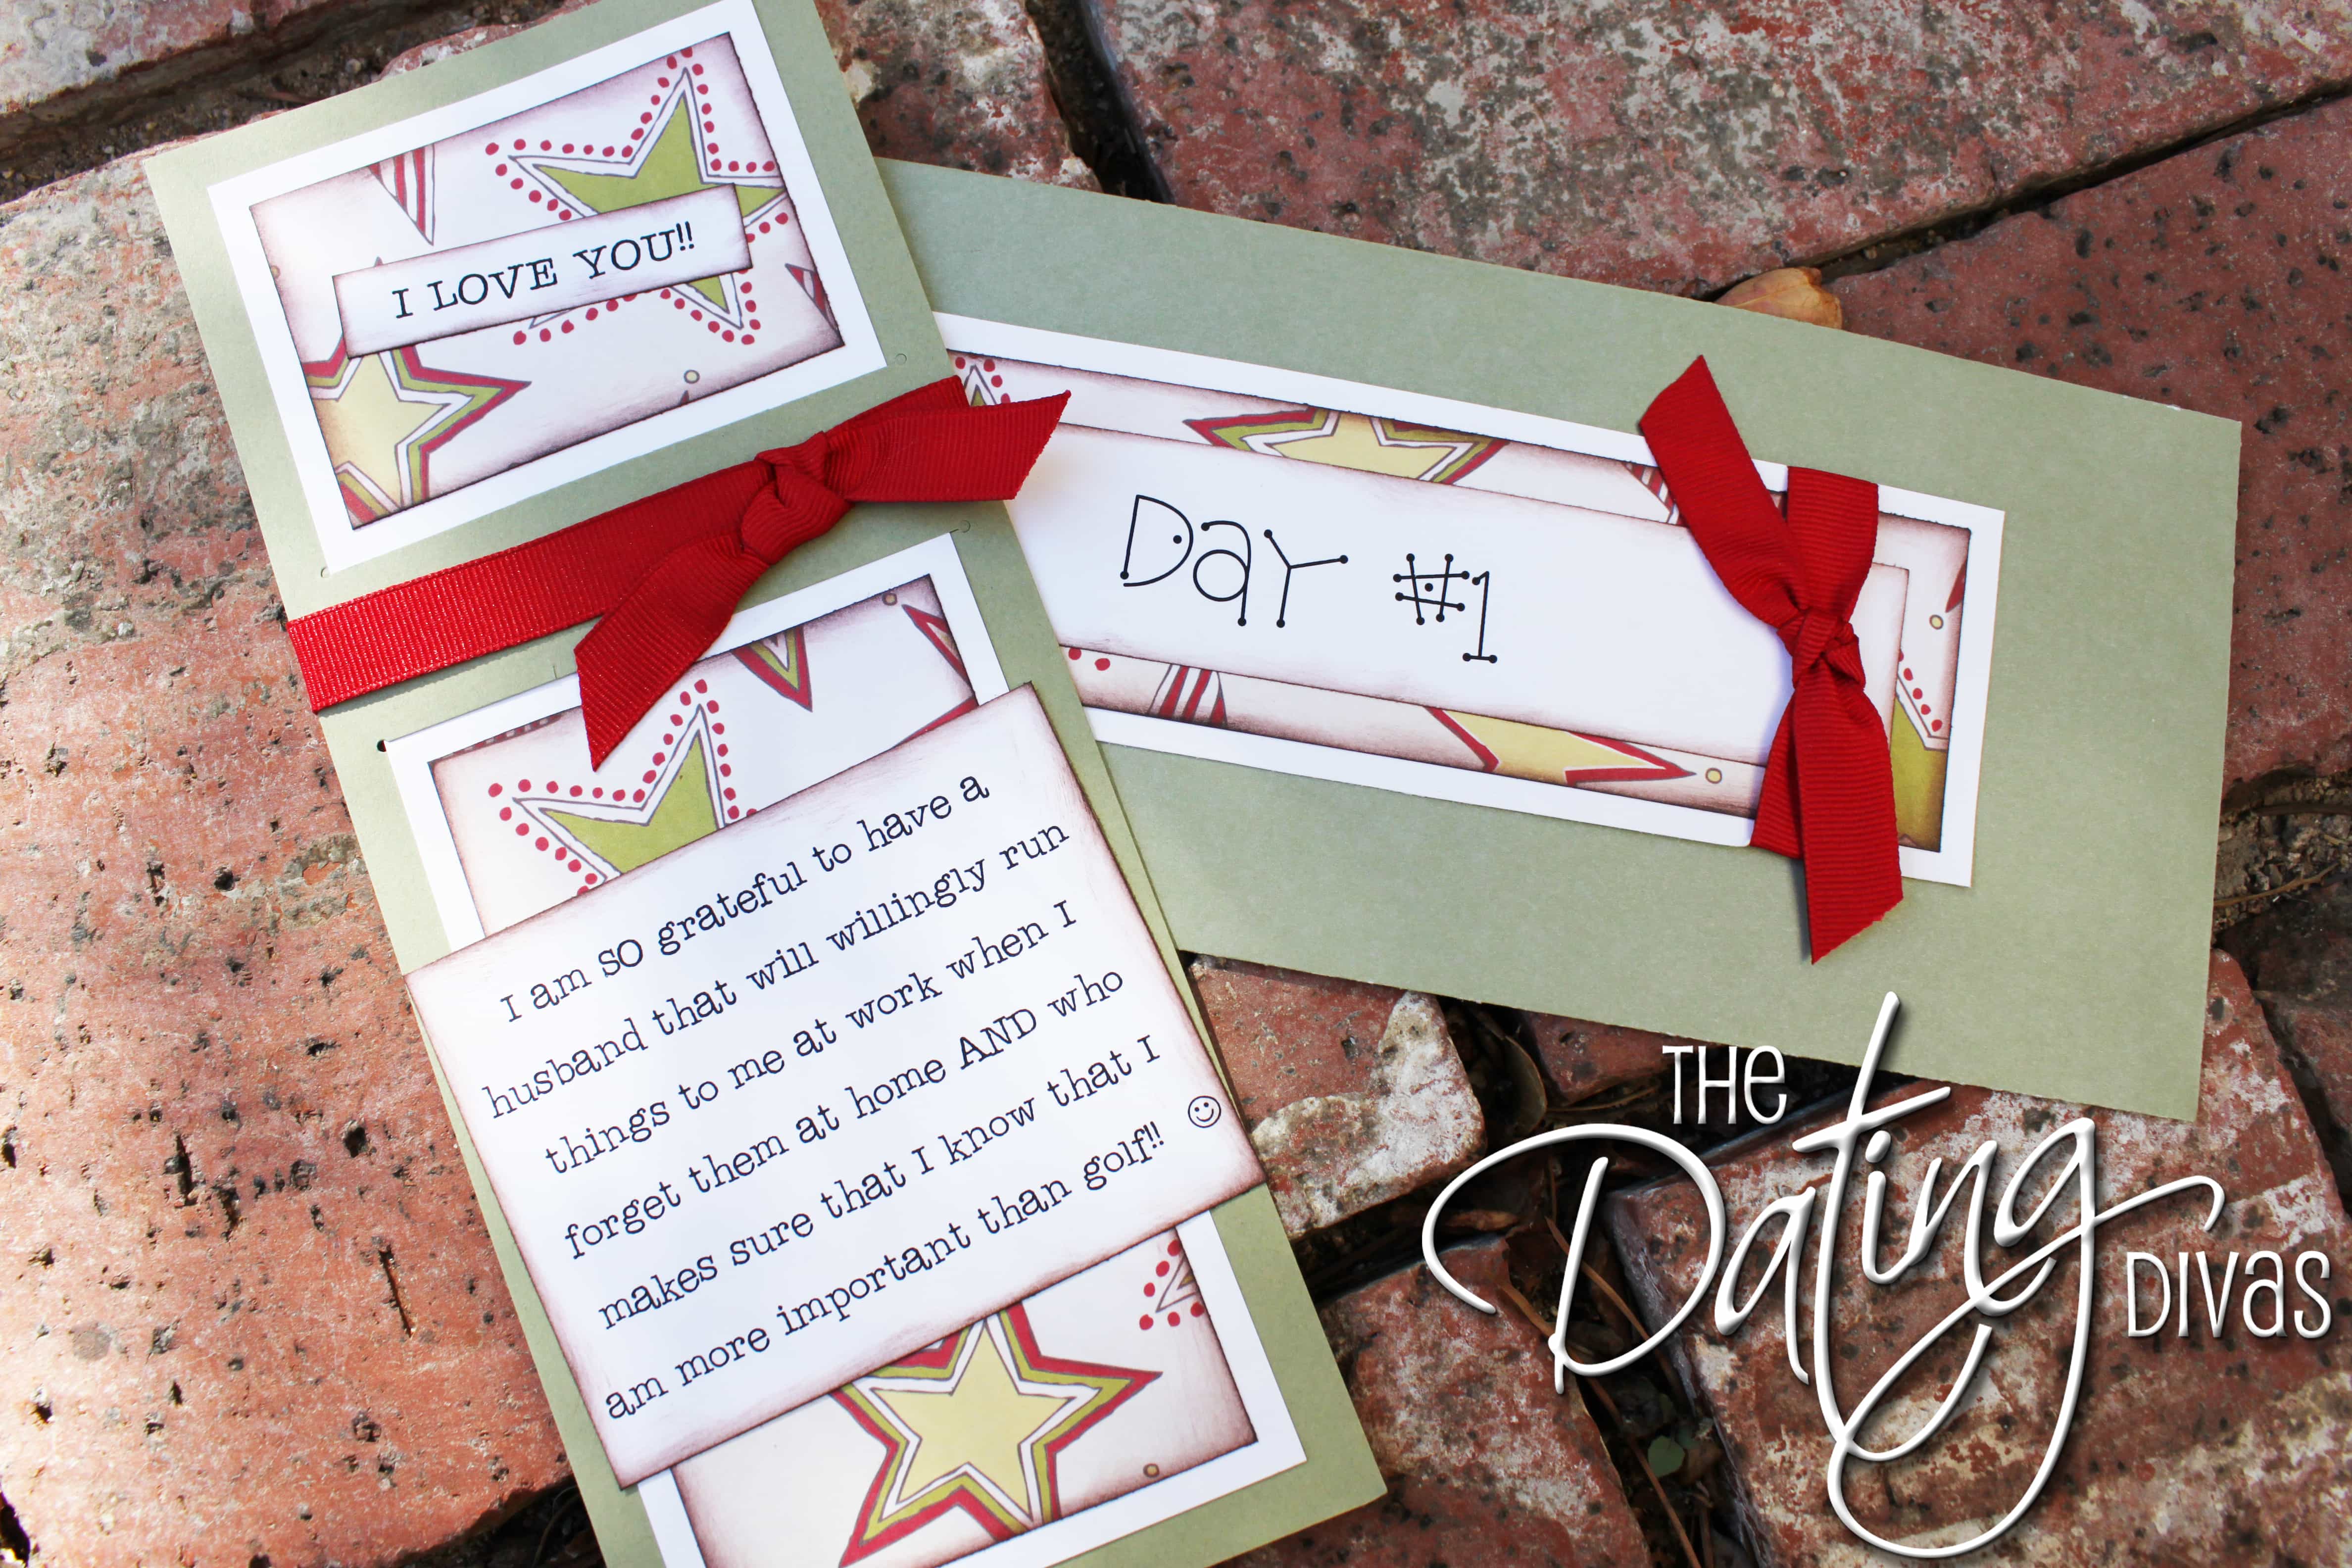
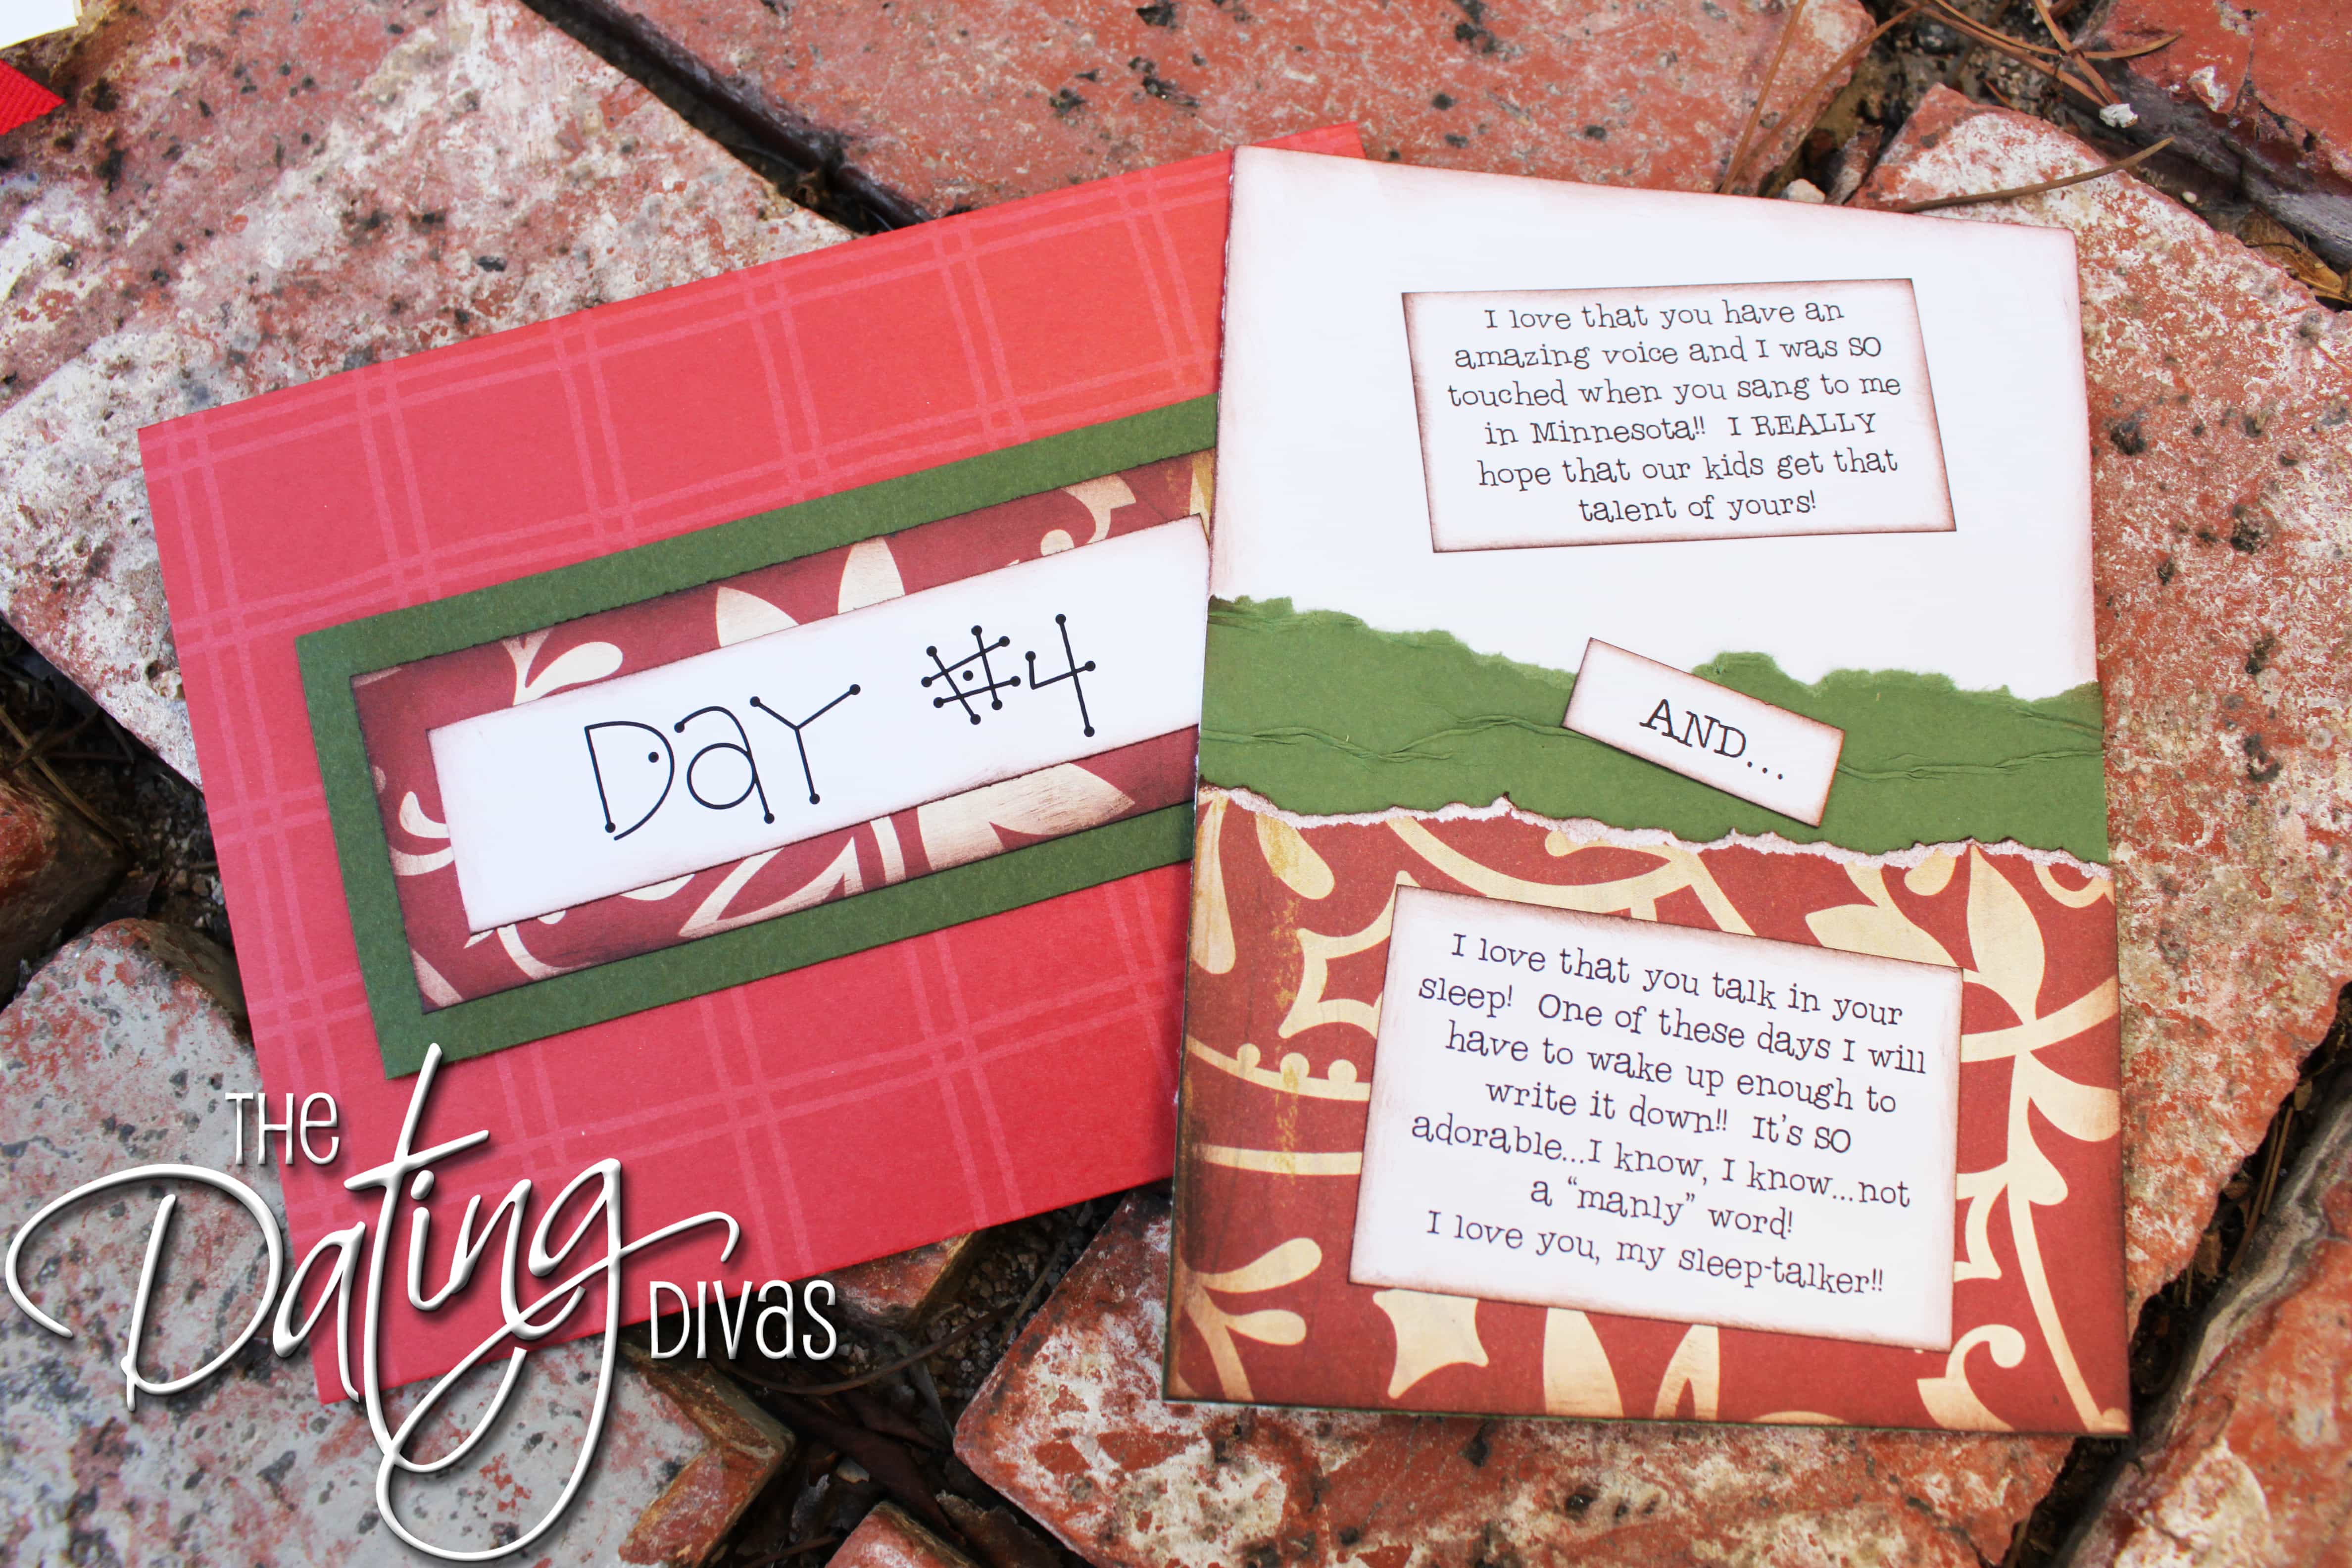
Here are a few of the ā€œComplimentā€ cards:

{Click On The Picture To Enlarge & Read Text}

{Click On The Picture To Enlarge & Read Text}

Make sure you take this opportunity to point out to your spouse ALL of the wonderful things that you love about him/her! You can NEVER compliment a person too much!! Let them know how much you adore the funny quirks…that only YOU know about! šŸ™‚ I had so much fun reflecting on our years together and jotting down the things I loved about him.

NEXT – the ā€œServiceā€ cards!

Here’s an example of one of mine:

{Click On The Picture To Enlarge & Read Text}

One night he came home to a trail of rose petals leading to our Master Bathtub where a candlelit bubble bath waited. {Wink} …thus the term ā€œbubblyā€ā€¦.

Think about things your spouse would REALLY enjoy…and then use those as your ā€œseviceā€ cards! For example, my husband LOVES back scratches…and I give super ā€œwimpyā€ ones…..or so he says. šŸ™‚ In my defense, uhhhhh….ok, so I AM a wimp! {lol} Anyway, I promised to give him an AMAZING backrub! I also don’t love to cook….please don’t judge me, all you CHEFS out there….so I made the ultimate sacrifice and told him I would create ANY dessert he wanted. {That was a HUGE sacrifice on my part….and do you know what he ā€œorderedā€?? Apple pie! You better believe I made it from scratch! Longest five hours of my life. J/K…maybe it only took me three?!?}

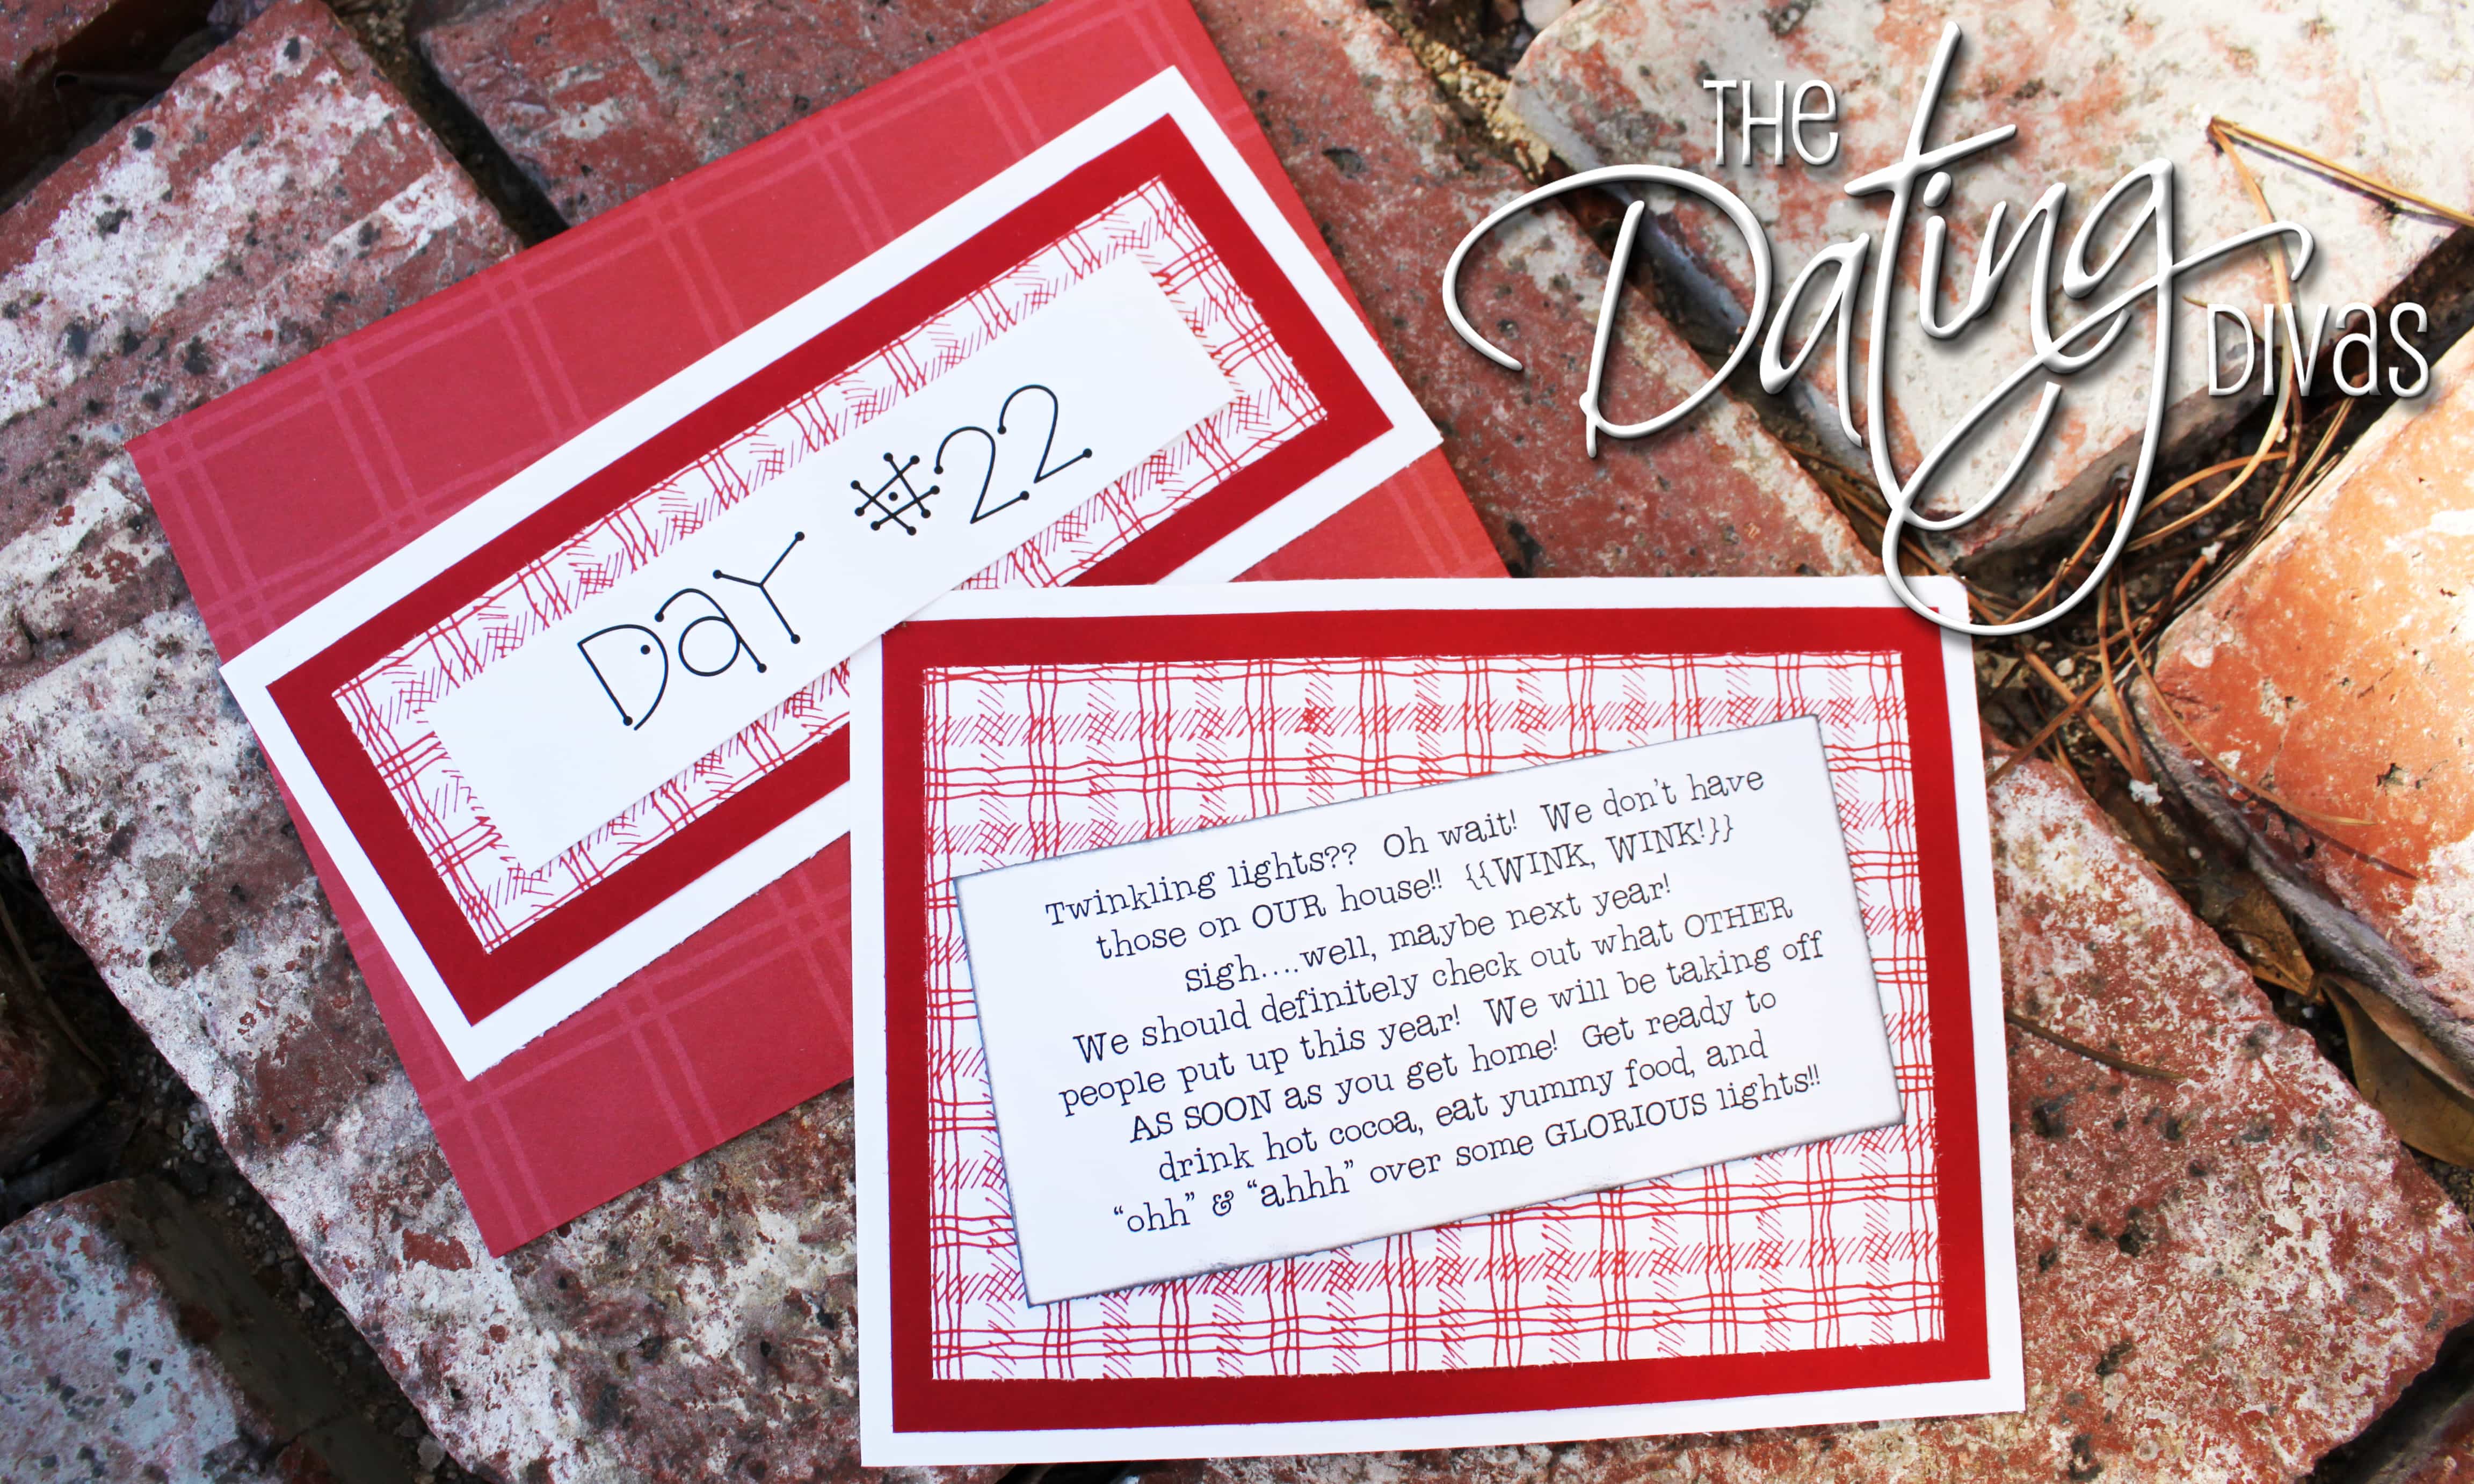
You get my point, right? Remember that December is going to be a CRAZY busy month for you…so don’t promise anything you can’t deliver on! šŸ™‚ LAST but not least are the actual FUN Christmas activities that you will do together. I chose to keep them all a secret and use the cards as ā€œteasersā€.

Here are a few of mine:

{Click On The Picture To Enlarge & Read Text}

{Click On The Picture To Enlarge & Read Text}

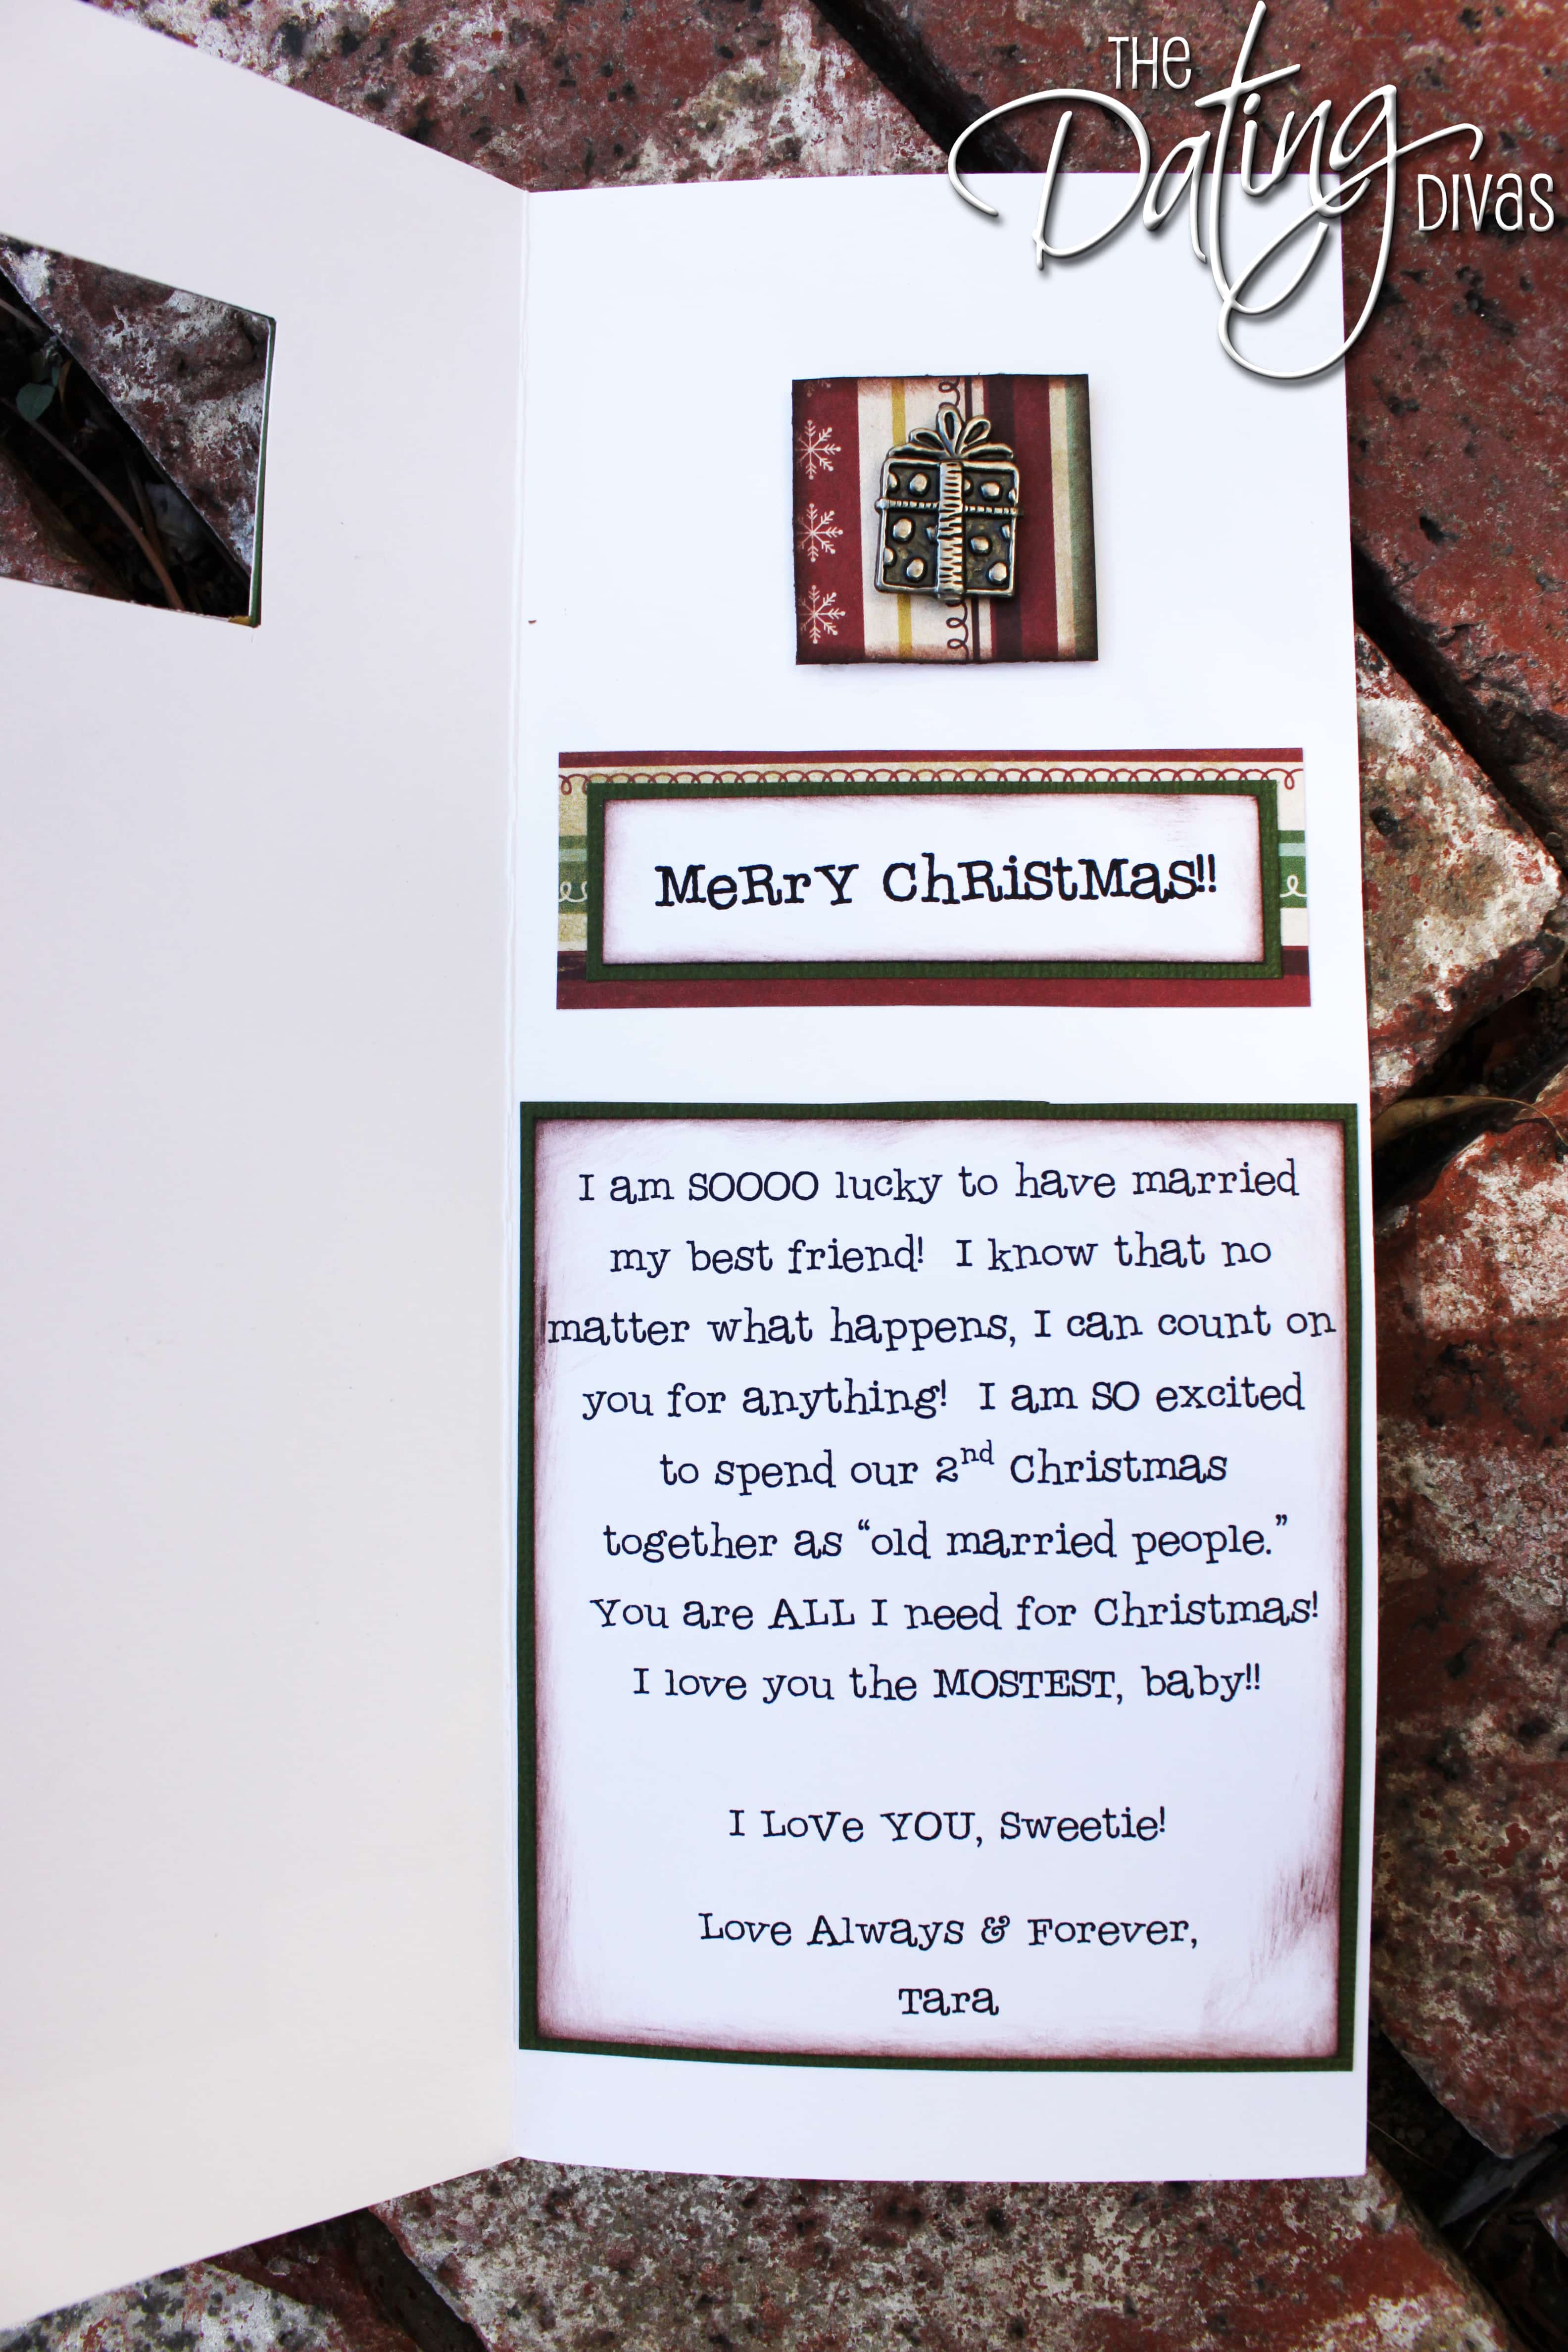
Some other activities I planned for us was a Christmas ā€œMovie-a-thonā€ & watching all of our FAVs while eating our favorite Christmas treats, checking out the lights at Temple Square {this was when we lived in Utah}, planning a night under the stars {we camped out by the Christmas Tree on a blow-up mattress}, going to the Festival of Trees with his family, etc. They don’t ALL have to be Christmas-related! We had an entire night of Wii games. There are SO many fun Christmas things you can do together! This is where you can also involve the whole family! Have a ā€œmake a gingerbread houseā€ night or decorate Christmas cookies or go caroling to your neighbors. Just make sure they are all activities that he {or she} would enjoy! THEN – you, of course, need to end the Countdown to Xmas with a LOVE note!!

{Click On The Picture To Enlarge & Read Text}”]

Now – if you are thinking….TARA!! Are you crazy?!? When am I going to find time to scrapbook 25 cards?? No worries! I found a pre-made cute Christmas notecard that you can download to use for YOUR cards. Just So Scrappy has super cute digiscrapbooking kits. She created a FREE {ooooohhhh…and we LOVE free….} download that would be perfect for this countdown idea!

Click HERE to be sent to that post. Just scroll all the way to the end of her post and the download is at the end. You can place the card png image on a Word document and size it to be ANY size you would like! I would suggest printing these on white cardstock….as they are in color. Cut them out and if you would like to make them ā€œpopā€, adhere them to Christmas-colored paper.

I also typed up the numbers #1-25 in my FAVORITE font….that you can download & cut apart. THEN – instead of putting your cards in an envelope, just flip them over and adhere the numbers on the back. Click HERE for that free printable. Wa-LAH! You are done!

Oh yeah….don’t forget to jot the actual ā€œscriptā€ on each card! šŸ™‚

I then put up the removeable hooks in our entryway, strung the festive ribbon along it, and clothespinned the cards up. It looked FAB-U-LOUS!!

I made sure to put up his countdown to xmas the last day of November….before he got home from work. He was extremely surprised to come home to this and was SO excited when I explained that he would get to read one each morning for the entire month of December!

If you still have children at home, you can involve them by letting them ā€œhelpā€ Daddy read his card each morning. You could make this countdown something for the whole family….but in my humble opinion…I think your spouse would be pretty touched if you did this JUST for him/her!!

.…AND….this was one of our most ā€œcommented onā€ Christmas decor!! All of our friends and family LOVED not only the idea behind this….but how festive it was and how it completely dressed up our entryway! šŸ™‚ Have fun creating your OWN Christmas Countdown!

So what is OUR website all about? I told you a little above….but in case you were curious….our website is what happens when a BUNCH of super crafty friends get together & come up with solutions for strengthening their marriages.

We blog about amazing & creative date ideas, fun gift ideas for our spouses, quick & easy romance ideas, CRAFTY tutorials, and MUCH, much more!! ANYTHING that would help enhance our already ROCKIN’ marriages!! We even decided to share tips on how to look good for our man AND ideas on how to keep things HOT in a certain room…..

…but you are gonna have to visit our blog for THAT!

Stop on by The Dating Divas to get more ROMANCE tips so you can keep dating that amazing spouse of yours! We love spreading the word about our blog….and we hope it will strengthen YOUR relationship as much as it has ours!!

Thanks again for letting me hang out with the ” Tipsy” crew today!

P.S. Don’t forget to sign up for free Tipsy updates via RSS or email.

We have decided to truncate our feed to help protect against stolen content. I apologize for any inconvenience. Please love us anyway. šŸ™‚

DIY Under $5 {4th of July Display}

June 29, 2011 By Michelle Barneck 3 Comments

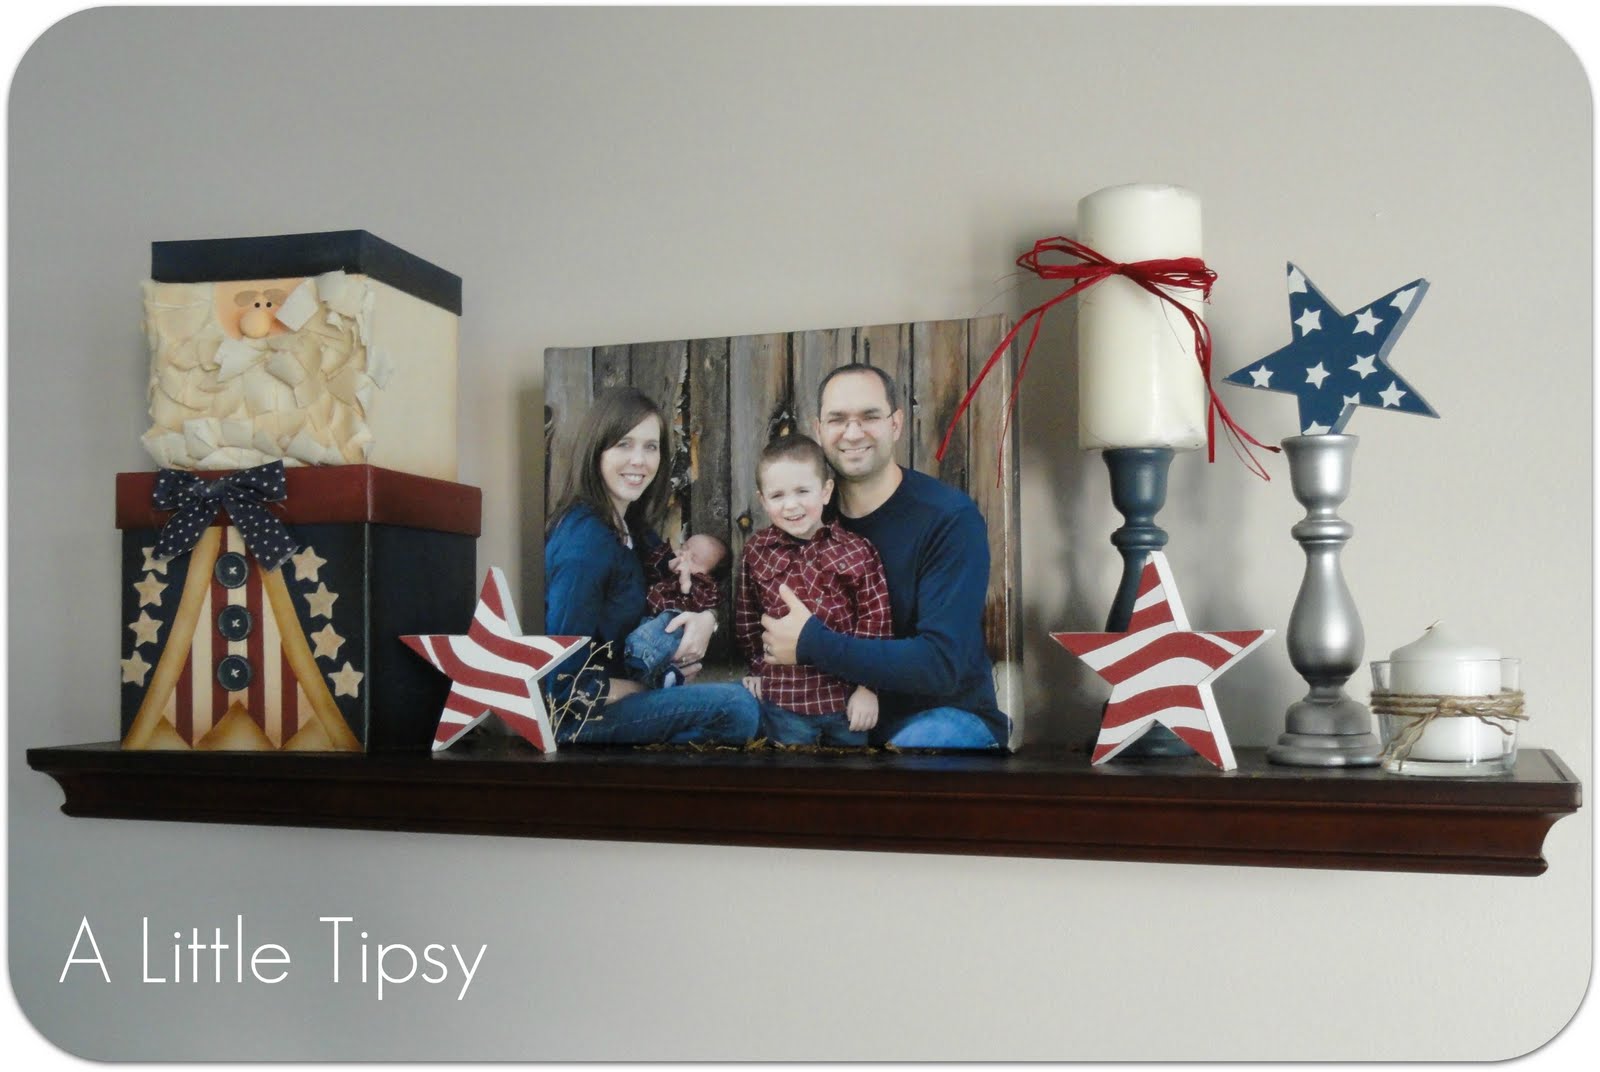
It’s almost here! Fireworks, parades, BBQs, good ol’ flag themed outfits. I love the 4th of July, but have not had a lot of time to decorate for it. I got some Americana decor out a couple of days ago to bring a little festive in to my life.

Uncle Sam, white pillar candle and candle sticks: thrift store $2.50 last year
Flag themed stars: Target $1 section two years ago
Canvas: recent blog review
Raffia, jute, white candle: on hand
Glass candle holder: 2 for $1 Dollar Tree

Now it’s time to link up your $5 projects!

Please remember:

  • Only link to your own projects that cost you $5 or less (price does not have to include items you had on hand)
  • You can link past projects that fit the dollar limit, but please only link each project one time to one DIY Under $5 party. Do not link the same project week after week.
  • No linking giveaways or items for sale
  • Please link back so others can join the party and so you have the opportunity to be featured on Saturday!

DIY under $5

P.S. Don’t forget to sign up for free Tipsy updates via RSS or email.

We have decided to truncate our feed to help protect against stolen content. I apologize for any inconvenience. Please love us anyway. šŸ™‚
« Previous Page
Next Page »

  • Bloglovin
  • Facebook
  • Google+
  • Instagram
  • Pinterest
  • RSS
  • Twitter

Hi there! I'm Michelle. Mother of three little boys and one little princess. Welcome to A Little Tipsy, a place for exploring creativity and sharing inspiration.

Follow on Bloglovin


Visit Michelle Barneck {A Little Tipsy}'s profile on Pinterest.

Tutorials by Category


15 Family Reunion Games

Family Reunion Games Collage

15 Sprinkle Party Ideas

Sprinkle Birthday Party
Creative Commons License

© Copyright 2014 A Little Tipsy · Site Designed by The Fairy Blogmother · Web Hosting by RFE Hosting

This website uses cookies to improve your experience. We'll assume you're ok with this, but you can opt-out if you wish.Accept Read More
Privacy & Cookies Policy