A Little Tipsy

Creative Tips & Ideas

  • home
  • About Me
  • the tipsy top
  • press
  • projects
  • contact me
[print_thumbnail_slider]

Easy Spider Craft

October 15, 2009 By Michelle Barneck 3 Comments

I wanted to do a little craft that my little guy could play with. I also needed a little something for my spooky banner. I thought a spider might be easy and I was right!

All you need is:

  • Chenille type yarn
  • Furry yarn
  • Scissors

I got my yarn at Big Lots for a total $3.


  • Start by cutting 4 equal length pieces of the Chenille yarn. (Big spider-6 inches, Small spider-4 inches)
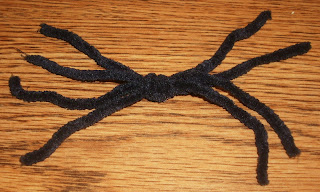
  • Grab all the pieces and tie them all in a knot.
  • For the big spider, wrap the knot with chenille yard until it looks like a round body and tuck the end piece in. For the small spider, skip this step.
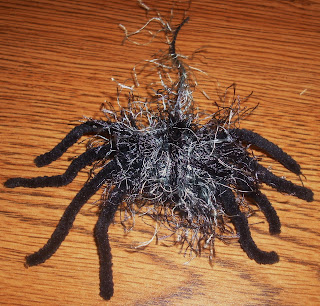
  • Wrap the knot/body with the furry yarn until desired furriness and then wrap then end around itself and pull tight. This will make the web string.
That’s it! Your ready to play with your creepy new spider. Make a bunch and hang them around the house from furniture and banners for a spooky touch!

I think it adds a nice touch to my banner.

This is what the small spider looks like. A bit more realistic.


I think he approves of the spider craft!

P.S. Don’t forget to sign up for free Tipsy updates via RSS or email.

We have decided to truncate our feed to help protect against stolen content. I apologize for any inconvenience. Please love us anyway. 🙂

Tricks for Treats-Cute Halloween Cookies

October 14, 2009 By Michelle Barneck 6 Comments

I got together with my sisters while the men were away at Priesthood session of General Conference and we made the cutest treats. Ghost, mummy, pumpkin and candy corn cookies made for quite the Halloween dessert fest.

We started making these cute ghosts last year…

Just dip Nutter Butters in white chocolate (I microwave a bag of chocolate ships with one tablespoon crisco to make it runnier and easier to work with) and add mini chocolate chip eyes.

And in a bit of late night inspiration, I thought to reinvent them in to mummies. I love them!! So cute in their little white chocolate wrappings.

Just dip a spoon in the white chocolate and drizzle away!

I got the idea for these adorable candy corn cookies from Once Upon A Party. They are still my nieces favorite! They are so simple, just dye your sugar cookie dough with food coloring and dip in white and brown chocolate (same thing with the bag of chocolate chips and tablespoon of Crisco)! Adorable!

The pumpkins, well the pumpkins are a standard right? The only difference with these is…the topping is not frosting, it’s chocolate. Hope you enjoyed these few tricks to make cute treats!

P.S. Don’t forget to sign up for free Tipsy updates via RSS or email.

We have decided to truncate our feed to help protect against stolen content. I apologize for any inconvenience. Please love us anyway. 🙂

A Few Thrifty Finds

October 13, 2009 By Michelle Barneck 3 Comments

I have been doing some major thrift store and garage sale shopping over the last couple of weeks. You saw much of it in my fall decor post, but here are the rest.

My little one has been obsessed with bikes for months. His legs are a bit too short for tricycles just yet, but I had been watching for a good deal. These babies are expensive. I found a Radio Flyer tricycle with a push handle for $8. I was thrilled and snatched it up.

I had also recently purchased an above ground pool on clearance at Big Lots for $20 and was wondering how in the world we would get in and out next year without collapsing the side. Tra la, I found this pool ladder for $4. Oh, how I love D.I.

Sometimes you just need a fake plant. All its little arms reached out to me, wanting me to take it home. How could I say no for $1?

I’m not usually in to rummaging through other people’s clothes. It just seems wrong in some inexplicable way. But, when we pulled up to a really nice house with a bin full of practically new name brand clothes in just my little guy’s size how could I not take home a few? $1 each.

We found these cowboy boots at D.I. for $3. They are the real deal, really high quality leather! He would not let them out of his sight. I thought they would make for a good dress up accessory. He can get them on all by himself and he LOVES that!

Linking up with Trash to Treasure Tues on Reinvented.

P.S. Don’t forget to sign up for free Tipsy updates via RSS or email.

We have decided to truncate our feed to help protect against stolen content. I apologize for any inconvenience. Please love us anyway. 🙂

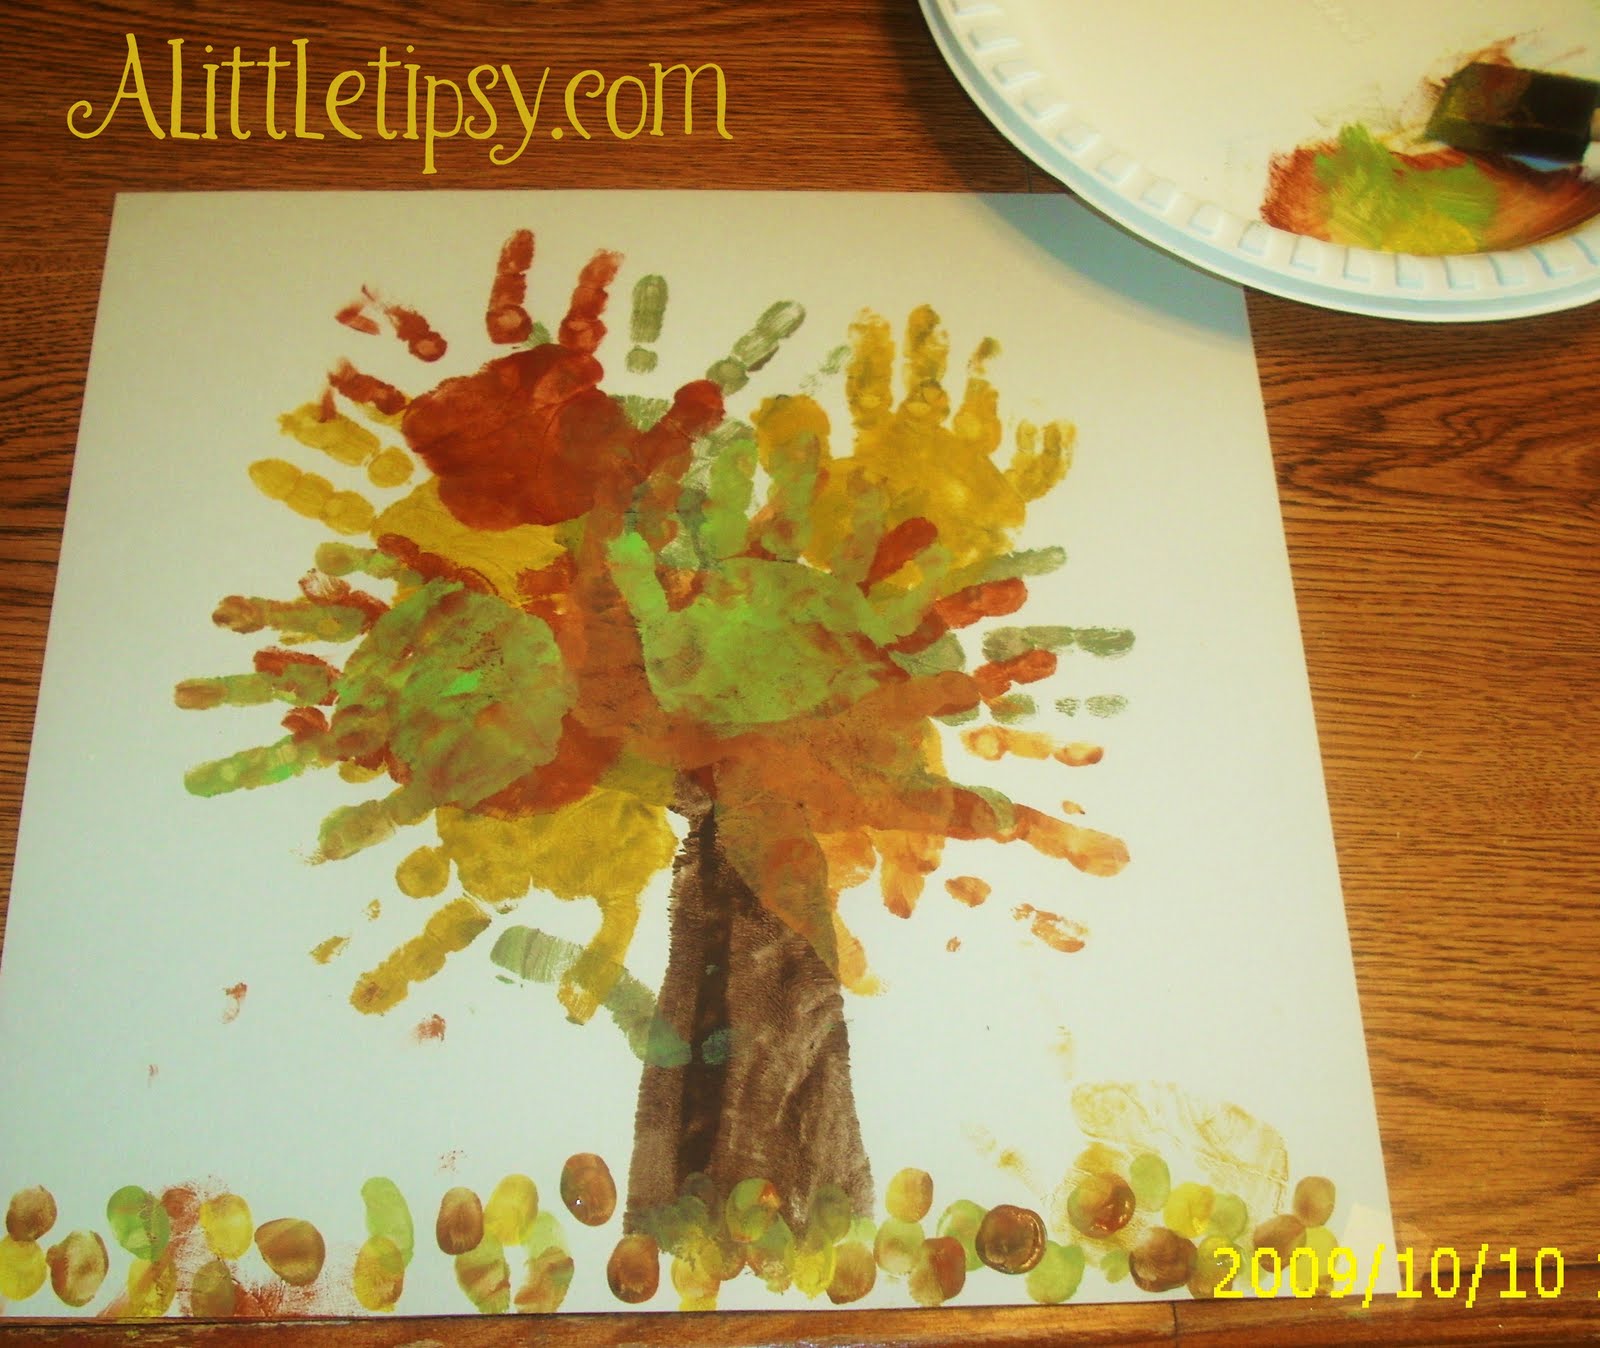
Finger Painting Fall Handprint Tree

October 11, 2009 By Michelle Barneck 13 Comments

I want to share a super simple little project to do with the kiddos that was inspired by those radiant fall colors, let’s call it Finger painting fall. I love a good alliteration. I love fall. It is my favorite season! The crisp air, the crunching leaves, the wardrobe change. I love the smells, the sounds, and the colors. Oh, the colors!!!

So here we go…

Supplies needed for you Kid’s fall handprint tree art project:

  • 12 x 12 cardstock (mine was a very light grey)
  • Craft paints (Red, Yellow, Orange, Brown, Green)
  • Foam brush
  • Disposable plastic plate
  • Hands (we all have a couple of those hanging around)

1. Start by squirting some brown paint on the plate and using the foam brush to paint the non-hairy side your little ones hand and arm brown. Then, place it with the hand spread wide in the middle of the page for form the trunk and the branches of your tree. Wipe arm and hand clean.

2. Choose your next color and squirt it directly over the brown. Mix it a little to give it a somewhat swirly look and paint just the hand this time. Stamp on two to three “leaves” pointing the fingers outward.

3. Repeat with remaining paint colors continuing to squirt and mix the paint and use the hands to stamp. We alternated hands and I wiped them off between each color to minimize the mess.

4. Once the tree has the fullness and coloring you like, dip just a fingertip in the paint to make leaves on the ground beneath the tree.

That’s it!! You’re done!

We loved ours so much that I framed it with a cheap wood frame I got from the craft store and painted black. Now our fall art project is proudly displayed in our kitchen for everyone to see.


P.S. Don’t forget to sign up for free Tipsy updates via RSS or email.

We have decided to truncate our feed to help protect against stolen content. I apologize for any inconvenience. Please love us anyway. 🙂
« Previous Page
Next Page »

  • Bloglovin
  • Facebook
  • Google+
  • Instagram
  • Pinterest
  • RSS
  • Twitter

Hi there! I'm Michelle. Mother of three little boys and one little princess. Welcome to A Little Tipsy, a place for exploring creativity and sharing inspiration.

Follow on Bloglovin


Visit Michelle Barneck {A Little Tipsy}'s profile on Pinterest.

Tutorials by Category


15 Family Reunion Games

Family Reunion Games Collage

15 Sprinkle Party Ideas

Sprinkle Birthday Party
Creative Commons License

© Copyright 2014 A Little Tipsy · Site Designed by The Fairy Blogmother · Web Hosting by RFE Hosting

This website uses cookies to improve your experience. We'll assume you're ok with this, but you can opt-out if you wish.Accept Read More
Privacy & Cookies Policy