A Little Tipsy

Creative Tips & Ideas

  • home
  • About Me
  • the tipsy top
  • press
  • projects
  • contact me
[print_thumbnail_slider]

Chocolate Dipped Candy Stick Gift Idea

December 17, 2009 By Michelle Barneck 3 Comments

I was headed to a craft night and needed a holiday treat to share quick. I looked around the pantry and found these ingredients. Then, I realized these would be the perfect gifts for my husbands coworkers too!


Supplies needed:

  • 2 bags Soft Candy Cane Sticks (about 20 sticks)
  • 1/2 bag Milk Chocolate Chips
  • 1/2 T. Crisco
  • Toppings:
  1. White Chocolate Chips
  2. Candy Cane Oreos
  3. Sprinkles
  4. Red Hots

1. Melt 1/2 a package of milk chocolate chips with a 1/2 T. of Crisco in the microwave stirring every 30 seconds until smooth. Tip the bowl so the chocolate is on one side and dip the candy stick rotating it to cover equally on all sides.

2. Hold the stick vertically with the chocolate down and shake side to side quickly (like ringing a bell) for 15 seconds to remove excess chocolate.

3. Grab a big pinch of topping and sprinkle over chocolate while rotating candy stick until covered on all sides. I used combinations of crushed oreos, chopped white chocolate, sprinkles and chopped red hots (I used my pampered chef hand chopper, so no this was not dangerous). I used the topping that fell to the plate too. I hate to waste a huge pile. I love the combination of colors.

4. Lay on cookie sheet covered with parchment paper to set. I put mine in the garage where it is cool to make them set faster. You can use the fridge if you have room.

I had leftover chocolate so I dipped some oreos too.

Don’t they look cute on my snowman plate!

Here they are with Amanda’s super easy and tasty Christmas cookies.

This project did double duty as I made extra for the hubs to give as coworker gifts. I just put them in clear treat bags and stapled a home made card to the top. They turned out so festive and adorable! Totally spreading the joy!

Super cute and economical Christmas gift using lots of things you probably already have! Or maybe it’s just me who keeps the house stocked with sweets at all times. Hmmm.

P.S. Don’t forget to sign up for free Tipsy updates via RSS or email.

We have decided to truncate our feed to help protect against stolen content. I apologize for any inconvenience. Please love us anyway. 🙂

Stamped Washer Necklace Tutorial: Courage

December 16, 2009 By Michelle Barneck 22 Comments

We always have a special Christmas lesson for our Young Women at one of our homes the Sunday before Christmas and wanted something special to give our Beehive class. My wonderful adviser and crafty girl extraordinaire, Amanda (from Every Crafty Endeavor), came up with the idea and the supplies to do stamped washer necklaces that say Courage to go along with next year’s mutual theme. I am so nice and took pics of the process so that you can do it too. I know, I know…too kind.

(Stay tuned for how we tie them in to the Christmas nativity lesson)

Supplies Needed:

  • Heavy Hammer (you can use a regular one, you will just have to hit harder)
  • Washers (ours were about an inch)
  • Alphabet stamp set
  • Black permanent marker
  • Baby wipe
  • Leather, ribbon, or a chain to put the charm on

Stamp sets are available on Amazon for $15 if you need one. *Update: I just bought a stamp set on sale from Harbor Freight for $10 including shipping!

1. Take your supplies to a concrete area so you don’t damage whatever is under your stamping. (We froze our little tushes on the porch in 30 degree weather, but the end result was well worth it and it really did not take that long.) Pull out the letters you will be using and put them in order. Place the first letter stamp equidistant from the hole in the middle and the edge. Now, with the other hand, whack the stamp with the hammer 3 or 4 times (depending on how hard you hit and the weight of your hammer).

See cute Amanda demonstrating her great skill.

2. Keep it going with the other letters. Place the next letter by aligning the edge of the stamp with the first letter and turning a hair so it follows the curve of the washer. This may take some getting used to. We had to redo some. Continue with each letter.

3. Once you have the letters stamped, get your permanent marker ready. Color over the letters so that the indentions are black. If you have a stubby marker like me this may take some doing. Once all the letters are covered, wipe with a baby wipe until you are left with black only in the letter indentions. I would do each washer one at a time. It is easy to wipe off when they have not been sitting.

4. Now just thread your “chain” of choice through the hole and you are good to go.

I love how they turned out! I love that they represent the theme so well! “Be strong and of a good courage.” Joshua 1:9

Now, for how they will be tied to the lesson. We are going to be talking about how each of the people in the Nativity Story had to have great courage. We will talk about each piece of the nativity as we place it on the table and also have a song to go with it.

  • Mary-to be the mother to God’s Son and to travel to Bethlehem 9 mos. pregnant and give birth in a stable
  • Joseph-to find out his wife to be will be giving birth to God’s Son
  • Jesus-to be the one to volunteer to come to earth and sacrifice himself for us
  • Shepherds-to have an angel come and then go to find the Christ child. Spreading the word to others.
  • Three Kings-followed a star to find the Christ child and did not tell Herod where He was

I am so excited for this lesson! It is so personal to have it in Amanda’s home with the fire crackling and everything so cozy. Last year, the Christmas lesson was AMAZING and I can only imagine this year will be the same!

P.S. Don’t forget to sign up for free Tipsy updates via RSS or email.

We have decided to truncate our feed to help protect against stolen content. I apologize for any inconvenience. Please love us anyway. 🙂

Feature Friday-Blog Swap with Sumo’s Sweet Stuff

December 11, 2009 By Michelle Barneck 2 Comments

With a high of 20 degrees today, my fingers are too cold to type so I am so lucky to have Summer from Sumo’s Sweet Stuff taking over for me today. Oh, and the fact that she is called Sumo makes her a top candidate for a blog swap in my book! Here we go…

——————————————————————-


Hello Tipsy Readers!

I’m Summer, or Sumo as my husband lovingly calls me. (And now consequently has all of my family calling me. Doesn’t Aunt Sumo have a nice ring to it?)
I’m the blogger from Sumo’s Sweet Stuff!
Sumo's Sweet Stuff I use my blog to share my projects, tutorials, recipes, host giveaways, and shamelessly promote my etsy shop! I AM: – married to my best friend

– mother to the most beautiful little girl (and a baby girl on the way!) – daughter and sister to the best family ever – friend to some of the greatest people out there I LOVE TO: – play piano – sing – read – craft – go on walks – spend time with my family – drink Diet Coke – bake/cook – exercise (well, sometimes) – crochet SOME OF MY FAVORITE THINGS: – Diet Coke – popcorn – chips and salsa – anything that involves peanut butter and chocolate – public library – fall – craft stores – black and green – Christmas – historical fiction – cats

Michelle asked me to answer these fun questions for you:

** What is your favorite crafting tool or secret weapon? **

Honestly, where would any crafter be without a glue gun? Especially since I don’t know how to sew (YET – hopefully that will change!), I find my glue gun to be quite useful and am always on the lookout for projects that I might be able to do using my glue gun! My fingers pay the price, but it is worth it!

** If you had to be a holiday scent what would you be? **

Since I love to bake, I’d have to say that sugar cookies (that’s what’s in my Scentsy right now) or vanilla would fit the bill! I love finding new recipes to try out, and it is so satisfying to be successful with a new recipe and have my house smelling delicious. Yum!

** What is your favorite Christmas tradition? **

I don’t know how to pick just one! Growing up, my parents always got us an ornament that had our name and the year written on it. Once I was married, it was fun to collect all of those ornaments from my parents and put them on our Christmas tree. Now we have all of those, the ones my parents have gotten my husband and daughter, and this year we started getting our own, too! I love pretty coordinated trees, but I also really love the character that our tree has with all of the memories from years past.

In the spirit of Christmas, here are a few of my favorite Christmas projects:
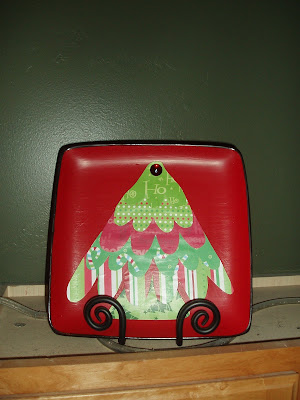
Mod Podge Plate
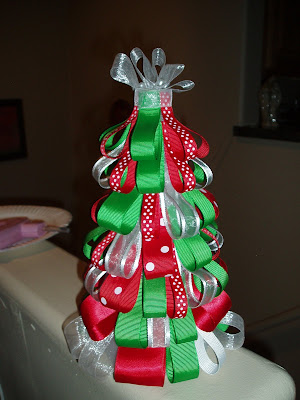
Ribbon Tree
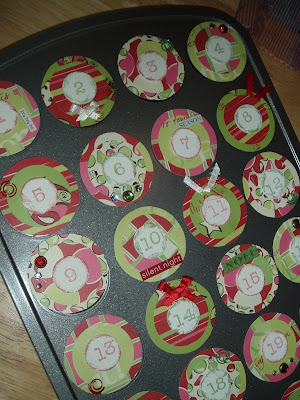
Advent Calendar
And if you are looking for some inexpensive holiday gifts, go here for some of the ideas I came up with.

I’m also participating in the 12 Days of Giveaways over at Somewhat Simple. My giveaway is being posted today, so go check it out for the chance to win some adorable baby girl stuff!

I love making new blogging friends, so come on over to Sumo’s Sweet Stuff! You’ll find something new being posted each day: Market Yourself Monday, Tutorial Tuesday, Mouth-Watering Wednesday, Things to Try Thursday, and Feature Friday. Something for everyone!

Thanks to Michelle for letting me swap with her today! Isn’t she just the greatest?

Happy Holidays!

—————————————————————————————————–

Thanks Summer for all your great ideas! You are now entered in to the Hall of Fame as Tipster of the week. Feel free to take a featured button and wear it with pride!

P.S. Don’t forget to sign up for free Tipsy updates via RSS or email.

We have decided to truncate our feed to help protect against stolen content. I apologize for any inconvenience. Please love us anyway. 🙂

Christmas Art Project

December 10, 2009 By Michelle Barneck 6 Comments

I love including the kiddos in holiday decorating. I wanted a fun Christmas art project that the family could do together and display for all to see. I love that this piece celebrates the season, but also celebrates our little family. In fact, you probably already have everything you need for this hand print pine tree painting. So here’s a little tutorial.

Supplies Needed:

  • Foam brush
  • Craft paint-brown, green (or mix navy, yellow & brown if you don’t have dark green & don’t want to run to the store )
  • 12×12 card stock (ours was a light gray with a slight shimmer)
  • Hands
1. Make a tree trunk by using the foam brush to paint a 4 inch area from your wrist to forearm brown. Then, stamp your arm on the paper. If you want it a little thicker, stamp again.
For us, my arm was the best size. Plus, the symbolism of me holding up the family is a bonus. 😉

2. Start with the person with the biggest hands, most likely Dad. Paint his hand with a light coat of green. If you use too much it will just ending up looking like a blob. Have him stamp his hand slightly right, then slightly left aligning the second stamp with the fingers filling in the gaps.

3. Paint the other family members hands from biggest to smallest and have each person do step two. We just have three people, so it went Dad, Mom, Son. You may have to adjust how much you stamp according to how big your family is.

4. I put my Christmas art project in the black wood frame I used for this fall art project and up on the wall it went. You could use fingertips dipped in white to add snow flakes falling or in red to add ornaments to the tree. I liked ours just the way it was. It could be really fun to make one for each member of the family and then let them decorate it. I feel an FHE coming on!

I would love to see your Christmas art project if you try it!

P.S. Don’t forget to sign up for free Tipsy updates via RSS or email.

We have decided to truncate our feed to help protect against stolen content. I apologize for any inconvenience. Please love us anyway. 🙂
« Previous Page
Next Page »

  • Bloglovin
  • Facebook
  • Google+
  • Instagram
  • Pinterest
  • RSS
  • Twitter

Hi there! I'm Michelle. Mother of three little boys and one little princess. Welcome to A Little Tipsy, a place for exploring creativity and sharing inspiration.

Follow on Bloglovin


Visit Michelle Barneck {A Little Tipsy}'s profile on Pinterest.

Tutorials by Category


15 Family Reunion Games

Family Reunion Games Collage

15 Sprinkle Party Ideas

Sprinkle Birthday Party
Creative Commons License

© Copyright 2014 A Little Tipsy · Site Designed by The Fairy Blogmother · Web Hosting by RFE Hosting

This website uses cookies to improve your experience. We'll assume you're ok with this, but you can opt-out if you wish.Accept Read More
Privacy & Cookies Policy