A Little Tipsy

Creative Tips & Ideas

  • home
  • About Me
  • the tipsy top
  • press
  • projects
  • contact me
[print_thumbnail_slider]

DIY Under $5 Features

September 10, 2011 By Michelle Barneck 4 Comments

Feature, feature, who got a feature? Seriously, how do you guys come up with this stuff for $5?! I am in awe!

My faves:


Burlap Spider Web Garland from Burton Avenue
Now this makes me excited for Halloween!


Recycled Magnetic Organizers from Life in the Motherhood

This is so the solution I need in my kitchen!


Fall Book Page Wreath from Alderberry Hill

It was the acorns that sealed the deal!

Link with the most clicks:

Oreo Truffles from Southern Lovely
These are seriously addicting, but the true beauty is how easy they are!

Be sure to grab your A Little Tipsy featured button here.

And another friendly reminder to please turn off comment word verification on your blogs. We will all thank you!

P.S. Don’t forget to sign up for free Tipsy updates via RSS or email.

We have decided to truncate our feed to help protect against stolen content. I apologize for any inconvenience. Please love us anyway. πŸ™‚

Photo Shoot Tips

September 8, 2011 By Michelle Barneck 3 Comments


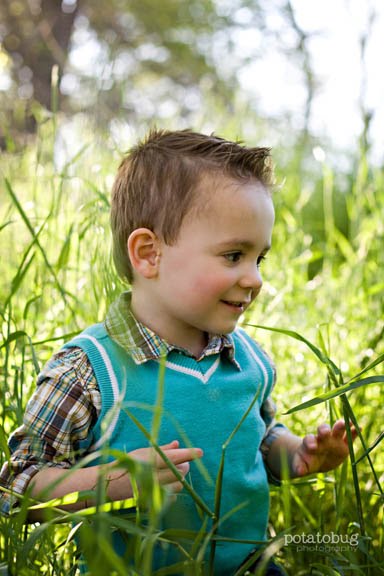
A big thanks to Fullerton Photographics for sponsoring this post about how to get the best family pictures.

Whether because of the approaching holidays or sending the kids to school and realizing how grown up they are, I think at this time of year everyone starts thinking about family pictures. We all want a great way to show off just how special our families are. Here are a few tips to get you that much closer to that perfect picture.

Photo Shoot Tips


1. What to Wear

  • Choose a color scheme for the family including a few colors to coordinate. It doesn’t have to be matchy, matchy. Stick with mostly solid colors or light patterns. There is tons of fantastic inspiration by googling what to wear family photography.
  • Wear clothing that is comfortable and coordinates with the season. They may look cute, but you will not get good pics if your family is whining about rubbing shoes or being too hot.

I love these monthly what to wear boards from Laura Fleming!

2. Location, Location, Location

  • Choose a location that fits your families personality. If you are more reserved, an urban area with graffiti and purple brick is probably not the best for you.
  • It can be fun to choose a place that has meaning to you. We had our last family pictures at an old barn next to my parents house that was being torn down.
  • If you have young kids they may do better at a location outdoors where they have fun photo opps to explore.
  • Try to keep it to one location. It will keep the kiddos and Dad for that matter happier about the whole experience.

3. Be Prepared

  • Choose a time when everyone is fed and well rested. Don’t risk getting to
  • Take along water, non-messy snacks, hairspray, baby wipes (they even safely get dirt off wedding dresses!), etc. to combat anything that may become a frustration.
  • I have been known to bribe. Smarties are great because they are fast and don’t change their face or tongue colors. I told my son he could have a pajama movie party when we got home if he was good for his photo shoot with his brother. It worked wonders and cost me nothing.

4. Don’t be a Poser…or do.

  • Research different photography styles and poses. Do you like everyone posed in a certain place or lifestyle where it is more relaxed and everyday family interaction? Do you want props of any kind, like balloons or chairs? Find what you like and communicate that with your photographer.
  • I created a Pinterest board to keep track of photo poses and ideas that I liked. It is a great visual way to keep track of things you love.

5. Be flexible.

  • This tip is especially for me. Have an idea of what you want, but don’t stress if everything does not go according to plan. Most photographers will get a good shot even if Little Joey won’t sit perfectly on the rocking horse. Keeping it low key will keep everyone be in a better mood which translates to better pictures. We all know “if mama ain’t happy, ain’t nobody happy” so relax and have a good time.
  • Some of my favorite pictures have been where the kids aren’t posed or even looking at the camera for that matter.

We are getting our family pictures at the end of this month and I can’t wait!

I hope these tips will help get you great family pictures!

For great way to display your favorite images, Fullerton Photographics has fabulous printing options from books to canvas to metal art. Thanks again to Fullerton Photographics for sponsoring this post!

P.S. Don’t forget to sign up for free Tipsy updates via RSS or email.

We have decided to truncate our feed to help protect against stolen content. I apologize for any inconvenience. Please love us anyway. πŸ™‚

DIY Under $5 {Ruler Frame}

September 7, 2011 By Michelle Barneck 13 Comments

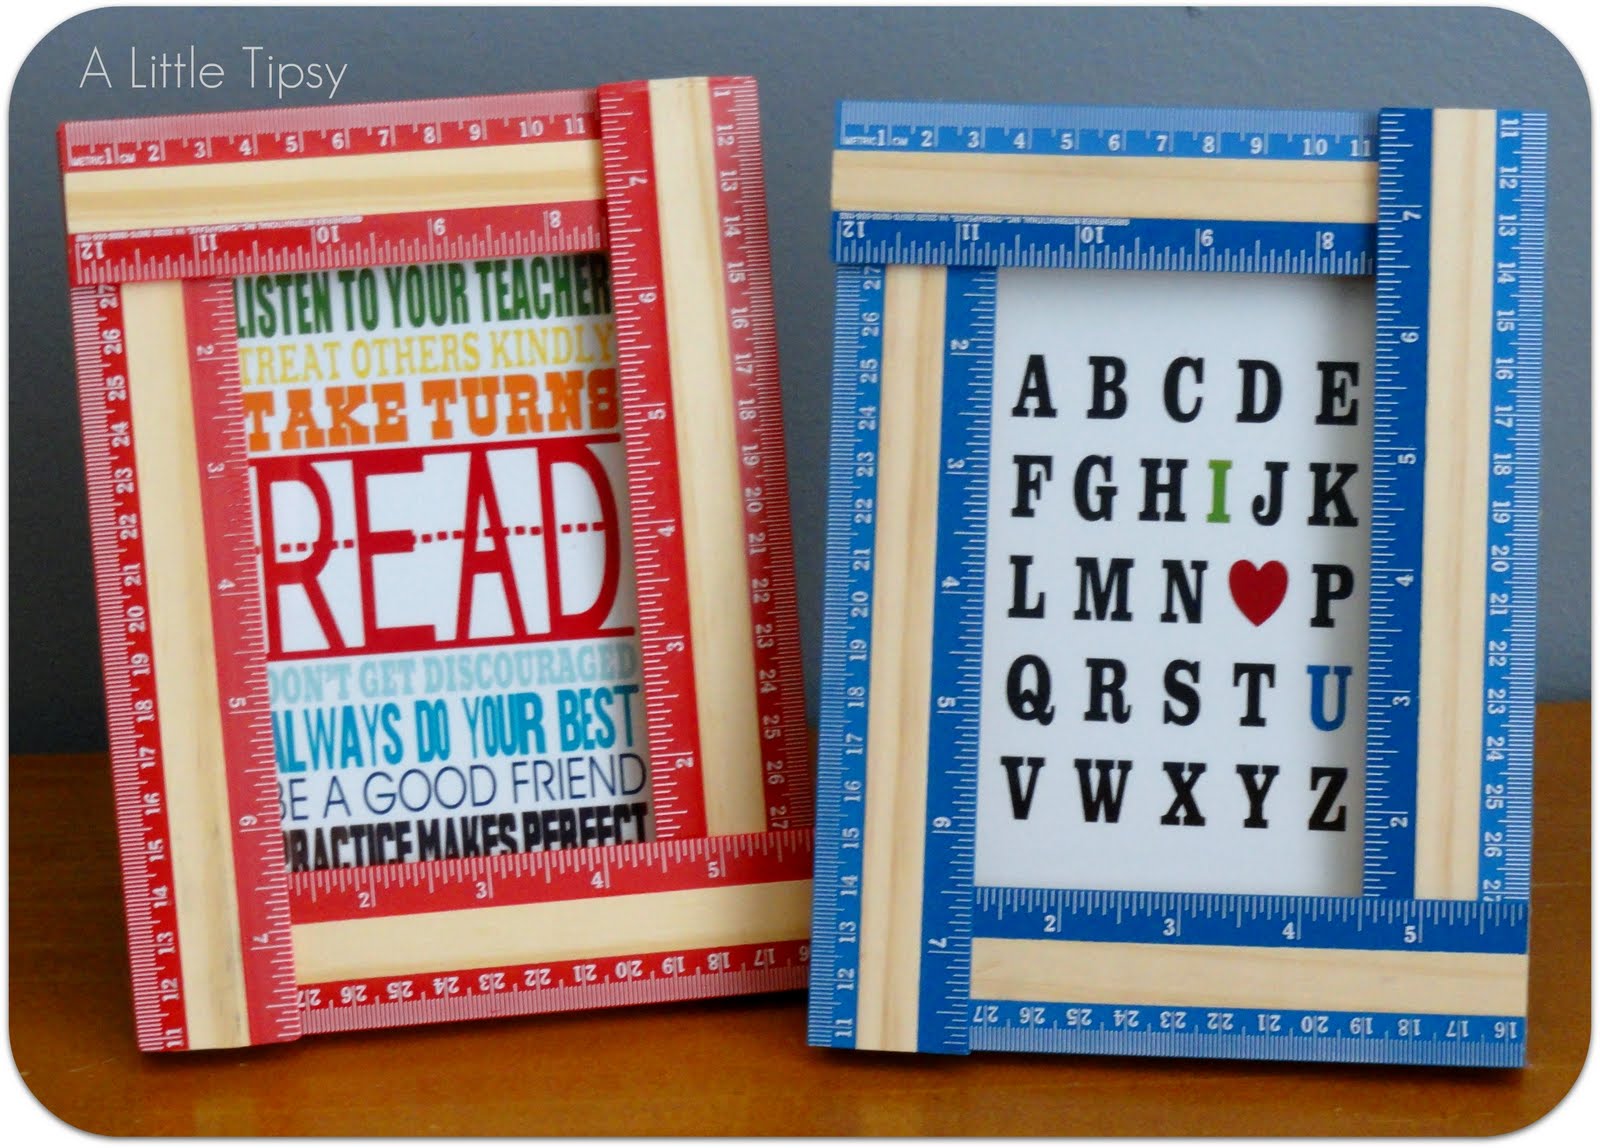
I’m kinda liking the whole school theme. My little guy is loving preschool and I want to reinforce that any way I can. When making my Back to School frame I got the idea to make a ruler frame to go along.

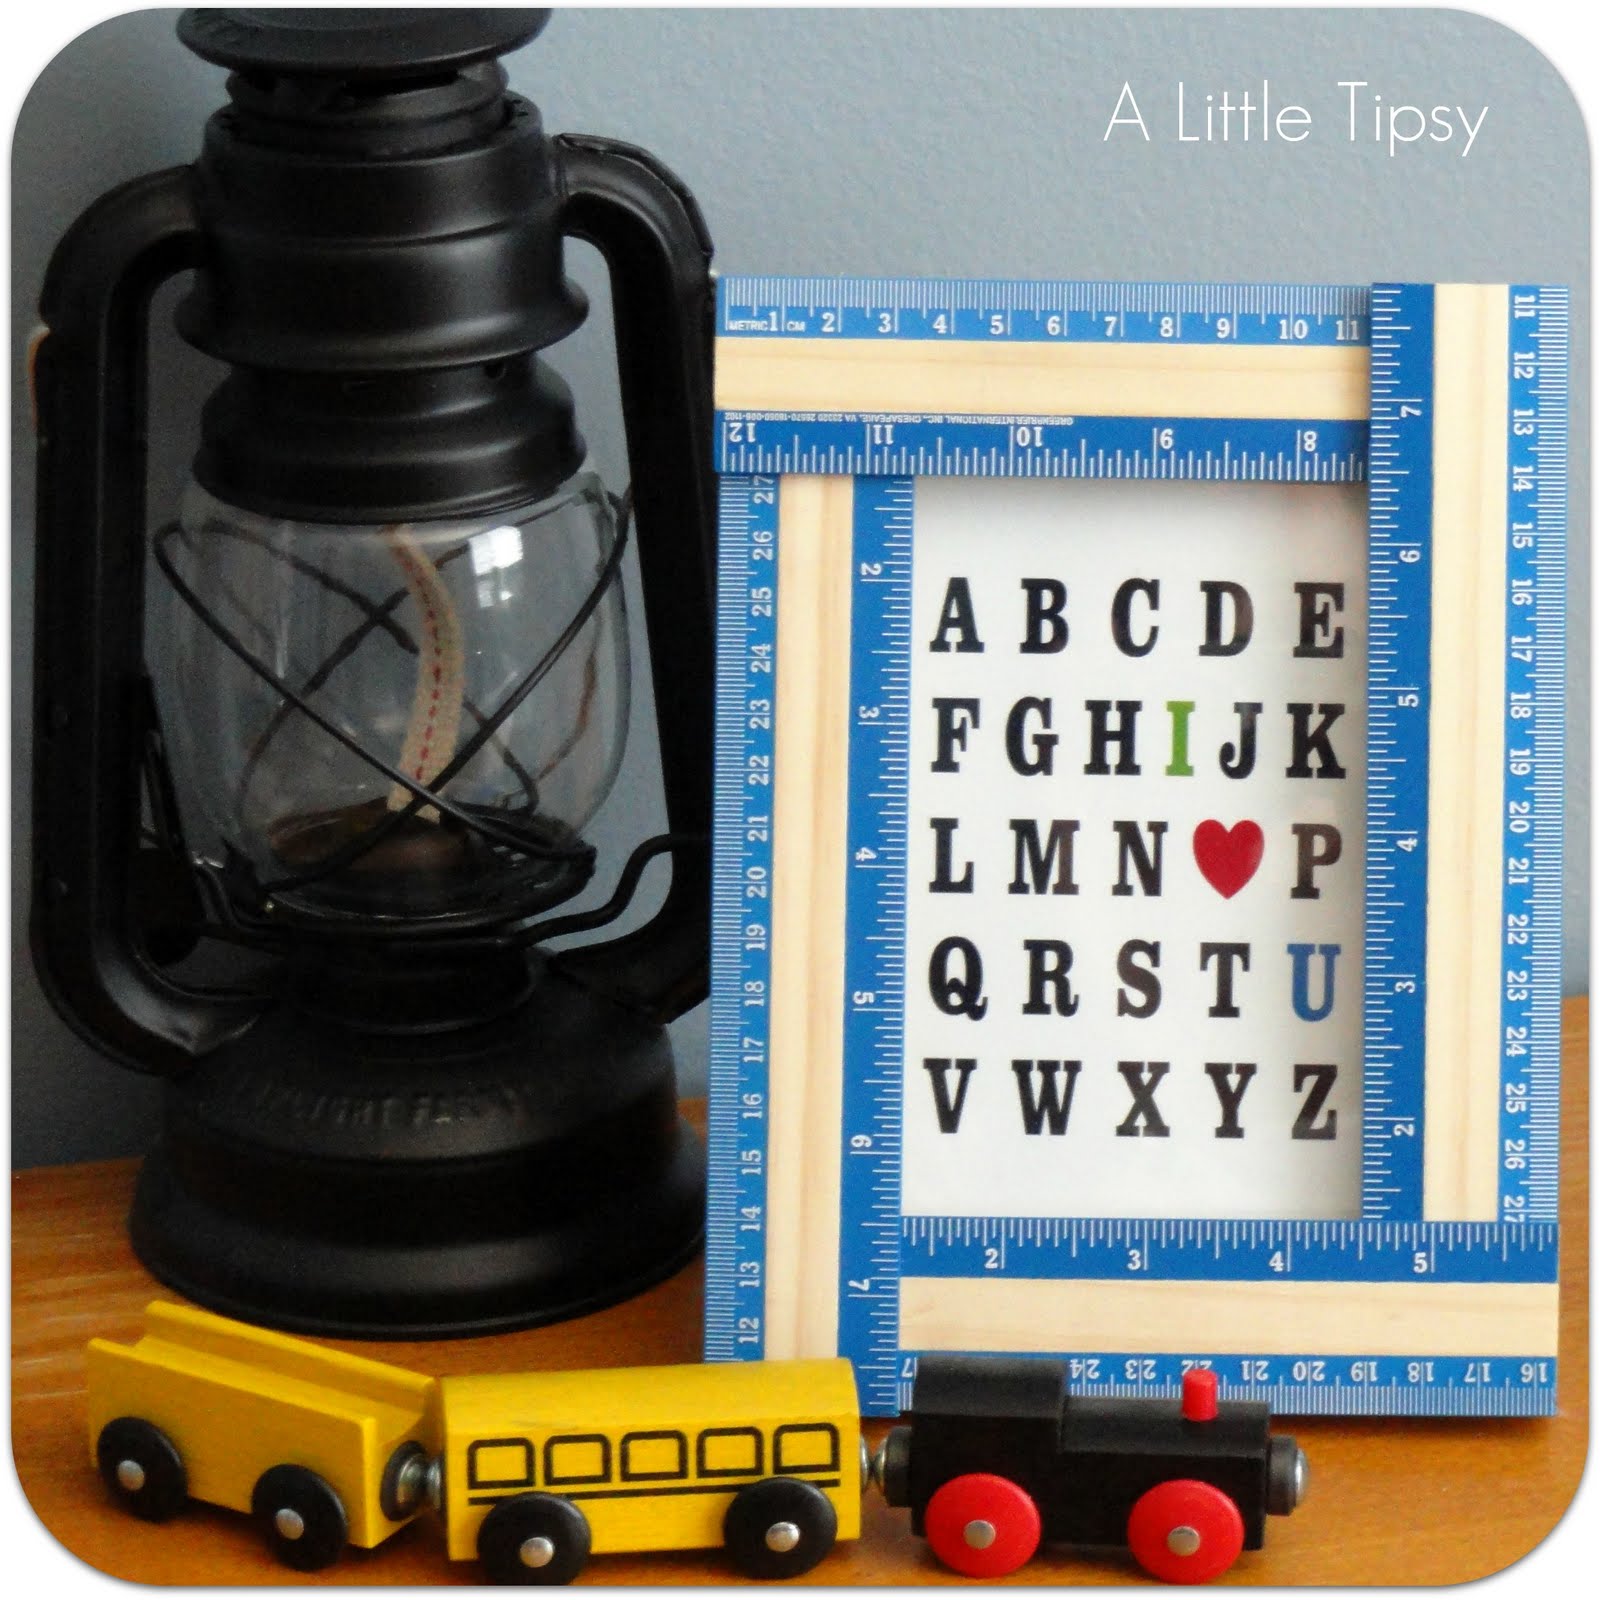
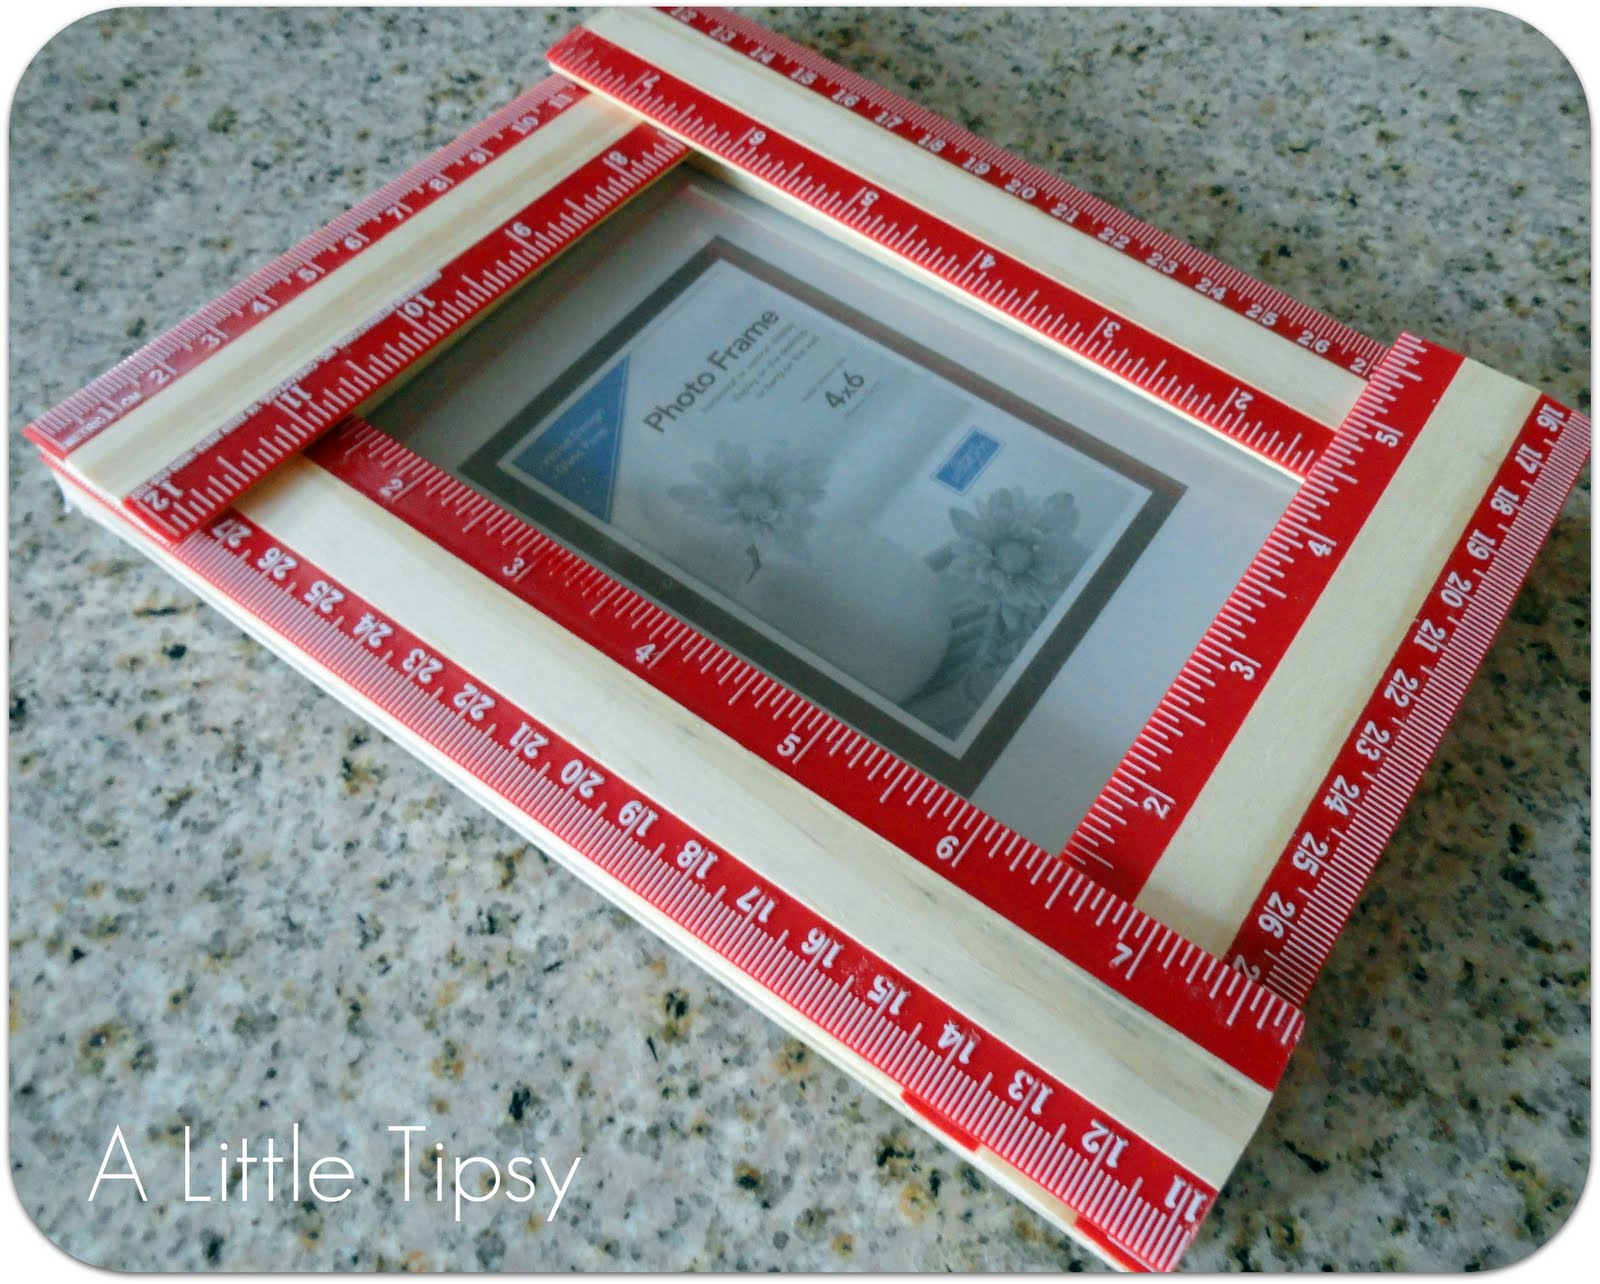
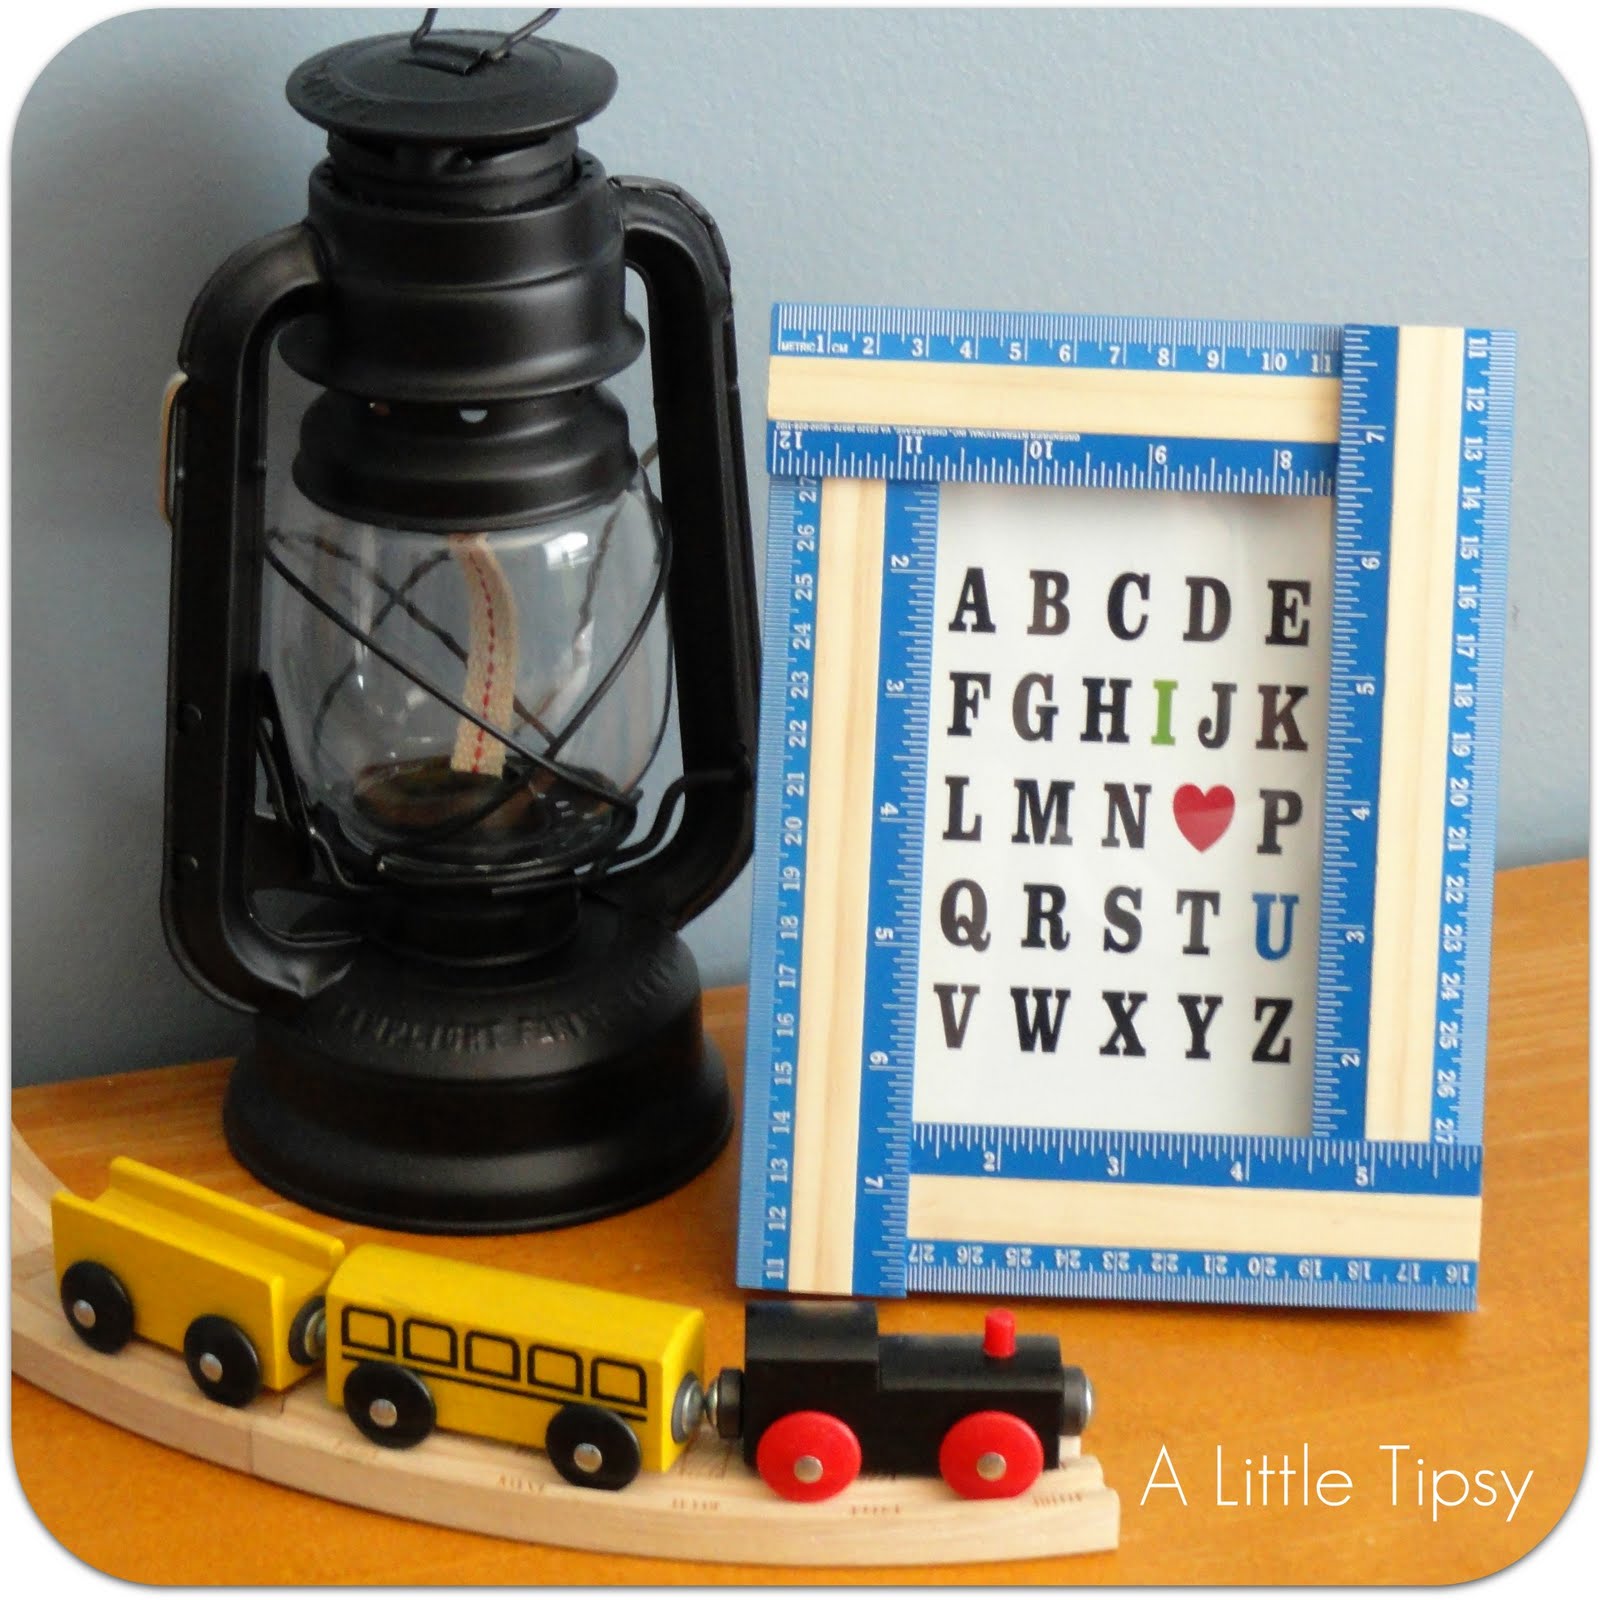
Making a ruler frame was pretty much as easy as I thought and I love how they turned out, very academic. πŸ˜‰

Ruler Frame

Supplies:

  • 4×6 frame
  • 4 wood or partially wood rulers
  • Table saw
  • Hot glue

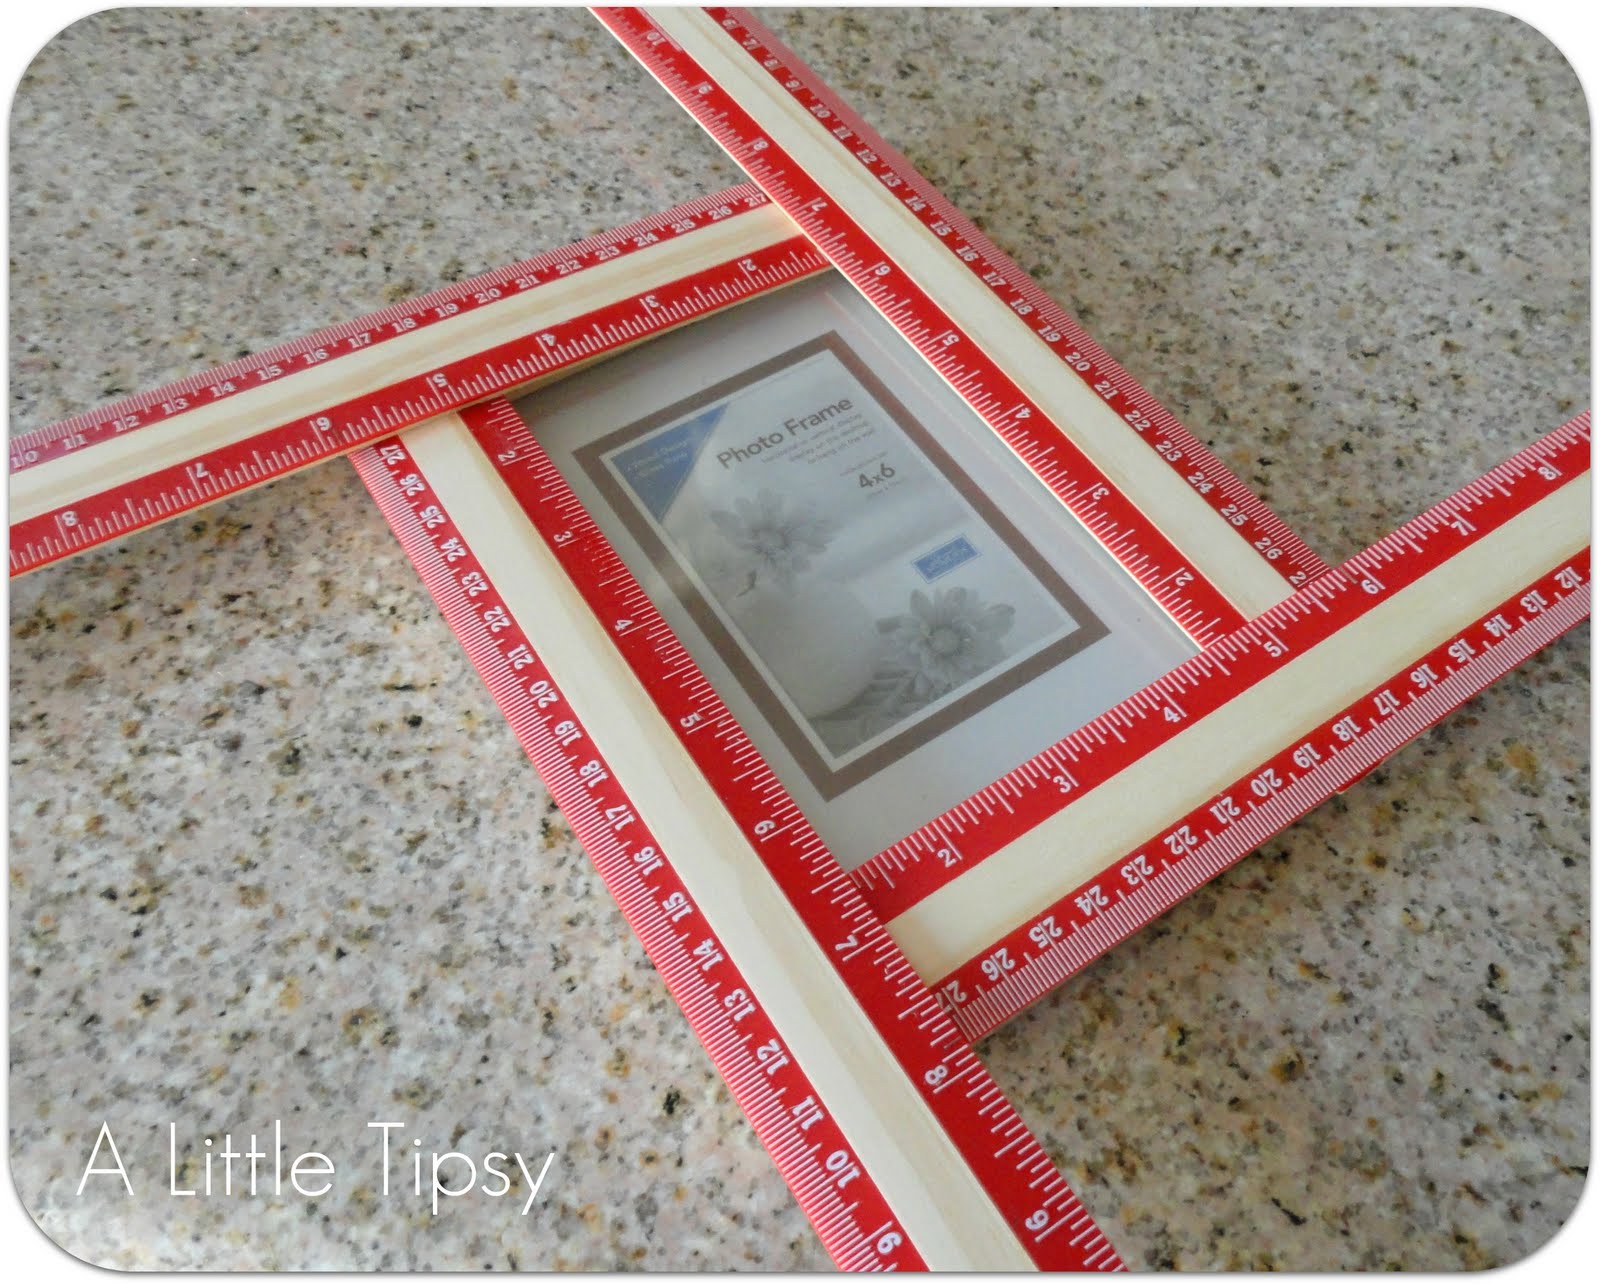
1. Lay your rulers on your frame. I liked one end under and one end over. Mark with a pencil where to make your cuts so they fit on the frame just right.

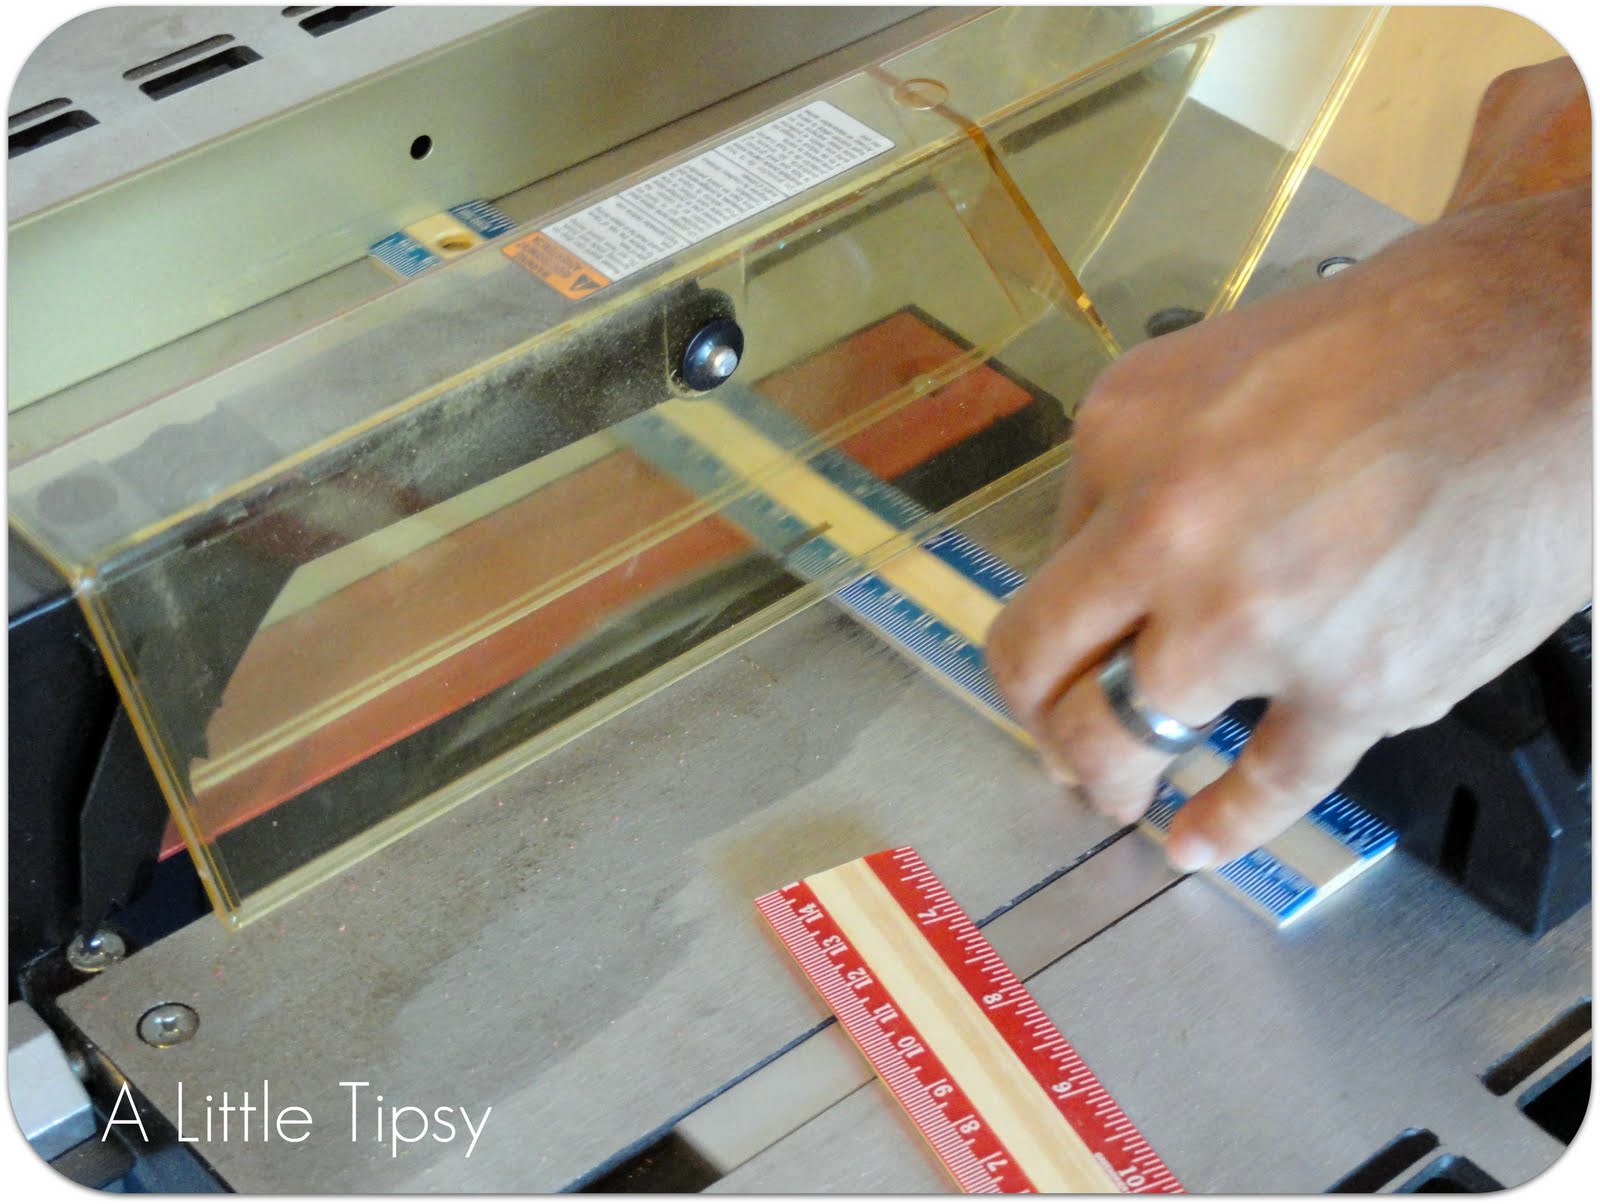
2. CAREFULLY cut your rulers with the table saw. Be sure to account for the width of the blade when cutting. I had to leave an extra 1/8th inch. If you don’t have a table saw you can use a hack saw. I did my first two like this, but it took forever.

3. Lay your rulers back on your frame to make sure they fit right. Then hot glue to frame by putting a line of glue across the end of the ruler that goes under and another line of glue about an inch in from the “over” end so it will touch the ruler under it.

Simple as pie. The kind made with pre-made crust and pudding.

Super cute on their own, but add a printable from the talented girls at Eighteen25 and Sprik Space and it totally makes them!

Total cost: $3 per frame
Frame: $1
Rulers: $2 (2 for $1, used 4)
Printables: FREE
Everything else on hand

Now it’s time to link up your $5 projects!

Please remember:

  • Only link to your own projects that cost you $5 or less (price does not have to include items you had on hand)
  • You can link past projects that fit the dollar limit, but please only link each project one time to one DIY Under $5 party. Do not link the same project week after week.
  • No linking giveaways or items for sale
  • Please link back so others can join the party and so you have the opportunity to be featured on Saturday!

DIY under $5

Linking up wtih:
Look What I Made
Whatever Goes Wednesday
Topsy Turvy Tuesday
Design Dazzle
The Idea Room

P.S. Don’t forget to sign up for free Tipsy updates via RSS or email.

We have decided to truncate our feed to help protect against stolen content. I apologize for any inconvenience. Please love us anyway. πŸ™‚

Make a Memory {Make a Game}

September 5, 2011 By Michelle Barneck 2 Comments

It’s week 14, the last and final week of the Make a Memory series! It is so important to create lasting memories with our families and this has been such a fun way to get ideas for fun traditions to start with our own families. So, let’s dive right in and see how Kara from Creations by Kara and her family make a memory!


Hi Little Tipsy readers, I’m Kara from Creations by Kara. I am so happy to be here today as part of Michelle’s awesome Make a Memory Series!

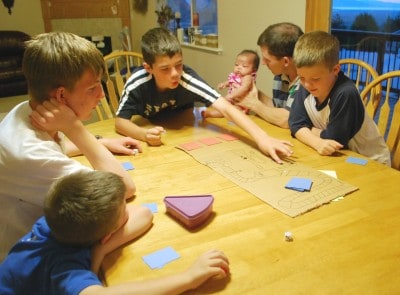
We have four very active boys ages 7-16 (and a baby girl). We are always looking for ways to keep them busy on days when the weather doesn’t make for much fun outside. A few years ago we came up with the idea of letting them create their own games. It has been a huge hit, and we have so much fun seeing what they can come up with. As a bonus, this activity costs nothing, we just use what we have around the house. Yay for free entertainment!

When we first started, they would make Bingo and Memory games. One year they made a Don’t Bug Daddy game for Father’s Day. And yes, some of the dads happen to be aliens. πŸ˜‰ It is similar to “Don’t Eat Pete”, and can be adapted to any holiday. I’m including the instructions at the bottom of the post in case you’ve never played it before.

Then they got a little older and started designing board games. Sometimes they just take turns drawing them on the dry erase board. We play, then erase it and let the next person have a turn making up the game.


When they want to make a game that will last for more than one day, they draw it on cardboard. My 10 year old spent hours coming up with an elaborate game that uses dice and playing cards. We have spent many Sunday afternoons playing it, and it really is just as fun as some of the games on the market.


Not only do these DIY games foster creativity and provide lots of family fun, but they are a great self-esteem booster for younger kids. My two youngest boys just beam with pride when they see the family playing “their” game. Especially when an older brother tells them what an awesome job they did.

I hope you’ll all give DIY games a try in your family. Thanks for having me Michelle!

You can all drop by and visit me at Creations by Kara anytime. I’ve always got a batch of goodies ready to share. πŸ™‚

Don’t Bug Daddy Instructions:

Place a small piece of candy on each dad. (We use M&M’s.) One person leaves the room. The remaining players agree on a Secret Dad. When everyone is ready, the player comes back into the room and begins picking up and eating the candy one piece at a time. When the player tried to pick up the candy on the secret Santa, everyone yells, β€œDON’T BUG DADDY!” Choose a different person to leave the room. The player that just had a turn picks the next secret Daddy. In addition to this Don’t Bug Daddy version, we also have a “Don’t Eat Santa”, and “Don’t Eat the Easter Bunny”. Kids of just about all ages love this game!

—————————————————————–

A big thanks to Kara for such a fun idea! We made a personalized Life Game once. It was really fun! So what did you think of the Make a Memory series? Did you find a new tradition to start with your family? Thanks to all who participated!

P.S. Don’t forget to sign up for free Tipsy updates via RSS or email.

We have decided to truncate our feed to help protect against stolen content. I apologize for any inconvenience. Please love us anyway. πŸ™‚
« Previous Page
Next Page »

  • Bloglovin
  • Facebook
  • Google+
  • Instagram
  • Pinterest
  • RSS
  • Twitter

Hi there! I'm Michelle. Mother of three little boys and one little princess. Welcome to A Little Tipsy, a place for exploring creativity and sharing inspiration.

Follow on Bloglovin


Visit Michelle Barneck {A Little Tipsy}'s profile on Pinterest.

Tutorials by Category


15 Family Reunion Games

Family Reunion Games Collage

15 Sprinkle Party Ideas

Sprinkle Birthday Party
Creative Commons License

© Copyright 2014 A Little Tipsy · Site Designed by The Fairy Blogmother · Web Hosting by RFE Hosting

This website uses cookies to improve your experience. We'll assume you're ok with this, but you can opt-out if you wish.Accept Read More
Privacy & Cookies Policy