A Little Tipsy

Creative Tips & Ideas

  • home
  • About Me
  • the tipsy top
  • press
  • projects
  • contact me
[print_thumbnail_slider]

New Years Eve

December 27, 2011 By Michelle Barneck 12 Comments

Hi everyone, I’m Angie and I’m really excited to be guest posting for Michelle!

I blog over at Burton Avenue where I love to share simple and inexpensive craft projects. I especially love all things vinyl! I have been blogging almost 4 years, but never really liked sharing craft projects on our family blog. So, earlier this year, Burton Avenue began.

I have been married for 10 years and we have 6 cute little kiddies (9 years and under). They keep me busy! I love blogging because it gives me a chance to take a break from the day to day tasks of being a mom and keeps my creative juices flowing.

With only a week between Christmas and the new year, there isn’t much time left to decorate for a New Year’s Eve bash. No worries, because I’ve got a project that’s quick and easy and is sure to add some pizazz to your party.

I’m going to show you how to make this cute balloon topiary.

Here is what you will need:

12 – Small Balloons (I used 5″ balloons)

16″ Dowel (painted to match your color scheme)

Styrofoam

Small Vase

Marbles, Shreds, or other Filler for the Vase

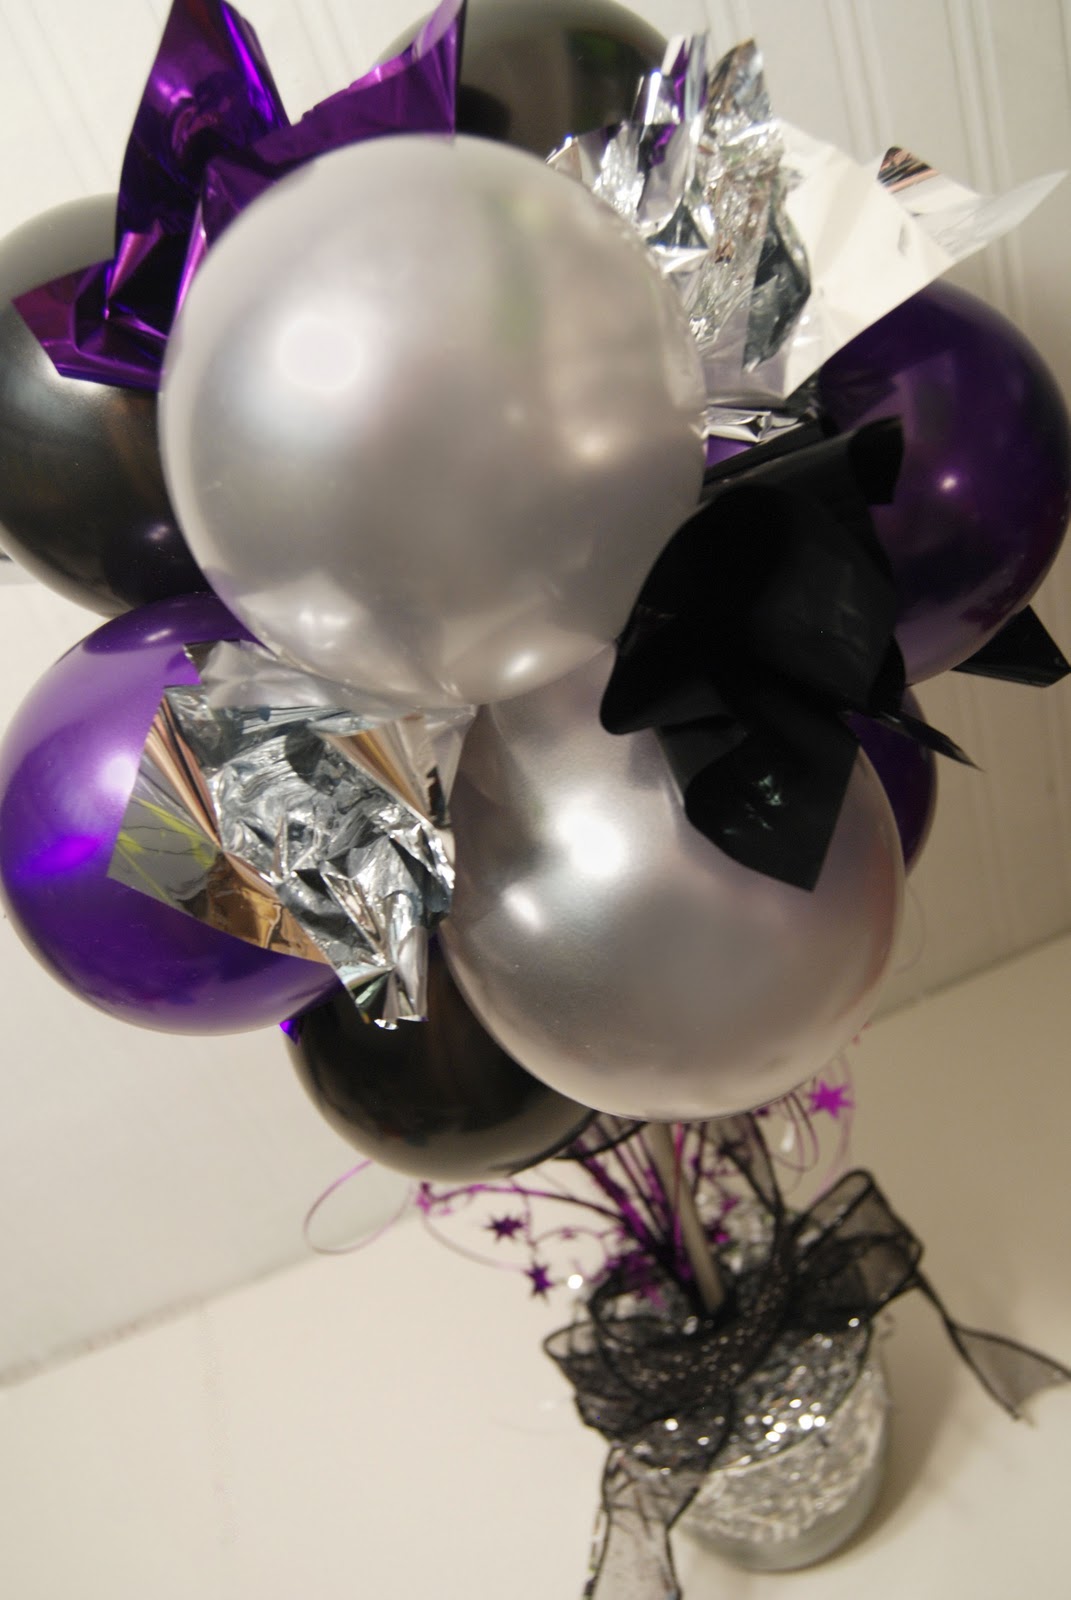
Foil Sheets (optional)

Star Sprays (optional)

First, inflate the balloons (try to make them the same size). Tie the necks of two balloons together and repeat until you have six groups.

Next, place one group over another group. Lock the two together by twisting the necks around each other.

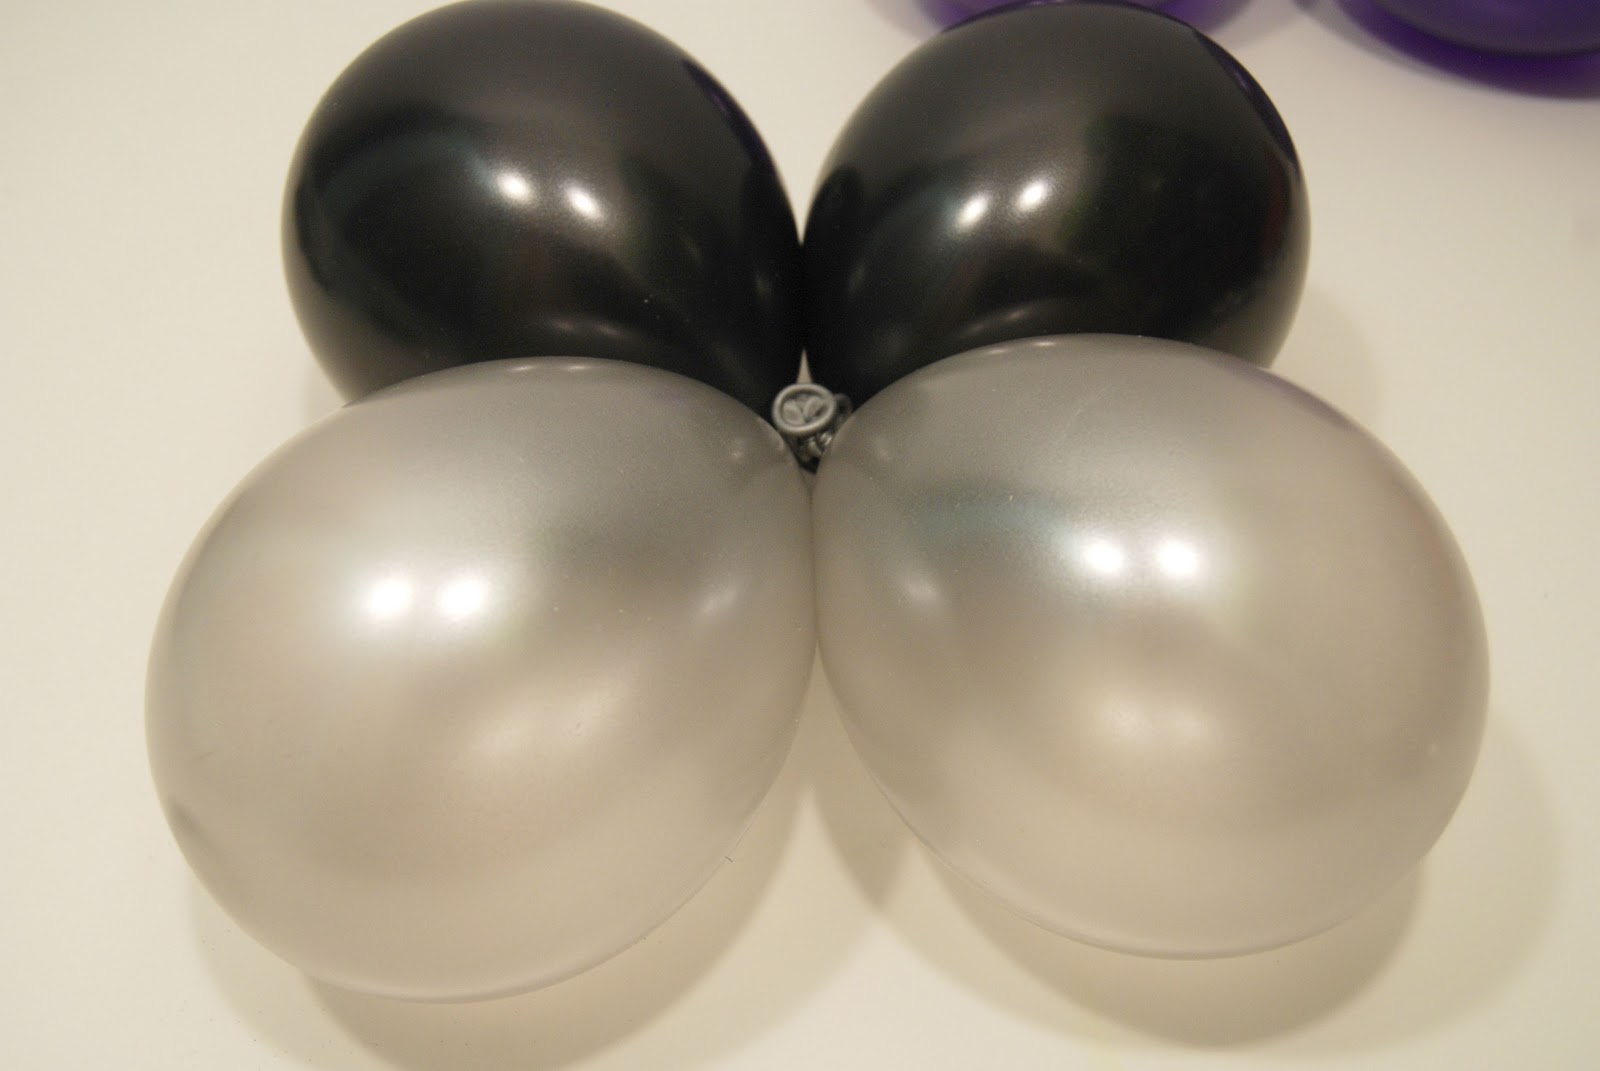
Repeat with a third group, there should now be six balloons in this cluster. Do the same with remaining groups, so you end up with two big clusters (each with 6 balloons).

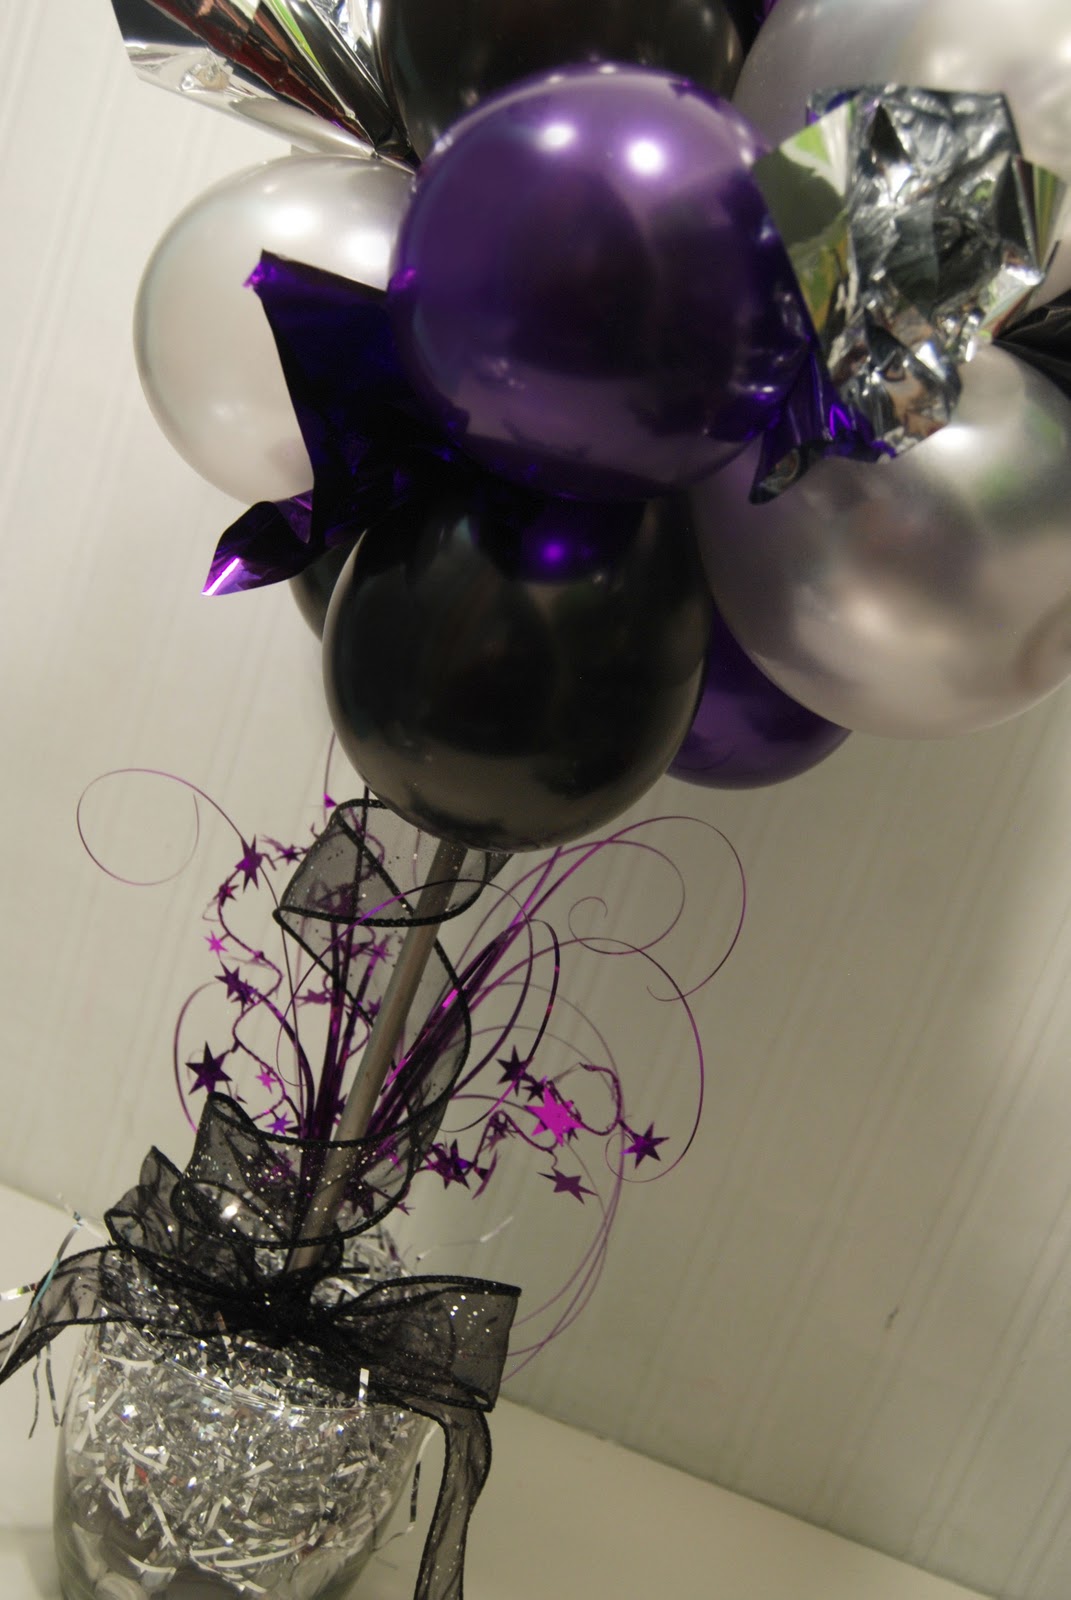
Now, put the two clusters together and twist the necks of a couple balloons around each other. You will end up with a ball that looks like this. You can move the balloons around until the colors and shape look good. I hope that all made sense (it’s way easier than it sounds).

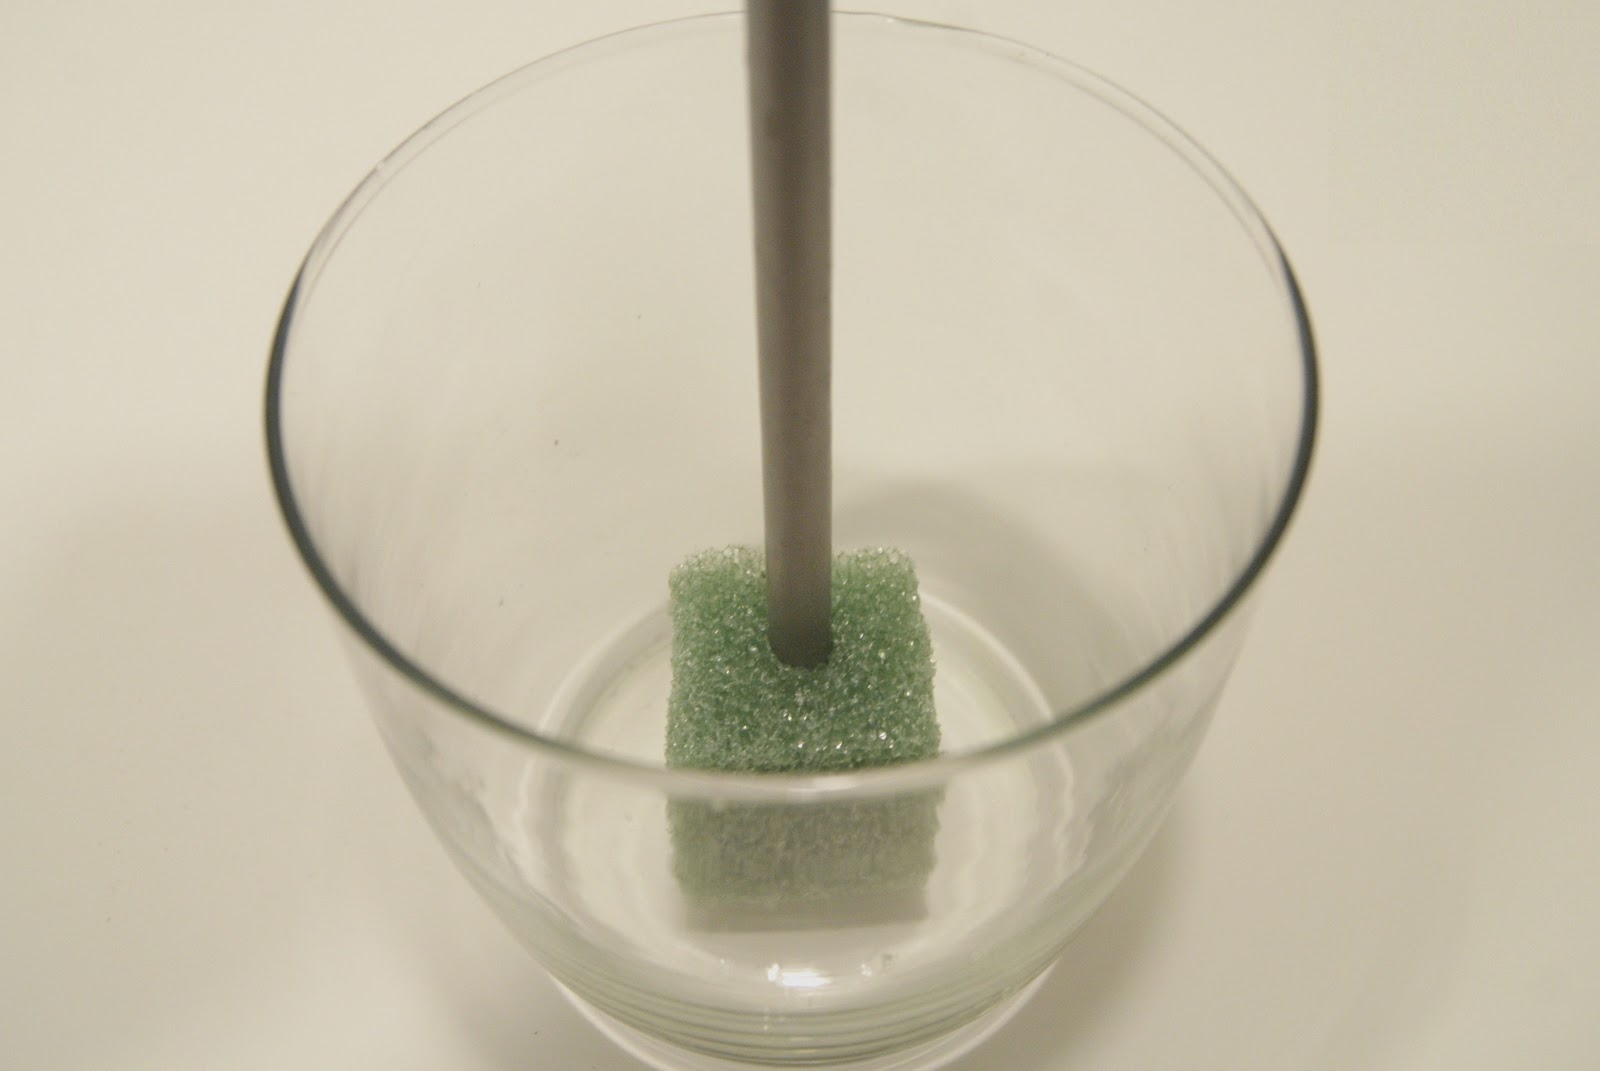
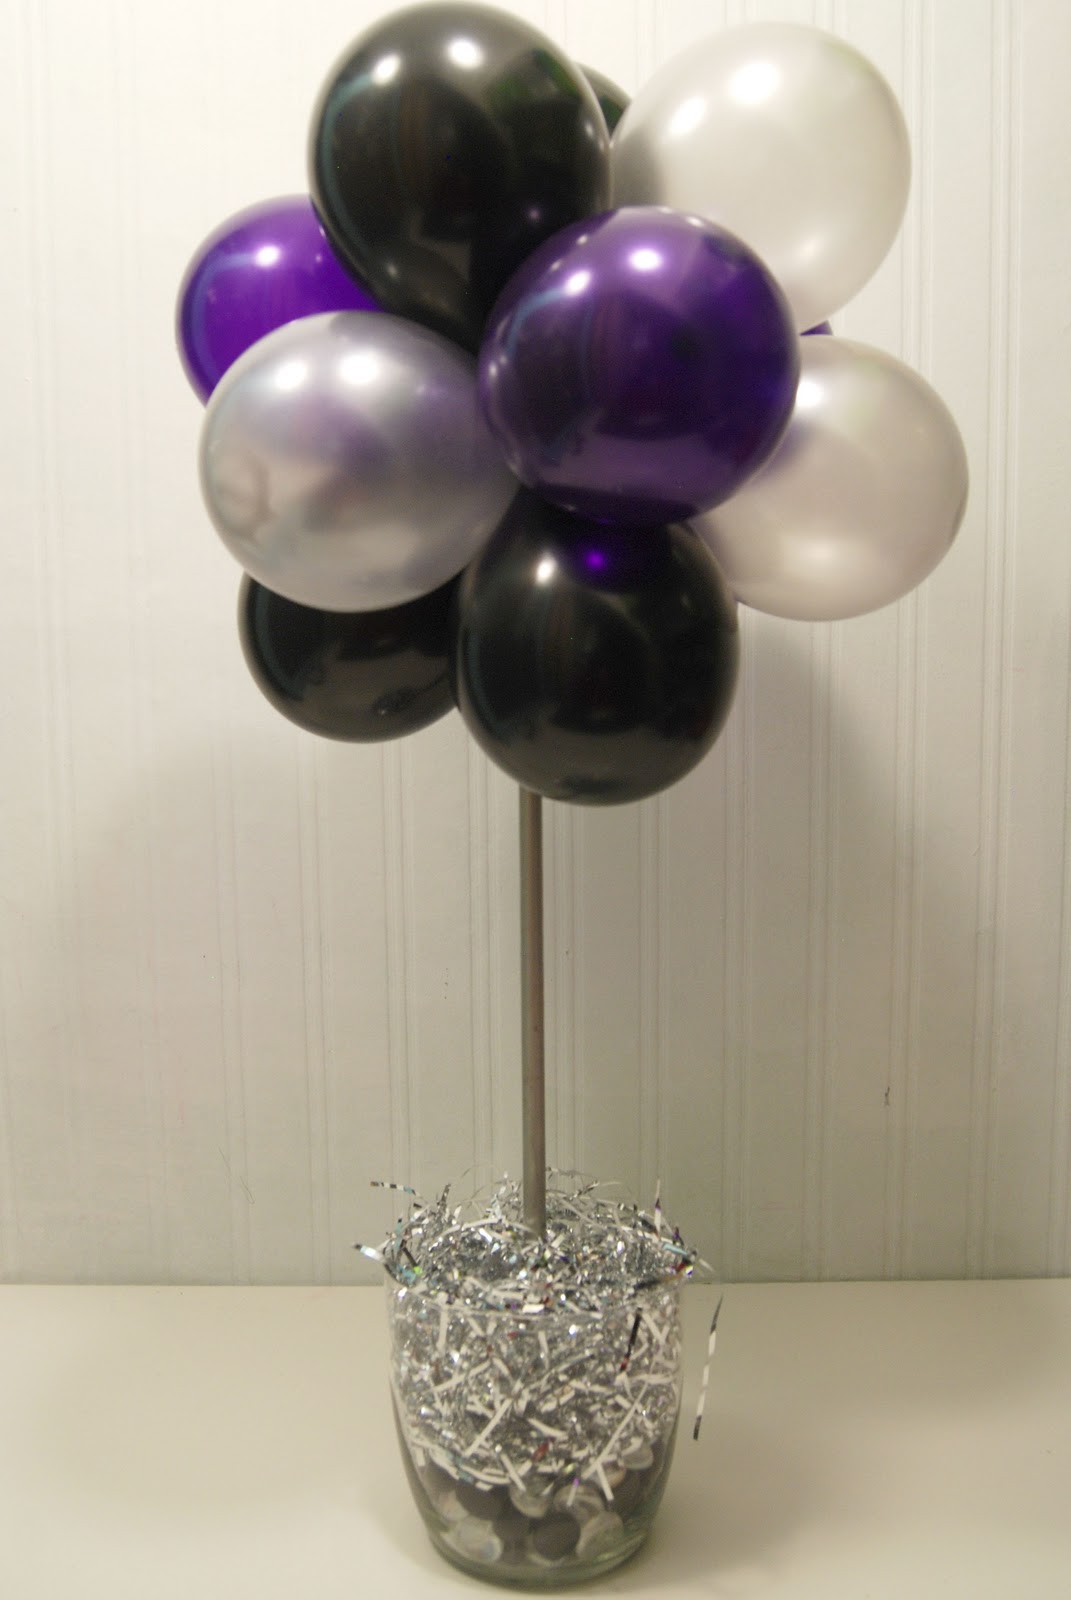
Set that aside for a bit and let’s start on the base. Stick your dowel into a piece of styrofoam and place it in the bottom of your vase. You may need to glue it down to keep it from tipping. Add marbles or other decorative items to fill the vase.

Place the top of the dowel in the center of your balloon cluster. You don’t need to glue it, just twist a couple of balloons around it to keep it in place.

It’s cute and simple like this, but I like to dress it up a bit more. Tuck some ribbon into the center of the cluster and wrap it loosely around the dowel a few times. Tie down the other end with another piece of ribbon and then make a bow.

Cut 5-6″ squares from foil sheets or tissue paper and stick between the balloons. Repeat all over the ball and fluff until it looks good.

Finally, for some more color, add a cute star spray to the base.

Isn’t it fun and festive?

And, since balloons come in so many different colors, you can make a topiary to match any party decor!

Thanks, Michelle for inviting me! I hope you all enjoyed this tutorial and will come over and visit me at Burton Avenue.

———————————————————————-
Isn’t Angie great?! This is a totally fun idea for a New Year’s celebration. You could even disassemble it at the end of the party and let the kids pop the balloons as party to ring in the New Year! Thanks Angie for such a cute idea!

P.S. Don’t forget to sign up for free Tipsy updates via RSS or email.

We have decided to truncate our feed to help protect against stolen content. I apologize for any inconvenience. Please love us anyway. 🙂
Tweet
PinIt

Filed Under: Holiday, Tutorials

Image Map

Comments

  1. Karen says

    December 28, 2011 at 3:56 pm

    very cute idea! I love the colors she used, and I want to know how she finds the time to do all this stuff with 6 kids! AMAZING!

    Reply
  2. Jen says

    February 22, 2015 at 8:32 pm

    how many days in advance can I make this before the balloons start to look old? thanks!

    Reply
    • Michelle Barneck says

      March 7, 2015 at 12:16 pm

      If you use high quality balloons I would imagine they would be fine for at least 5 days.

      Reply
  3. hockeymom says

    March 18, 2015 at 6:57 am

    Did you use helium for the balloons?

    Reply
    • Michelle Barneck says

      March 28, 2015 at 8:09 am

      This was a guest post by another author, but I believe they are just regular balloons blown up. No helium needed.

      Reply
  4. Rachel says

    March 21, 2015 at 10:12 pm

    Might be obvious, but what type of store do you purchase the dowels from? I haven’t heard of them before…

    Reply
    • Michelle Barneck says

      March 28, 2015 at 8:07 am

      You can get dowels at a craft store like Michaels or something similar.

      Reply
  5. Pam Messing says

    May 3, 2015 at 1:06 pm

    I’m curious as to how much one topiary, with all the added embellishments, costs.

    Reply
    • Michelle Barneck says

      May 29, 2015 at 11:00 am

      It really depends on where you get your supplies. Many of these things you can pick up at the dollar store which would make it about $6. From a party store it would be $10+.

      Reply
  6. natasha says

    January 13, 2019 at 3:48 pm

    is the dowel 3/16, 5/16
    can’t find it

    Reply
    • Michelle Barneck says

      February 23, 2019 at 11:59 am

      Either should be fine since the balloons do not weigh much. the 5/16 would be sturdier.

      Reply

Trackbacks

  1. Graduation Table Decoration Ideas - A Heart Full of Love says:
    February 24, 2016 at 7:25 am

    […] used this tutorial over at A Little Tipsy and used it to make the graduation balloon topiary centerpieces for my daughter’s grad party. […]

    Reply

Leave a Reply Cancel reply

Your email address will not be published. Required fields are marked *

This site uses Akismet to reduce spam. Learn how your comment data is processed.

  • Bloglovin
  • Facebook
  • Google+
  • Instagram
  • Pinterest
  • RSS
  • Twitter

Hi there! I'm Michelle. Mother of three little boys and one little princess. Welcome to A Little Tipsy, a place for exploring creativity and sharing inspiration.

Follow on Bloglovin


Visit Michelle Barneck {A Little Tipsy}'s profile on Pinterest.

Tutorials by Category


15 Family Reunion Games

Family Reunion Games Collage

15 Sprinkle Party Ideas

Sprinkle Birthday Party
Creative Commons License

© Copyright 2014 A Little Tipsy · Site Designed by The Fairy Blogmother · Web Hosting by RFE Hosting

This website uses cookies to improve your experience. We'll assume you're ok with this, but you can opt-out if you wish.Accept Read More
Privacy & Cookies Policy