A Little Tipsy

Creative Tips & Ideas

  • home
  • About Me
  • the tipsy top
  • press
  • projects
  • contact me
[print_thumbnail_slider]

Mummy Shirt

October 4, 2011 By Michelle Barneck 13 Comments

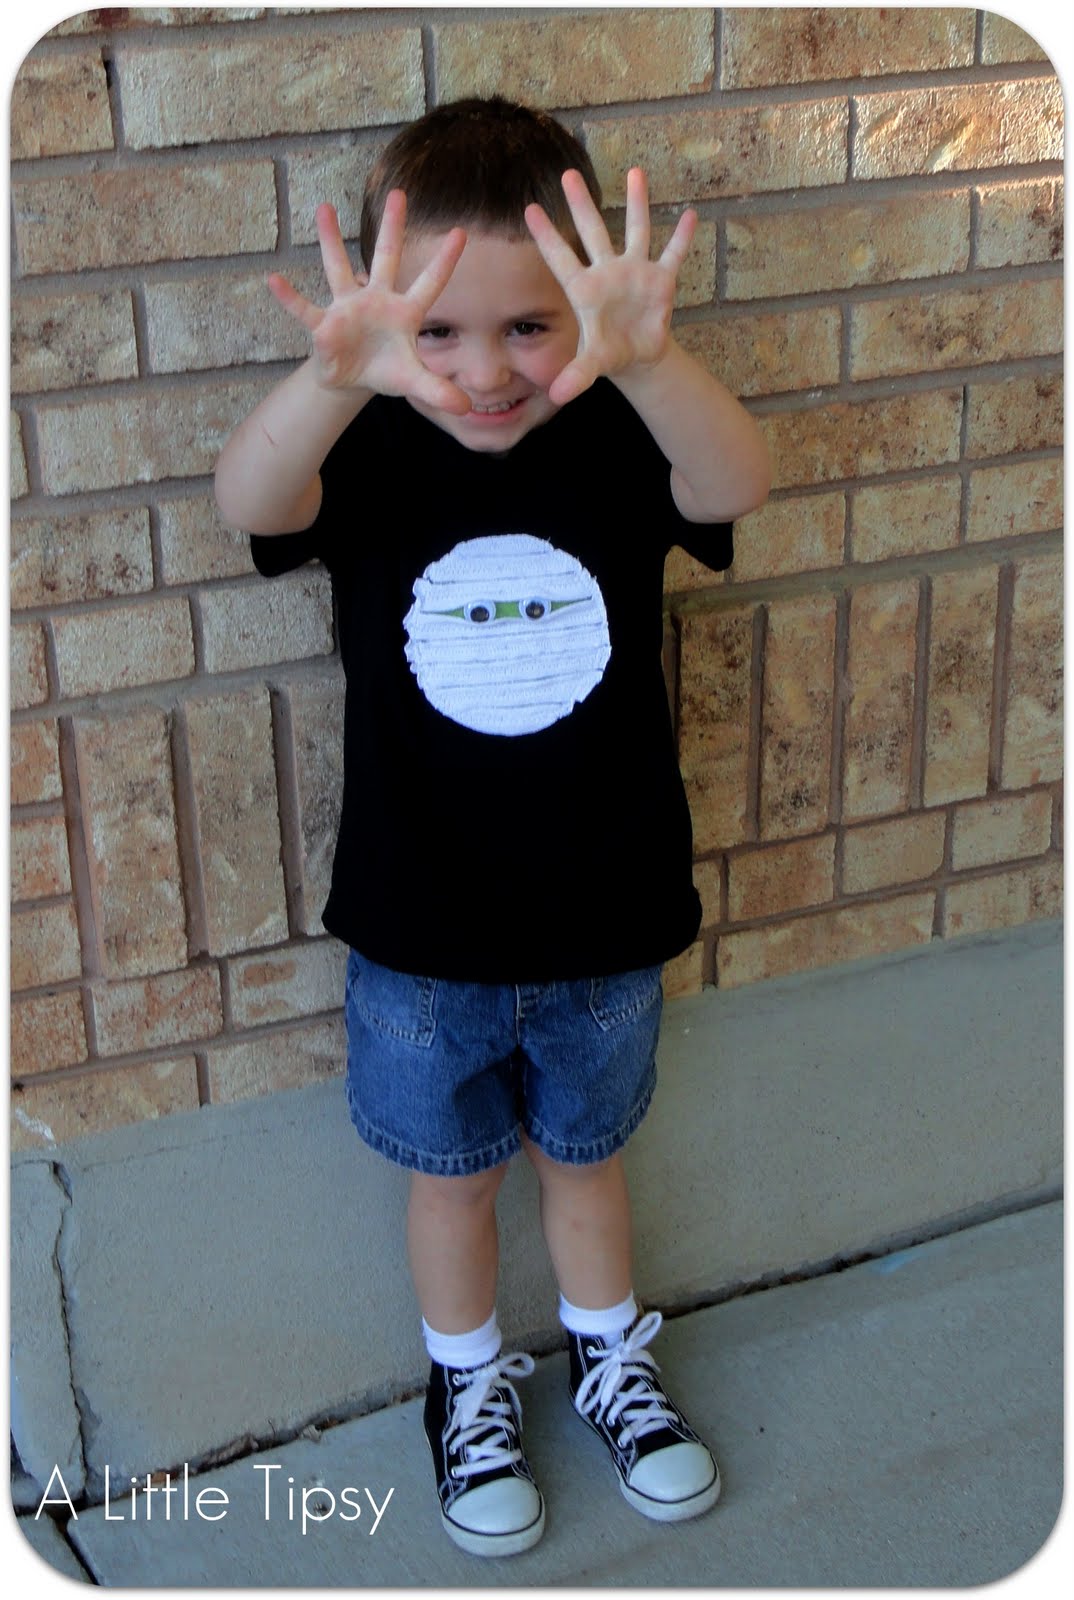
I wanted to have some cute shirts for my little guys for Halloween, but did not want to spend a fortune on something they would only wear a few times. Dressing boys can be hard. I don’t love that almost everything out there for boys is a graphic tee with something obnoxious on it. So I took things in to my own hands and got to work on the mummy shirt.

How do you make a mummy you may ask. What does a mummy make? Well let’s get down to business. Here’s what you’ll need.

Mummy Shirt


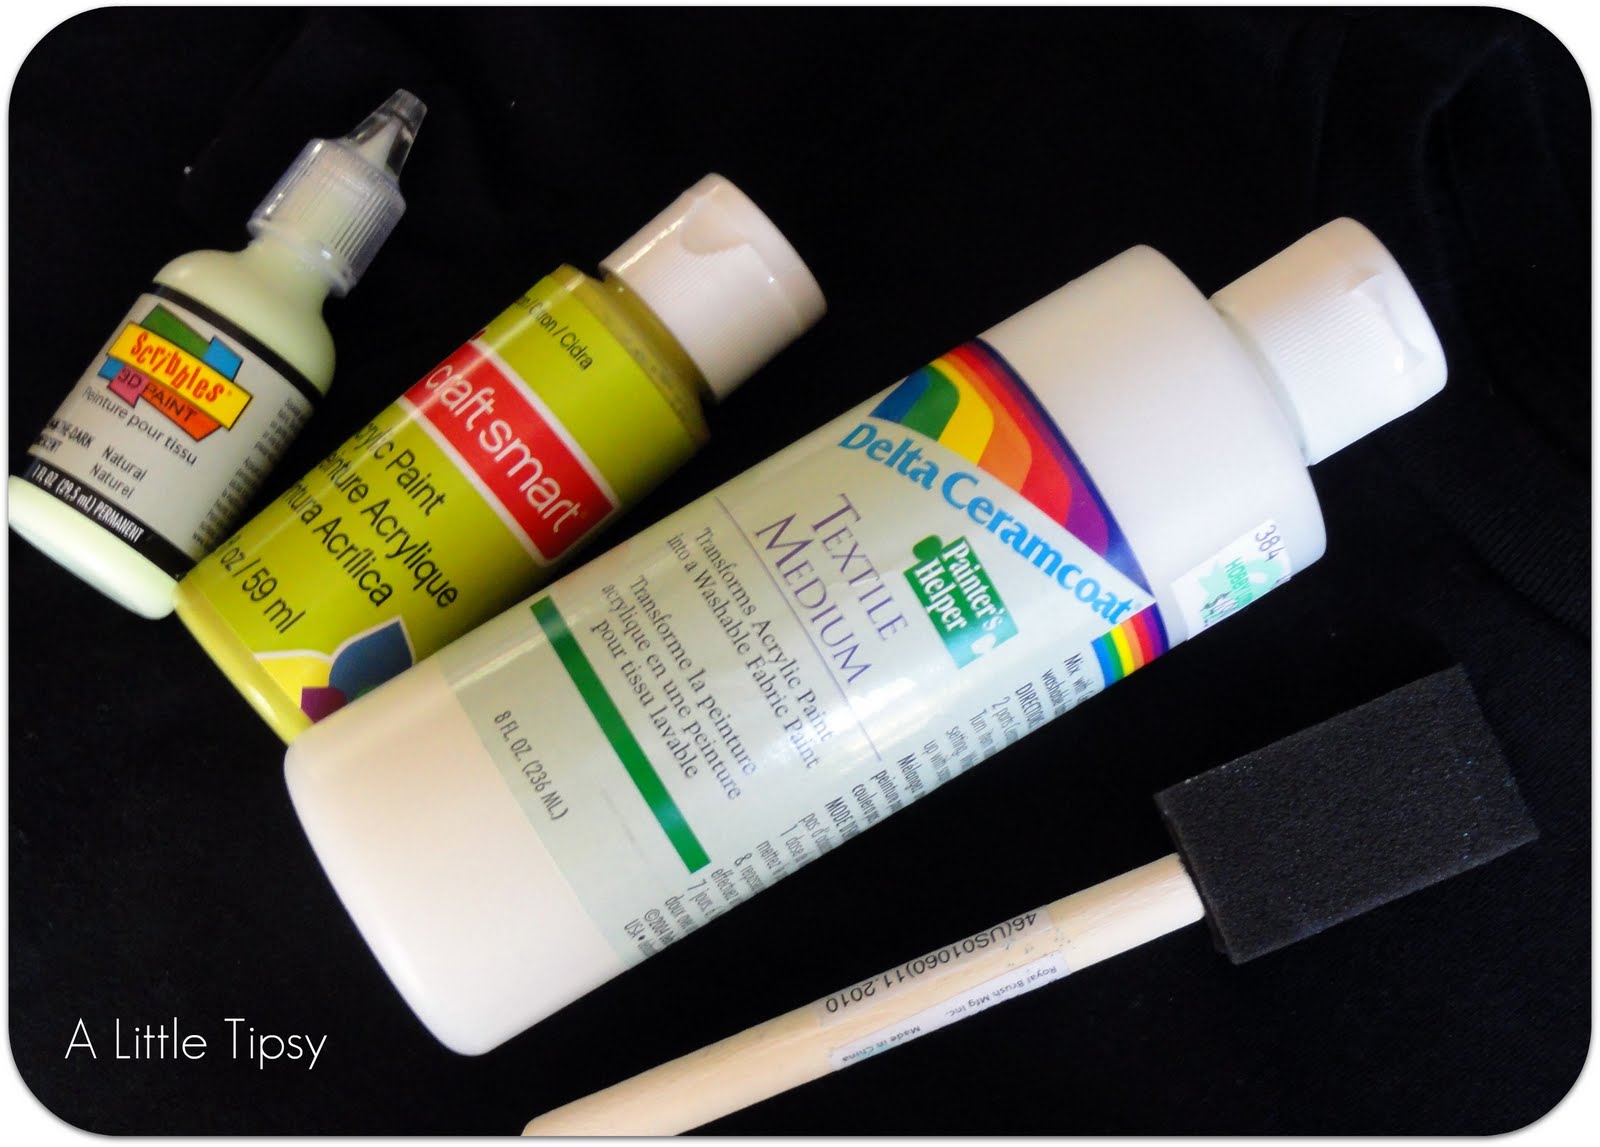
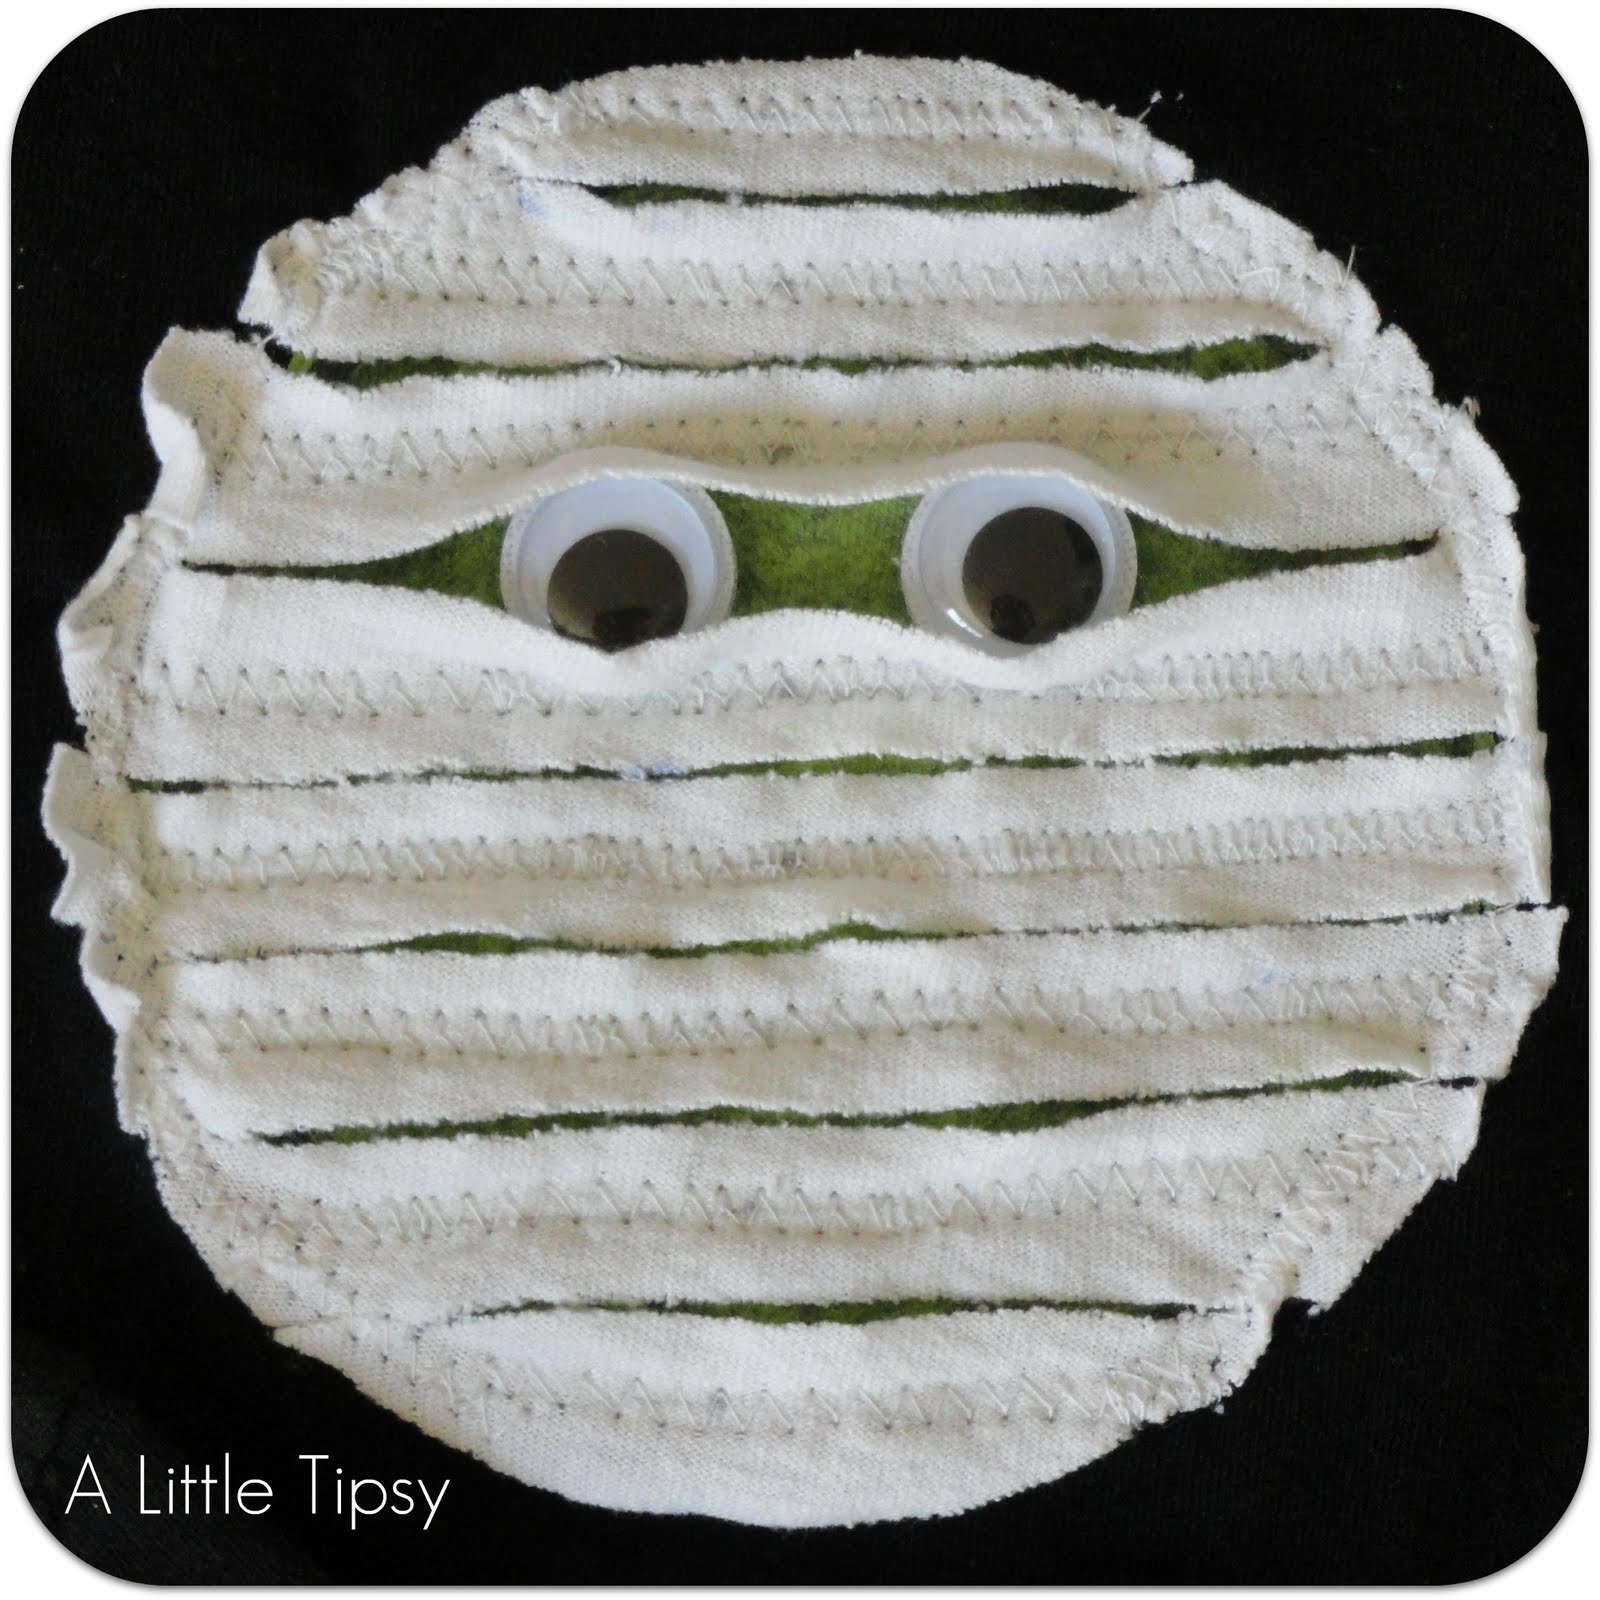
Ignore the puffy paint. I was going to do glow in the dark eyes, but decided on googly eyes instead.

Mummy Shirt Supplies:

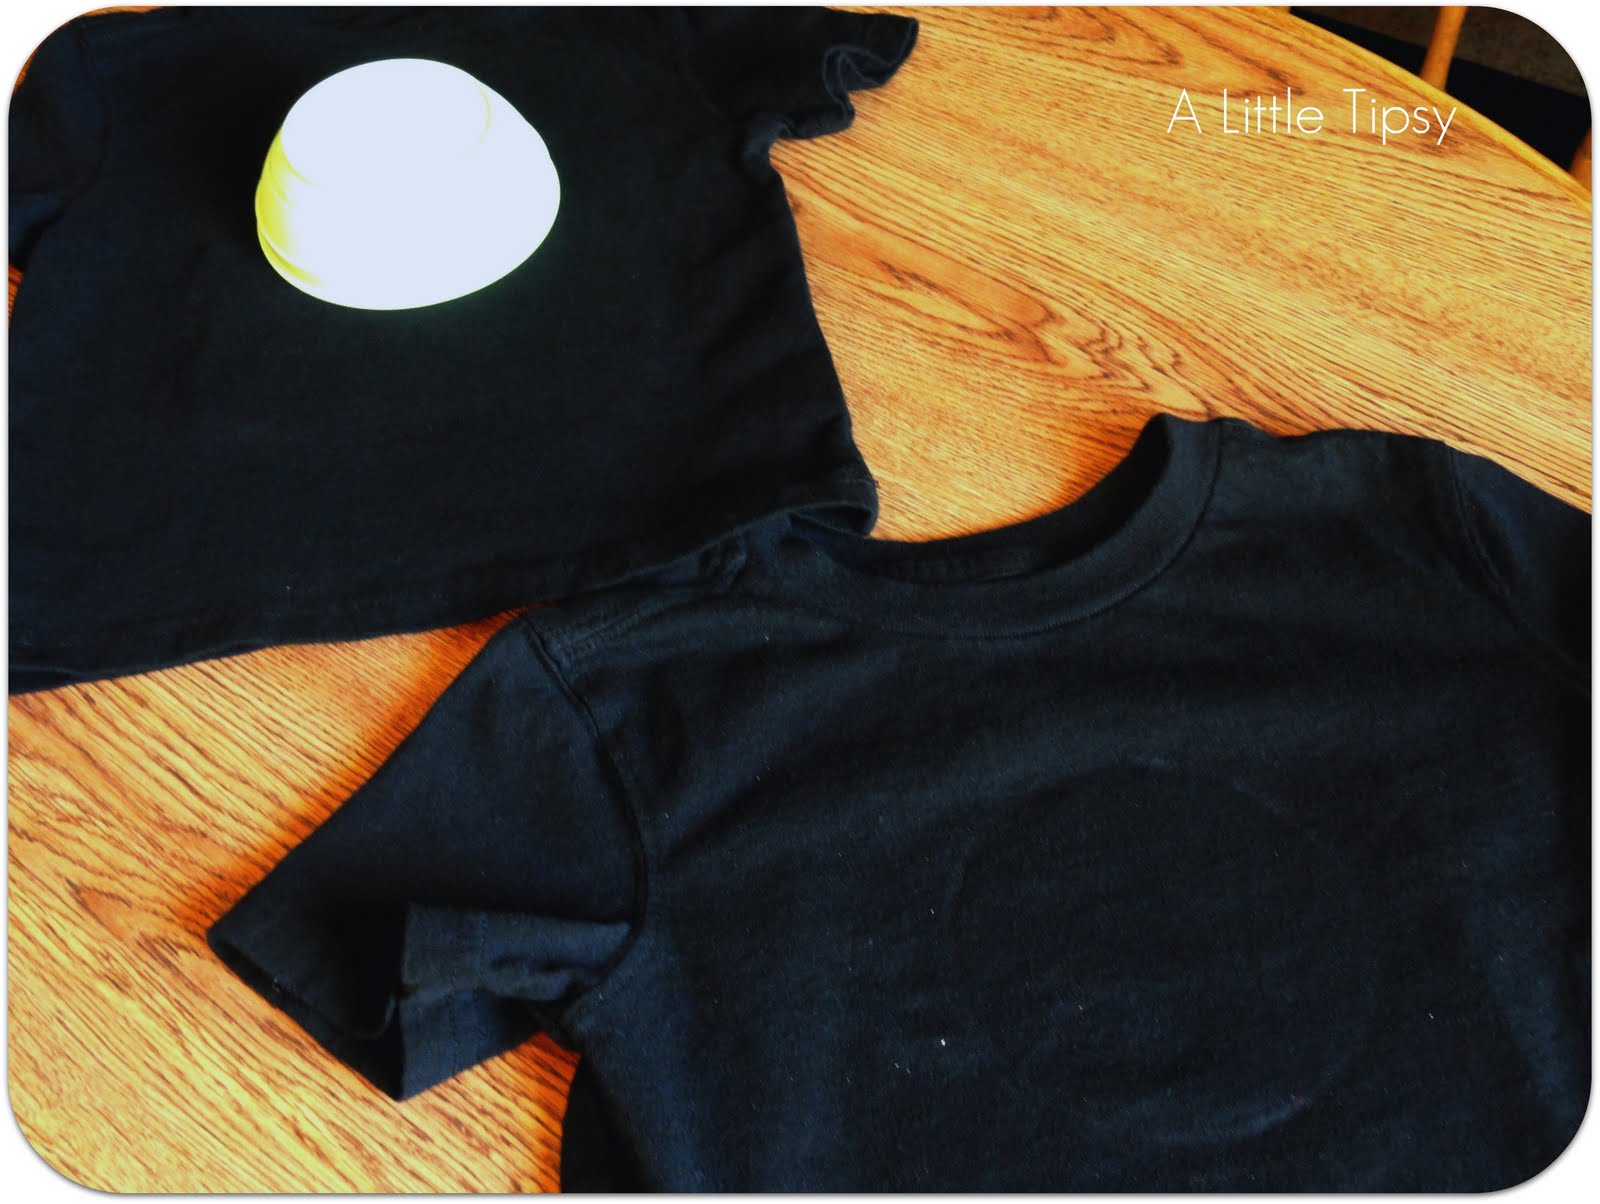
  • Black t-shirt (Target clearance $1.99)
  • Small bowl
  • White jersey (Dad’s old t-shirt)
  • Light green acrylic paint
  • Fabric medium (turns acrylic paint into fabric paint)
  • Foam Brush
  • Scissors
  • Ruler
  • Sewing Machine
  • White thread
  • Googly eyes
  • Adhesive velcro or glue

1. Wash t-shirts to remove any shrinkage issues. Find a bowl the size you want the mummy head to be and press on to shirt leaving a ring.

2. Mix up your fabric paint using the instructions on the textile medium. Mine was 2 parts paint to 1 part medium. Paint your circle. Messy is fine, it’s a mummy. Black shirts need a lot of coats. My sis did white shirts and they only needed one coat. I stamped my shirt with the bowl at the end to see how accurate I was.

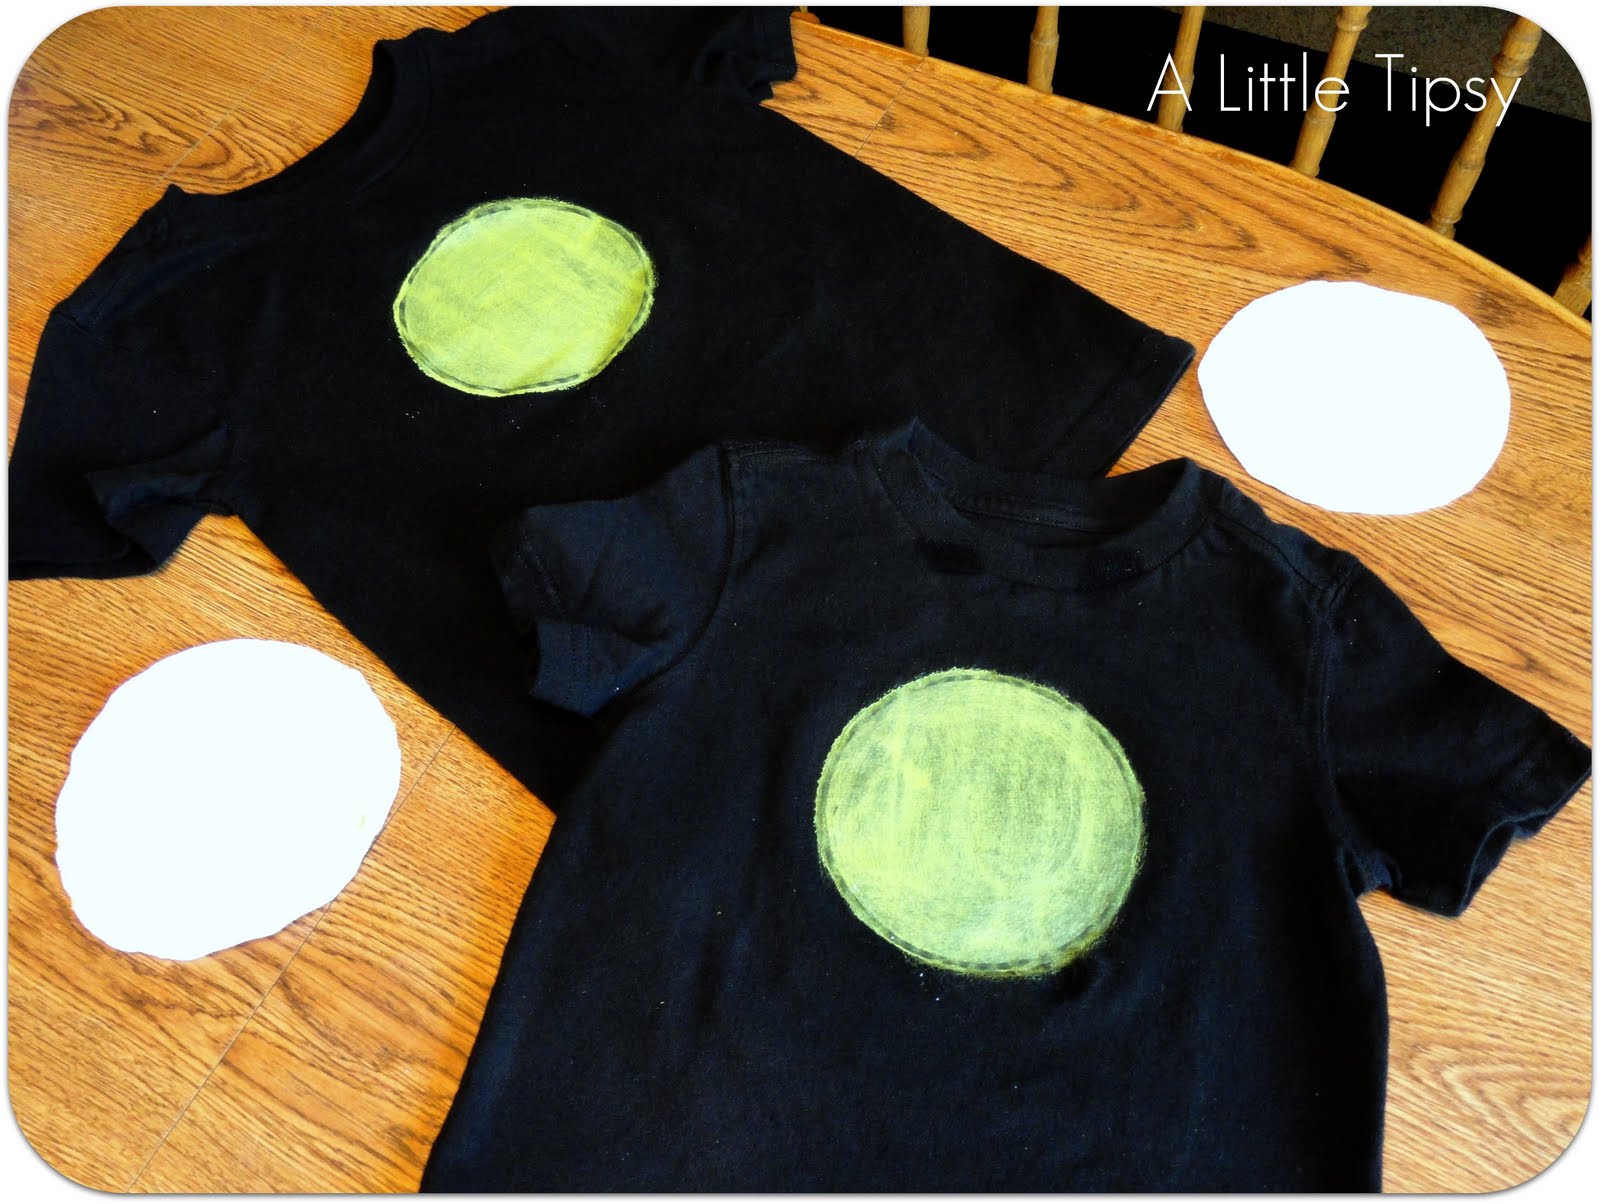
3. Cut a circle out of the white a little bigger than your bowl rim. Fold it in half and mark where you want your stitches. We decided that 2 cm for the eye gap and 1/2 inch for the rest of the gaps worked best (the pic is wrong). Trace horizontal lines across your marks to show you where to sew. If you want your jersey to curl a lot, make sure you have the underside of the jersey facing up when you mark and sew. You will be able to tell which side will curl.

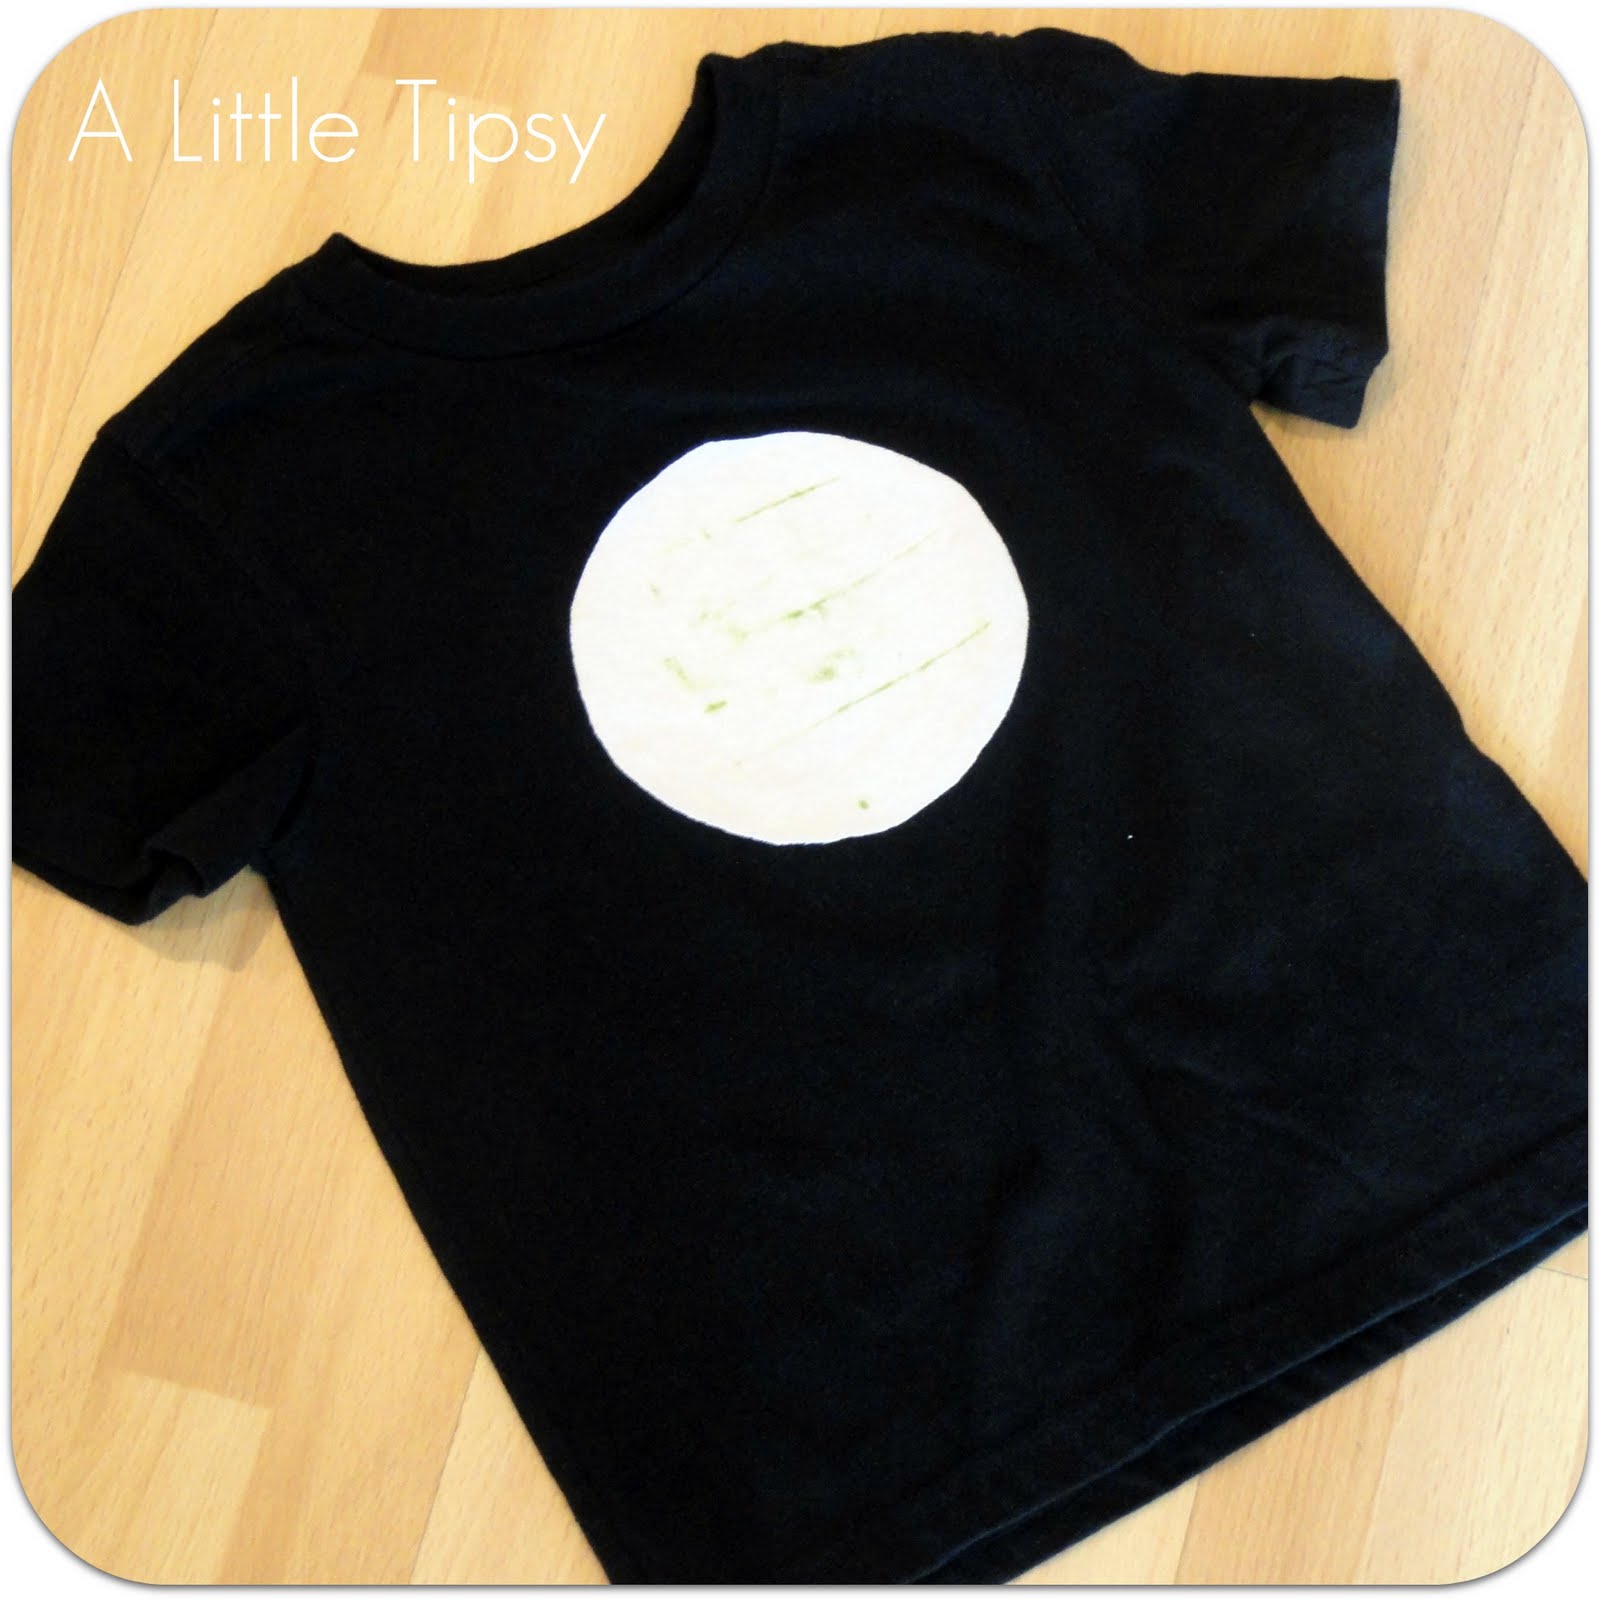
4. Place your white circle over the dry paint.

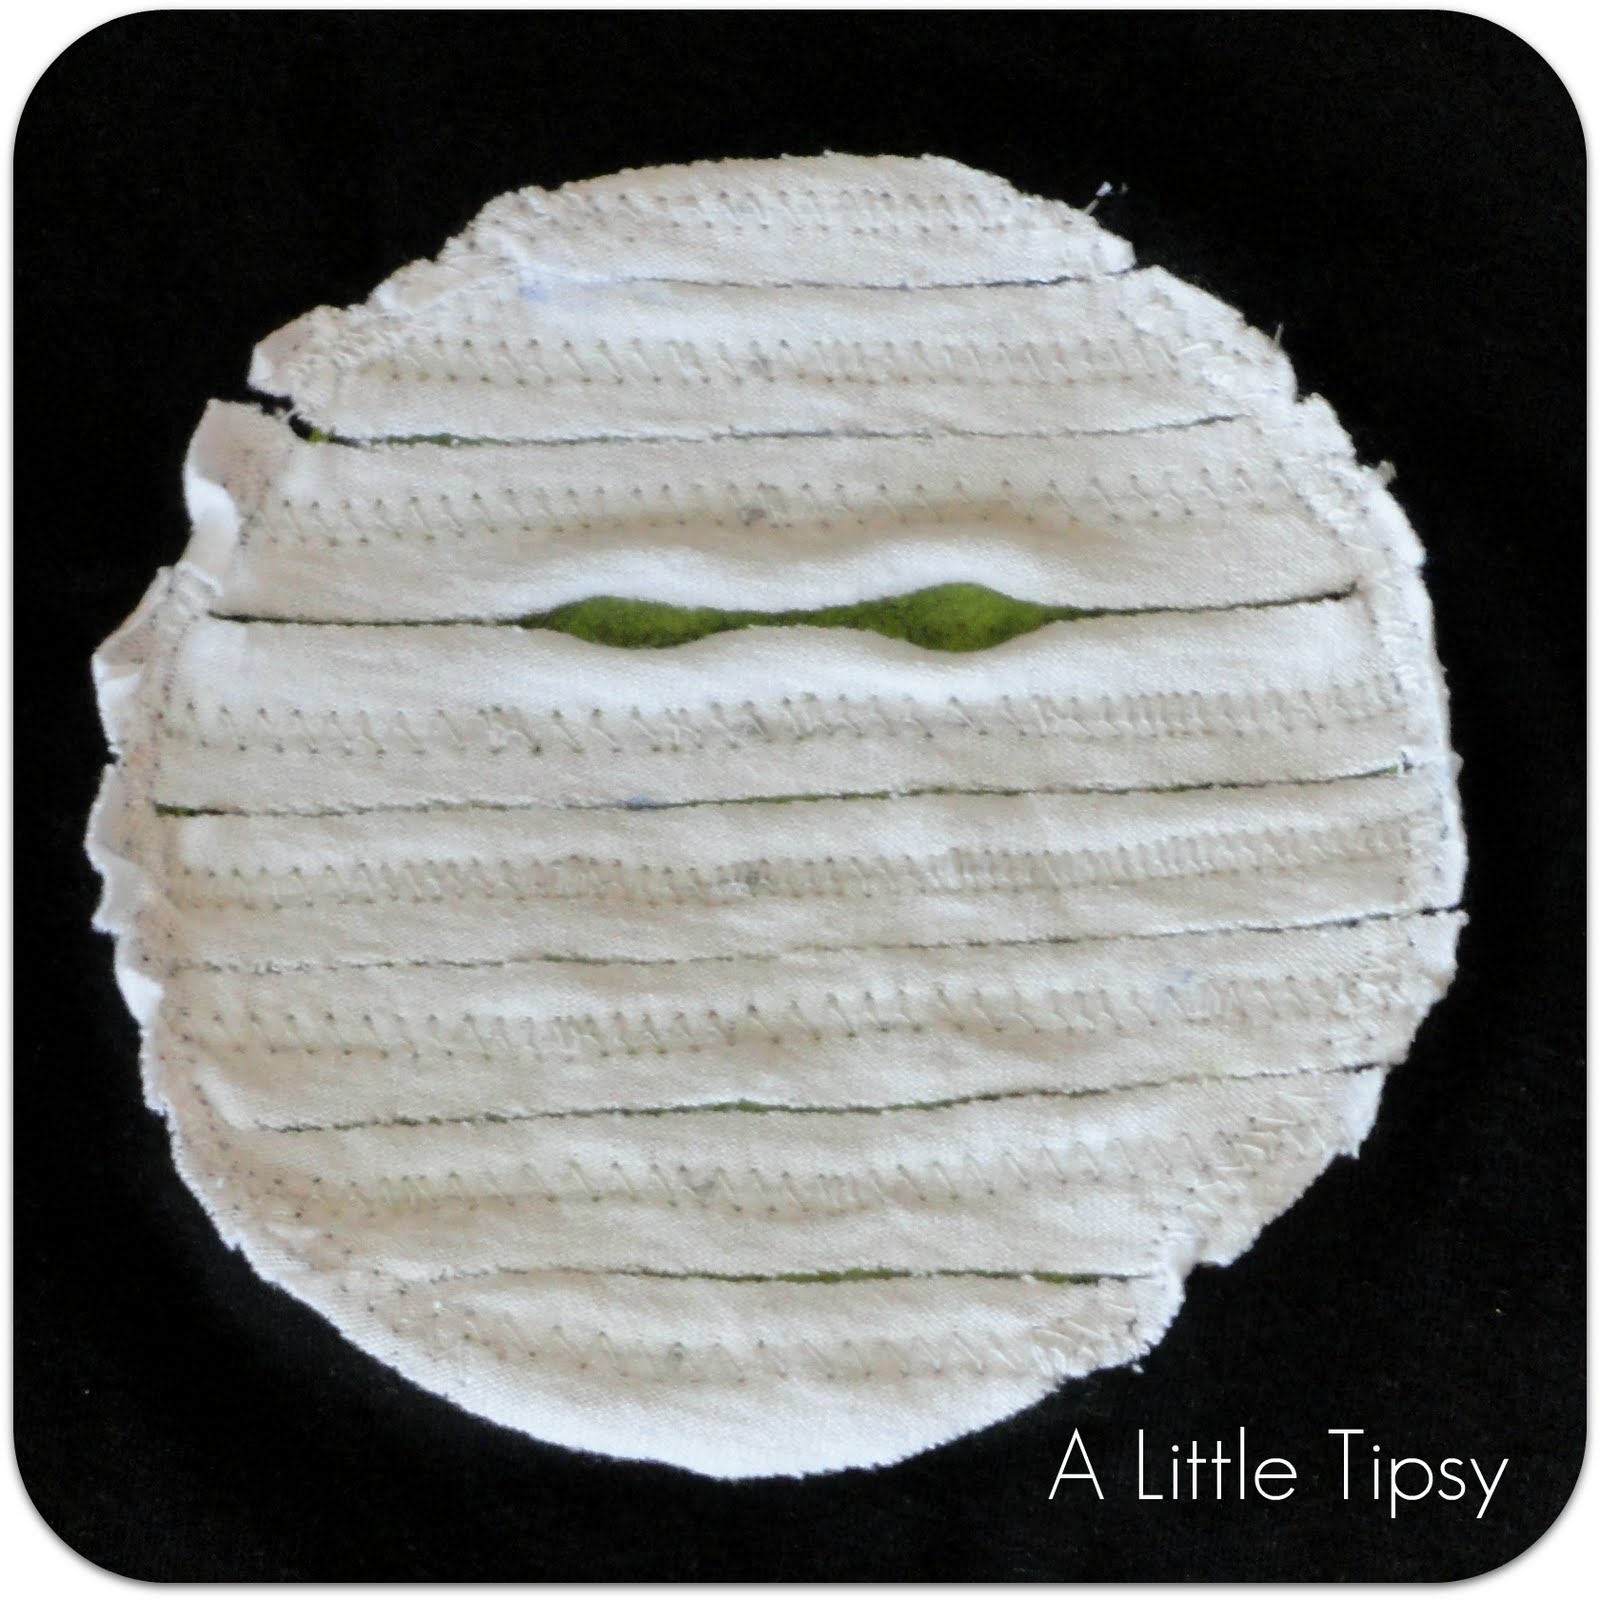
5. Sew over each line using a zig zag stitch. Cut the white fabric between each stitch line with scissors.

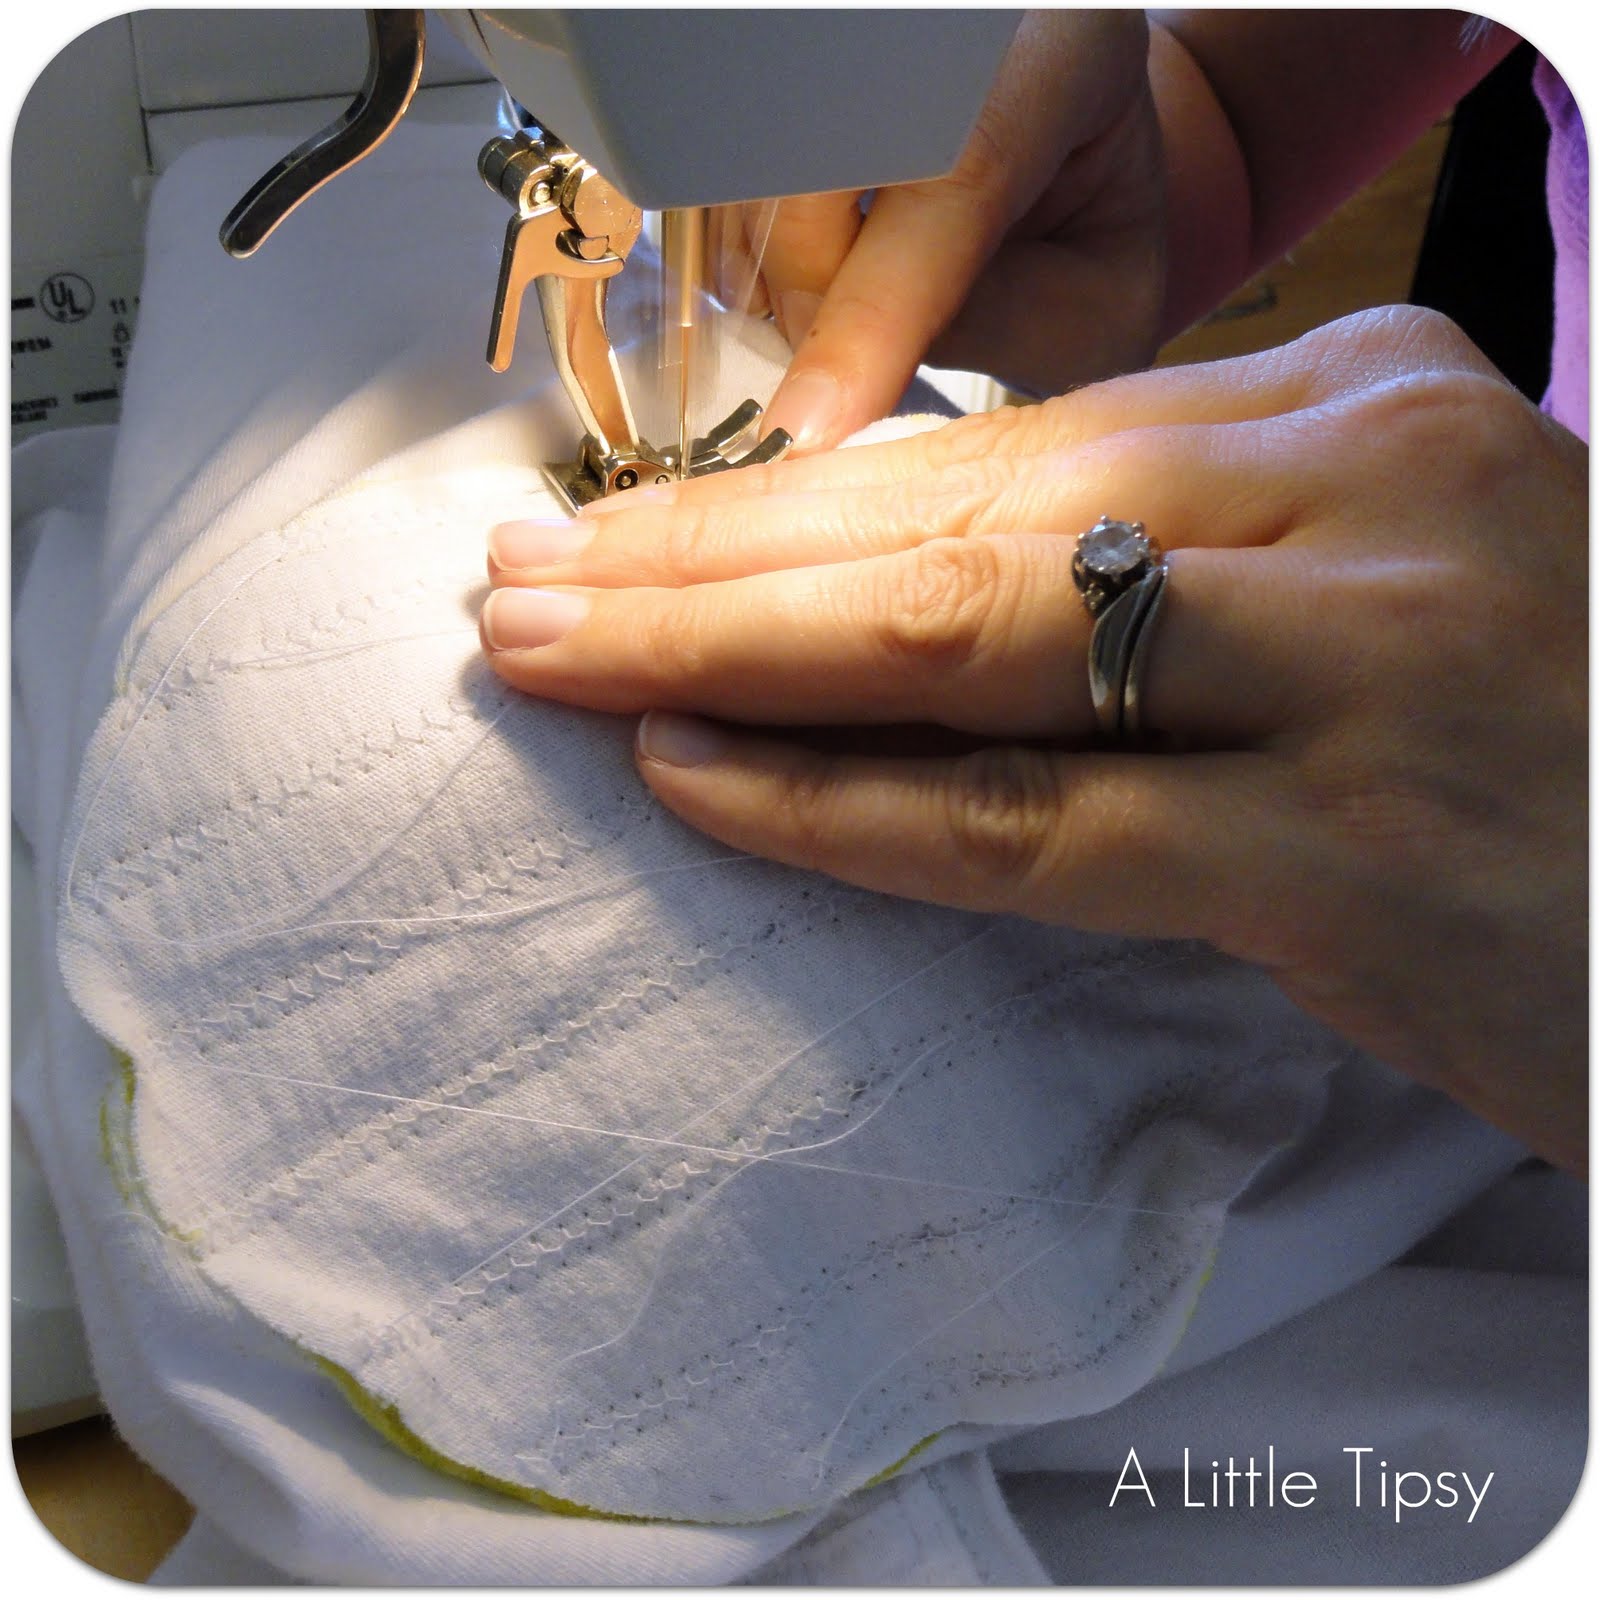
6. Sew around the edge of the circle to secure and control the curling.

7. Secure googly eyes to your mummy shirt with adhesive velcro dots (if your child is over 3 and you want to take them off to wash) or glue (if your child is under three or you want them affixed permanently).

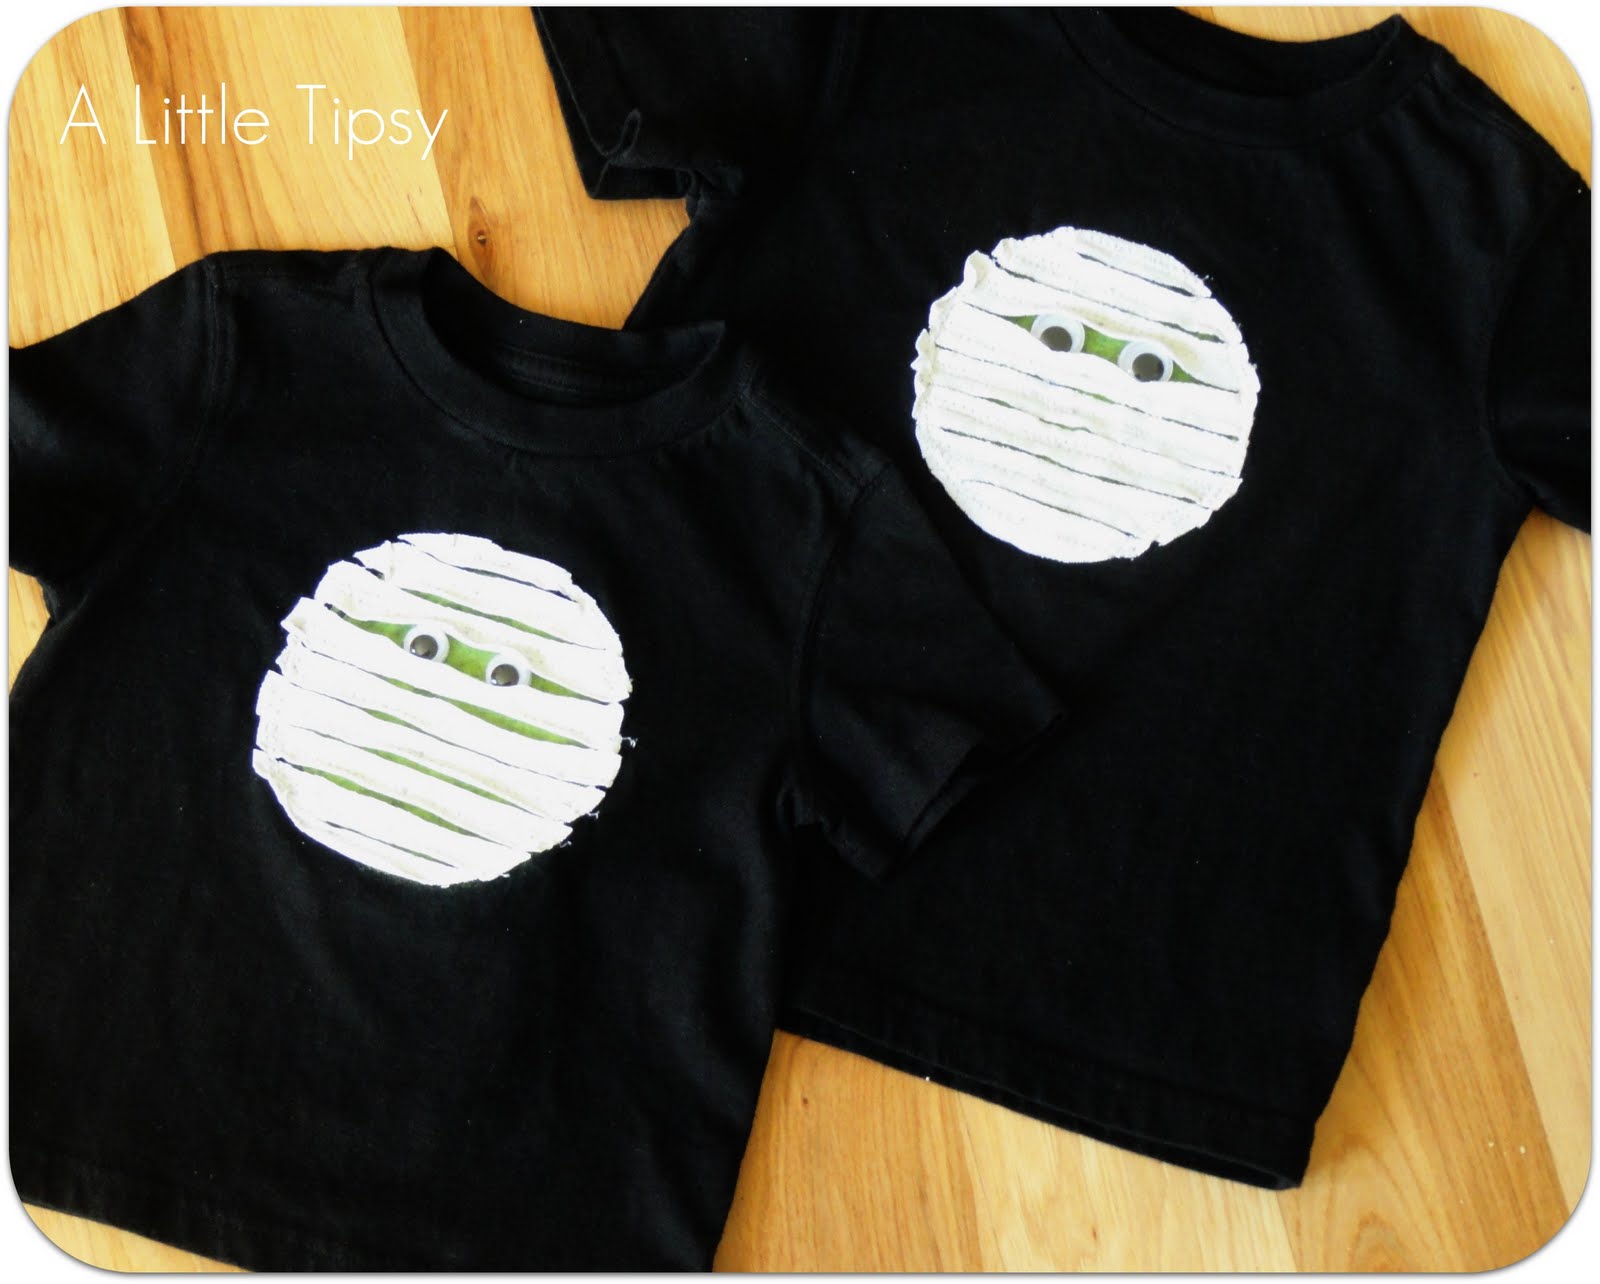
Below you can see the difference between sewing the strips on with curling side up and down. One also has larger eyes.


Curling side down

Curling side up

My little guy is loving his mummy shirt and got to show it off at preschool during show and tell. I love that it was so easy to make a mummy shirt that no one else has.

P.S. Don’t forget to sign up for free Tipsy updates via RSS or email.

We have decided to truncate our feed to help protect against stolen content. I apologize for any inconvenience. Please love us anyway. 🙂

Pumpkin Game

September 20, 2011 By Michelle Barneck 7 Comments

A fun little activity for fall could be disguised in your scrap fabric! This cute pumpkin game uses things you probably already have lying around the house and only takes a few minutes to throw together.

PUMPKIN GAME

Supplies:

{3 Fabric Pumpkins}

  • Scrap Fabric (three 18 inch squares)
  • 9 plastic grocery bags
  • Green ribbon
  • Hot Glue

{Pumpkin Board}

  • I used Styrofoam packaging from my new dishwasher, but you could make something similar by cutting a board or a big piece of cardboard.

1. Lay out an 18 inch square of fabric. Scrunch up 3 plastic bags and place them in the center.

2. Tie two of the corners around each other.

3. Tie the other two corners in a knot.

4. Fold all the fabric tails up in to a point. Leave one out, but roll the other three down in to a “stem.” Wrap the remaining tail around the stem and secure with hot glue.

5. Cover the stems with ribbon, securing with hot glue. Then, add curly vines out of ribbon securing with hot glue.

6. Make a the pumpkin game board by cutting a pumpkin shape out of your styrofoam, board or cardboard.

Prop it up outside and give your pumpkin game a go!

You can even use your pumpkin game in a clear area inside when the weather turns cold because the fabric pumpkins are like pillows and won’t scratch or break anything.

Let me know if you give our fun little pumpkin game a try!

Linking up with:
Topsy Turvy Tuesday
Get Your Craft On
Tip me Tuesday
Show Me What Ya got
Market yourself Monday
Making Monday Marvelous
Making the World Cuter

P.S. Don’t forget to sign up for free Tipsy updates via RSS or email.

We have decided to truncate our feed to help protect against stolen content. I apologize for any inconvenience. Please love us anyway. 🙂

DIY Under $5 {Ruler Frame}

September 7, 2011 By Michelle Barneck 13 Comments

I’m kinda liking the whole school theme. My little guy is loving preschool and I want to reinforce that any way I can. When making my Back to School frame I got the idea to make a ruler frame to go along.

Making a ruler frame was pretty much as easy as I thought and I love how they turned out, very academic. 😉

Ruler Frame

Supplies:

  • 4×6 frame
  • 4 wood or partially wood rulers
  • Table saw
  • Hot glue

1. Lay your rulers on your frame. I liked one end under and one end over. Mark with a pencil where to make your cuts so they fit on the frame just right.

2. CAREFULLY cut your rulers with the table saw. Be sure to account for the width of the blade when cutting. I had to leave an extra 1/8th inch. If you don’t have a table saw you can use a hack saw. I did my first two like this, but it took forever.

3. Lay your rulers back on your frame to make sure they fit right. Then hot glue to frame by putting a line of glue across the end of the ruler that goes under and another line of glue about an inch in from the “over” end so it will touch the ruler under it.

Simple as pie. The kind made with pre-made crust and pudding.

Super cute on their own, but add a printable from the talented girls at Eighteen25 and Sprik Space and it totally makes them!

Total cost: $3 per frame
Frame: $1
Rulers: $2 (2 for $1, used 4)
Printables: FREE
Everything else on hand

Now it’s time to link up your $5 projects!

Please remember:

  • Only link to your own projects that cost you $5 or less (price does not have to include items you had on hand)
  • You can link past projects that fit the dollar limit, but please only link each project one time to one DIY Under $5 party. Do not link the same project week after week.
  • No linking giveaways or items for sale
  • Please link back so others can join the party and so you have the opportunity to be featured on Saturday!

DIY under $5

Linking up wtih:
Look What I Made
Whatever Goes Wednesday
Topsy Turvy Tuesday
Design Dazzle
The Idea Room

P.S. Don’t forget to sign up for free Tipsy updates via RSS or email.

We have decided to truncate our feed to help protect against stolen content. I apologize for any inconvenience. Please love us anyway. 🙂

Point of View: Back to School

August 26, 2011 By Michelle Barneck 14 Comments

Is it the fourth Friday already? I swear it sneaks up on me every month. Well, you know what that means. It’s Point of View time!! This months theme was “Back to School” and I am loving what the girls came up with! Just take a look…

https://mail.google.com/mail/?ui=2&ik=9f43e60d7f&view=att&th=13201a7487fe9b1d&attid=0.1&disp=inline&realattid=f_grrwy6yd0&zw

I’m not going to lie, I was stumped with this month’s Point of View theme “Back to School.” My oldest just started his first year of preschool so I have not had a lot of experience in school themed crafts or teacher appreciation etc. I asked the hubs what was the first thing that came to mind with “back to school” and he said, “pencils and paper”. So, I ran with it.

I took a cute picture of my son on his first day of school and wanted a special way for him to display his big boy milestone. But, in true Tipsy style I did not want to spend a lot or buy some really cheesy, overly colorful back to school frame. So, I made one out of the true symbols of back to school: pencils and paper.

Back to School Frame

Want to make your own? Here’s what you’re going to need.

Supplies needed for Back to School frame:

  • 4×6 picture frame (mine was from Dollar Tree, the plain wood frames from Michael’s were too long for my pencils)
  • 16 pencils, may want to have extras in case you break one or make one too short (they have packs of 16 at Dollar Tree, got my packs at Office Depot)
  • Pencil sharpener
  • Hack saw
  • Foam brush
  • White lined paper
  • Mod Podge
  • Exacto knife
  • Hot glue
  • Red cardstock apple
  • School Picture

1. Lay your pencils on your frame and mark them where you want the end to be for them to fit all puzzle like on a diagonal.

2. Slice off the extra with a hack saw so you don’t have to sharpen the pencils for hours (or be like me and recruit the hubs to do so). Our table saw had the perfect little groove to hold two pencils in place which was great since you need two of each size.

3. Sharpen the pencils to a point until they all fit perfectly on the frame.

4. Brush a light coat of Mod Podge over your frame and lay a sheet of lined paper over it carefully smoothing over the front of the frame. The only part that will show are the corners, so if it creases a little don’t worry.

5. Mod Podge the edges of the frame and wrap the paper around folding on the corners like a present. Mod Podge the paper around to the back of the frame so the sides look nice and finished.

6. Cut an X in the paper in the middle of the frame with your exacto so you can fold it in to the middle and Mod Podge on to the inside edge.

7. Trim off the excess paper. You will fold the paper under the picture when you put it in.

8. CAREFULLY hot glue each pencil in place. I had all the pencils in place so I could see exactly where they needed to go. I put 3 or 4 tiny dots of hot glue on the back of each pencil.

9. Add a cardstock apple (found in my scrapbook stash). I cut a little piece of lined paper and penciled some seeds o it to add a little dimension.

10. Add your favorite back to school photo (the one with him wearing his life jacket to look like muscles was a close second) to finish it off.

Now link up so we can see your Point of View on
Back to School!

  • Link up your own current or past projects as long as they fit the theme: Back to School
  • Link back so others can join the party and so you can have the chance to be featured by one of the Point of View girls!

Linking up with:
Design Dazzle

P.S. Don’t forget to sign up for free Tipsy updates via RSS or email.

We have decided to truncate our feed to help protect against stolen content. I apologize for any inconvenience. Please love us anyway. 🙂
« Previous Page
Next Page »

  • Bloglovin
  • Facebook
  • Google+
  • Instagram
  • Pinterest
  • RSS
  • Twitter

Hi there! I'm Michelle. Mother of three little boys and one little princess. Welcome to A Little Tipsy, a place for exploring creativity and sharing inspiration.

Follow on Bloglovin


Visit Michelle Barneck {A Little Tipsy}'s profile on Pinterest.

Tutorials by Category


15 Family Reunion Games

Family Reunion Games Collage

15 Sprinkle Party Ideas

Sprinkle Birthday Party
Creative Commons License

© Copyright 2014 A Little Tipsy · Site Designed by The Fairy Blogmother · Web Hosting by RFE Hosting

This website uses cookies to improve your experience. We'll assume you're ok with this, but you can opt-out if you wish.Accept Read More
Privacy & Cookies Policy