A Little Tipsy

Creative Tips & Ideas

  • home
  • About Me
  • the tipsy top
  • press
  • projects
  • contact me
[print_thumbnail_slider]

Easter Treats for Kids

March 13, 2013 By Michelle Barneck 3 Comments

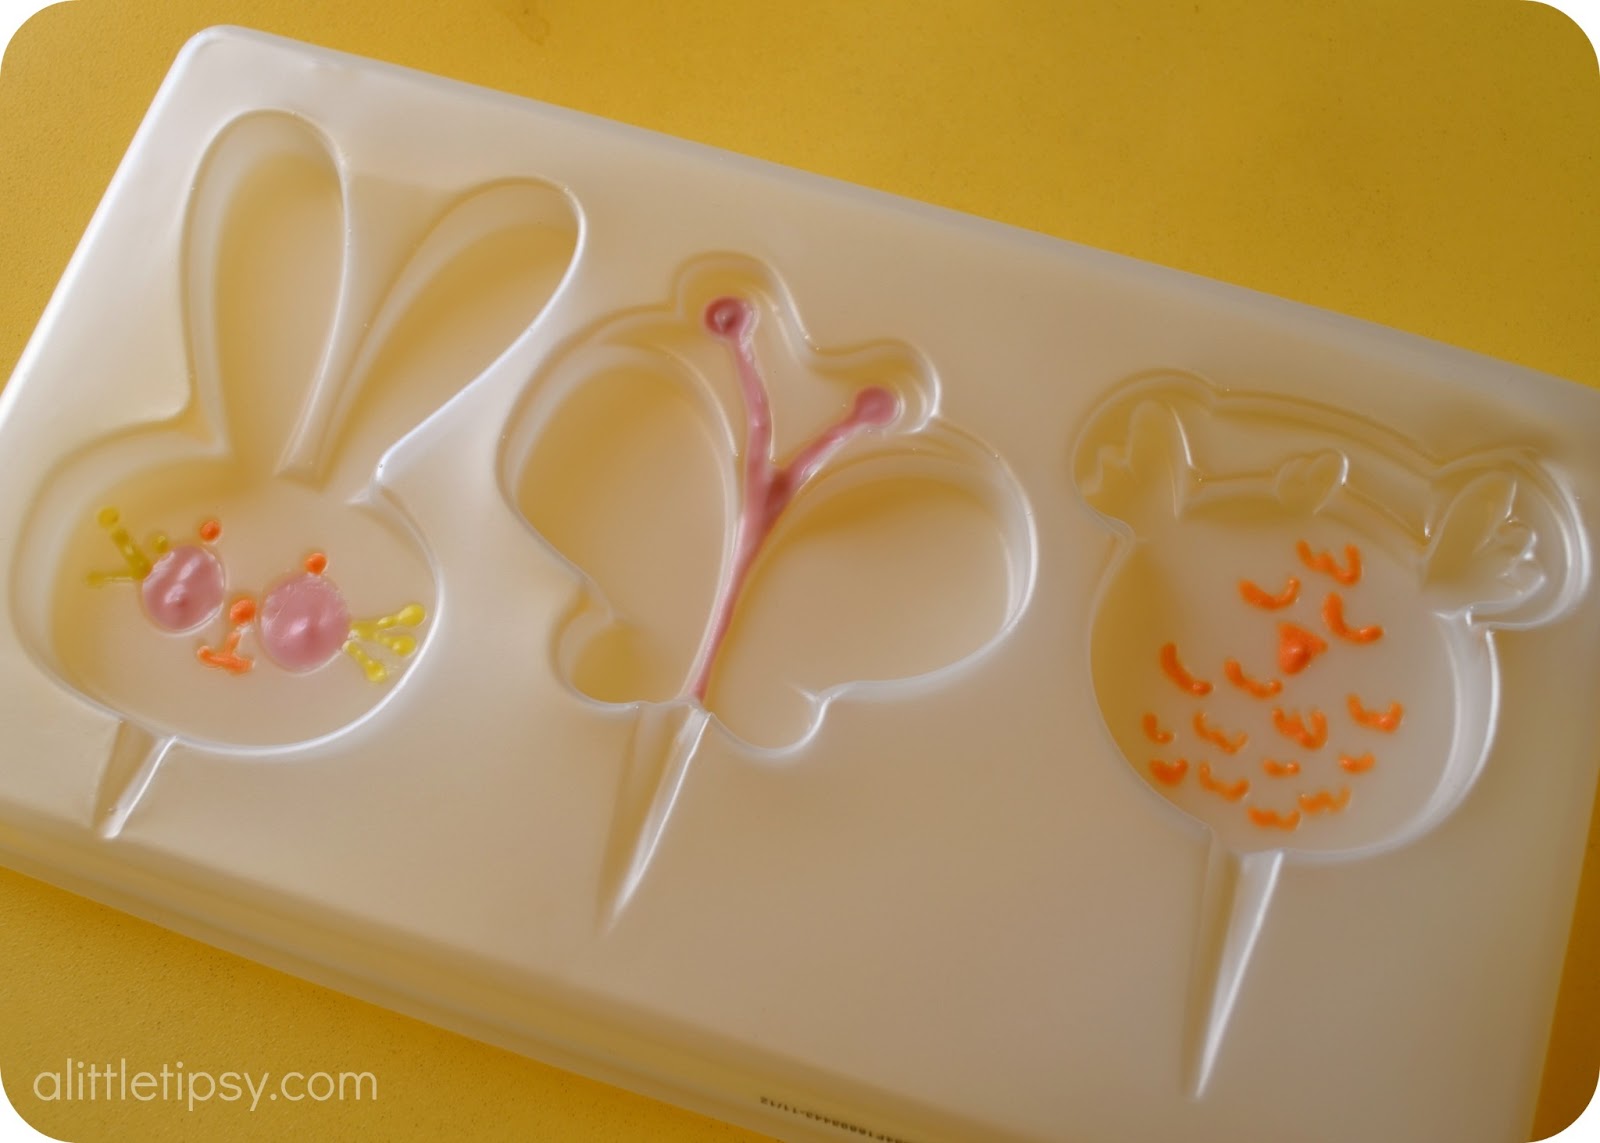
We found the cutest candy molds in the Target Dollar Spot. They had bunnies, butterflies, chicks, eggs and flowers. I remembered making lollipops with my mom when I was young and how fun it was to make your own candy. I knew it would be the perfect Easter treats for kids.

Easter Treats for Kids
SUPPLIES:
  • Candy Mold and sucker sticks (both in the Target dollar spot kit)
  • Colored candy melts
  • Small bowls
  • Spoons
  • Toothpicks

1. Melt down the candy melts you want for your first layer of color according to package directions. You’ll only need a little bit for this step. Use a toothpick to “paint” the melts in to the detailed grooves in the mold. Let dry.

2. Melt down the colors for your second layer. Spoon the melts into the molds and move in to grooves as necessary with toothpick. Add the sucker sticks and cover them. Let this dry until the top layer is set.
3. Add your last layer (white behind butterfly antennae and chick wings) and make sure there is a thick enough layer behind the sticks to hold them securely. Let them dry completely. You can put them in the fridge if you you need to speed it up.

4. To remove from mold, turn them over and carefully wiggle them out.
These easter treats are easy for the kids to do themselves too. This bunny was made by my 5 year old and the other two by my two year old. They LOVED painting with candy!
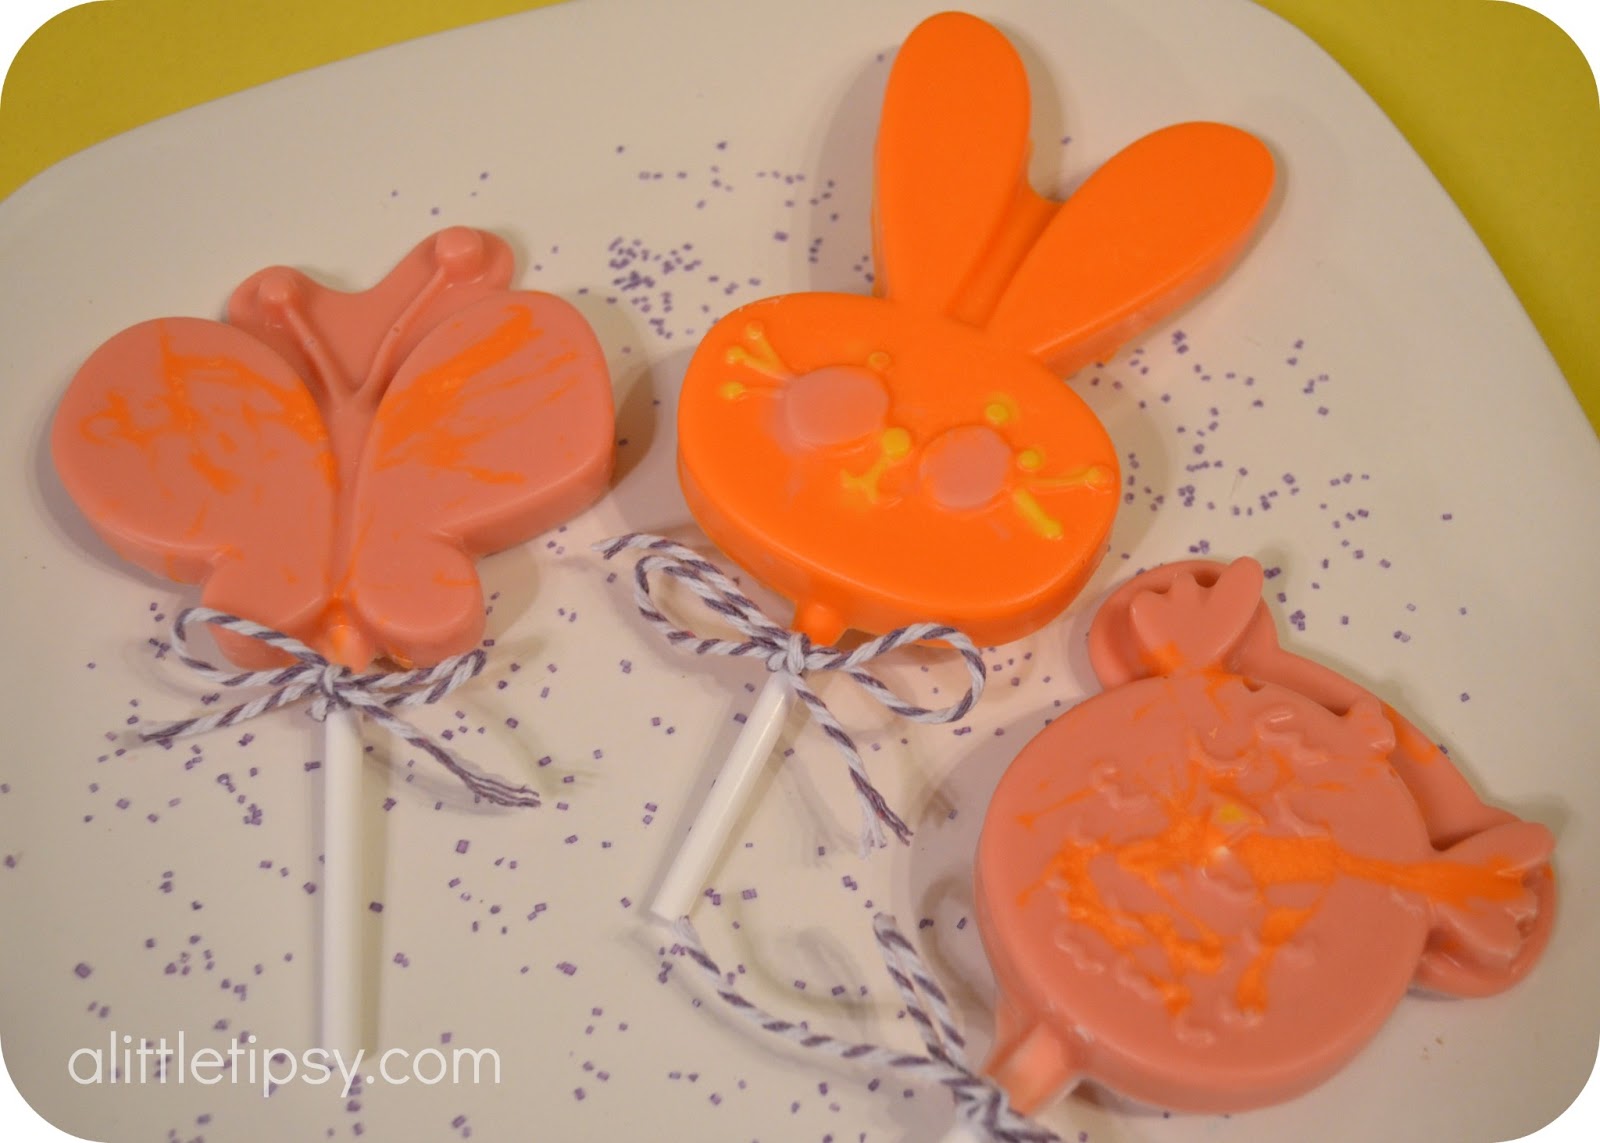
They are totally kid approved, which means they may not last long!

We have decided to truncate our feed to help protect against stolen content. I apologize for any inconvenience. Please love us anyway. 🙂

Layered Citrus Scrub

March 5, 2013 By Michelle Barneck 2 Comments

Hello! I’m Kelly from Smart School House. Today I have a pretty project to get you excited for spring!

It’s so fun to be here! Please come see the other pretty little inspirations I have at Smart School House, like these Marshmallow Wrapped Rainbows:
Citrus scrub seems like the perfect way to ring in spring! Love the fresh smell and how adorable it is in those jars! Thanks Kelly for such a fun idea!
We have decided to truncate our feed to help protect against stolen content. I apologize for any inconvenience. Please love us anyway. 🙂

5 Out of the Box T-shirt Refashions

March 4, 2013 By Michelle Barneck 2 Comments

The t-shirt, a trusted friend on a summer day. We probably all own more than we would like to admit. But, the t-shirt can be so much more than the casual day jean companion. We’re prepared to show you five out of the box ways to refashion this closet staple.

Here’s my clip from the Studio 5 segment today:


5 Out of the Box T-shirt Refashions

1. DIY Shoes
Turn an old t-shirt and a pair of flip flop soles into some super comfy sandals.


2&3. Swim Suit Cover & Headband

With the most beginning level of sewing, a 5XL shirt can become a ruffly swim suit cover and matching headband.


Dress up a t-shirt with another t-shirt, a t-shirt made in to accessories of course. How about a Rosette Necklace and Ruffled Infinity Scarf?

4. DIY Necklace
All you need for this run necklace is a t-shirt, scissors and a glue gun.


5. Cascading Ruffle Infinity Scarf
If you can sew straight lines, you can make this scarf.

We have decided to truncate our feed to help protect against stolen content. I apologize for any inconvenience. Please love us anyway. 🙂

Custom Desk Pad

February 26, 2013 By Michelle Barneck 43 Comments

Hi Friends, this is Aly from Entirely Eventful Day.  I am so excited to be part of the A Little Tipsy Creative Team.  I have a really fun, easy, and inexpensive project for you today: How to make a DIY custom mouse pad.

This beauty cost me about $8 to make and it makes the biggest difference in my office.  My favorite thing about it is when I get tired of the pattern all I need to buy is a new roll of wrapping paper!

Start with a transparent desk pad.  I used this one from IKEA.
Here’s how I did it.  
1. I sprayed the bottom of the pad with Elmer’s Glue Brand spray adhesive.
2. Then I positioned the pad sticky side up on the ground and rolled the wrapping paper over it.  I made sure to line up the bottom edges for a nice straight line.

3. Next I cut off the roll part of the wrapping paper and flipped the mat over.

4. All that was left to do was to trim around the edges of the mat.  All done!

Note: You might need to add a little more spray adhesive to the corners once you have trimmed.  

I hope you make one of these for yourself.  Mine makes me so happy!  Until next time.

We have decided to truncate our feed to help protect against stolen content. I apologize for any inconvenience. Please love us anyway. 🙂
« Previous Page
Next Page »

  • Bloglovin
  • Facebook
  • Google+
  • Instagram
  • Pinterest
  • RSS
  • Twitter

Hi there! I'm Michelle. Mother of three little boys and one little princess. Welcome to A Little Tipsy, a place for exploring creativity and sharing inspiration.

Follow on Bloglovin


Visit Michelle Barneck {A Little Tipsy}'s profile on Pinterest.

Tutorials by Category


15 Family Reunion Games

Family Reunion Games Collage

15 Sprinkle Party Ideas

Sprinkle Birthday Party
Creative Commons License

© Copyright 2014 A Little Tipsy · Site Designed by The Fairy Blogmother · Web Hosting by RFE Hosting

This website uses cookies to improve your experience. We'll assume you're ok with this, but you can opt-out if you wish.Accept Read More
Privacy & Cookies Policy