A Little Tipsy

Creative Tips & Ideas

  • home
  • About Me
  • the tipsy top
  • press
  • projects
  • contact me
[print_thumbnail_slider]

Glittered Wine Glasses #12monthsofmartha

August 12, 2013 By Michelle Barneck 5 Comments

This post was sponsored by Martha Stewart and contains affiliate links to products.

Sometimes it’s nice to have a little something special. Whether it’s a wedding gift, late night date night, or special holiday with your family its nice to have something extravagant up your sleeve.
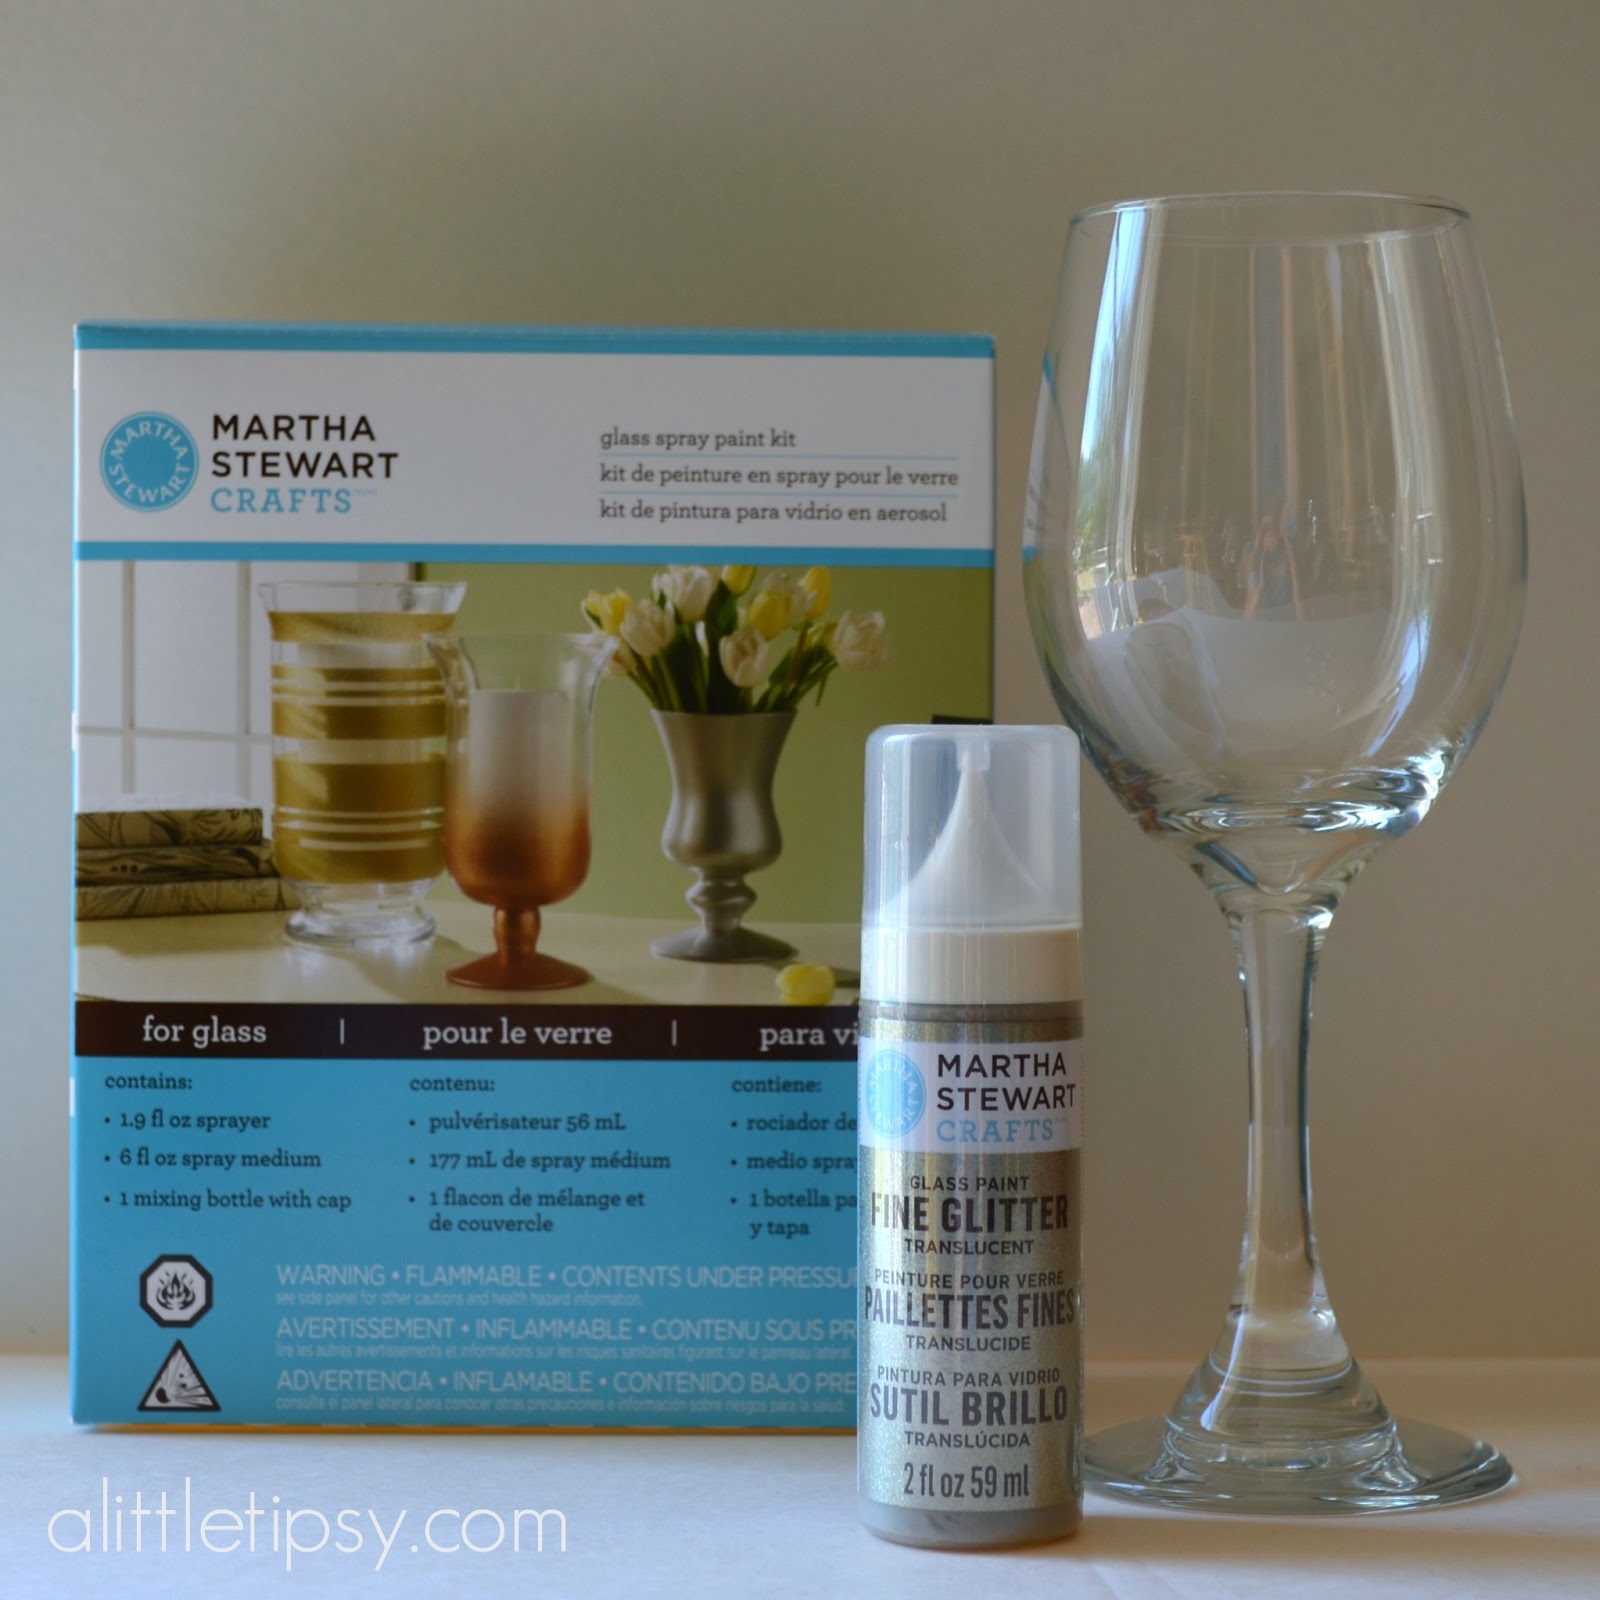
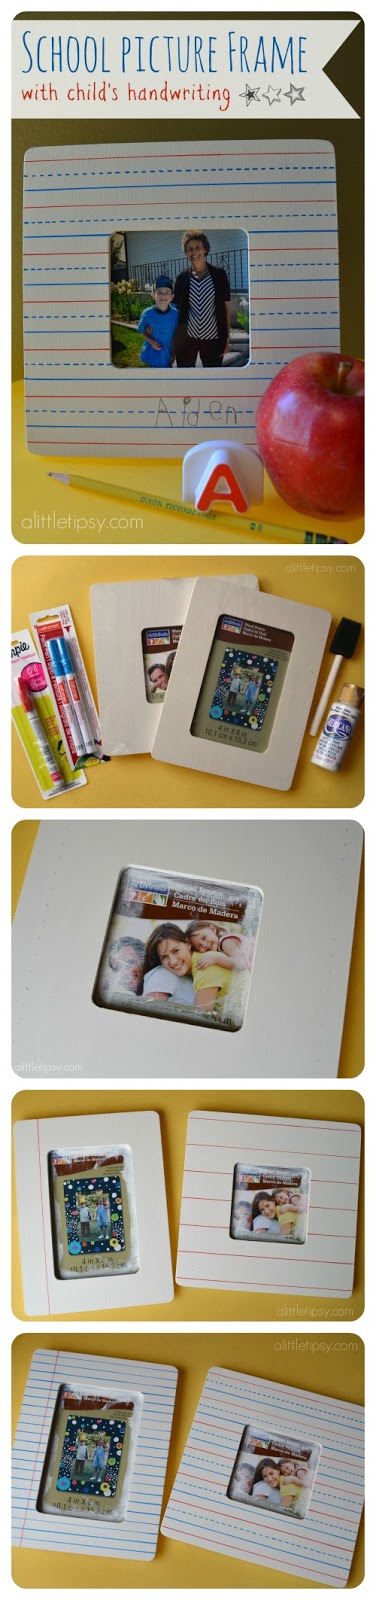
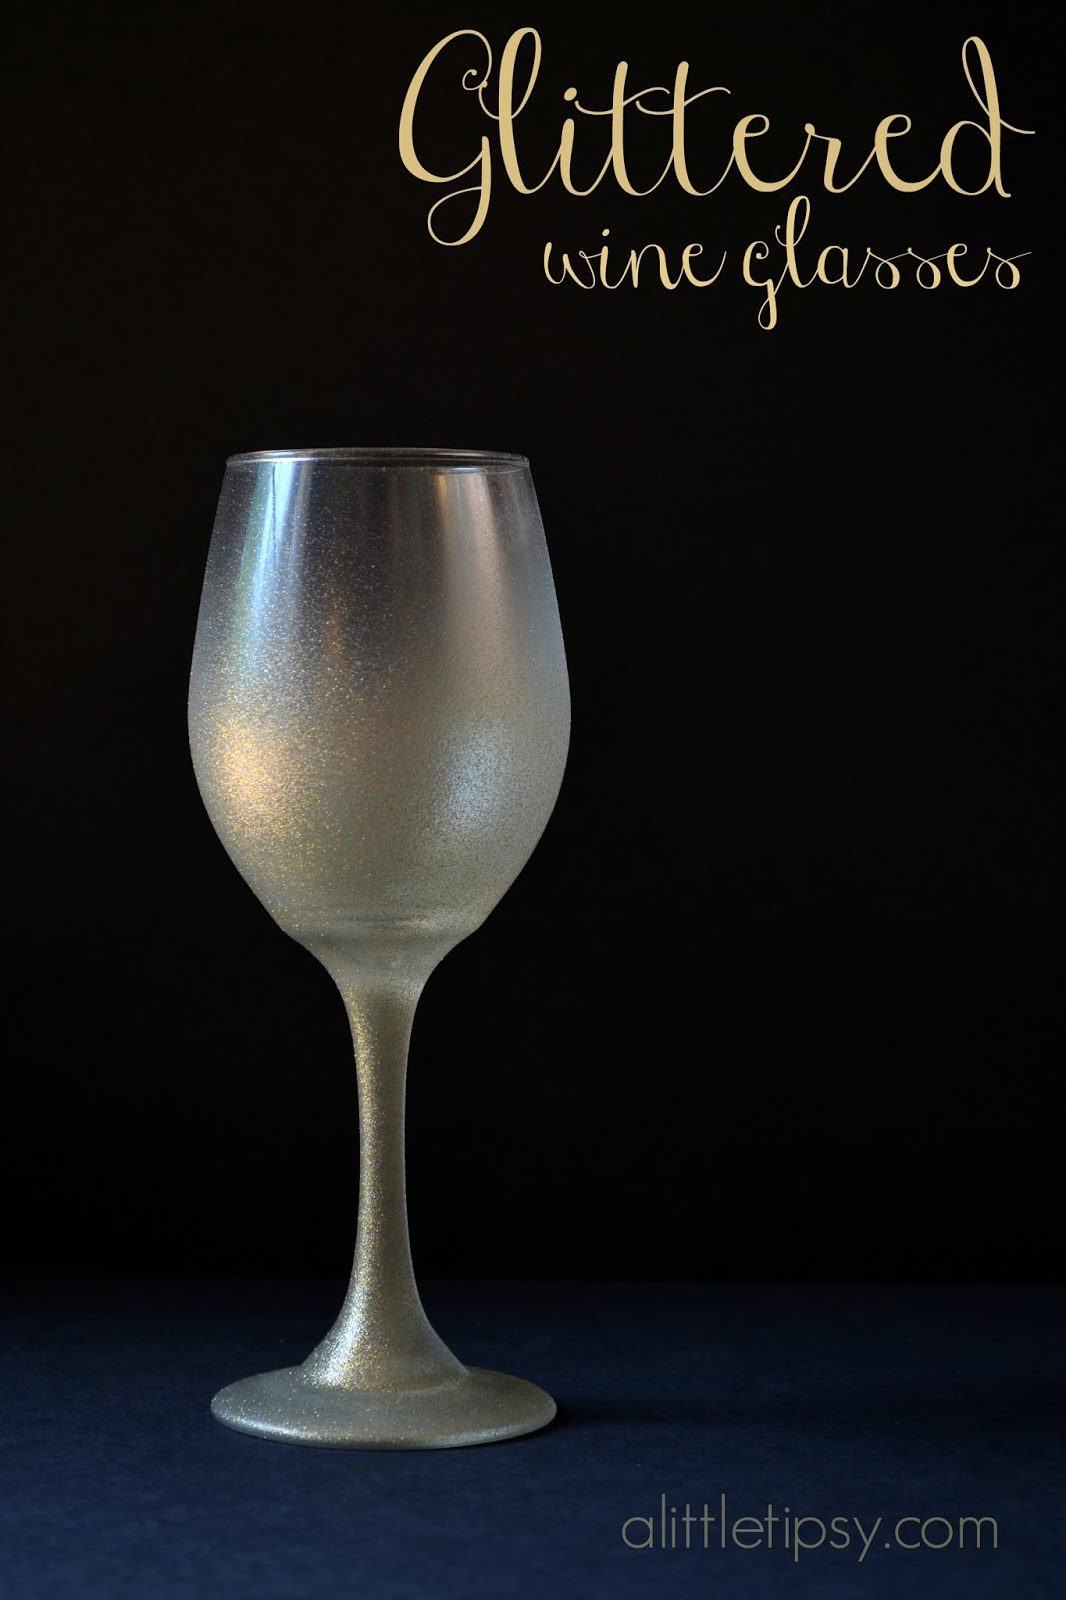


What better way to add a little glamour than glitter? The best part is, it’s so easy and dishwasher safe! That’s right, no one time use with this method! Let me show you how to paint wine glasses to bring that touch of elegance.

See the full tutorial.


SUPPLIES:
  • Wine Glasses
  • Martha Stewart Fine Glitter Translucent Glass Paint in Antique Silver
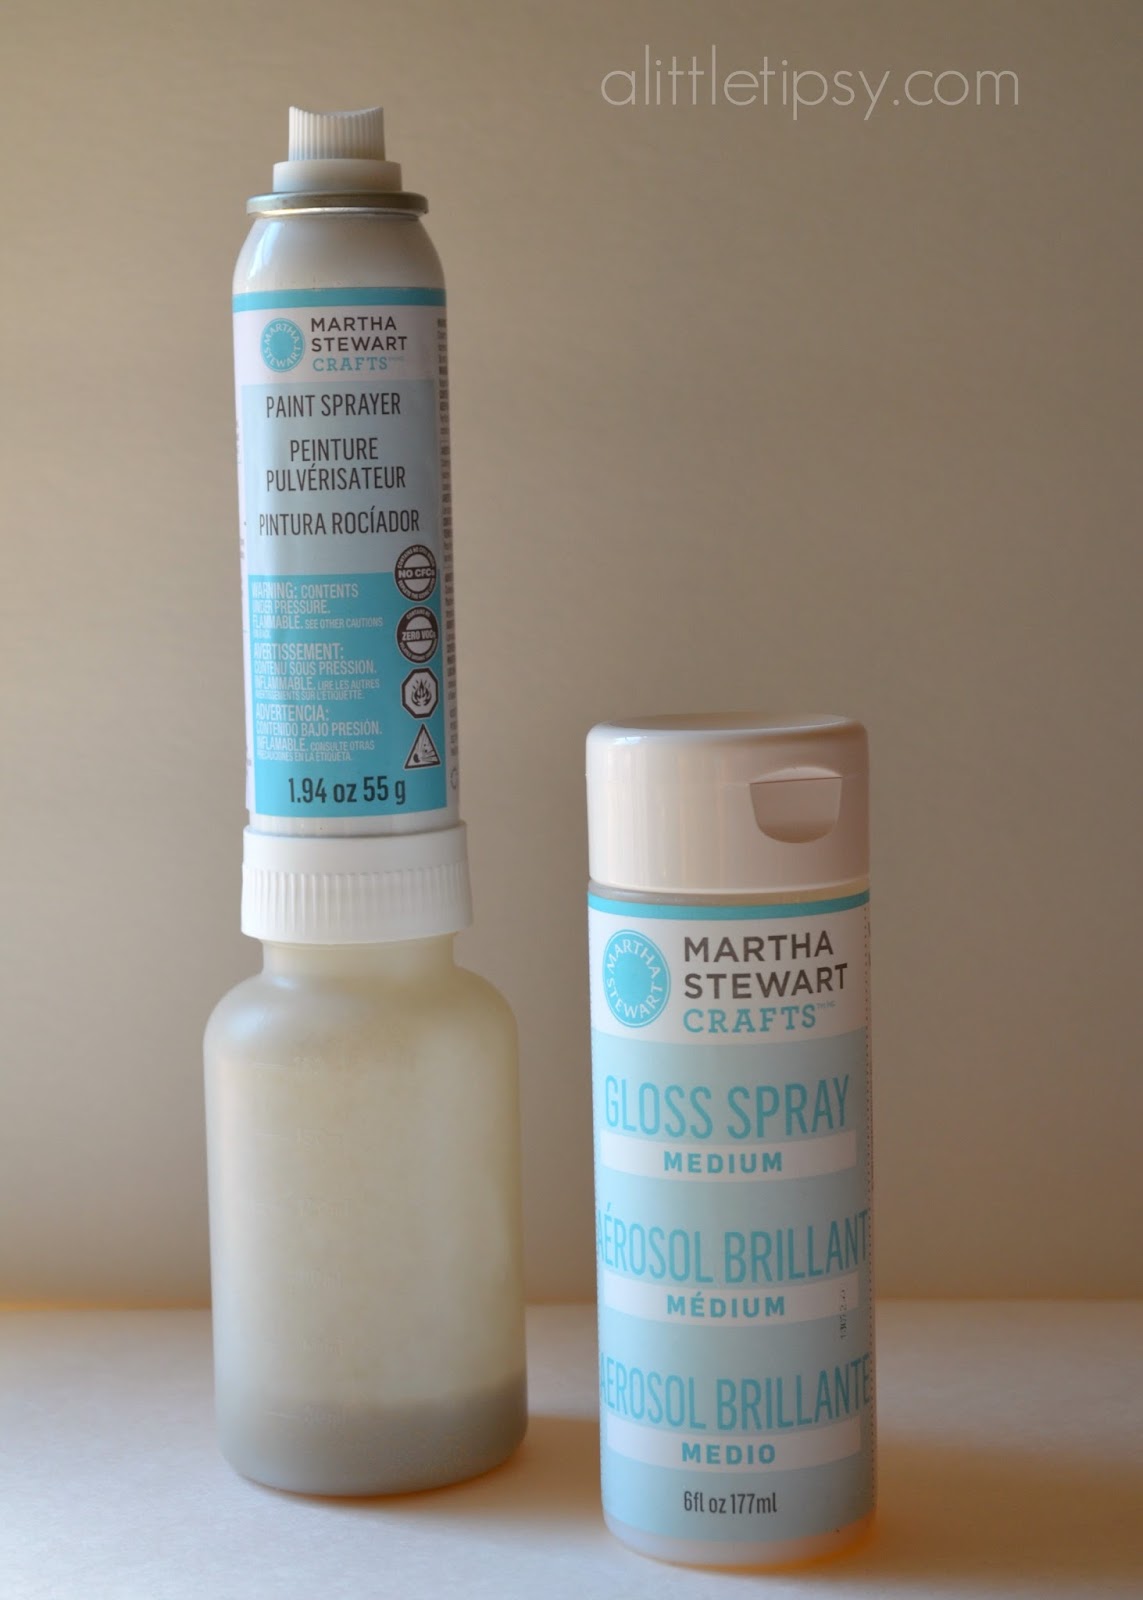
  • Martha Stewart Spray Paint System with Glass Medium 
DIRECTIONS:

1. Mix the glass paint with the gloss spray medium according to package directions. For two glittered glasses you will want to use about 1.5 ounces of paint and 1.5 ounces of medium. 
2. Attach the paint sprayer to the bottle being sure to take the straining cap off the bottom of the tube to allow the glitter through. 


3. Place a plastic grocery bag over your hand to hold the wine glass while spraying. 


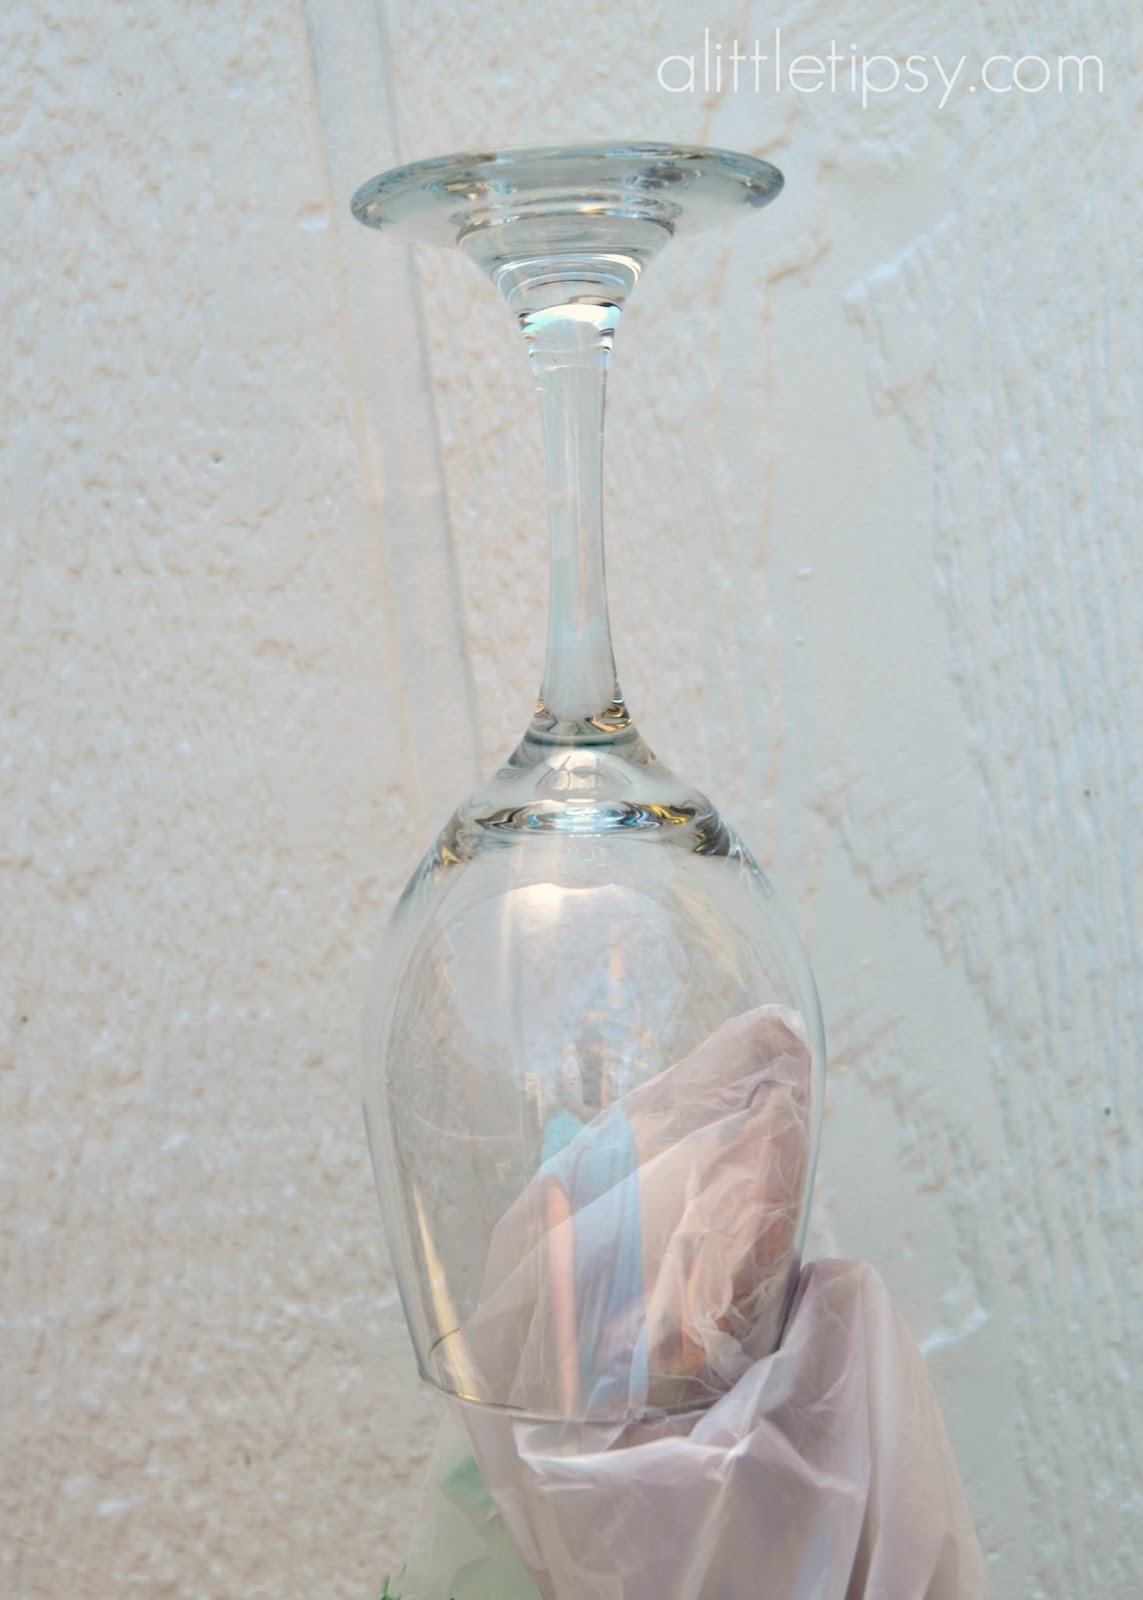
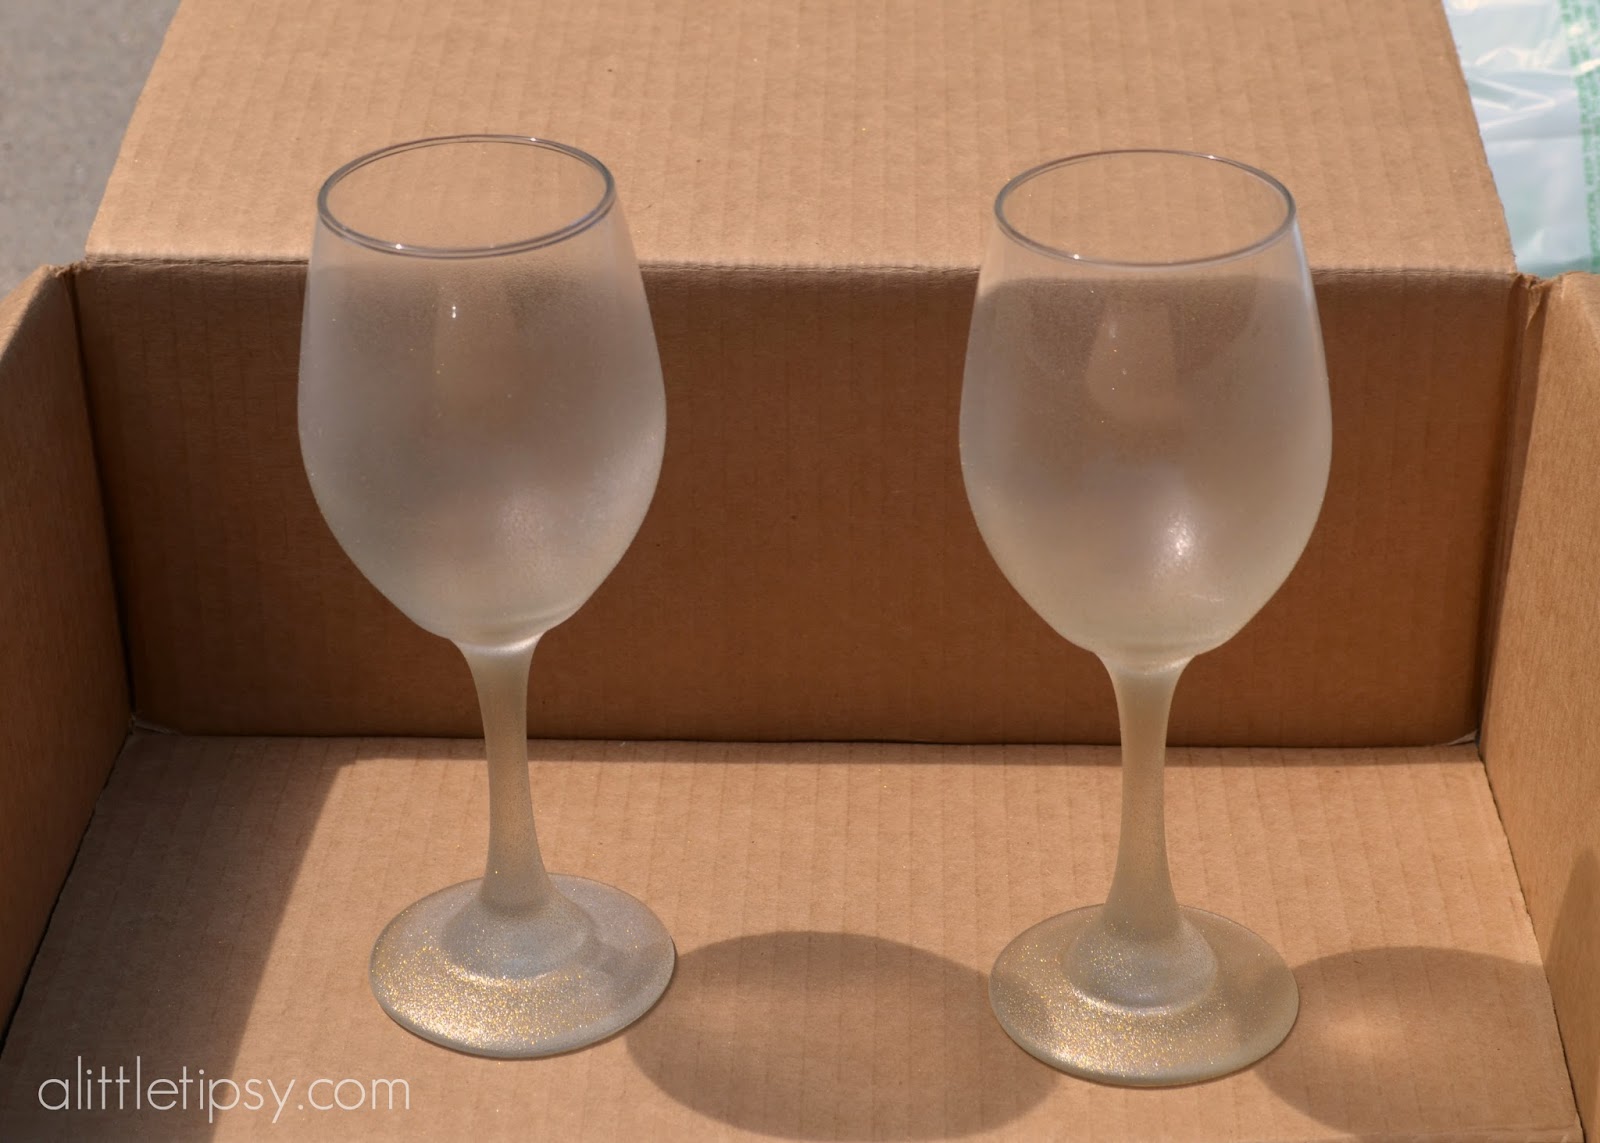
4. Paint the glasses with multiple light coats letting them dry between to avoid puddling. Do not tilt the sprayer more than 45 degrees. Continue glittering, more concentrated at the base and gradually becoming thinner at the top giving it an ombre effect. If the sprayer gets clogged, put your finger over the hole and press down the sprayer. This will clear out the tube. Dry completely.


Enjoy your beautiful new glittered wine glasses with the beverage of your choice or give them away to someone celebrating an exciting occasion. Either way they will put a smile on your face.


Disclaimer: Martha Stewart provided product for my review. All ideas and opinions are my own.

We have decided to truncate our feed to help protect against stolen content. I apologize for any inconvenience. Please love us anyway. 🙂

Easy Painted Notebook Paper Frames

July 31, 2013 By Michelle Barneck 8 Comments

This post is sponsored by Michael’s and their Back to School Challenge.
I have a thing for back to school. Something about fresh notebooks and backpack shopping gives me a big grin. I am a nerd. I loved school and want my kids to love it too. There is something fun about capturing those first day excitement and end of year celebrations which brings me to my project…School Picture Frames. I joined up with Michael’s to participate in their First Day of School Challenge and I think you’ll like what I came up with. This is not my first rodeo, see my ruler frame and back to school frame, this year I went with paper.


The notebook paper frames are hand painted, but sooo easy! I made two versions one frame with college rule paper for the older kids and one frame with the “learn to write” paper for little kids (see picture on left).

They are perfect for your first day of school pictures and I love that they can preserve your little person’s adorable handwriting.


SUPPLIES:

Wood Frames ($1 each)
White Craft Paint
Foam Brush
Ruler
Pencil
Red Fine Tip Paint Pen
Blue Fine Tip Paint Pen
Mod Podge or Clear Spray Paint

*all available at Michael’s*


DIRECTIONS: 

1. Paint the frame white. I used three coats. Let dry.

2. Using your ruler make marks on each side of the frame where you want the lines to go. I spaced my lines one centimeter for both versions, you just alter the colors of the lines for the learn to write paper.

3. Using your ruler add the red lines with your paint pen. One line going down vertically about an inch from the left side for the college ruled or every 3rd pencil mark for the learn to write. Let dry.

4. Using your ruler add the blue lines with your paint pen. For the college ruled on each pencil mark. For the learn to write, one under each red line. After the blue lines are dry, go back and add the blue dashed lines after your blue lines are dry.

5. To personalize, have your child add their name with a pencil or add the teacher’s name and use for a gift.

6. Cover with protective clear coat.

Not bad for buying all the supplies (most of which you may have on hand) for about $10 right?

Speaking of gifts for teachers, Michael’s offers a 15% off discount for teachers everyday! Talk to a store associate for more info. Also, be sure to download the Michael’s app so you always have their deals and coupons at your fingertips! I love just pulling out my smartphone and getting a discount!

Last, but not least, here is how I put it all together. I still can’t believe my little guy is starting Kindergarten. Tear.

Disclosure: I was provided a Michael’s gift card to pick up supplies for this challenge.

We have decided to truncate our feed to help protect against stolen content. I apologize for any inconvenience. Please love us anyway. 🙂

Honey Sugar Face Scrub

July 23, 2013 By Michelle Barneck Leave a Comment

Hi Friends, it’s Aly from Entirely Eventful Day again! I am happy to be here to share with you a Summer-time life saver. Seriously though, it may not actually save your life, but it will save your face (which is pretty close).  
I’m a big believer in Natural Beauty Treatments, and this face scrub is one of my absolute favorite! There are a lot of sugar scrub recipes out there, and all I have tried are great. But this one (which I’m pretty sure I invented) is the best, best, best! 
If you have never tried a honey facial, I highly recommend it. Turing honey into a scrub is just a little bonus to all the benefits of slathering honey all over your face; it is sooo moisturizing and soothing.
Click for the full tutorial.

Here’s what you do…
You can either make it as you go (which is what I usually do) or you can make a whole batch and package it up cute (I even created a little printable label for you).
1. Use new-ish (not old and gooey) honey (the honey in the squeezy bear bottles works best because it’s so soft). Fill a container 2/3 full with honey.
2. Add white granulated sugar a tablespoon at a time until you achieve the right consistency.
3. Use as you would use any other facial scrub to exfoliate your face and neck (don’t scrub too hard).
4. Leave the honey mixture on your face for 5 minutes to receive the hydrating benefits.
5. Rinse and enjoy!
The printable label is formatted to fit the lid of a mason jar. I used one of the short Mason jars to package my facial scrub. It turned out so cute. I also wrapped a little washi tape around the outside of the lid. I was happy and surprised to find that it was the perfect width! Bonus!

This is a perfect gift idea! You’re friends will thank you. Package it up cute and give it away.

Go here to download a high-resolution version of the darling honey sugar scrub printable label.
Also, check out my other free printables and the ones in my printable shop.
You might also like… How to Make a Custom Desk Pad // Jello Flavored Watermelon Cookies // Blue and Pink Girl’s Room Ideas // Green Smoothie Popsicle Recipe
——————————————————————————-
Thanks Aly for this yummy face scrub recipe! It is so adorable all wrapped up in a jar with washi!
We have decided to truncate our feed to help protect against stolen content. I apologize for any inconvenience. Please love us anyway. 🙂

10 Creative Cash Graduation Gifts

May 15, 2013 By Michelle Barneck 2 Comments

With Graduation right around the corner I’ve had graduation gifts on the mind. I like to give cash so they can use it on whatever they need, but I like to fancy it up with a little more than a card. That led to this search and collection of creative cash graduation gifts. Who knew cash could be so cool?!

Dollar Diplomas from A Little Tipsy
Graduation Gift-Soda Bottle Filled with Cash or Treats- Labels and Gift Tags
Soda Bottle from Its Written on the Wall

Frame_display_#2
In Case of Emergency from Create My Event

CatheHoldenMoneyRosette

Money Badge from Just Something I Made
Graduation Gift in a Jar
Graduate Bottle from Fave Crafts
Chocolate box from Life as a Mom
Graduation Cap Box from Crafts Unleashed
Your Hard Work has Paid Off from eighteen25
Money Leis from Honeysuckle on the Vine
main.jpg
$2 Bill Pad from Instructables
We have decided to truncate our feed to help protect against stolen content. I apologize for any inconvenience. Please love us anyway. 🙂
« Previous Page
Next Page »

  • Bloglovin
  • Facebook
  • Google+
  • Instagram
  • Pinterest
  • RSS
  • Twitter

Hi there! I'm Michelle. Mother of three little boys and one little princess. Welcome to A Little Tipsy, a place for exploring creativity and sharing inspiration.

Follow on Bloglovin


Visit Michelle Barneck {A Little Tipsy}'s profile on Pinterest.

Tutorials by Category


15 Family Reunion Games

Family Reunion Games Collage

15 Sprinkle Party Ideas

Sprinkle Birthday Party
Creative Commons License

© Copyright 2014 A Little Tipsy · Site Designed by The Fairy Blogmother · Web Hosting by RFE Hosting

This website uses cookies to improve your experience. We'll assume you're ok with this, but you can opt-out if you wish.Accept Read More
Privacy & Cookies Policy