A Little Tipsy

Creative Tips & Ideas

  • home
  • About Me
  • the tipsy top
  • press
  • projects
  • contact me
[print_thumbnail_slider]

Disney Countdown

November 14, 2012 By Michelle Barneck 10 Comments

A Disney trip is definitely something to look forward to so we created a fun countdown to turn up the excitement, but also help prepare us for the trip. I saw this fun Disney countdown and put my own spin on it.

DISNEY COUNTDOWN


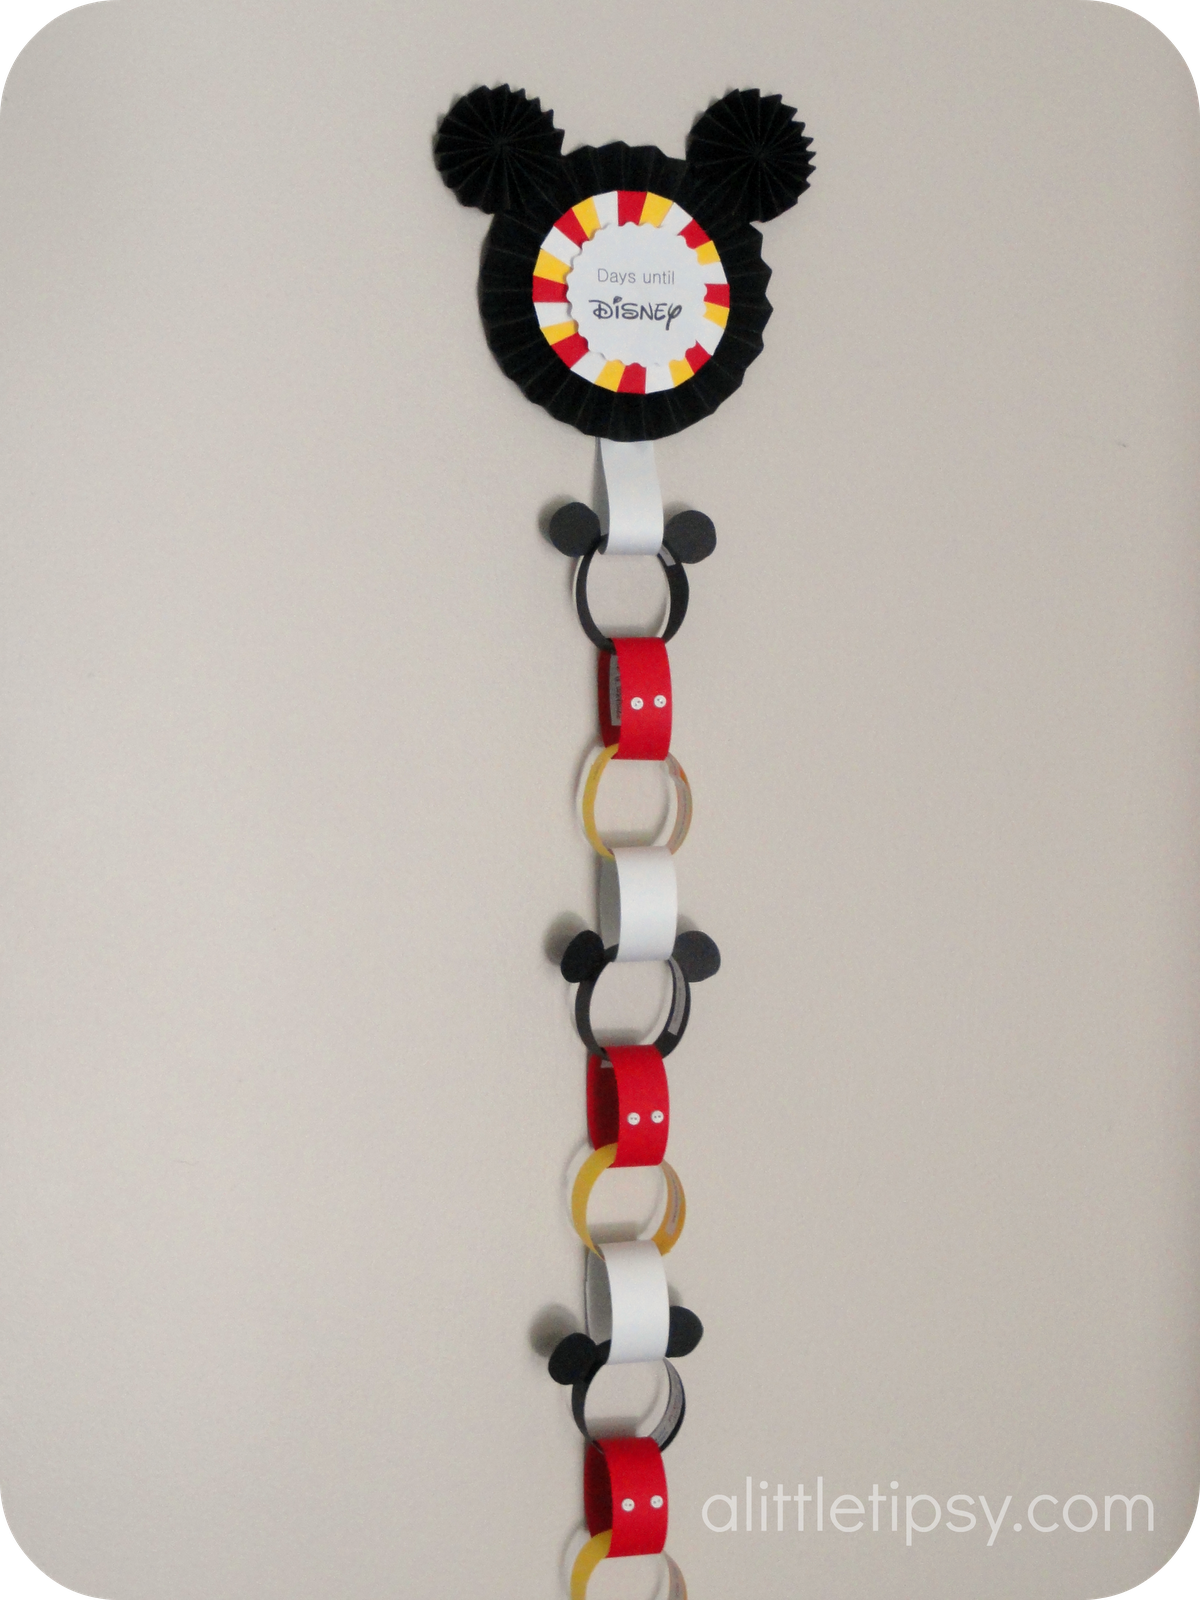
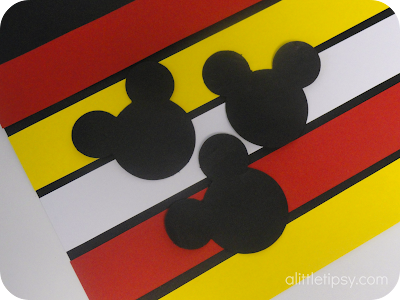
Each chain link on the Disney countdown had an activity for the day. You can download the printable Disney countdown activity list here.
  1. Color a Disney picture
  2. Which 3 characters do you most want to meet?
  3. Make Disney characters out of playdough
  4. Play Disney scene it
  5. Choose a light up toy for parades & fireworks
  6. Sing your favorite Disney song
  7. Write a letter to your favorite Disney character
  8. Play Disney games on the computer
  9. Dress like pirates and dance to yo ho a pirate’s life for me & the jake & the neverland pirates theme song
  10. Make mickey oreos
  11. Find the hidden mickeys around the house (cut them out with my cricut and hung them around the basement)
  12. Make a Disney water bottle
  13. Watch Disney videos on you tube
  14. Play Disneyland or rush on xbox Kinect
  15. Make tags for the stroller and luggage
  16. Name the 3 rides you are most looking forward to.
  17. Make mickey mousse. 
  18. Have a Disney Pajama party and watch a Disney movie.
  19. What should we do if we get lost? Make tattoos with phone number.
  20. Make mickey pancakes
The kids loved having fun activities everyday and I loved that it kept me on task to get some trip preparations done in advance. This really did create a great atmosphere in our home before leaving on our trip!

Inspired by:
Mickey Mousse We used Oreo pudding and added the chocolate mickey on top.
Mickey Oreos We used Nerds for buttons.

Wednesdays through January

Linking with:

P.S. Don’t forget to sign up for free Tipsy updates via RSS or email.

We have decided to truncate our feed to help protect against stolen content. I apologize for any inconvenience. Please love us anyway. πŸ™‚

Sesame Street Birthday Party

November 13, 2012 By Michelle Barneck 12 Comments

My little guy has a big thing for Elmo and Cookie Monster. So when birthday time rolled around it was an easy choice to do a Sesame Street birthday party. The primary colors were great and I had a blast adding faces to everything I could.


Elmo loves his crayons so we set up a coloring table and a bubble machine to entertain the guests while everyone arrived. I had no idea what a hit the bubble machine would be!

Each games prize coordinated with the character. Pin the nose on Elmo gave goldfish crackers (like Elmo’s pet Dorothy) in a fish bowl. Oscar’s trash toss players received gummy worms (like his pet Slimey). Ernie’s duck pond players kept their rubber ducky and also got  silly straw or punch ball depending on what number their duck said on the bottom.

Each guest got also took home Sesame Street character playdough, Cookie Monster’s cookies, an Elmo book and Sesame Street character bubbles.

Hints for creating a budget friendly yet swanky Sesame Street party:

HINT #1 Use your (or your friends) craft cutter to your advantage!

This is the first party I have done with my Cricut mini and it was a huge help! Choose from TONS of Cricut Cartridges! I used the Cricut Sesame Street – Friends Cartridge to make:

  • Lincoln Street sign (Sans Serif font)
  • Playdough, bubble and drink Sesame Street character faces
  • Cookie Monster Shirts – heat transfer on blue shirts
  • Dorothy on fish bowls
I used other cricut shapes like scallops, circles, and labels to make:
  • Lincoln is Two banner
  • Sesame Street character faces (Scallop-Snowflke from Best images of 2009 cartridge)
  • Food, game, and prize labels (DnceTeam Label from Twinkle Toes cartridge with Sesame Street Elmo’s Party font)
Want to know my other secret weapon? 
HINT #2 Discount stores! Shopping smart at budget friendly stores for your party does not have to look well…cheap.
Dollar Tree supplies:
  • Playdough
  • Elmo Books
  • Bubbles
  • Mondo drinks
  • Cookie Monster juice
  • Clear fruit & veggie platters
  • Silly Straws
  • Punch balls
Wal-mart supplies:
  • Bubble machine
  • Chips Ahoy individual packs
  • Crayons
  • Cupcakes (ordered cupcakes with blue grass tip frosting and finished myself with candy melts and chocolate chips for eyes and a chips ahoy mini cookie)
Ikea:
  • Mini canister “fish bowls”
  • Oscar’s trash bucket
HINT #3 Tie it all together with a fun color scheme or pattern. We stuck with primary colors and tied all the areas together using red polka dot wrapping paper. It was 50% off in the Christmas section at Hobby Lobby and cost me $4. I think it took the party to another level.
HINT #4 You don’t have to reinvent the wheel. Be inspired by other parties with similar themes and put your own spin on it.
I was inspired by many other parties as you can see on my Perfect Party Pinterest board. Here are the references I used specifically…
Ernie’s Duck Pond and Oscar’s Trash Toss
Cookie Monster Cupcakes
Fruit and Veggie Sesame Street Character Faces
Sesame Street Character Faces on take homes
Chocolate covered Elmo Oreos
Scallop Sesame Street Character Heads
Dorothy Fish Bowls

Good luck planning your own Sesame Street Party! 
I’d love to see it!

Linking with:
Thirty Handmade Days
We have decided to truncate our feed to help protect against stolen content. I apologize for any inconvenience. Please love us anyway. πŸ™‚

DIY Scarf {Cascading Ruffle Infinity Scarf}

November 9, 2012 By Michelle Barneck 12 Comments

Who doesn’t love a cozy cute scarf?! It can not only keep you warm on chilly days, but it can add that extra oomph to an otherwise blah outfit.
Wanna know the best part about this cascading ruffle infinity scarf? It came from this…
a dollar store t-shirt. And it’s so easy nearly anyone can make it. Literally, I just bought a sewing machine and this was my first project! Trust, it is simple.
So what do you need to make a scarf from a shirt?
SUPPLIES:
  • T-shirt
  • Scissors
  • Pins
  • Coordinating thread
  • Sewing machine
1. Cut the sleeves, collar and side seams off the shirt leaving the bottom hem intact. You’ll have two main pieces. Cut each piece in half down the center.

2. Place the left piece of each shirt half on top of the right piece with the outsides of the shirt facing in. Align the neck and arm holes and cut the neck area to be straight across. Pin the neck area together for each half.

3. Take the two “strips” you’ve created and now pin the bottom hem area together with the inside of the shirt strips facing out. It will now be one big long strip pinned together. 
4. Sew all the strips together where pinned using a straight stitch and backstitch on each end. Trim any excess material on the inside of the seam.

 5. You now have one long strip. You could stop here if you want a long thin super versatile scarf.

Cute, but not exactly what I was looking for. I wanted a chunky scarf with lots of texture.
I was inspired by Amanda’s Scarf and decided I wanted a mix between that and a cashmere infinity  scarf I purchased at a boutique.
Continuing on with the how-to…
6. Sew a long basting stitch down the length of each side in about an inch and a half from the edge. (I used a stitch length of 5 and tension of 4.) This will gather the fabric slightly. Be sure to leave a good amount of thread on each end.

7. Holding the bottom thread carefully pull the top thread while pushing the fabric down to create more gathers and ruffling. Careful not to break the thread. Do this from each end toward the center until you get the desired look. Tie the string in a knot on each end so they won’t come loose during the next step.

8. Pin the last two ends together and sew with a straight stitch to form the infinity scarf circle.

Put it on and act like it’s a fancy boutique number and enjoy the fact that only you know it cost you $1.


Oh and did I mention that my my scarf is in a Craft Wars type competition over on Buzzfeed? If you like my scarf I would love your vote! 

Linking with:

Thirty Handmade DaysThe Shabby Nest
We have decided to truncate our feed to help protect against stolen content. I apologize for any inconvenience. Please love us anyway. πŸ™‚

$75 Pick Your Plum Giveaway

November 8, 2012 By Michelle Barneck 76 Comments

I am excited today to team up with one of my favorite deal sites for an awesome giveaway. I’m sure you’ve heard of Pick Your Plum, but just in case, each day they have a new deal on crafting, fashion, baking, or home decor item. The thing is they have limited amounts, so you have to get it before your neighbor does.
Wondering what kind of awesome things they have each day? Here are a few of the deals spotted in the past.


Pretty sweet right?! I need to get my hands on some of those burlap baskets and that cupcake caddy would come in handy at an upcoming birthday party!
Lucky for you Pick Your Plum is giving away a $75 box of swag to one lucky Tipsy reader!

Enter via the Rafflecopter form below.

a Rafflecopter giveaway

We have decided to truncate our feed to help protect against stolen content. I apologize for any inconvenience. Please love us anyway. πŸ™‚
« Previous Page
Next Page »

  • Bloglovin
  • Facebook
  • Google+
  • Instagram
  • Pinterest
  • RSS
  • Twitter

Hi there! I'm Michelle. Mother of three little boys and one little princess. Welcome to A Little Tipsy, a place for exploring creativity and sharing inspiration.

Follow on Bloglovin


Visit Michelle Barneck {A Little Tipsy}'s profile on Pinterest.

Tutorials by Category


15 Family Reunion Games

Family Reunion Games Collage

15 Sprinkle Party Ideas

Sprinkle Birthday Party
Creative Commons License

© Copyright 2014 A Little Tipsy · Site Designed by The Fairy Blogmother · Web Hosting by RFE Hosting

This website uses cookies to improve your experience. We'll assume you're ok with this, but you can opt-out if you wish.Accept Read More
Privacy & Cookies Policy