A Little Tipsy

Creative Tips & Ideas

  • home
  • About Me
  • the tipsy top
  • press
  • projects
  • contact me
[print_thumbnail_slider]

Easter Subway Art and Mantle Decor

April 13, 2014 By Michelle Barneck 2 Comments

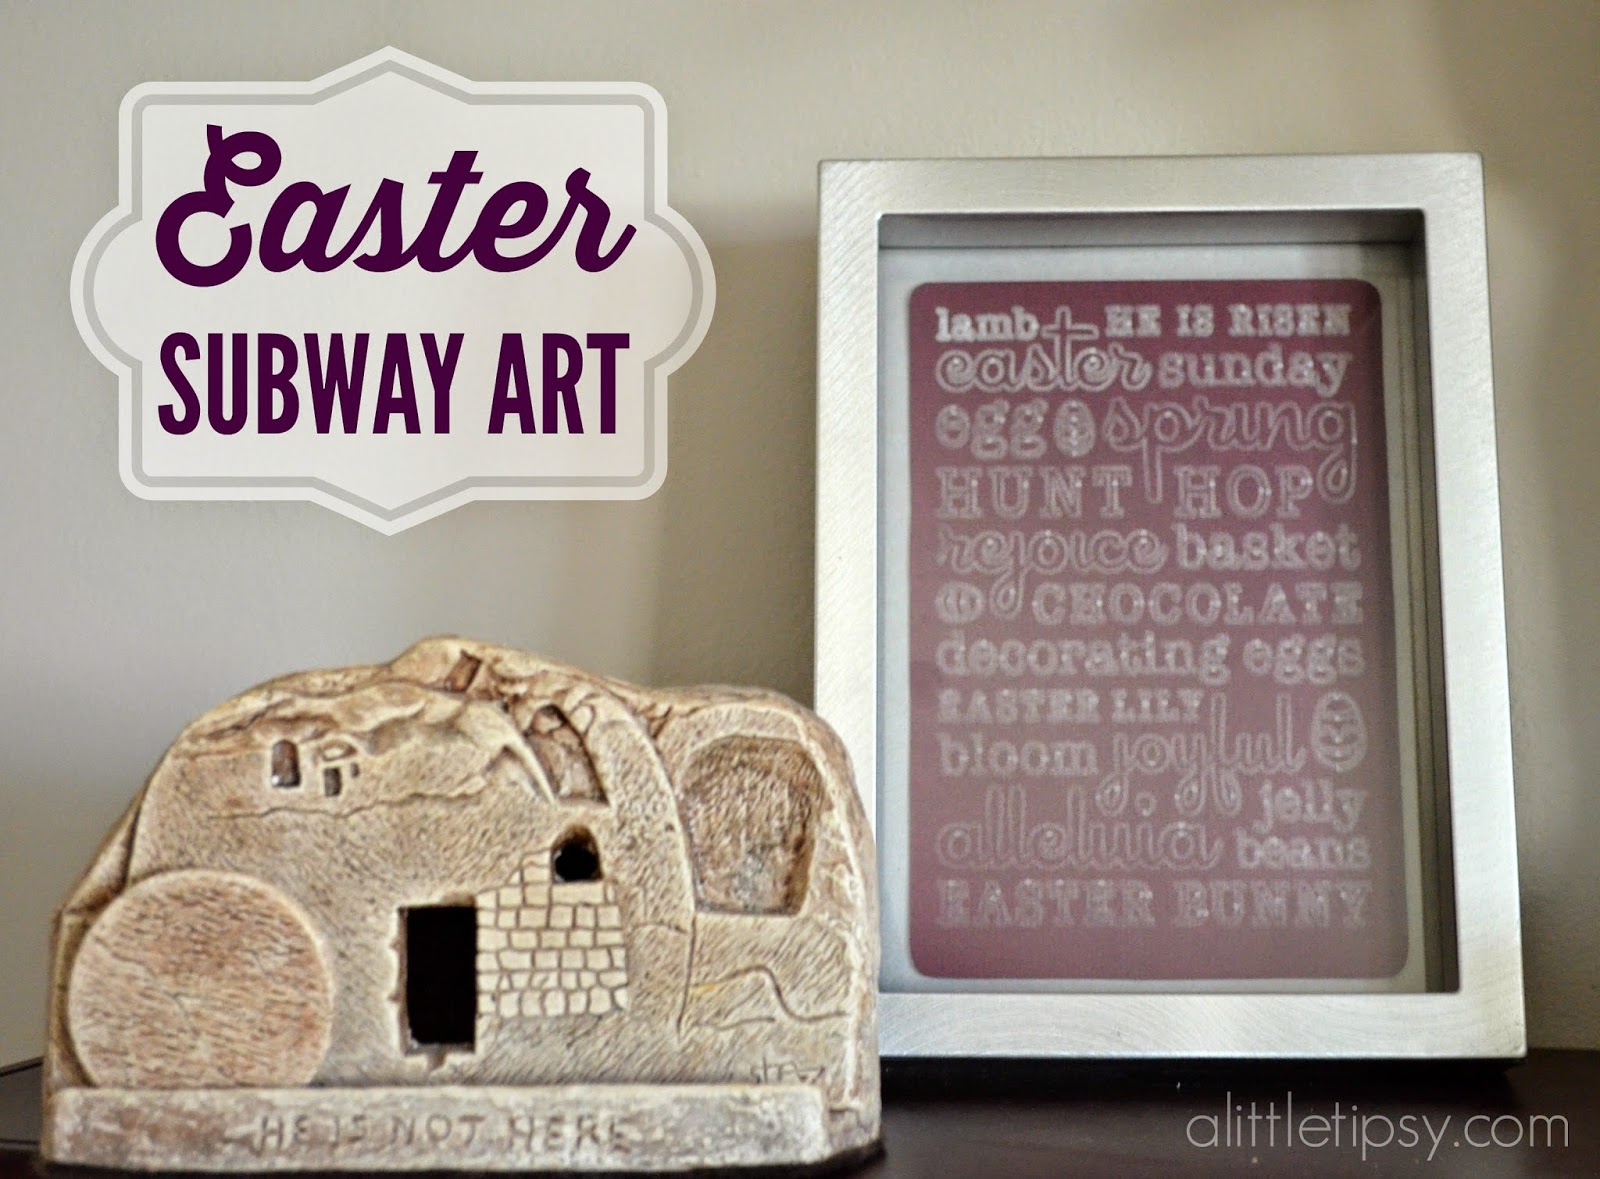
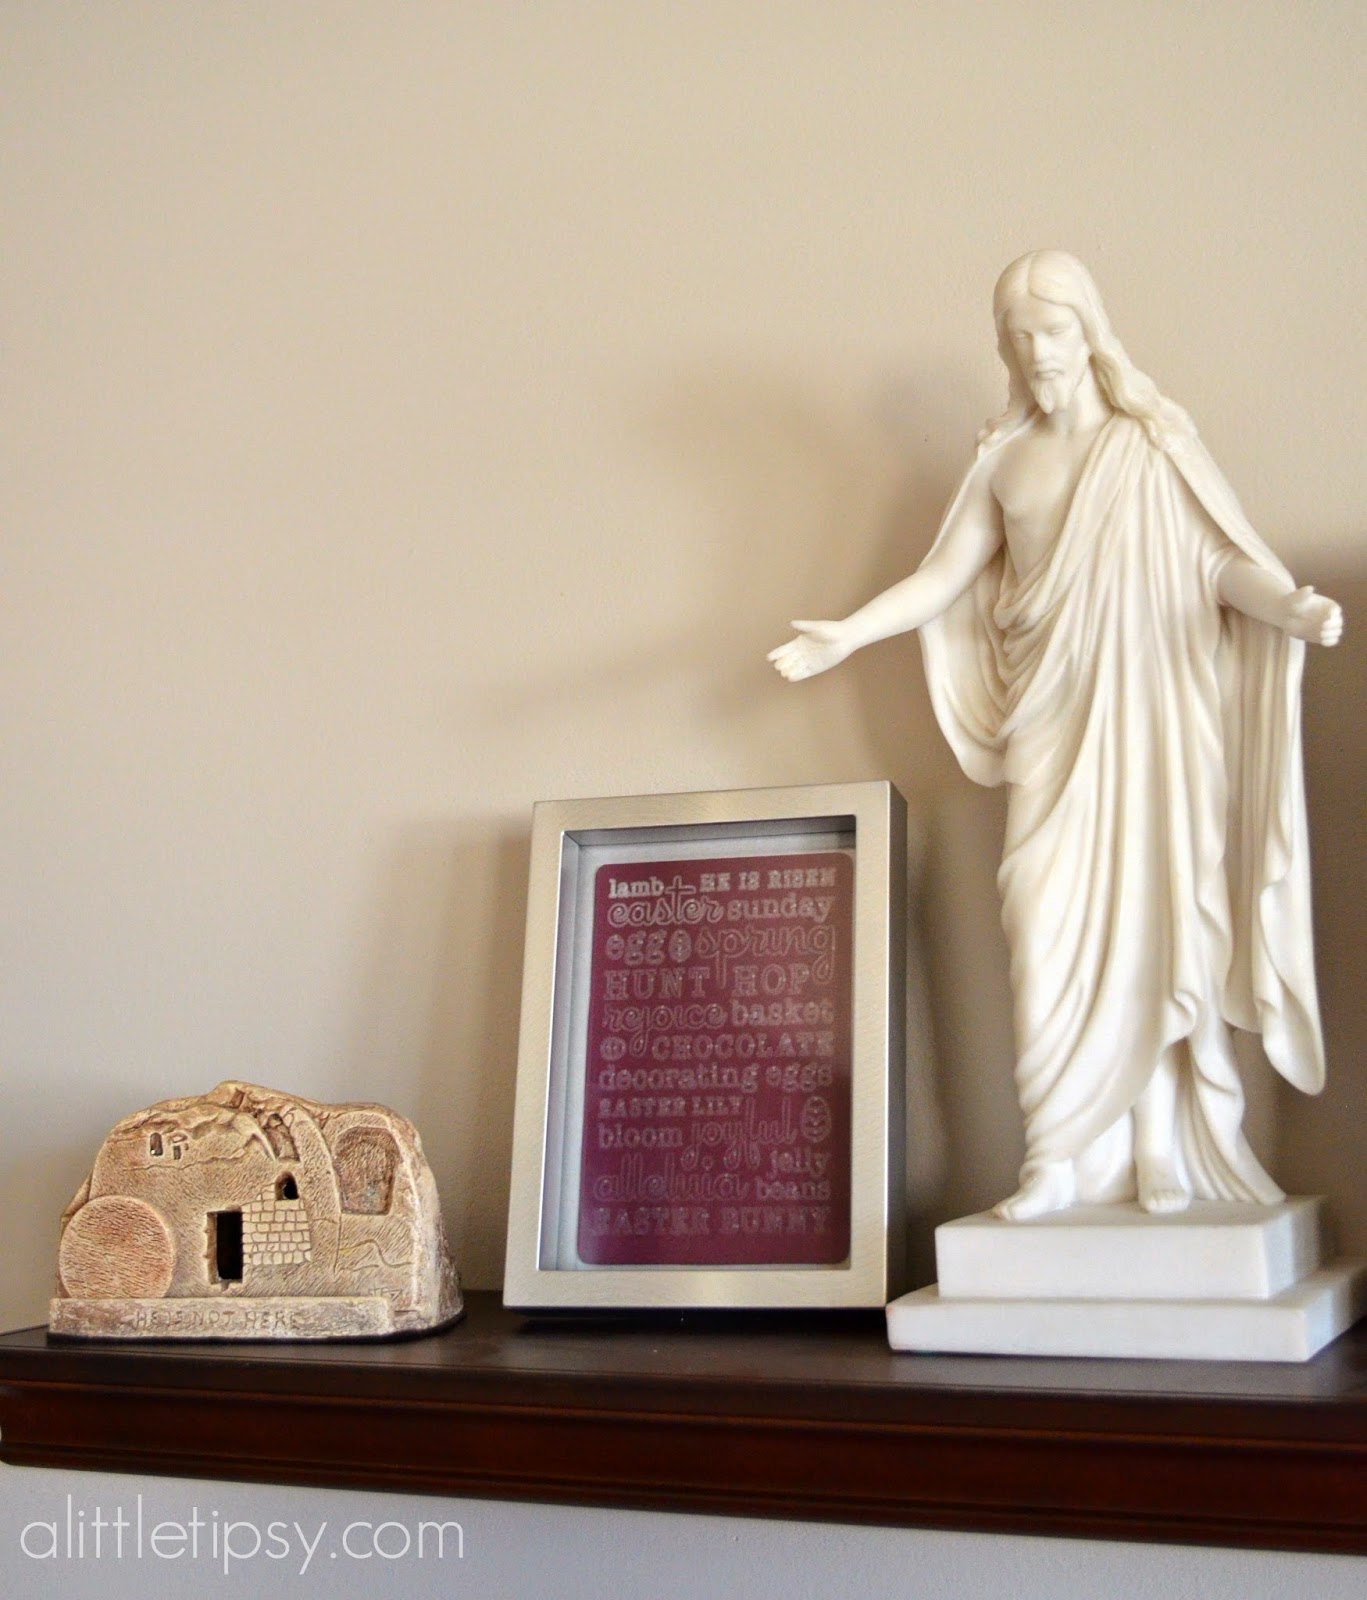
Do you ever feel like the true meaning of a holiday gets lost in the shuffle? Behind the Easter eggs, baskets, and chicks there is true meaning of rebirth and resurrection. I decided I wanted the main shelf/mantle area in my front room to focus on the true celebration of Easter and I love how it came together!


I gathered things I already had on hand:
  • Tomb Replica
  • Christus Statue
  • Easter “I Know My Redeemer Lives” Printable
  • Paper Mache Eggs
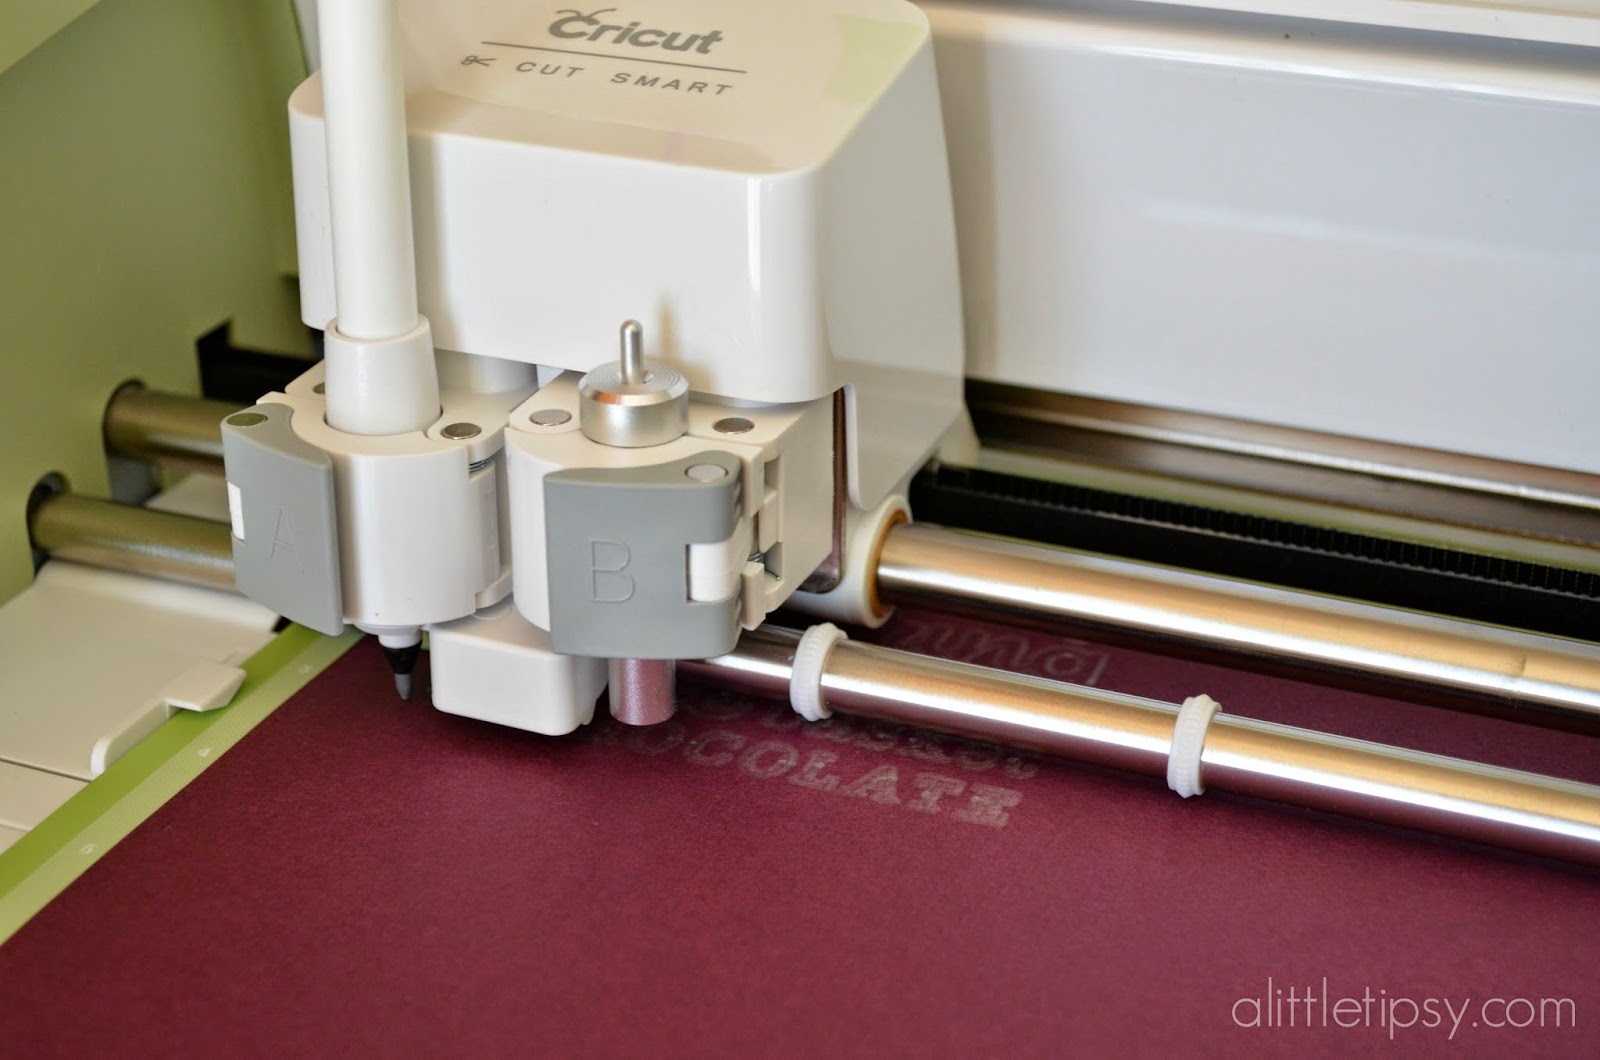
But, I needed something a little more with a bit of color. I love the dark plum in the print and egg ribbon so I thought I would run with it. I love how deep purple is so elegant and royal, it seemed fitting for such a display. I grabbed some plum cardstock and my metallic Cricut pen because I thought it would be awesome to have some “hand-written” art. I found this Easter word collage and knew it would be perfect!


See the entire post.


Check out how easy it is. I literally put the pen in the housing, clicked a couple of buttons and my Cricut Explore did the rest.


I just popped it in a frame and my display was complete.


What do you think? Do you have a mantle/shelf you decorate for each season?

We have decided to truncate our feed to help protect against stolen content. I apologize for any inconvenience. Please love us anyway. 🙂

Rainbow JELL-O Recipe

April 10, 2014 By Michelle Barneck Leave a Comment

Rainbow JELL-O is not new. I had seen it many times, but was intimidated. It looked like A LOT of work. With spring here I decided I wanted to make a fun colorful treat and put my big girl pants on to brave the gelatin rainbow.

Get the full recipe…

Guess what? It really isn’t that bad. The key is using a timer and it is basicaly like clock work. First you are going to need JELL-O. Decide on your colors. I opted to leave out the white layers you see between the colors in some recipes because I wanted to use all the colors of the rainbow and lets face it, that would have been too darn many layers. You may have to visit multiple stores to find all the colors. You only need the small boxes (I could only find blue and purple in large).


Items needed:
  • Six 3oz. boxes of JELL-O in rainbow colors
  • Knox Unflavored Gelatin
  • 9 x 13 pan

Decide what order you want your colors in. I started with purple on the bottom and ended with red so it would be in true rainbow order, red, orange, yellow, green, blue purple.

Mix 1 package of JELL-O with 1 tsp Knox gelatin and 1 cup boiling water.  Cool and pour into pan; refrigerate about 30 minutes to set up in the fridge before you move on to the next layer. While waiting for your JELL-O to set, make the next layer and let it cool on the counter.
Continue repeating layers until you are done. Use a timer so you can set it and forget it!
Once finished, cover and refrigerate overnight to set. Then just slice and serve! 

We love topping it with whipped cream to look like a little cloud at the end of the rainbow. I seriously could not get over how beautiful each bite was!
What do you think? Will you brave rainbow JELL-O?
We have decided to truncate our feed to help protect against stolen content. I apologize for any inconvenience. Please love us anyway. 🙂

Hoppy Easter Wood Banner

April 7, 2014 By Michelle Barneck 2 Comments

Hello A Little Tipsy readers! My name is Amanda and I blog over at The Contractor Chronicles with my partner in crime and best friend, my husband Spencer. Spencer is a contractor by trade and together we have a great time remodeling rooms in our home and building furniture. We have the motto the he builds it and I make it look good! I also love to decorate for Holidays and am here today to share a fun and simple Hoppy Easter Banner.


View the full tutorial.


We just installed board and batten in our boy’s room and after cutting all the pieces of MDF I had a stack of 6×4 inch pieces and knew they would be perfect for a banner.


I found some scrap paper in my supplies and matched them up with coordinating paint colors. I figured out how many pieces I needed and the pattern I wanted as well.


Then I sanded and painted the edges of each piece.


Using spray adhesive, I sprayed the MDF pieces and then applied my paper to the wood, securing them in place.

  Easter Banner (18) copy 

After the contact adhesive dried, I used my x-acto and cut off the extra paper, leaving nice straight lines.


When all 12 of my pieces of MDF were cut and ready, I used my Cameo to cut out white vinyl. I used the font pupcat and found a cute little bunny and egg in the Silhouette store. Spencer used his drill and pilot drilled holes in the corner of each one (he stacked up three at at time) using a 1/4″ drill bit.


After they were all drilled, I simply strung twine through each one and was ready to hang it up!


I like that it is wooden and sturdy so I can hang it up inside or outside. I plan on hanging up on my porch so it can welcome people to my home! Thank you so much for having me today! I would love if you stopped by and said hello and checked out the projects we have finished and are working on!

  Build A Cedar Picnic Table (106) a checkered Closet (78) Build a backyard fire pit (33) 
Build a Picnic Table – Checkered Coat Closet – Build a Backyard Fire Pit 

You can also follow me on these social media sites as I am always showing sneak peeks of the projects we are working on!

  Follow Us On Facebook Follow Us On Twitter Follow Our Feed Follow Us On Instagram Follow Us On Pinterest 

 Happy Easter!

signature-copy_thumb.jpg

——————————————————————————
Thanks Amanda! I love the idea of having a fun Easter banner that is a way more durable and can last from year to year! Be sure to go visit her site for great DIY tutorials and ideas!
We have decided to truncate our feed to help protect against stolen content. I apologize for any inconvenience. Please love us anyway. 🙂

April Visiting Teaching Message Handout

April 6, 2014 By Michelle Barneck Leave a Comment

The April Visiting Teaching Message is titled, The Divine Mission of JesusChrist: Savior and Redeemer. It has such a great message about our Savior and how He loved us enough to come to earth and atone for our sins. I absolutely love this story of a woman comparing herself to a 20 dollar bill. It has such a powerful message.

Download the free printable April Visiting Teaching Handout.

Feel free to print the handout above and share with your sisters. It is meant to be a 4 x 6 to easily print on a photo card. 
We have decided to truncate our feed to help protect against stolen content. I apologize for any inconvenience. Please love us anyway. 🙂
« Previous Page
Next Page »

  • Bloglovin
  • Facebook
  • Google+
  • Instagram
  • Pinterest
  • RSS
  • Twitter

Hi there! I'm Michelle. Mother of three little boys and one little princess. Welcome to A Little Tipsy, a place for exploring creativity and sharing inspiration.

Follow on Bloglovin


Visit Michelle Barneck {A Little Tipsy}'s profile on Pinterest.

Tutorials by Category


15 Family Reunion Games

Family Reunion Games Collage

15 Sprinkle Party Ideas

Sprinkle Birthday Party
Creative Commons License

© Copyright 2014 A Little Tipsy · Site Designed by The Fairy Blogmother · Web Hosting by RFE Hosting

This website uses cookies to improve your experience. We'll assume you're ok with this, but you can opt-out if you wish.Accept Read More
Privacy & Cookies Policy