A Little Tipsy

Creative Tips & Ideas

  • home
  • About Me
  • the tipsy top
  • press
  • projects
  • contact me
[print_thumbnail_slider]

Valentine’s Day Valentines {Plane Awesome}

February 9, 2012 By Michelle Barneck 22 Comments

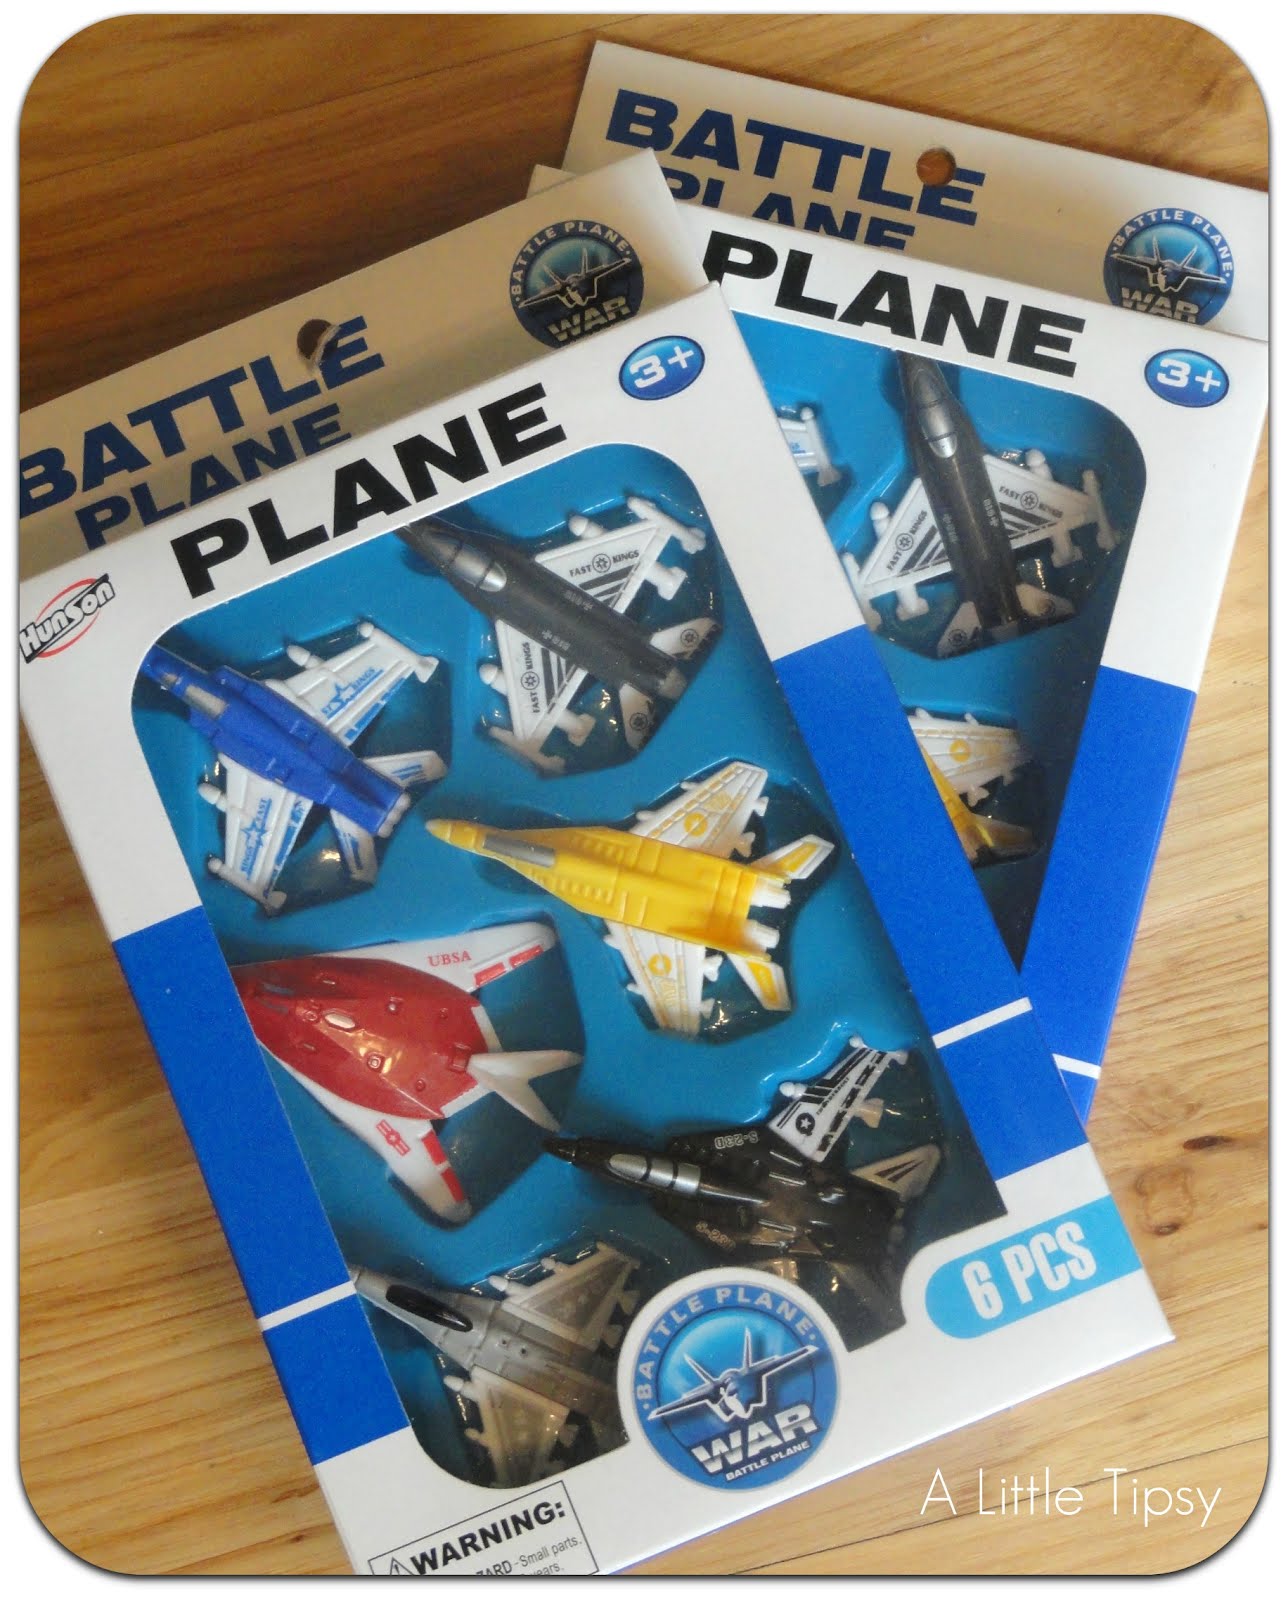
This is my first year making Valentine’s Day Valentines for my son to take to school. Of course we didn’t want anything too girly and they get way too much candy, so I took him to the dollar store to have a look. Luckily, we found six packs of airplanes for a dollar so we settled on a “plane” awesome theme!
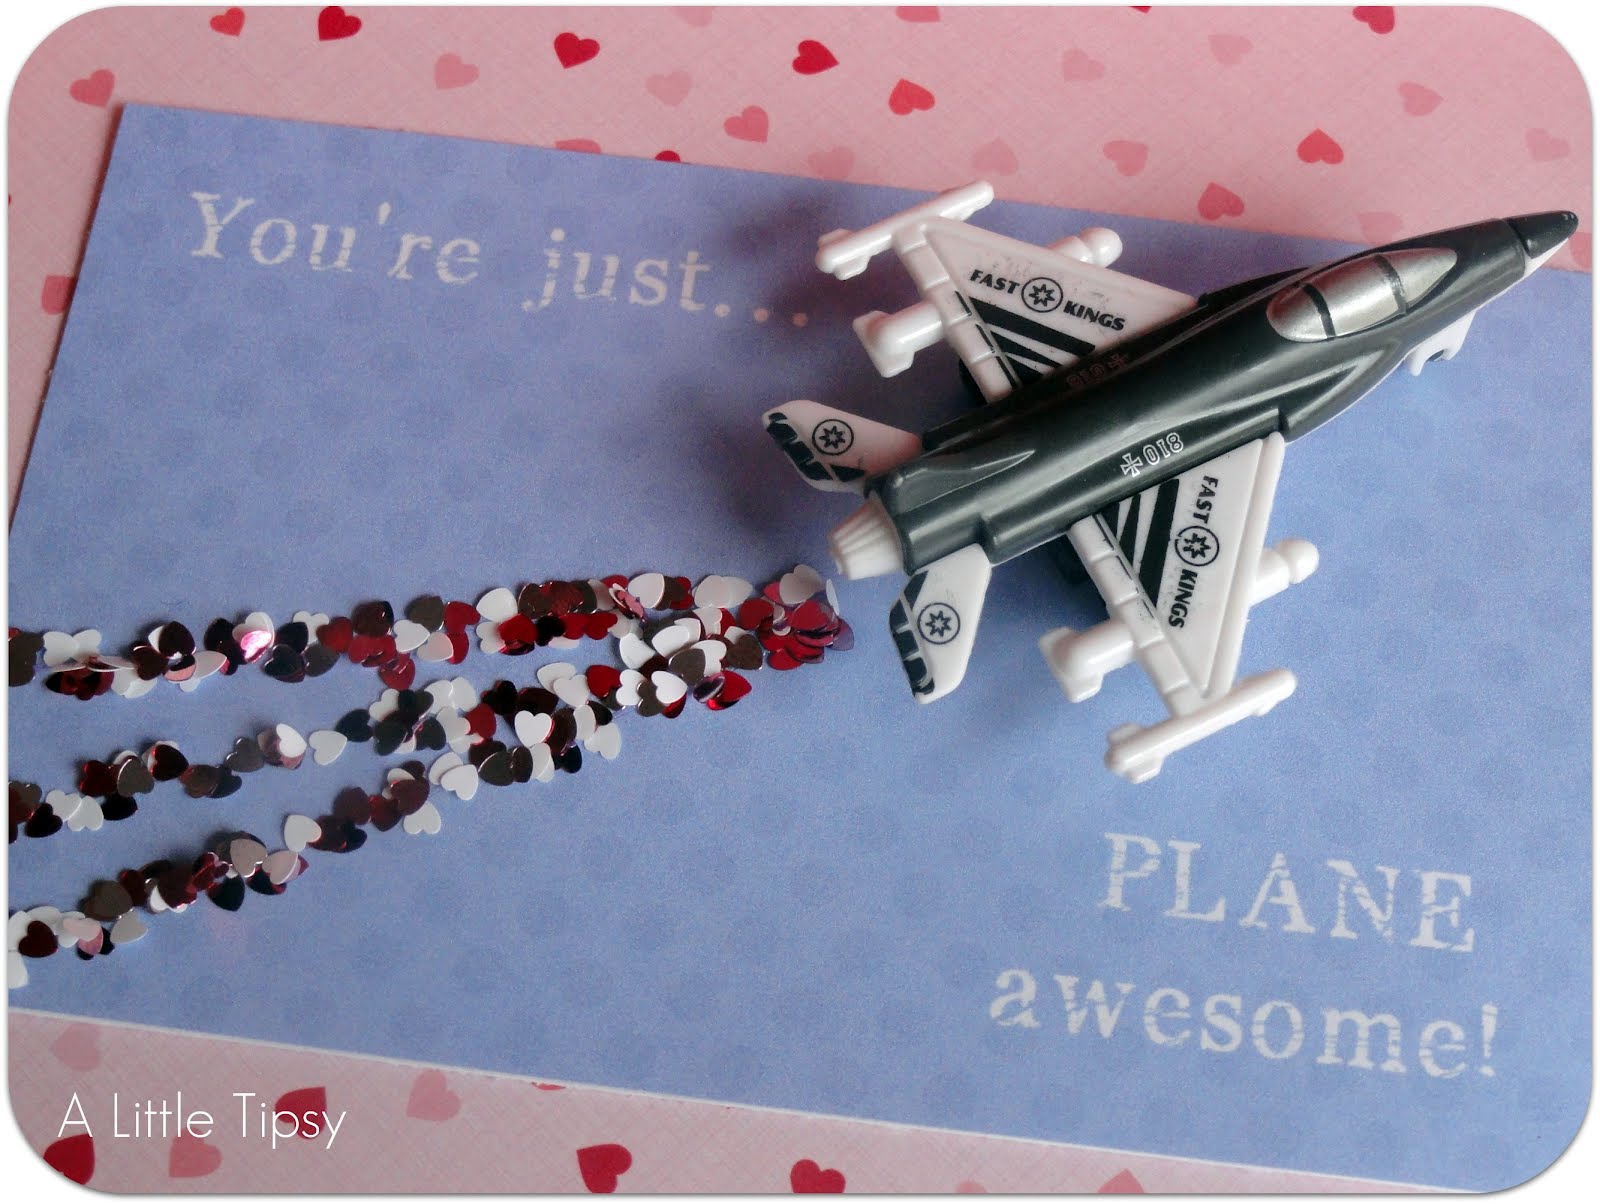
Valentine’s Day Valentines: You’re just PLANE awesome!
We pretty much love them and they were so easy!
Plane awesome supplies:
  • Toy airplanes
  • Mini Glue dots
  • Color printer
  • White cardstock
  • Paper cutter
  • Glue (I used what came with the glitter)
  • Martha Stewart heart shaped glitter
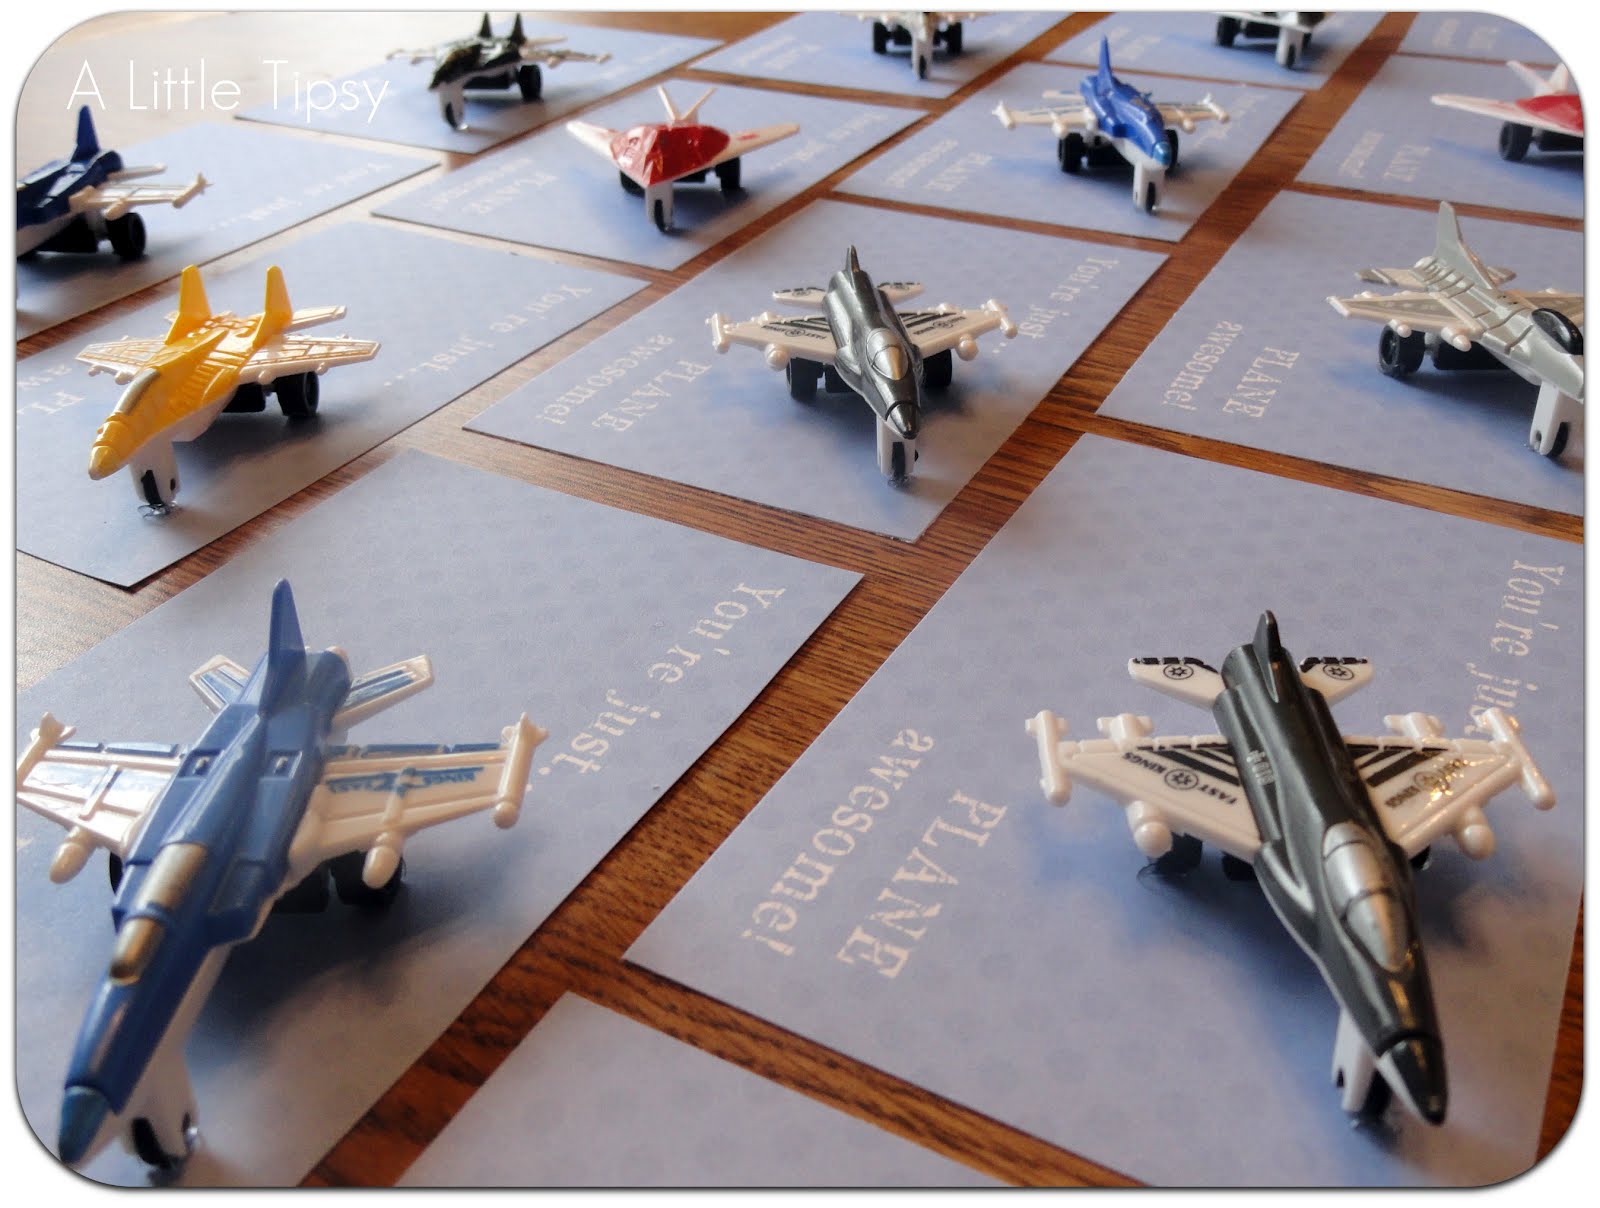
We printed four of the following image to a page on white cardstock. That is what worked best with our size planes.

Cut out your cards and glue dot the wheels of the planes to the cards.

Draw three contrails (aka the white trails planes leave) from the back of the plane using your glue. Mix multiple colors of glitter hearts in a bowl. Pour the glitter on the glue and shake the excess glitter hearts back in to the bowl. Let the glue dry.

Voila! You have created a cool kid’s Valentine’s Day valentine that is just plane awesome and may I mention allergy safe! My sons class has gluten, nut and red dye allergies this year. Find a valentine treat that avoids all that, I dare you! Or do the easy road like me and just do a toy instead.

My son is happy to have a cool valentine and I’m happy it was extremely affordable and easy!
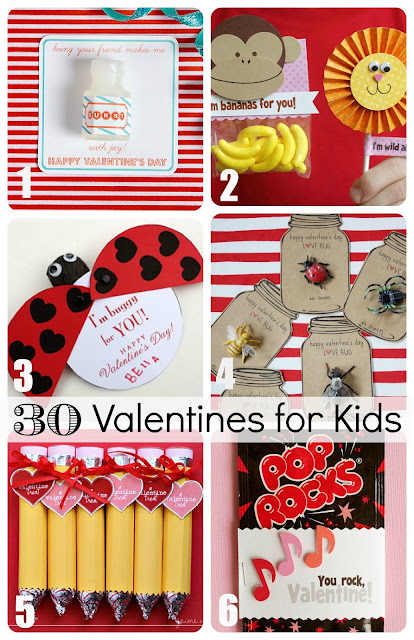
For more fabulous valentine ideas be sure to check out our 30 Valentines for Kids round up! There’s something for every kind of kid.

P.S. Don’t forget to sign up for free Tipsy updates via RSS or email.

The Super Hero Squad Invite

December 8, 2011 By Michelle Barneck 1 Comment

At our house it is all about the boys, so amid the collection of transformers and tools strewn about it was no surprise that my four year old asked for a super hero party. Honestly, I could not have been happier with his choice. There are so many fun avenues to explore with this theme.
We’ll be sharing a whole series of posts on how to throw your own super hero squad party so stay tuned for all the how-to details on decor, activities, food and more. For now, let’s talk invites!

Invites
The invitation really sets the tone for the party. It not only explains the details for the upcoming event, it is the guests first introduction to the theme. Trust me on this one and go with paper invites rather than online. It is more personal and your attendance will double. The only kids that did not show up this year were the ones with email or phone invites. Crazy!
We went with a vintage superman comic feel for our invite, keeping the design simple, but fun. I printed them on 4×6 photo cards. The invites were designed by the fabulous Key Lime Digital Designs and Kendra made a blank template of the invite just for you to download FREE!
DOWNLOAD INVITE TEMPLATE
So, invite the super hero squad over and check in later for more posts on all the details for decor, activities, food, party favors and more for your own super hero squad party!! A new post in the series will go live every few hours today!

P.S. Don’t forget to sign up for free Tipsy updates via RSS or email.

We have decided to truncate our feed to help protect against stolen content. I apologize for any inconvenience. Please love us anyway. šŸ™‚

Feature Friday {Gwenny Penny}

June 3, 2011 By Michelle Barneck 3 Comments

Hey, everybody! I’m so happy to be blog swapping with Michelle today. I’m Gwen, and I blog over at Gwenny Penny. I’m an engineer turned middle-school math teacher turned full-time mom of two little girls, and I blog in order to make sure that I carve out some creative time just for me each week.

I love sewing, crafting, and just about everything creative (even a little woodworking).

I’d love to introduce you to a few of my favorite projects…

I’m guilty of feeding my 16-month-old daughter her finger food right on the table at restaurants. Gross? Yes… have you seen them wipe down the tables before?! I decided to make a place mat that I could easily tuck in my bag to bring with us when we go out to a restaurant. Thus, the Out to Eat Place Mat was born. It even holds a set of toddler-sized flatware.

I created the Dot, Dot, Dot Pillow for Valentine’s Day, but it could be done in any color combination. A red and green would look great for Christmas, or an orange and black for Halloween.

And since I work with Michelle on the Point of View creative collaboration project, you may have seen some of these projects, too…

Spring Embroidery Hoop * The May Day Skirt * Summer Pinwheel Pillow

I also occasionally make and share some fun printables like these…

Autumn Recipe Cards/Labels * Halloween Paper Dolls * Winter Recipe Cards/Labels

If you like what you see, I hope you’ll come visit soon over at Gwenny Penny. I would love to have you. Thanks so much for swapping with me today, Michelle!

———————————————————–

Thanks for stopping in Gwen. Such great ideas! I love all the possibilities with the pillow and those printables are so fun!

P.S. Don’t forget to sign up for free Tipsy updates via RSS or email.

We have decided to truncate our feed to help protect against stolen content. I apologize for any inconvenience. Please love us anyway. šŸ™‚

DIY Under $5: Easter Printables

March 30, 2011 By Michelle Barneck 33 Comments

I wanted something meaningful for my Easter display this year to remind us what that Easter is more than bunnies and baskets full of treats. I made this printable with the words to “I Know That My Redeemer Lives” a hymn written by Samuel Medley.

The best thing about printables is they are free! I made mine in dark purple as a part of a display I will be debuting soon, but I wanted to get this out there if you would like to use it! I printed mine to fit an 8×10 frame. Click the pic to go to photobucket to download.

Photobucket


Click the thumbnails above to print in
Black, Green, or Lavender.

So now it’s time to link up!

Please remember:

  • Only link to your own projects that cost you $5 or less (price does not have to include items you had on hand)
  • You can link past projects that fit the dollar limit
  • Please link back so others can join the party

DIY under $5

P.S. Don’t forget to sign up for free Tipsy updates via RSS or email.

We have decided to truncate our feed to help protect against stolen content. I apologize for any inconvenience. Please love us anyway. šŸ™‚
« Previous Page
Next Page »

  • Bloglovin
  • Facebook
  • Google+
  • Instagram
  • Pinterest
  • RSS
  • Twitter

Hi there! I'm Michelle. Mother of three little boys and one little princess. Welcome to A Little Tipsy, a place for exploring creativity and sharing inspiration.

Follow on Bloglovin


Visit Michelle Barneck {A Little Tipsy}'s profile on Pinterest.

Tutorials by Category


15 Family Reunion Games

Family Reunion Games Collage

15 Sprinkle Party Ideas

Sprinkle Birthday Party
Creative Commons License

© Copyright 2014 A Little Tipsy · Site Designed by The Fairy Blogmother · Web Hosting by RFE Hosting

This website uses cookies to improve your experience. We'll assume you're ok with this, but you can opt-out if you wish.Accept Read More
Privacy & Cookies Policy