A Little Tipsy

Creative Tips & Ideas

  • home
  • About Me
  • the tipsy top
  • press
  • projects
  • contact me
[print_thumbnail_slider]

DIY Under $5 Bracelet Instructions & a Hair Bow

May 18, 2011 By Michelle Barneck 6 Comments

Today for DIY under $5 I will share with you some bracelet instructions and a hair bow. These little ruffly numbers are super easy and will add some style in a flash.

Bracelet instructions:

Supplies:
  • ruffle trim
  • snaps
  • needle and thread
  • button
I got the idea of using trim for bracelets from Blue Cricket Design. I loved her bracelets, but I saw the snaps in the same section as the trim and knew they would work for my ruffle bracelet. So, I saved myself a trip to the jewelry area and went with snaps.

1. Cut trim to be just bigger than your wrist. {hot glue ends under if needed for finished look}
2. Sew snaps in place on each end with needle and thread.
3. Sew on a button for a little added flair.

Use the extra bit of trim for a hair bow.
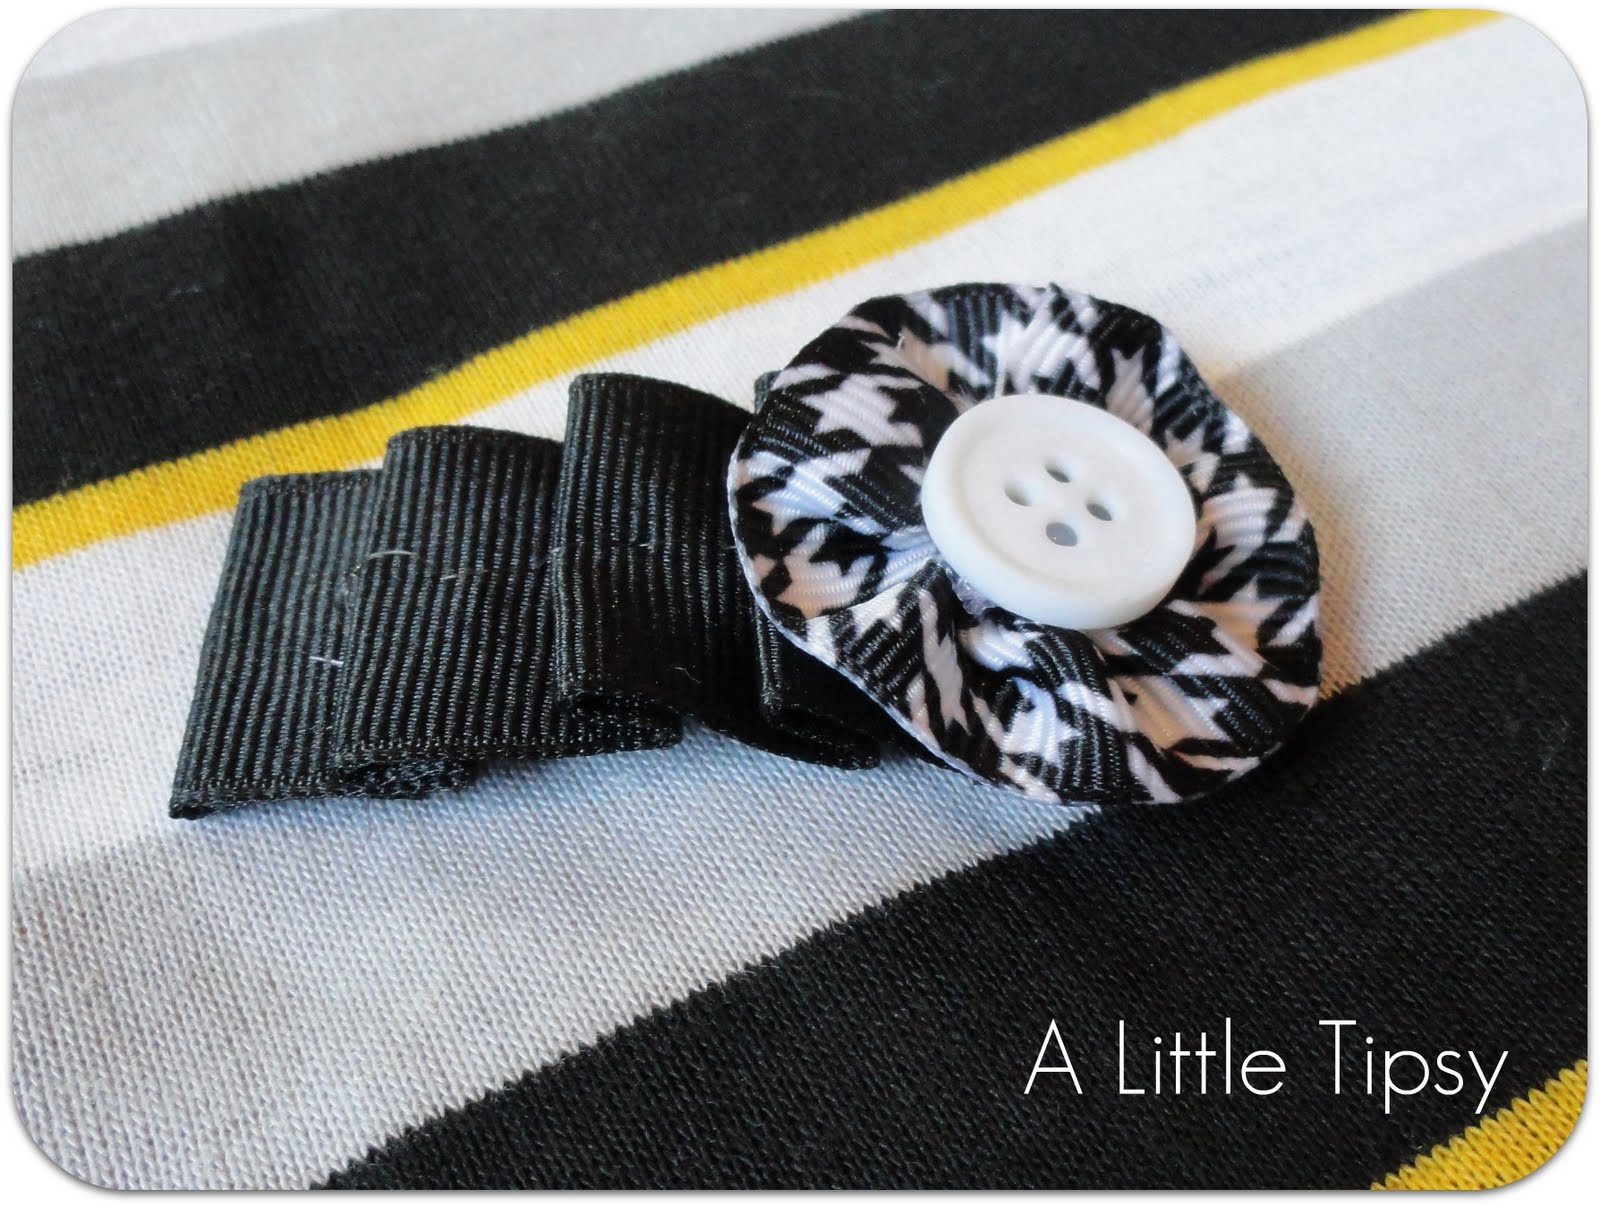
Supplies:
  • ruffle trim
  • houndstooth ribbon
  • snap clip (pack of like 10 at the dollar store)
  • hot glue
  • needle & thread
  • button

1. Glue a piece of trim to cover the entire snap clip.
2. Make a yo yo flower with your ribbon (you can follow steps 1-4 here, the glue will take care of the rest)
3. Glue the flower on the end of the trim and the button on the middle of the flower.


Don’t worry, that huge weird thing next to my cheek is a knot in the wood door.

I spent less than $4, but will have stuff left for another project. Trim was about 50 cents, snaps a dollar or two and ribbon $1.

Now it’s time to link up your $5 projects!

Please remember:

  • Only link to your own projects that cost you $5 or less (price does not have to include items you had on hand)
  • You can link past projects that fit the dollar limit, but please only link each project once
  • Please link back so others can join the party and so you have the opportunity to be featured on Saturday!

DIY under $5


P.S. Don’t forget to sign up for free Tipsy updates via RSS or email.

We have decided to truncate our feed to help protect against stolen content. I apologize for any inconvenience. Please love us anyway. 🙂

DIY Under $5 Features

May 14, 2011 By Michelle Barneck 4 Comments

Another great week of link ups! Keep em comin’! I love seeing all your projects! Here are a few that stood out this week:

Link with the highest clicks:

Gee, I wonder why. 😉 Great minds think alike! I had not seen Mandy from Sugar Bee’s version of the memo board window, but I love it!

My faves:

I love this Jar Soap Dispenser from Decor-ganize Crafts! And who knew it was so easy?! I want to make one for my kitchen. Oh and I love her blog name too! So clever!

This Williams Sonoma Inspired Tile Shell Art by c.w.frosting has me swooning! I can’t get over the shells with the blue and white stripes. Makes me want to head to the beach. (I guess the girls craft weekend at Bear Lake I am currently enjoying is the next best thing. Thanks Jen & Robin for the invite!) I might have to do this in the boys bathroom!

And these flowering branches from Organize and Decorate everything are lovely! Gotta love faux nature. 😉

I can’t wait to see more from all of you!

Be sure to grab your A Little Tipsy featured button here.

P.S. Don’t forget to sign up for free Tipsy updates via RSS or email.

We have decided to truncate our feed to help protect against stolen content. I apologize for any inconvenience. Please love us anyway. 🙂

DIY Under $5: Task Board

May 11, 2011 By Michelle Barneck 10 Comments

Old Window + Personal Kanban = Task Board

If you’re like me you always have a million projects in the works. I have become the queen of multi-tasking which leaves me at the end of the day with a whole bunch of things worked on, but not much to show for it. I decided I need a new system. Something to whittle down the tasks so that even if it is only a few, at the end of the day there are tasks done and off the list.

Kanban definition in a nutshell: task management made visual and simple, limiting work in progress

Task Board

Supplies needed:

  • Old window {donated by the fabulous Stacy of Not Just a Housewife}
  • Electric handheld sander and/or Sanding sponge
  • Heirloom white spray paint
  • Clear contact paper
  • Letter decals
  • Post-its
  • Pen

Total cost: FREE I had everything on hand. Though I will be buying some hanging supplies to attach it to the wall.

1. Take an old window and give her a nice sanding. I used our hand held electric sander and then went over it by hand with a sanding sponge. I didn’t get all the areas all the way down to the wood because I liked the texture and chippiness.


Before………………………………………………………….After

2. Then, I cut clear contact paper the size of the glass and adhered it to keep the paint off the glass.

3. Spray paint. I only needed one good coat. I use Rustoleum 2x paint so you may need more with another brand.

4. Rough up the edges using the sanding sponge.

5. Add the decals to label your different areas. I did four: list, prep, doing, and done because that is the Personal Kanban system. Plus, it helped that my window had four panes. 🙂


Can you see the perfect little nook for my pen there at the bottom? The little hook holds it in place.

6. Fill with a sticky note for each task in your list. You could also do dry erase markers. Kanban likes you to use something physical that you move along the system so you can actually see and track the tasks getting done.

Now it’s time to link up your $5 projects!

Please remember:

  • Only link to your own projects that cost you $5 or less (price does not have to include items you had on hand)
  • You can link past projects that fit the dollar limit
  • Please link back so others can join the party and so you have the opportunity to be featured on Saturday!

DIY under $5


P.S. Don’t forget to sign up for free Tipsy updates via RSS or email.

We have decided to truncate our feed to help protect against stolen content. I apologize for any inconvenience. Please love us anyway. 🙂

DIY Under $5 Features

May 7, 2011 By Michelle Barneck 3 Comments

Thanks so much to all those who participated in the DIY under $5 linky this week! I have so much fun looking through all your projects! Here are the features for this week.

Link with Highest clicks:

Edible Crayons from Stampin’ and Craftin’

My faves:

I love from Nothing But Country’s Princess and the frog party theme!

I am totally digging this light bulb vase from A Law Student’s Journey

This faux milk glass from C.W. frosting is awesome!

I can’t wait to see more from all of you!

Be sure to grab your A Little Tipsy featured button here.

P.S. Don’t forget to sign up for free Tipsy updates via RSS or email.

We have decided to truncate our feed to help protect against stolen content. I apologize for any inconvenience. Please love us anyway. 🙂
« Previous Page
Next Page »

  • Bloglovin
  • Facebook
  • Google+
  • Instagram
  • Pinterest
  • RSS
  • Twitter

Hi there! I'm Michelle. Mother of three little boys and one little princess. Welcome to A Little Tipsy, a place for exploring creativity and sharing inspiration.

Follow on Bloglovin


Visit Michelle Barneck {A Little Tipsy}'s profile on Pinterest.

Tutorials by Category


15 Family Reunion Games

Family Reunion Games Collage

15 Sprinkle Party Ideas

Sprinkle Birthday Party
Creative Commons License

© Copyright 2014 A Little Tipsy · Site Designed by The Fairy Blogmother · Web Hosting by RFE Hosting

This website uses cookies to improve your experience. We'll assume you're ok with this, but you can opt-out if you wish.Accept Read More
Privacy & Cookies Policy