A Little Tipsy

Creative Tips & Ideas

  • home
  • About Me
  • the tipsy top
  • press
  • projects
  • contact me
[print_thumbnail_slider]

Magnetic Paper Dolls

December 10, 2012 By Michelle Barneck 4 Comments

Remember that time when I flew to Arkansas to share a really fun project on KATV for Cricut? Well, I am finally posting the how-to for those super cute paper dolls. They are easy to put together using the Cricut Mini and the possibilities are endless with patterns, colors and textures to mix and match.

Are they not adorable? Did you spot the blogger bear? 🙂
Magnetic Paper Dolls
SUPPLIES:
  • Tin
  • Spray Paint
  • Cricut Mini
  • Teddy Bear Parade or Snow Friends cartridge
  • Cricut Vinyl
  • Cricut Magnet Material
  • Deep Cut Blade
  • Paper
DIRECTIONS:

1. Start off by finding a tin you like. This is a great way to use a thrifted or holiday cookie tin. I love these rectangle game tins you can find for $1 at the thrift store. Give it a couple of coats of spray paint and let dry completely.

2. Now cut your base image out of vinyl and place it slightly below center on the tin.
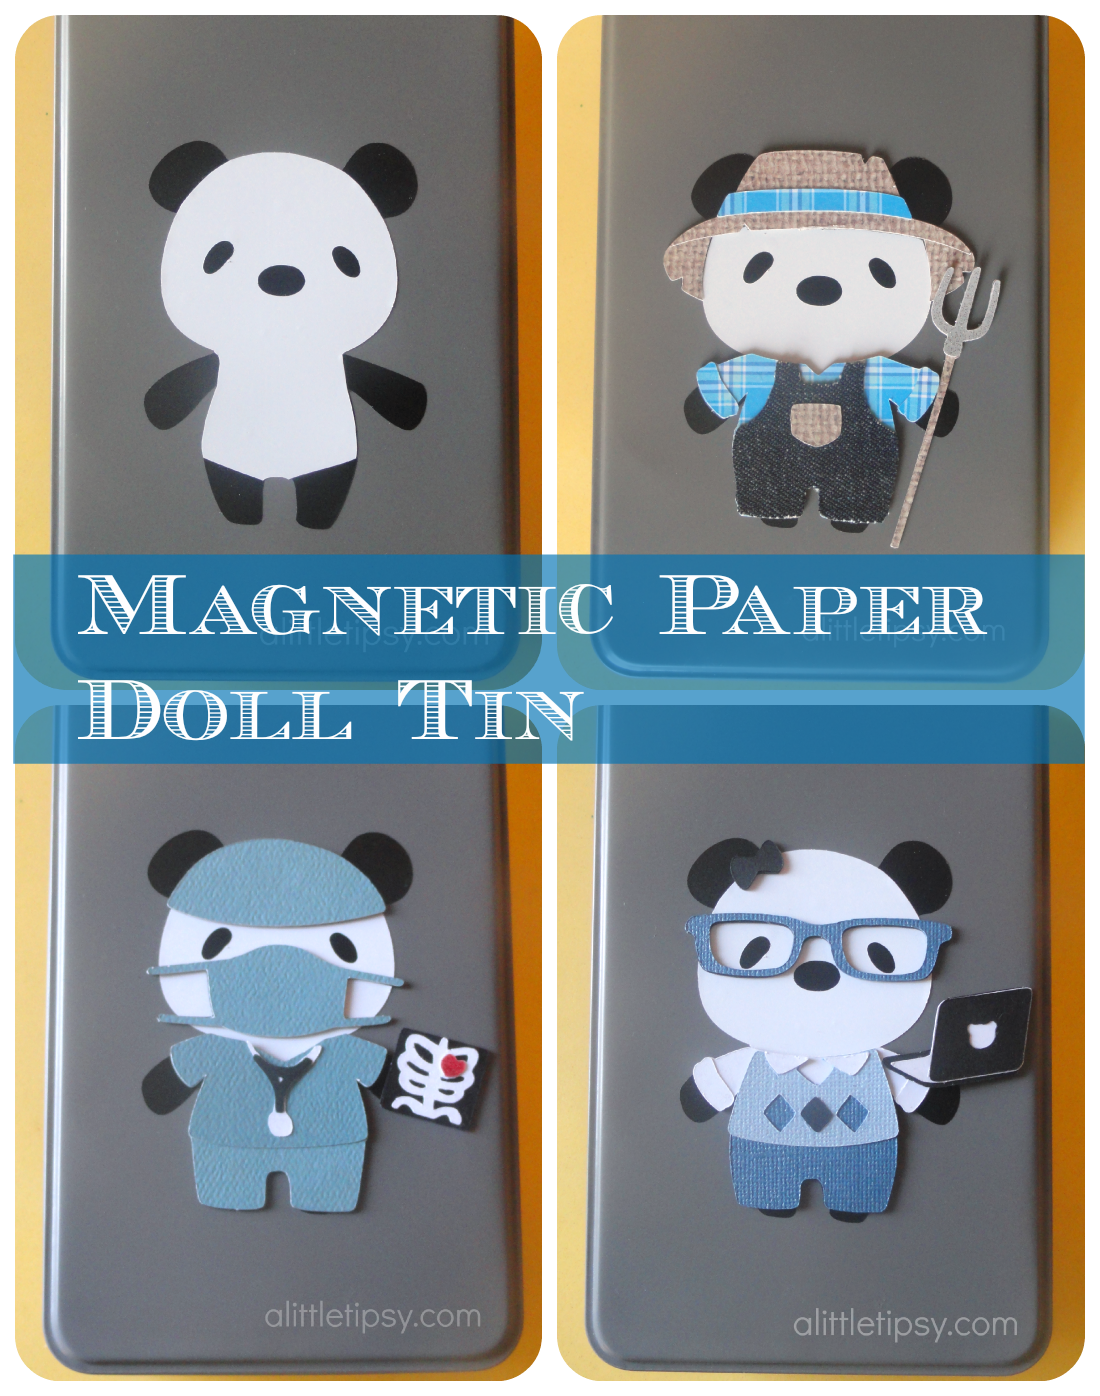
  • Panda Bear – In the free Cricut Craft Room software, drag Teddy Bear Parade Cartridge image TddyBear on to the mat. Click “hide contour” and click all of the lines, except the eyes, within the bear outline. Add an oval for the nose. Cut in white vinyl. Then cut just the bear outline hiding the eyes and nose in black vinyl. Trim the arms, legs and ears from the white bear and layer it on top of the black.
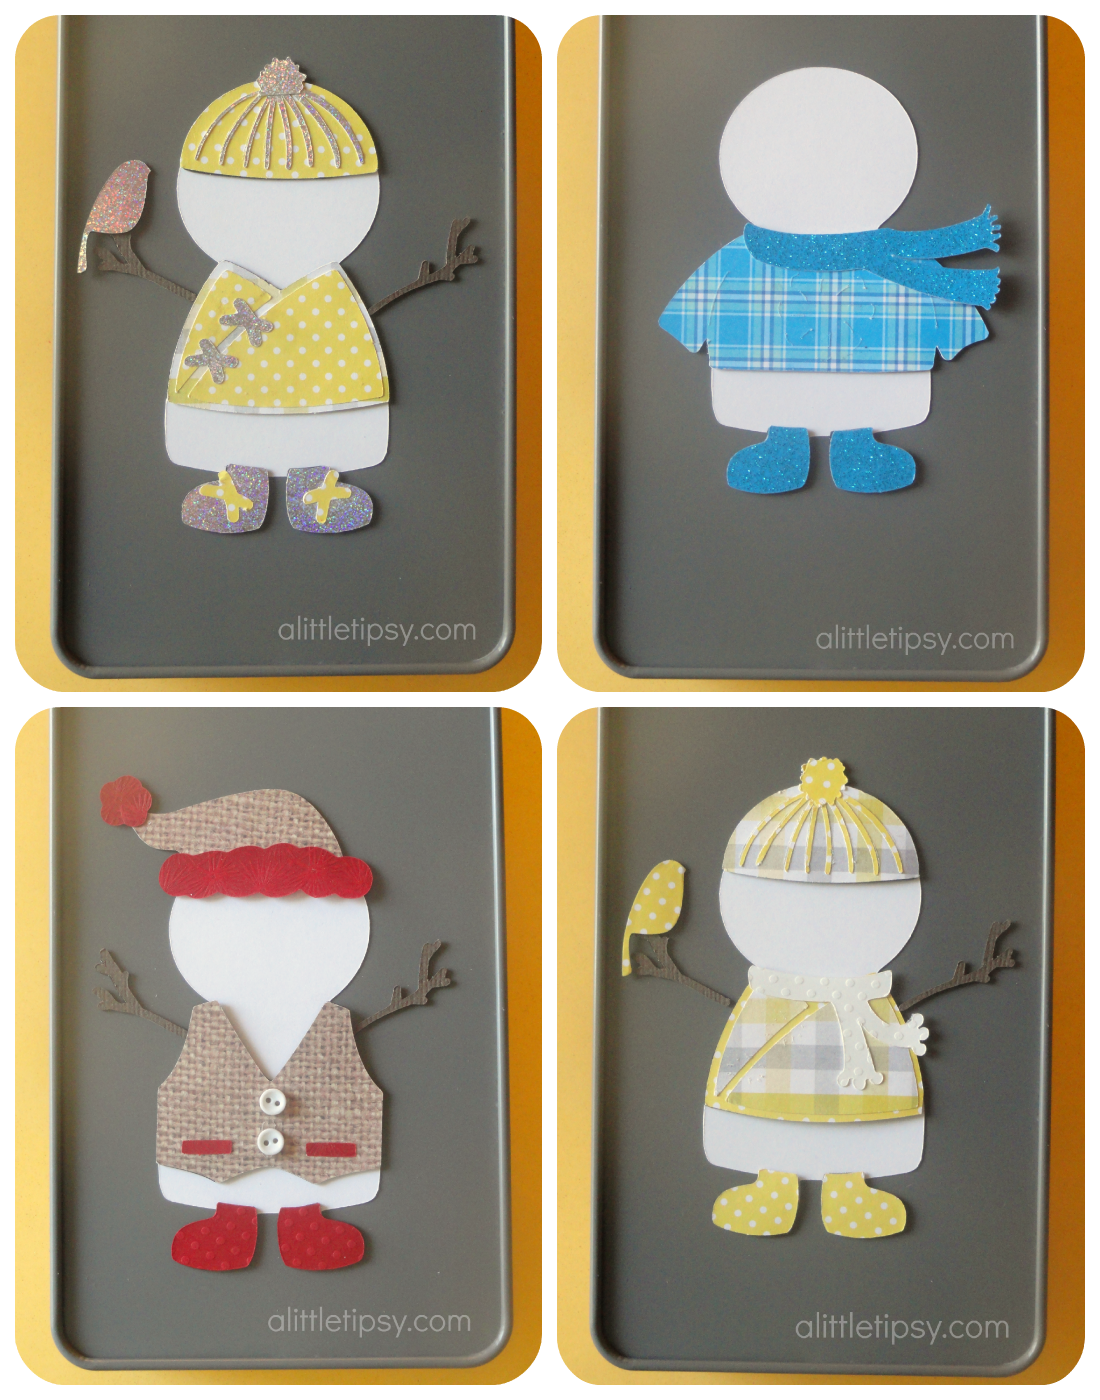
  • Snowman – In the free Cricut Craft Room software, drag Snow Friends Cartridge image Snowman1 on to the mat. Click “hide contour” and click all of the lines within the snowman outline so it will just cut a blank snowman body outline. There are multiple faces to choose from. I added some coal eyes and a carrot nose in vinyl. I added it after the pics, but you can see it in the news clip.

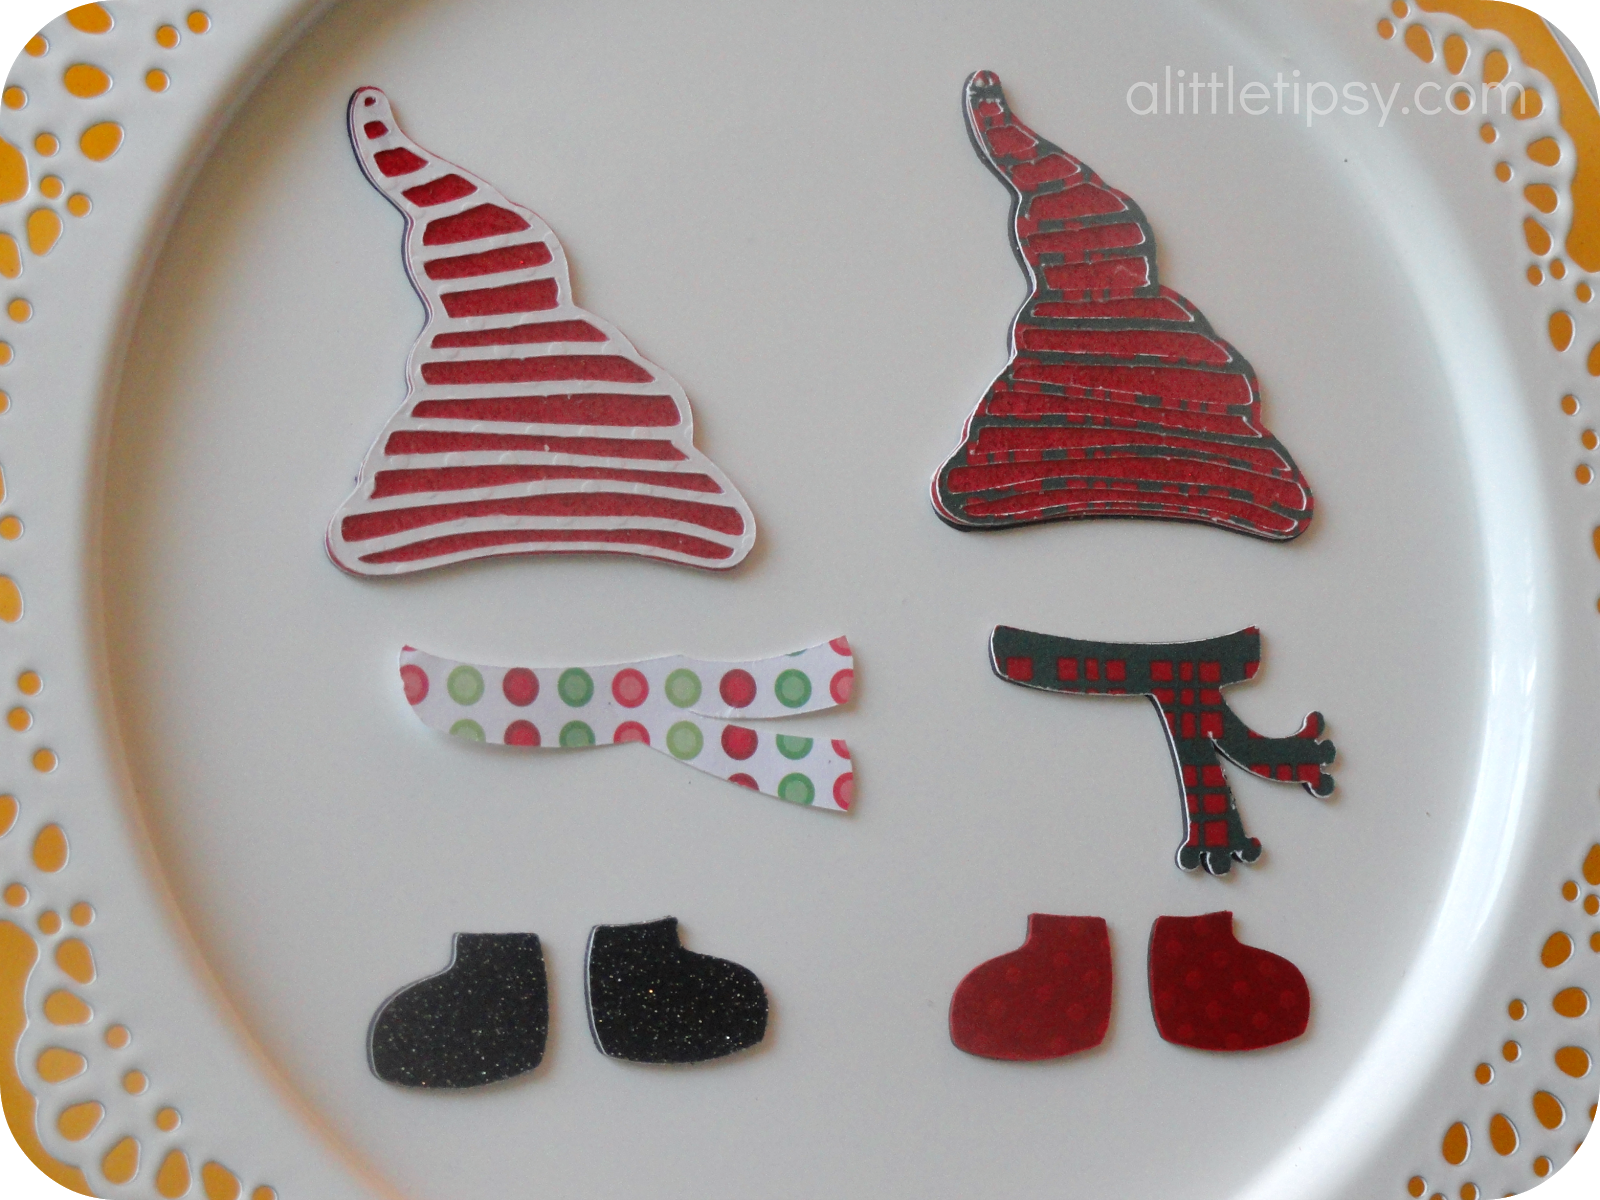
3. Use the coordinating outfits on each cartridge to create outfits for your “paper dolls.” Just keep the default height (at the bottom of the craft room screen by the image selection window) the same as the dolls for all the clothes and they will fit just right.

I loved including papers with different patterns and textures like sparkle and denim (DYK the cricut cuts fabric?). We even made a cute Santa outfit that I didn’t get a picture of, but it is in the news segment.

4. Make them magnetic paper dolls by cutting the most basic layer of each outfit image in the magnet material. I used the deep cut blade with Speed 3, Pressure 5, Depth 6, and 4 cuts which worked beautifully. Then, just peel off the white vinyl backing and use the existing adhesive to stick the clothes to the magnet pieces.
5. Store all the pieces inside the tin for a fun gift or great quiet activity for the kiddos in the car or at church. These two tins are under my tree for two lucky little ones.
What outfit was your favorite? 
If you could choose anything, what outfits would you make for paper dolls?

P.S. Don’t forget to sign up for free Tipsy updates via RSS or email.

We have decided to truncate our feed to help protect against stolen content. I apologize for any inconvenience. Please love us anyway. 🙂
Tweet
PinIt

Filed Under: Gift Ideas, Kid Friendly

Image Map

Comments

  1. Livelovehope Jewels says

    December 11, 2012 at 2:24 am

    Excellent idea! I think children and adults will love that idea!

    Reply

Trackbacks

  1. 50 fantastic road trip activities for kids says:
    May 23, 2014 at 3:02 am

    […] 36. To avoid meltdowns when things drop on the floor out of everyone’s reach, why not make your own magnetic paper doll set? […]

    Reply
  2. Rocket Straws By A Little Tipsy | Skip To My Lou says:
    June 4, 2014 at 6:04 am

    […] more fun boredom busting ideas check out our Magnetic Paper Dolls, Toothbrush Splatter Painting, and Puppet Playhouse with Animal […]

    Reply
  3. Collegiate Blog says:
    March 14, 2017 at 7:21 pm

    Disney Magnetic Paper Dolls Snow

    […] . Then, just peel off the white vinyl backing and use the existing adhesive to s […]

    Reply

Leave a Reply Cancel reply

Your email address will not be published. Required fields are marked *

This site uses Akismet to reduce spam. Learn how your comment data is processed.

  • Bloglovin
  • Facebook
  • Google+
  • Instagram
  • Pinterest
  • RSS
  • Twitter

Hi there! I'm Michelle. Mother of three little boys and one little princess. Welcome to A Little Tipsy, a place for exploring creativity and sharing inspiration.

Follow on Bloglovin


Visit Michelle Barneck {A Little Tipsy}'s profile on Pinterest.

Tutorials by Category


15 Family Reunion Games

Family Reunion Games Collage

15 Sprinkle Party Ideas

Sprinkle Birthday Party
Creative Commons License

© Copyright 2014 A Little Tipsy · Site Designed by The Fairy Blogmother · Web Hosting by RFE Hosting

This website uses cookies to improve your experience. We'll assume you're ok with this, but you can opt-out if you wish.Accept Read More
Privacy & Cookies Policy