A Little Tipsy

Creative Tips & Ideas

  • home
  • About Me
  • the tipsy top
  • press
  • projects
  • contact me
[print_thumbnail_slider]

Archives for July 2011

DIY Under $5

July 20, 2011 By Michelle Barneck 11 Comments

Instead of sharing a project I did this week, I will be sharing the features from last week. Our recent family tragedy has reinforced to us the importance of time with and taking care of family so I may not have a lot of new projects to share for a little bit, but that doesn’t mean I don’t want to see yours!

Link with the most clicks:

Washer Necklace Tutorial from Creations by Kara

My faves:

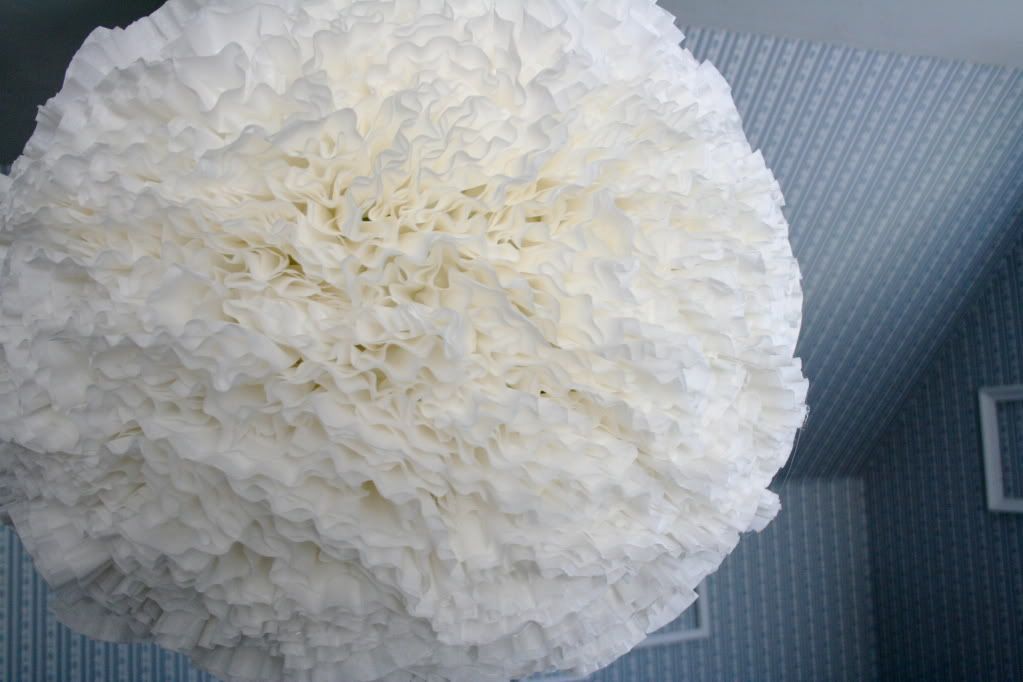
Coffee filter lamp from A Law Student’s Journey

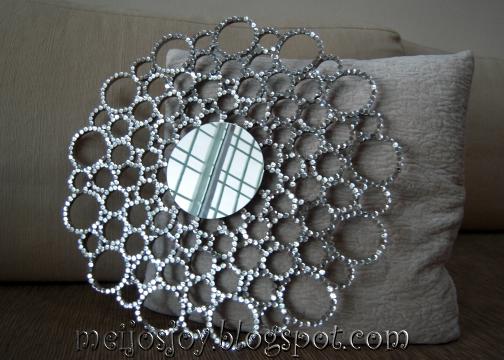
Sunburst Mirror from Meijo’s Joy

Summery Flower Arrangement from The V Spot

roses, limes, floral arrangement, wedding, centerpiece

Anyone else notice that my features are nearly completely devoid of color? It is a sickness my attraction to neutrals. Now on to the party!!

Now it’s time to link up your $5 projects!

Please remember:

  • Only link to your own projects that cost you $5 or less (price does not have to include items you had on hand)
  • You can link past projects that fit the dollar limit, but please only link each project one time to one DIY Under $5 party. Do not link the same project week after week.
  • No linking giveaways or items for sale
  • Please link back so others can join the party and so you have the opportunity to be featured on Saturday!

DIY under $5

P.S. Don’t forget to sign up for free Tipsy updates via RSS or email.

We have decided to truncate our feed to help protect against stolen content. I apologize for any inconvenience. Please love us anyway. 🙂

Online Support

July 19, 2011 By Michelle Barneck 24 Comments

Thank you to Yahoo! Mail for sponsoring this post about staying connected. I was selected for this sponsorship by the Clever Girls Collective, which endorses Blog With Integrity, as I do.

As many of you may know, the last week or so has been a difficult time for our family. My husband’s 15 year old sister, one of a set of twins, was killed in a tragic accident involving a clogged culvert that caused the road to give way and create a 40 foot hole. She and my Father-in-law had taken the same road just 30 minutes earlier to take a friend home and could not see the hole in the dark of night. By some miracle, their SUV made it over the hole and hit the grill of the car on the other side with enough force to push them up on to the road. We are so blessed and grateful that my Father-in law survived and is doing well.

Our family has been truly touched by the overwhelming response to our loss. Not only have people shown support through visits, calls and bringing food, but we have all received so much support online. Email boxes are filled with people showing their support and love for our family and our beautiful sister. The pain is real, but becomes more bearable each day as we feel the concern and special thoughts of our family and friends near and far.

[July08+211.jpg]

{ twins visiting us in 2008}

It has been such a great thing for our surviving twin sister to be able to hop online to find endless messages from all those who love her and want her to know they are there for her. I am so thankful for the technology we have today who help us connect with those across the country who cannot be here, but can be here for us.

Things may be sparse around here while we spend quality time with our family, but I will be back. Thank you to everyone for the love and prayers. It means the world to us.

P.S. Don’t forget to sign up for free Tipsy updates via RSS or email.

We have decided to truncate our feed to help protect against stolen content. I apologize for any inconvenience. Please love us anyway. 🙂

Make a Memory {Homemade Ice Cream}

July 18, 2011 By Michelle Barneck 1 Comment

Here we are, week 7 of the Make a Memory series. Each Monday now through the end of August I will feature a special family tradition from one of my favorite bloggers. It is so important to create lasting memories with our families and this will be a fun way to get ideas for fun traditions we can start with our own families. So let’s dive right in and see how Mandy from Sugar Bee and her family make a memory!

Hi everyone!! So excited to be here on A Little Tipsy!! I’m Mandy, from over at Sugar Bee Crafts:

Here’s the whole gang on our recent vacation:

I enjoy all things crafty and have lots of DIY and tutorials on my blog. I even have a link party on Tuesdays so I can see your craftiness – then I show off a bunch of you on Wednesdays. You might know me from a few of my fabulously popular posts (click picture to check them out!):

You can see more projects in my new Tutorials Page, so check that out as well.

Don’t you just LOVE the Make a Memory Series – – such a great idea!!

Today I’m going to talk about a great tradition that I married into – – my husband’s family is always making homemade ice cream – yum!! So this year when we visited his family on our vacation, I was sure to pay attention – –

First off, their ice cream is always so smooth and creamy – – some homemade ice cream is kind of crunchy, but not this. Turns out you need a good thickening agent, and there are 3 choices (I hadn’t heard of using any of these – where have I been?!?!)

—Eggs – you know, frozen custard has eggs in it. So can homemade ice cream. It’s best to use eggs when making something like chocolate ice cream, since you have to melt the chocolate on the stove, that way the eggs get heated.

—Jello – – you know, jello thickens up itself, so it will thicken up ice cream. This is best for fruit-flavored ice cream. For example, they made raspberry ice cream with real raspberries and raspberry jello as the thickener.

–Junket – I had never even heard of this stuff, but it’s made specifically for making ice cream:

There are tons of homemade ice cream recipes out there, and they love trying lots of different varieties. Once it’s made, you pour it into the machine’s cylinder thing:

Put the top on, surround the cylinder in ice, and let it go! Then voila, ice cream – takes about 40 minutes – –

The kids all LOVE making ice cream at home – – and all the adults remember growing up eating homemade ice cream, so it’s for sure memories in the making….

What is is about food that makes for such great memories?!?

I should have taken lots of pictures of everyone enjoying the ice cream – but let’s face it, I was busy eating my own delicious portion – -but here’s a few I happened to capture:

Enjoy making your own summer memories!! – Hope to see you over at www.SugarBeeCrafts.com!

————————————————————————————–

Mandy is so right! Many of my memories are tied to great family recipes: fondue, Rocky Road Brownies, Pierre Armondd Crepes. I had no idea you needed a thickening agent, but that totally makes sense. Our ice cream is delicious, but always a little runny. No more! Thanks Mandy for another great way to make a memory!

P.S. Don’t forget to sign up for free Tipsy updates via RSS or email.

We have decided to truncate our feed to help protect against stolen content. I apologize for any inconvenience. Please love us anyway. 🙂

DIY Under $5 {Oreo Recipe}

July 13, 2011 By Michelle Barneck 10 Comments

With summer comes BBQs and potlucks, so it is always nice to have an easy recipe that is always a crowd pleaser. I have always loved homemade oreos and they can be ready to go in a snap. Add a few sprinkles really takes them up a notch.

Oreo Recipe

Devil’s food cake mix
2 eggs
1 stick of butter softened
Your favorite white frosting
Sprinkles

Mix ingredients together and roll in to one inch balls. Bake at 350 degrees for 10 minutes. Cool on rack. Place a generous amount of frosting between two cookies. Put sprinkles in a bowl and roll the edge of each cookie in the sprinkles until coated.

I love how the sprinkles add a little extra crunch to the Oreos.

Total cost: about $4


Now it’s time to link up your $5 projects!

Please remember:

  • Only link to your own projects that cost you $5 or less (price does not have to include items you had on hand)
  • You can link past projects that fit the dollar limit, but please only link each project one time to one DIY Under $5 party. Do not link the same project week after week.
  • No linking giveaways or items for sale
  • Please link back so others can join the party and so you have the opportunity to be featured on Saturday!

DIY under $5


P.S. Don’t forget to sign up for free Tipsy updates via RSS or email.

We have decided to truncate our feed to help protect against stolen content. I apologize for any inconvenience. Please love us anyway. 🙂
« Previous Page
Next Page »

  • Bloglovin
  • Facebook
  • Google+
  • Instagram
  • Pinterest
  • RSS
  • Twitter

Hi there! I'm Michelle. Mother of three little boys and one little princess. Welcome to A Little Tipsy, a place for exploring creativity and sharing inspiration.

Follow on Bloglovin


Visit Michelle Barneck {A Little Tipsy}'s profile on Pinterest.

Tutorials by Category


15 Family Reunion Games

Family Reunion Games Collage

15 Sprinkle Party Ideas

Sprinkle Birthday Party
Creative Commons License

© Copyright 2014 A Little Tipsy · Site Designed by The Fairy Blogmother · Web Hosting by RFE Hosting

This website uses cookies to improve your experience. We'll assume you're ok with this, but you can opt-out if you wish.Accept Read More
Privacy & Cookies Policy