A Little Tipsy

Creative Tips & Ideas

  • home
  • About Me
  • the tipsy top
  • press
  • projects
  • contact me
[print_thumbnail_slider]

DIY Scarf {Cascading Ruffle Infinity Scarf}

November 9, 2012 By Michelle Barneck 12 Comments

Who doesn’t love a cozy cute scarf?! It can not only keep you warm on chilly days, but it can add that extra oomph to an otherwise blah outfit.
Wanna know the best part about this cascading ruffle infinity scarf? It came from this…
a dollar store t-shirt. And it’s so easy nearly anyone can make it. Literally, I just bought a sewing machine and this was my first project! Trust, it is simple.
So what do you need to make a scarf from a shirt?
SUPPLIES:
  • T-shirt
  • Scissors
  • Pins
  • Coordinating thread
  • Sewing machine
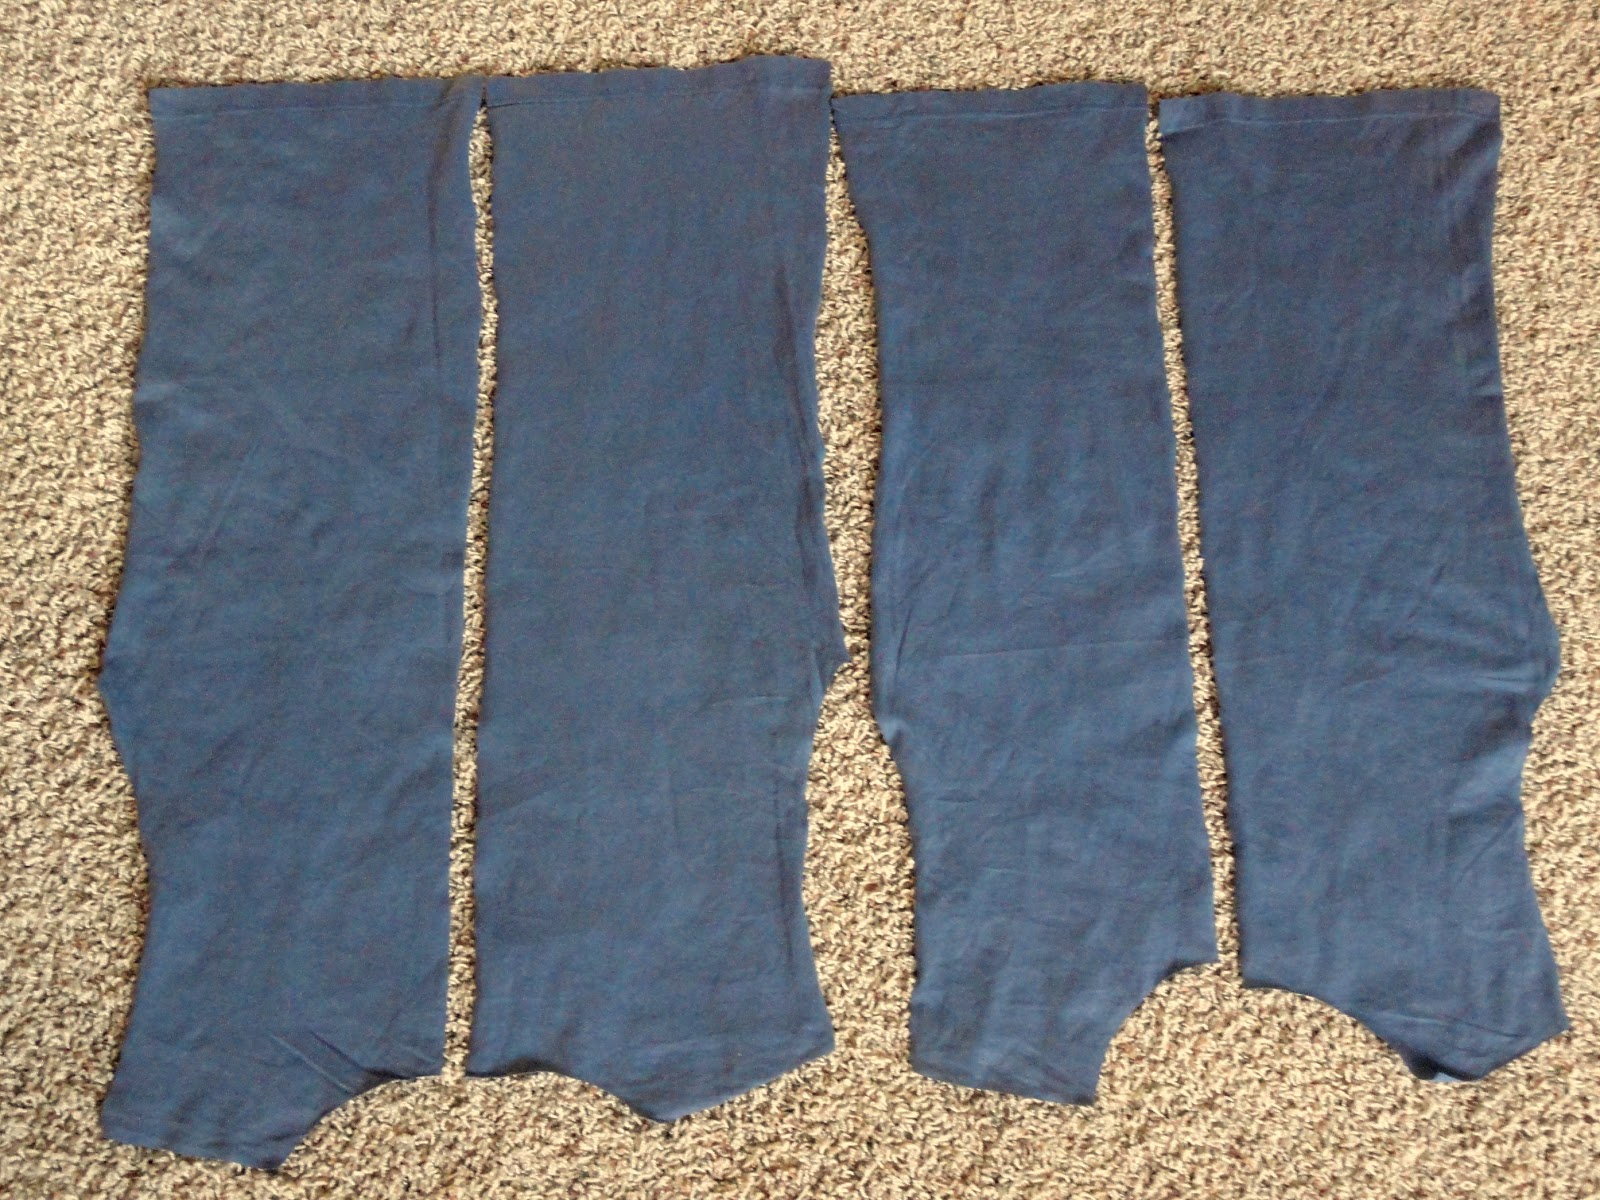
1. Cut the sleeves, collar and side seams off the shirt leaving the bottom hem intact. You’ll have two main pieces. Cut each piece in half down the center.

2. Place the left piece of each shirt half on top of the right piece with the outsides of the shirt facing in. Align the neck and arm holes and cut the neck area to be straight across. Pin the neck area together for each half.

3. Take the two “strips” you’ve created and now pin the bottom hem area together with the inside of the shirt strips facing out. It will now be one big long strip pinned together. 
4. Sew all the strips together where pinned using a straight stitch and backstitch on each end. Trim any excess material on the inside of the seam.

 5. You now have one long strip. You could stop here if you want a long thin super versatile scarf.

Cute, but not exactly what I was looking for. I wanted a chunky scarf with lots of texture.
I was inspired by Amanda’s Scarf and decided I wanted a mix between that and a cashmere infinity  scarf I purchased at a boutique.
Continuing on with the how-to…
6. Sew a long basting stitch down the length of each side in about an inch and a half from the edge. (I used a stitch length of 5 and tension of 4.) This will gather the fabric slightly. Be sure to leave a good amount of thread on each end.

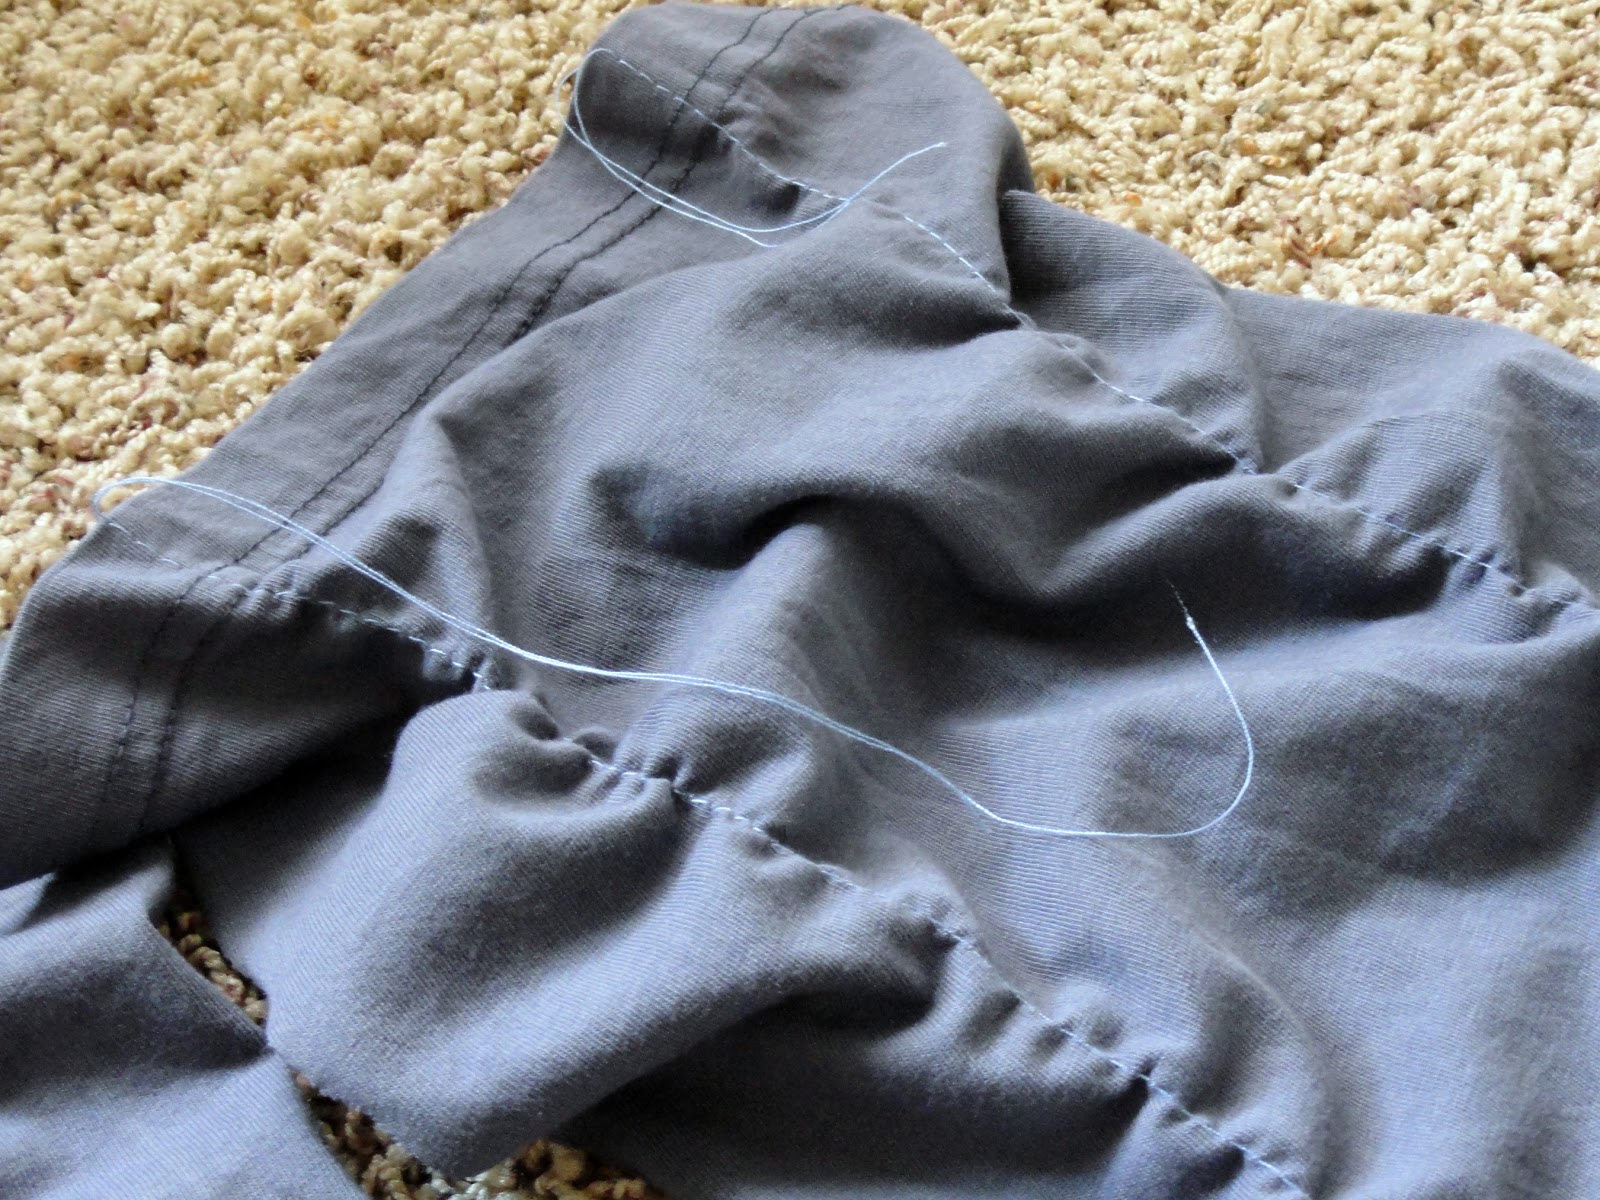
7. Holding the bottom thread carefully pull the top thread while pushing the fabric down to create more gathers and ruffling. Careful not to break the thread. Do this from each end toward the center until you get the desired look. Tie the string in a knot on each end so they won’t come loose during the next step.

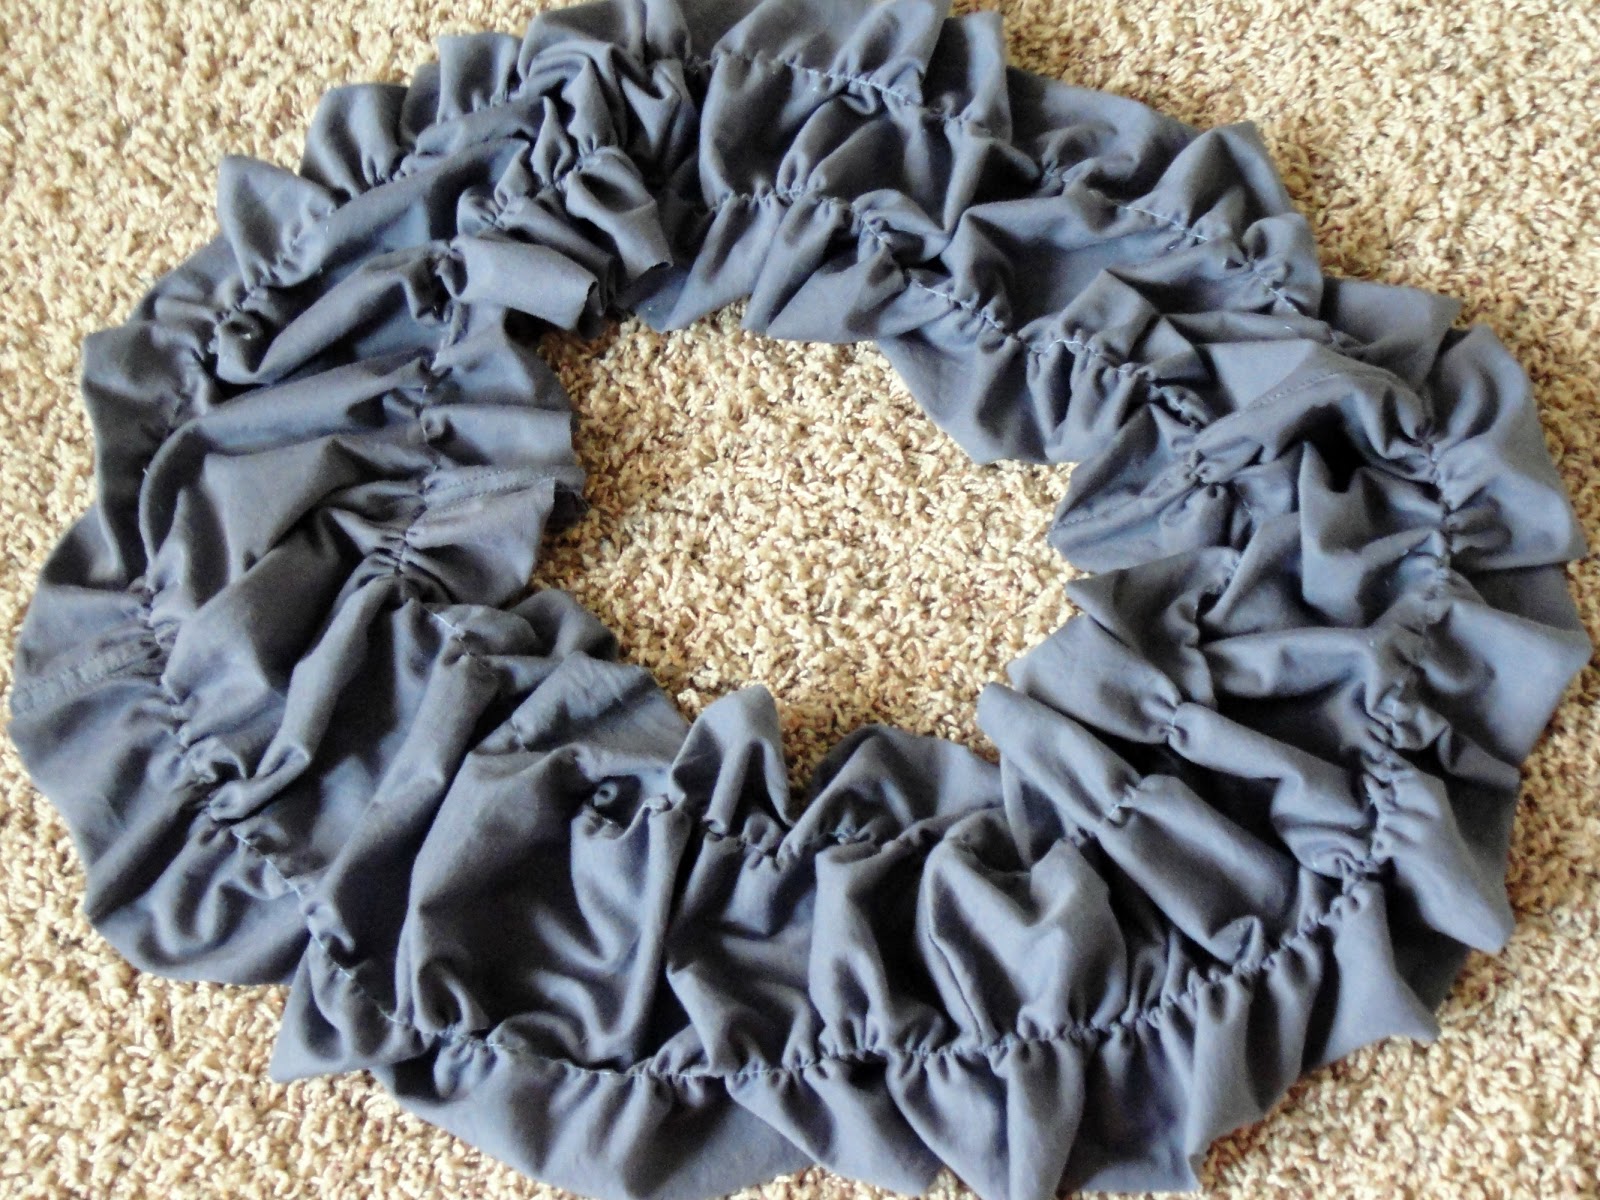
8. Pin the last two ends together and sew with a straight stitch to form the infinity scarf circle.

Put it on and act like it’s a fancy boutique number and enjoy the fact that only you know it cost you $1.


Oh and did I mention that my my scarf is in a Craft Wars type competition over on Buzzfeed? If you like my scarf I would love your vote! 

Linking with:

Thirty Handmade DaysThe Shabby Nest
We have decided to truncate our feed to help protect against stolen content. I apologize for any inconvenience. Please love us anyway. đŸ™‚

Sing Your Way to Sleepytime

October 25, 2012 By Michelle Barneck 2 Comments

Bedtime is one of my favorite times of day. What could be better than cozy jammies, reading together, and sharing songs and snuggles? Like most families we have our routine down. Jammies, snack, brush teeth, potty, drink, 3 books, sing “I Love to see the Temple” and then close it out with “Twinkle Twinkle Little Star” and kisses. It works for us and my littles know just what to expect once 8 o’clock rolls around.

I love so much that my youngest is a snuggler. Those little hugs are seriously the best thing ever! I love singing to him though I am far from a performer. I like that he knows and loves my voice imperfect as it is. He has started to join in and sing with me which totally melts my heart. These are the moments I treasure!

Enter your lullaby video in the Celestial Seasonings® ‘Sing your way to Sleepytime Contest’ for the opportunity to win a $5,000 Pottery Barn® gift card and transform your bedroom into a cozy, sleep-friendly space!

Now that is something we could all use!!

This is a sponsored conversation written by me on behalf of Celestial Seasonings®. The opinions and text are all mine.

We have decided to truncate our feed to help protect against stolen content. I apologize for any inconvenience. Please love us anyway. đŸ™‚

How to Make Bats

October 23, 2012 By Michelle Barneck Leave a Comment

I promised myself I was done with Halloween decor, but a Halloween obsessed preschooler and some free time to spend together convinced me otherwise. We decided to join in on the bat wall craze and it turned out so fun I just had to share.
The best part is that it is playing double duty and staying up for my son’s upcoming Batman birthday party. Nothing like killing two birds with one stone!
How to Make Bats:
Find a bat shape (or a set of three in multiple sizes like me) and cut a bundle out of black cardstock with your craft cutter. Using double sided sticky tape, stick them to the wall alternating shapes and direction and bending the wings out slightly for 3D effect. That’s it!
So easy and free considering we had everything on hand! Love it!

We have decided to truncate our feed to help protect against stolen content. I apologize for any inconvenience. Please love us anyway. đŸ™‚

This is Our Happily Ever After Temple Pictures

October 15, 2012 By Michelle Barneck 1 Comment

I ran across a cute print on etsy stating, “This is our Happily Ever After.” I loved the simplicity, but meaning behind it and decided that by adding temple pictures they could make really cute wedding gifts.

This is Our Happily Ever After Temple Pictures

I love fairy tales with the prince and the princess living happily ever after in their castle. The temple for me is my castle symbolizing forever so it is the perfect addition. 
I just added the saying on the glass of a shadow box in white vinyl and added the picture of the temple the couple was married in to the back of the box. This gives it nice dimension.

Lucky for us Kristyn from Lil’ Luna searched through and found 20 different non-copyrighted temple images and antiqued them so all you have to do is print them out and add them to the frame! She is so awesome right?!
I love the look of the images and the fact that they are black and white means they go with almost any decor scheme the couple may have chosen. The couple can also easily swap out the image for temple pictures from their wedding day.
I’m thinking I need to create one for myself now!

P.S. Don’t forget to sign up for free Tipsy updates via RSS or email.

We have decided to truncate our feed to help protect against stolen content. I apologize for any inconvenience. Please love us anyway. đŸ™‚
« Previous Page
Next Page »

  • Bloglovin
  • Facebook
  • Google+
  • Instagram
  • Pinterest
  • RSS
  • Twitter

Hi there! I'm Michelle. Mother of three little boys and one little princess. Welcome to A Little Tipsy, a place for exploring creativity and sharing inspiration.

Follow on Bloglovin


Visit Michelle Barneck {A Little Tipsy}'s profile on Pinterest.

Tutorials by Category


15 Family Reunion Games

Family Reunion Games Collage

15 Sprinkle Party Ideas

Sprinkle Birthday Party
Creative Commons License

© Copyright 2014 A Little Tipsy · Site Designed by The Fairy Blogmother · Web Hosting by RFE Hosting

This website uses cookies to improve your experience. We'll assume you're ok with this, but you can opt-out if you wish.Accept Read More
Privacy & Cookies Policy