A Little Tipsy

Creative Tips & Ideas

  • home
  • About Me
  • the tipsy top
  • press
  • projects
  • contact me
[print_thumbnail_slider]

Preschool at Home

October 5, 2010 By Michelle Barneck 21 Comments

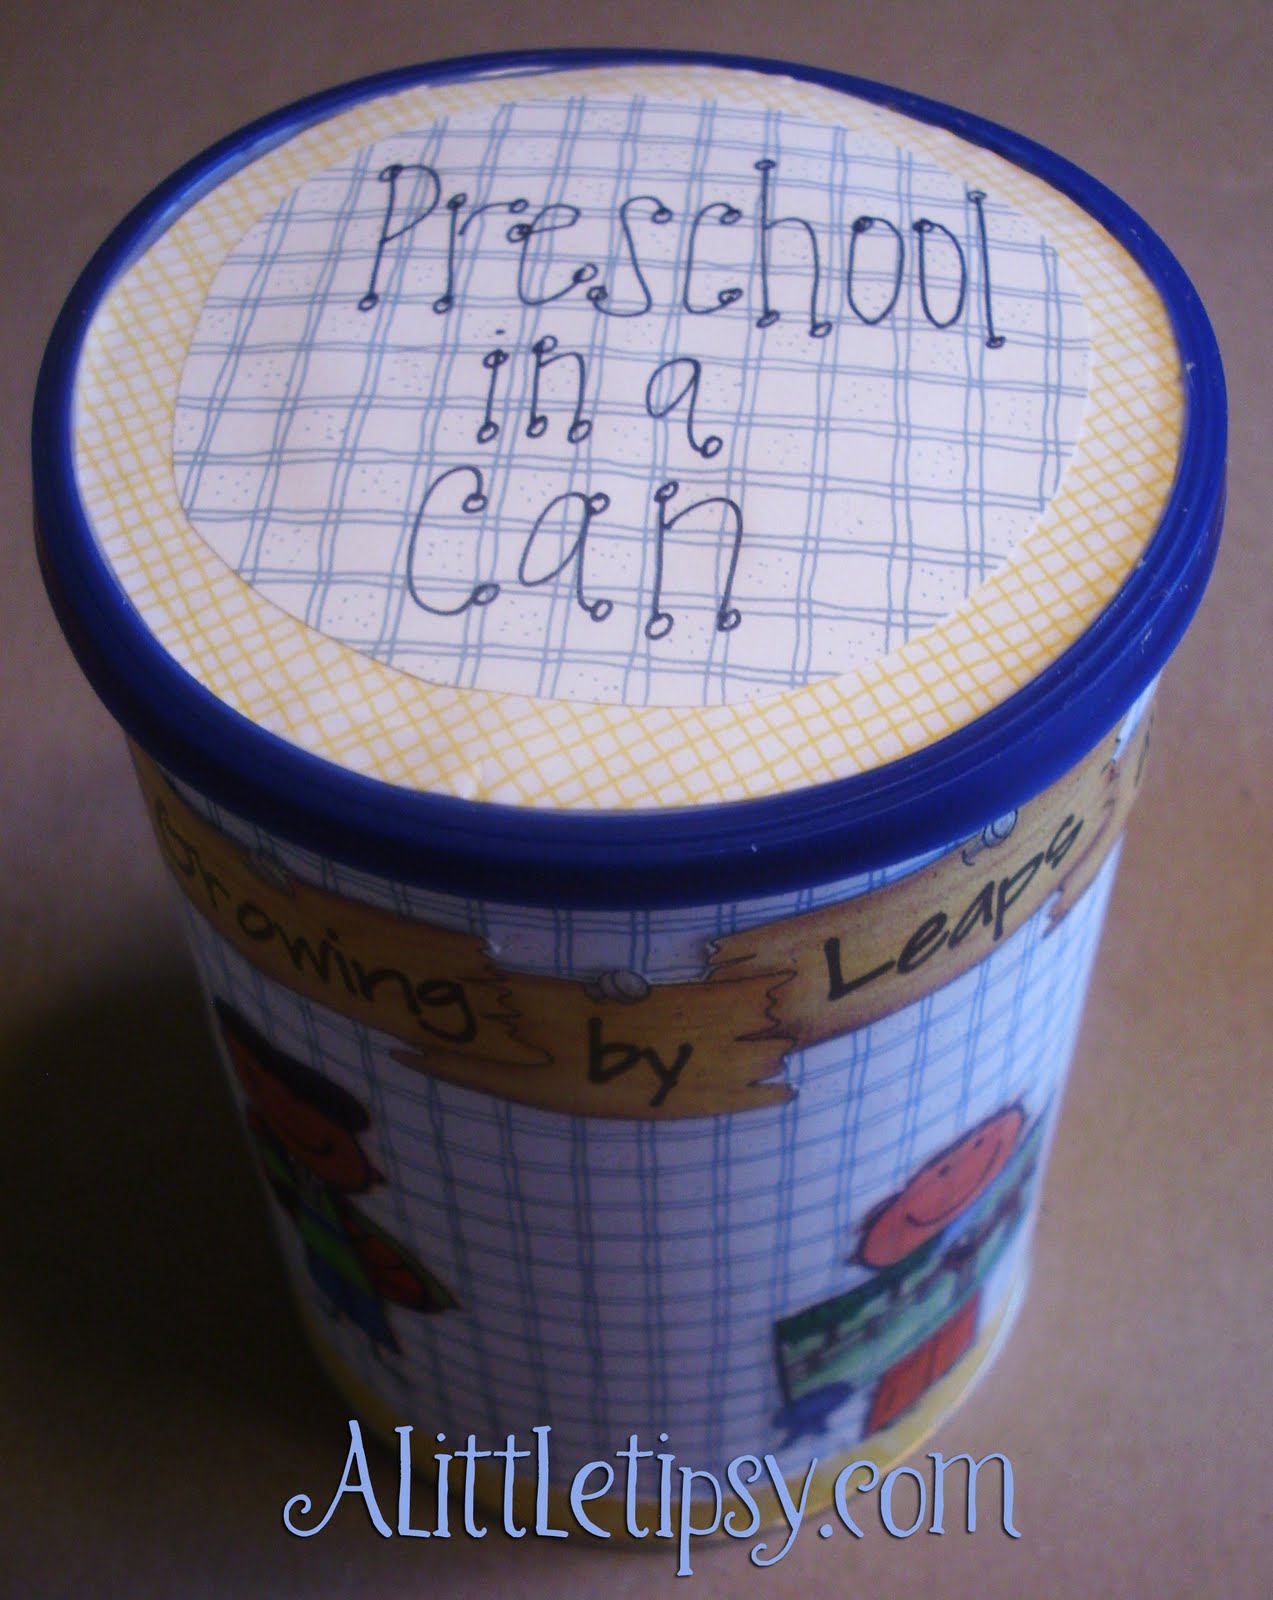
My 34 month old is not quite ready for official preschool, so I decided to make an activity can so we could do preschool at home. This way I don’t have to go through all the work of having a complete lesson plan everyday, but he still gets educational and developmental activities worked in to his schedule. I color coded little sticks and put them in a can so we could pull out activities in a variety of areas each week including: Art/Music, Science, Physical, and Language development.

Preschool at Home Can
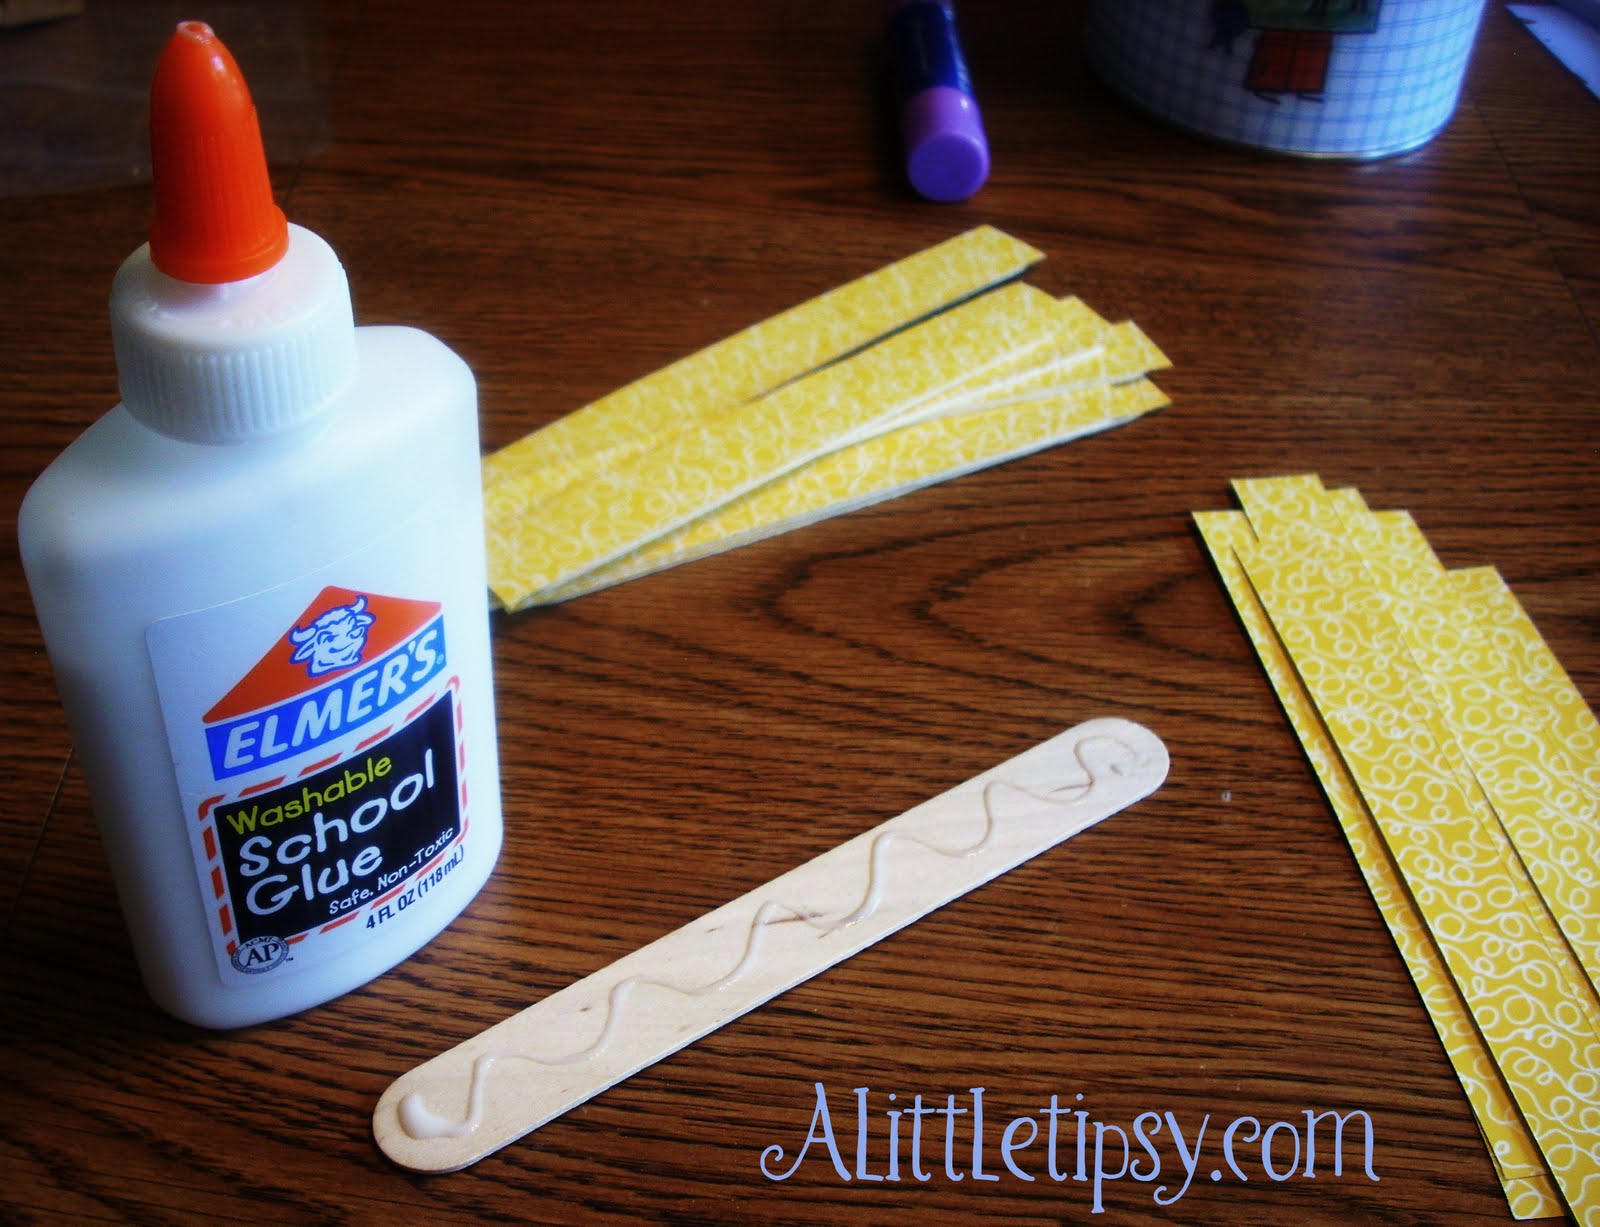
Supplies needed:

  • Big popsicle sticks aka tongue depressors
  • Colorful paper
  • Paper cutter
  • Scissors
  • Pen
  • White Glue
  • Fine tip Sharpie
  • Can (mine was an Ovaltine can with a lid from La Choy noodles because I wanted blue not brown)

I was going to glue the paper to the sticks and then exacto knife the edges clean, but then I remembered a 4th grade incident where they handed me a 2 liter bottle and a box cutter and wanted me to make a bird feeder resulting in this scar. I’m pretty sure box cutters are banned from Elementary schools now.

Anyway, I quickly realized that cutting the paper to size first would be way easier and safer.

1. Place a popsicle stick on the back of one of the decorative papers and mark the height. Then, mark the width, continuing across the whole page to fit as many as you can.
2. Using your paper cutter, cut out all the little popsicle stick sized rectangles.

3. Using a squiggle of glue secure a paper strip to the stick. Trim the excess corners with your scissors.

4. Once you have your sticks in four colors (Art/music, Science, Physical, Language), write the coordinating activities on the sticks using a fine tip Sharpie. I got mine from many resources, so I also put the reference of where to find the activity description whether a book, magazine, etc.


Edit: I got many of my preschool at home activity ideas from Family Fun magazine, Utah Family Magazine, and lots from my kid friendly and preschool collections of bookmarks from blogs.

5. Decorate your can however you like and place the completed sticks inside.
6. I figured 4 days a week for preschool at home was plenty so we will draw a different colored stick each day so we get activities in each area.

Linking Up:
Get Your Craft On
Anything Related
Toot Your Horn Tuesday
Topsy Turvy Tuesday
Take-A-Look Tuesday

P.S. Don’t forget to sign up for free Tipsy updates via RSS or email.

We have decided to truncate our feed to help protect against stolen content. I apologize for any inconvenience. Please love us anyway. 🙂

Paper Pumpkins

September 30, 2010 By Michelle Barneck 25 Comments

I found some really cute doilies at Dollar tree and immediately knew I could make some fun paper pumpkins out of them. If you have five minutes and a glue stick you can make these! They are so easy and turned out super cute.

Items needed:

  • Paper pumpkin doilies
  • Glue stick
  • Green wire or ribbon

1. Separate the doilies, this can be tricky as they stick together. I never did get 36.
2. Fold the doily in half with the orange inside.
3. Glue two white sides together by putting glue on the parts without holes and carefully lining them up.

4. Continue gluing and stacking. I liked using 12 doilies per pumpkin. It seemed to have just the right amount of fullness. Glue the top doily to the bottom doily to finish it off.

Congrats you just made paper pumpkins! Don’t you look fancy!

Put them on the table or hide them from your toddler on a shelf.

Linking Up:
Get Your Craft On
Transformation Thursday
Strut Your Stuff
Show Off Your Stuff
Look at me
Fall Frenzy

Visit thecsiproject.com


Post sponsored by PSprint. Here are 20 wicked Jack-O-Lantern halloween design inspirations to boost your creativity.

We have decided to truncate our feed to help protect against stolen content. I apologize for any inconvenience. Please love us anyway. 🙂

Fall Garland

September 28, 2010 By Michelle Barneck 8 Comments

I got the idea a couple of weeks ago to make a fall garland that reads “I’ve Fallen for You.” I headed over to Dollar Tree to see what I could find to make my fall garland a reality.

They had just what I needed.
Two 4 ft. fall garlands
Three packs of fall leaves with wire stems

1. Stretch out the garlands on the table so you can see the space you have to work with.
2. Using a sharpie, write a letter on alternating colors of the wire stemmed leaves to spell out “I’ve fallen for you.”

3. Attach the leaves to the fall garland using the wire stem, spreading them across the whole thing, but leaving room to attach a picture between each word.

4. Print small pictures of your family in Sepia tone. Most of mine were 2″x 3″ so I could print two on a 4″ x 6″ photo paper.
5. Attach them to the fall garland using garden twine.

6. Hang on the wall. I tied twine to the garland and hung a loop over a nail.

I love that it brings a bit of those luscious warm colors in and can stay up until Thanksgiving. I don’t want to have to worry much about my decor with the new baby coming mid November.

Linking Up:
Get Your Craft On
Toot Your Horn Tuesday
Anything Related
Topsy Turvy Tuesday

P.S. Don’t forget to sign up for free Tipsy updates via RSS or email.

We have decided to truncate our feed to help protect against stolen content. I apologize for any inconvenience. Please love us anyway. 🙂

Frosted Glass Jar Lanterns

August 3, 2010 By Michelle Barneck 9 Comments

This is a craft we did at LDS Girl’s Camp that I just loved. We turned pint glass jars in to little lanterns. They turned out adorable. I am going to be putting mine in my little guy’s new paleontology room. Stay tuned for deets on that. Now for the how to on to the Frosted Glass Jar Lantern Tutorial…

Supplies needed:
Pint jar
Stickers (or contact paper cut by Cricut)
Heavy Wire
Pliers
Flat clear spray paint
Tea light (real or battery operated)

1. Choose stickers and place them on the jar. These will be the spots left clear in the end.

2. Take a long piece of wire (2 or 3 ft depending on how many times you want to wrap it) and wrap it around the neck of the jar under the lip where you would screw on the lid. Leave it loose enough to fit a piece of the wire through for the handle. Use the pliers to pull the remaining wire around and up through the wire around the neck to make the handle. Make an arc of wire over the jar for the handle and secure on the other side. You can make a second arc or wrap the remaining wire all around the first handle to make it thicker if you like.

3. Hold the handle and spray the jar all around with two light coats of flat clear spray paint. If you spray too much at once it will drip. It will not look frosted until it starts to dry.

4. Let the paint dry for a few minutes and spray more if you want it more frosted. If it is too hot leave it in the shade to dry or the stickers will melt and leave residue on the jar.

5. Once the paint is dry peel off the stickers and put the tea light inside. We used the battery operated kind. You can get them at Dollar Tree.

The girls also got charms from different activities they participated in to add to their lanterns.

I found out from the lady in charge of our craft at camp that the original idea came from Under My Umbrella via Sugardoodle. They have a tutorial, but their background was missing so you could see the pics but could not read the words. Thus, I made this tutorial.

Linking Up:
Toot your Horn Tuesday
Anything Related
Topsy Turvy Tuesdays

P.S. Don’t forget to sign up for free Tipsy updates via RSS or email.

We have decided to truncate our feed to help protect against stolen content. I apologize for any inconvenience. Please love us anyway. 🙂
« Previous Page
Next Page »

  • Bloglovin
  • Facebook
  • Google+
  • Instagram
  • Pinterest
  • RSS
  • Twitter

Hi there! I'm Michelle. Mother of three little boys and one little princess. Welcome to A Little Tipsy, a place for exploring creativity and sharing inspiration.

Follow on Bloglovin


Visit Michelle Barneck {A Little Tipsy}'s profile on Pinterest.

Tutorials by Category


15 Family Reunion Games

Family Reunion Games Collage

15 Sprinkle Party Ideas

Sprinkle Birthday Party
Creative Commons License

© Copyright 2014 A Little Tipsy · Site Designed by The Fairy Blogmother · Web Hosting by RFE Hosting

This website uses cookies to improve your experience. We'll assume you're ok with this, but you can opt-out if you wish.Accept Read More
Privacy & Cookies Policy