A Little Tipsy

Creative Tips & Ideas

  • home
  • About Me
  • the tipsy top
  • press
  • projects
  • contact me
[print_thumbnail_slider]

DIY Under $5: Making Fabric Flowers

March 23, 2011 By Michelle Barneck 8 Comments

I wanted a little something to spruce up my wardrobe, but did not want to dent my pocket book. I pulled out my fabric stash and got to work. I made a few little fabric flowers (you have seen them EVERYWHERE), but made them so I can interchange them and wear them a whole bunch of ways depending on my mood and outfit.

How to make Fabric Flowers

Supplies:

  • Scrap Fabric
  • Buttons
  • Hot Glue

Cost: FREE!!

Everything I used for making these fabric flowers was stashed in a drawer or on a shelf.

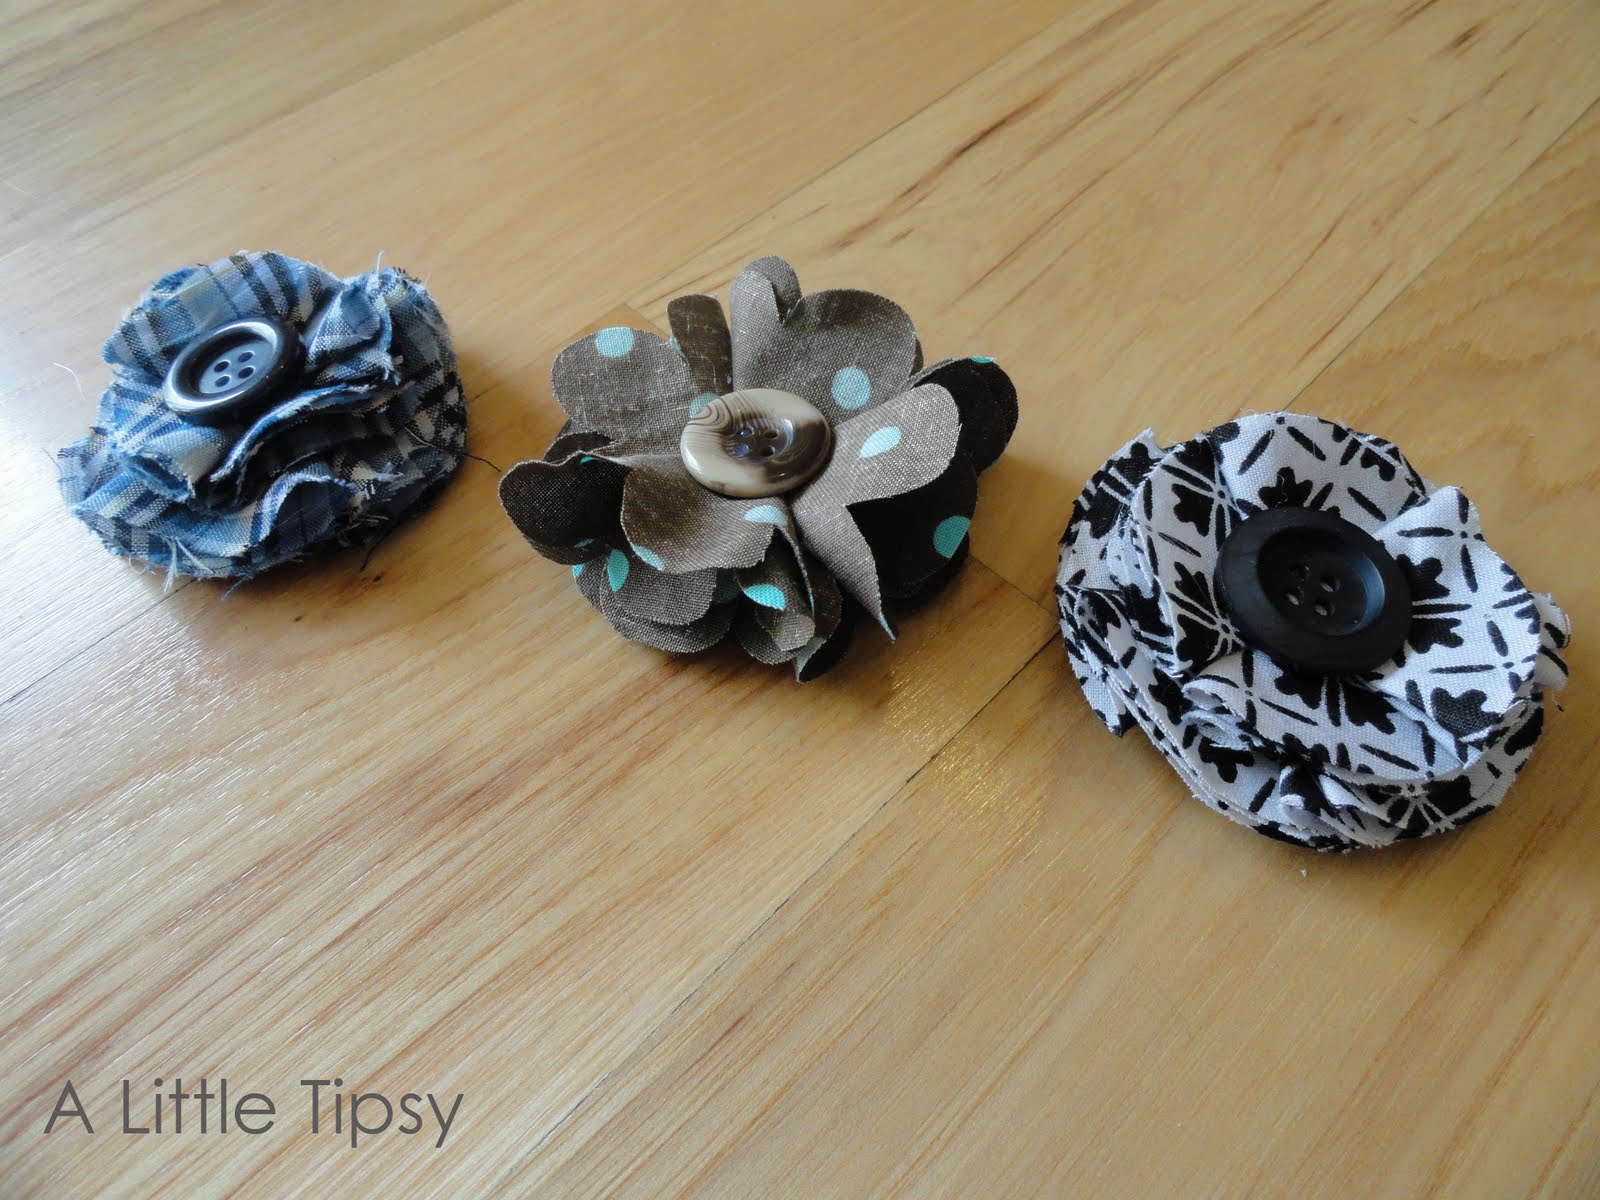
1. Cut out four fabric flowers. (I liked the back of this material better. It looked aged and had a burlap/canvas feel.)

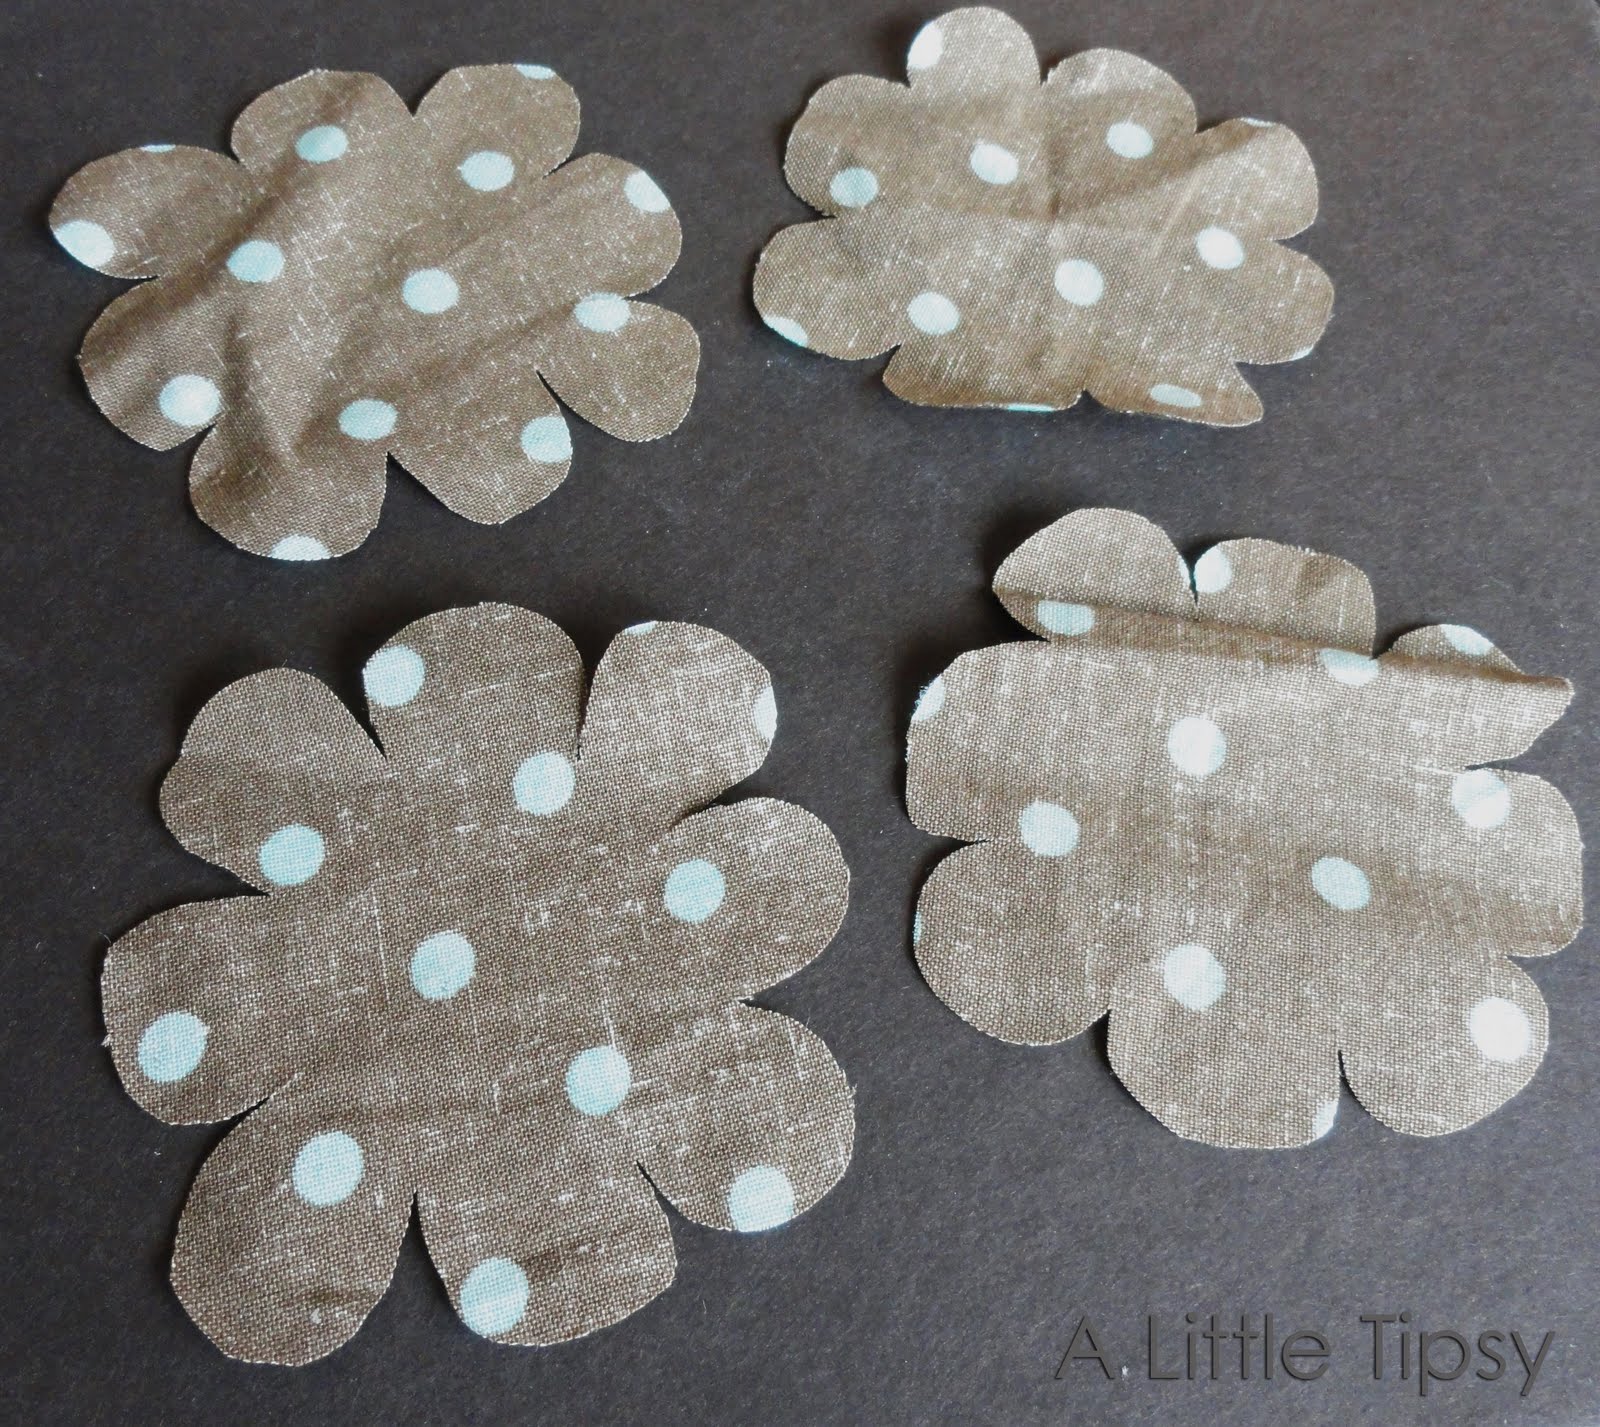
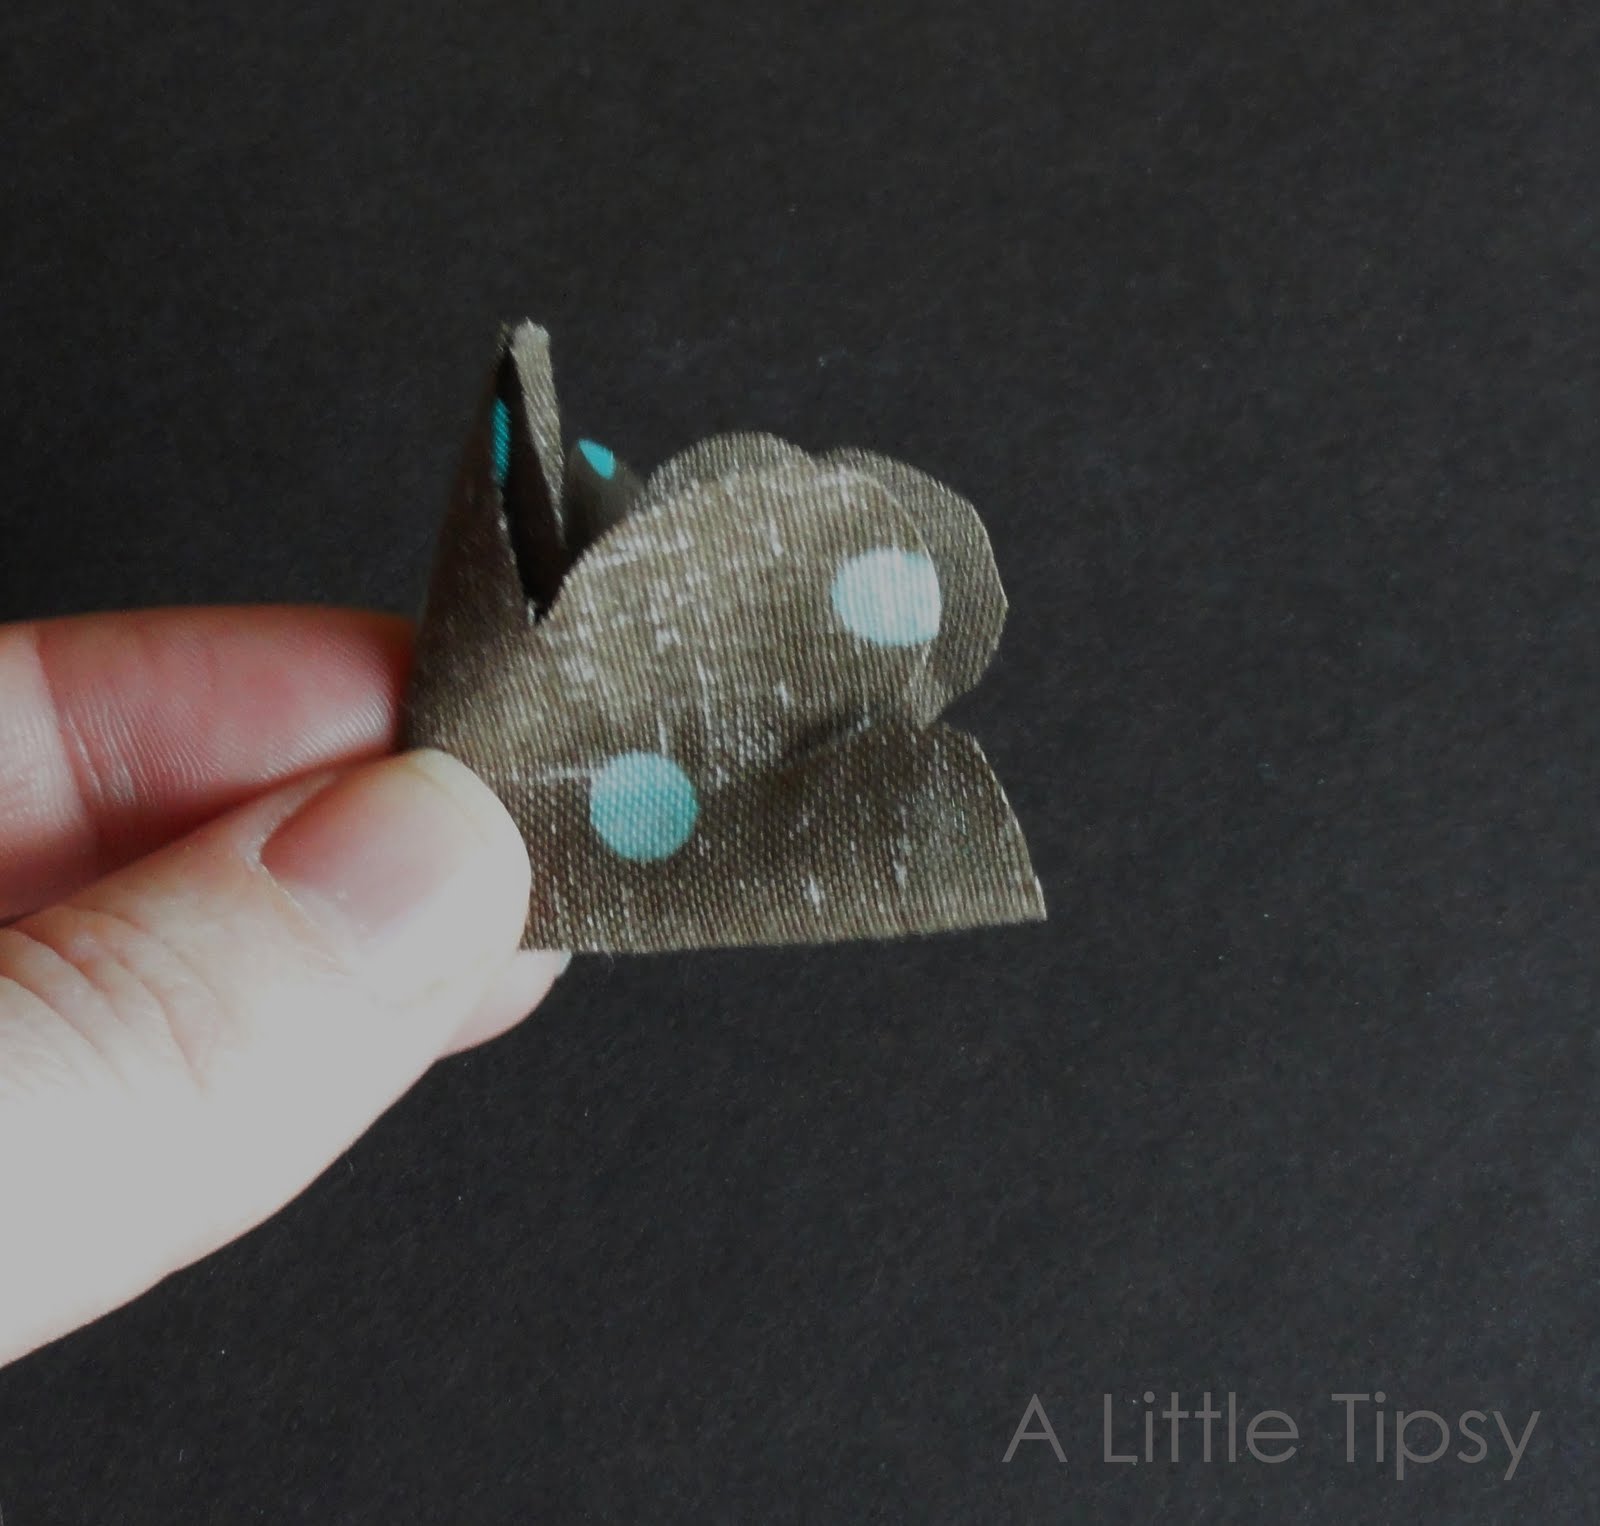
2. Fold each flower in half and then in half again.

3. Glue all four folded flowers to a circle of felt or cardstock. Add a button to the middle.

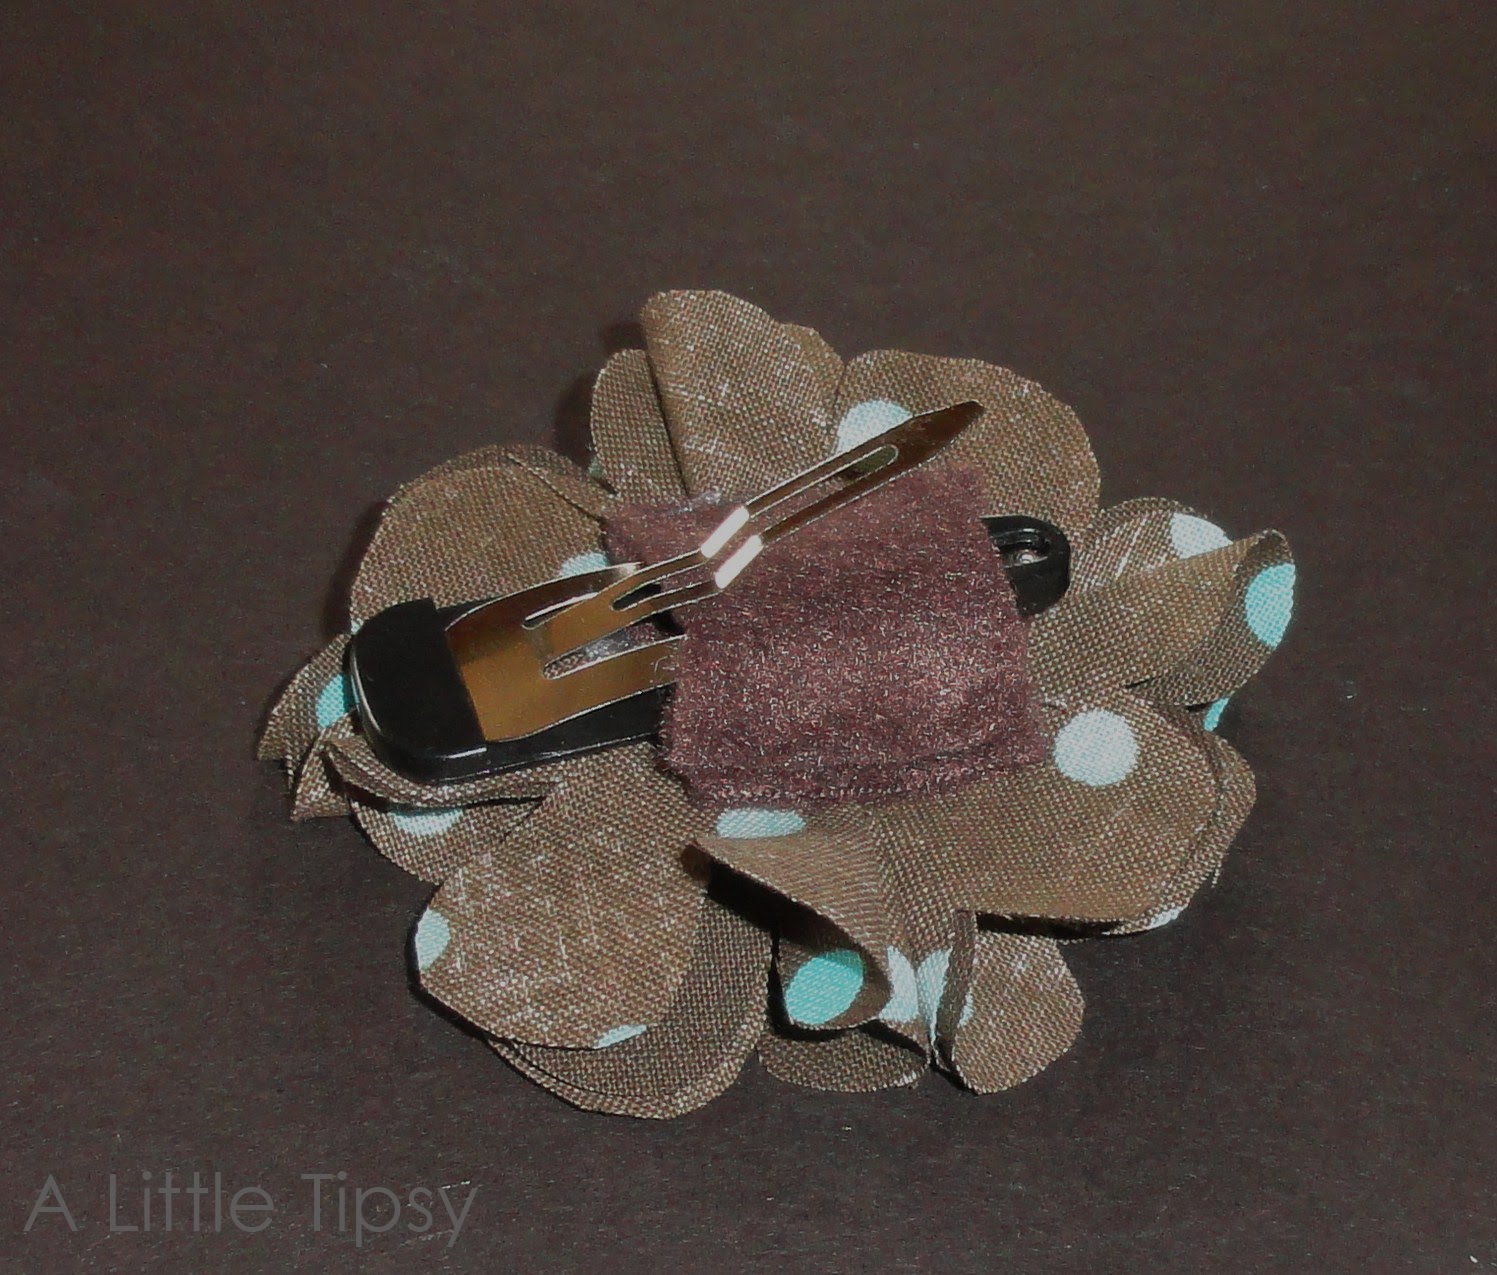
4. Glue an additional piece of cloth over the one the petals are glued to. I only glued two edges so I could slide it on a headband or clip and interchange the flowers.

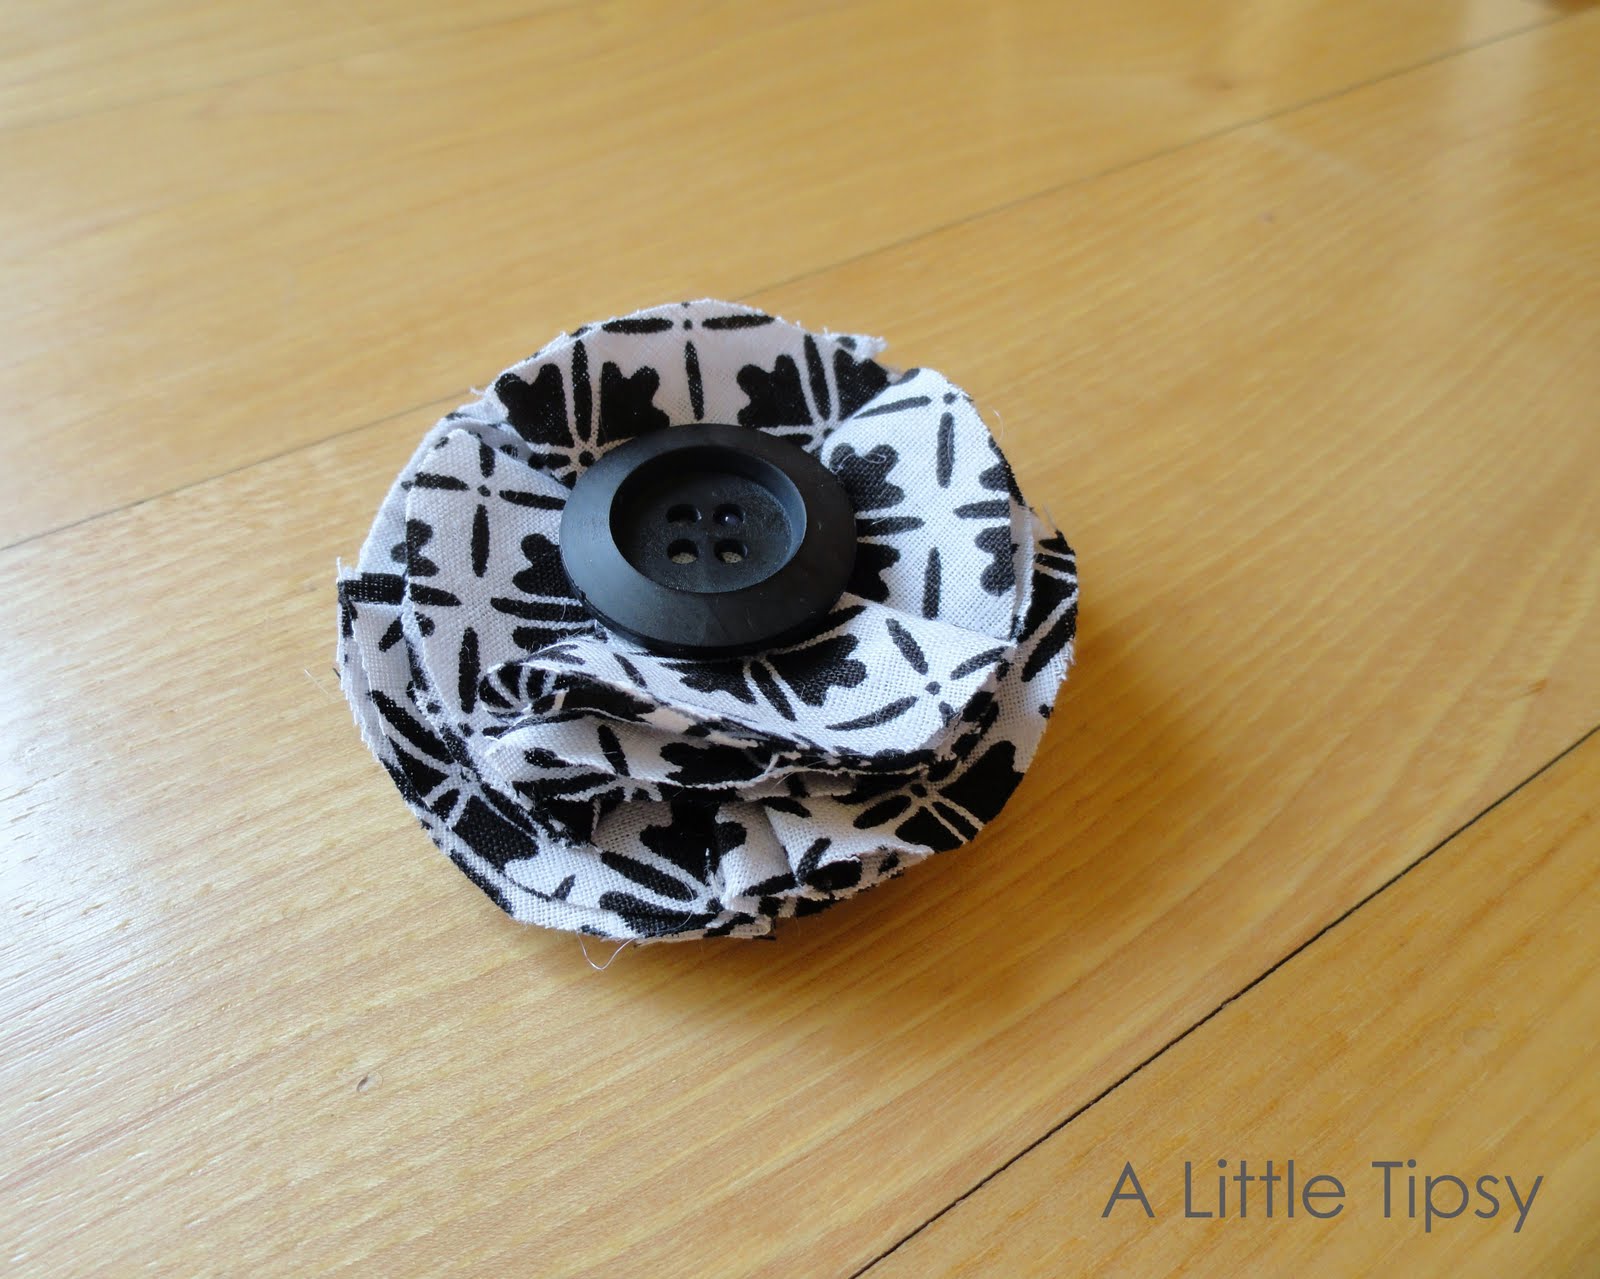
I also made another type of fabric flower by cutting out circles instead of flowers and using the same folding technique. I did two layers of circle petals making he second layer a bit smaller.


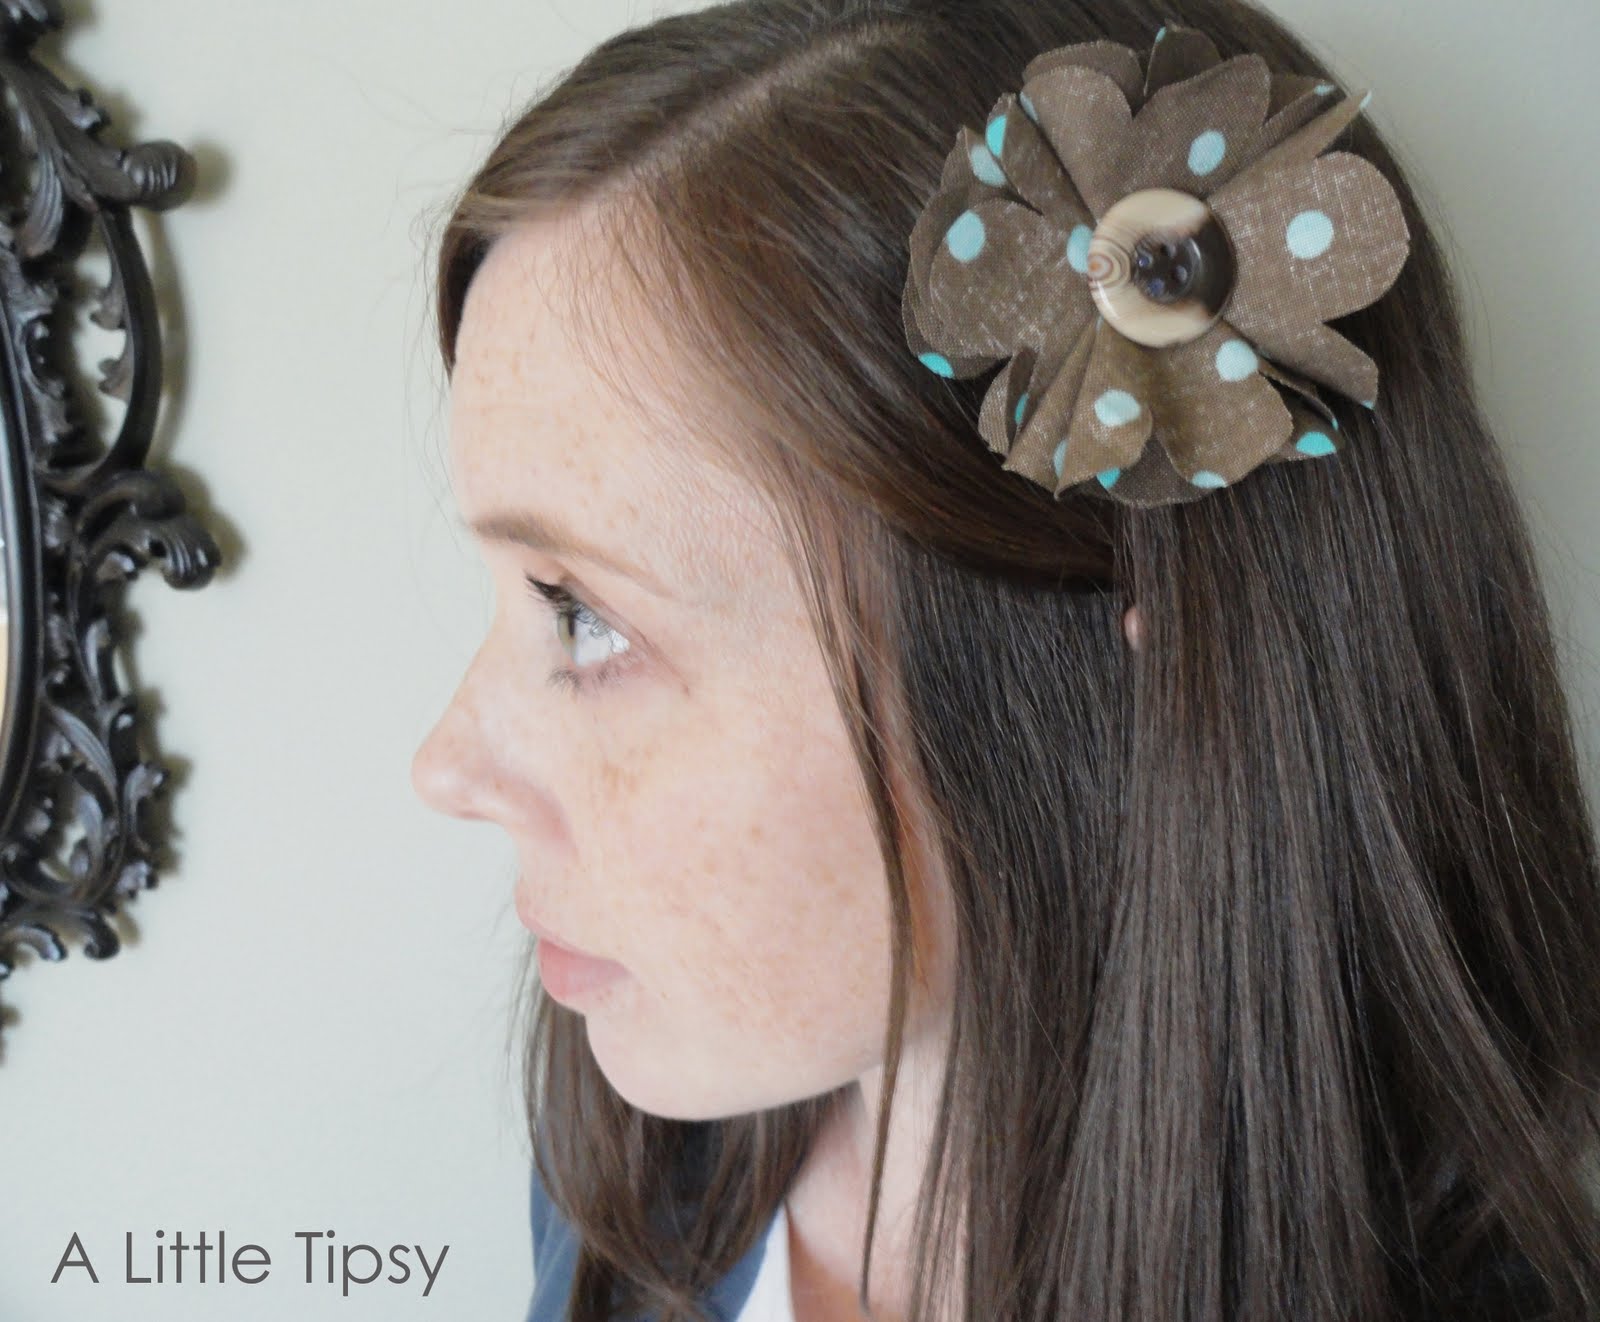
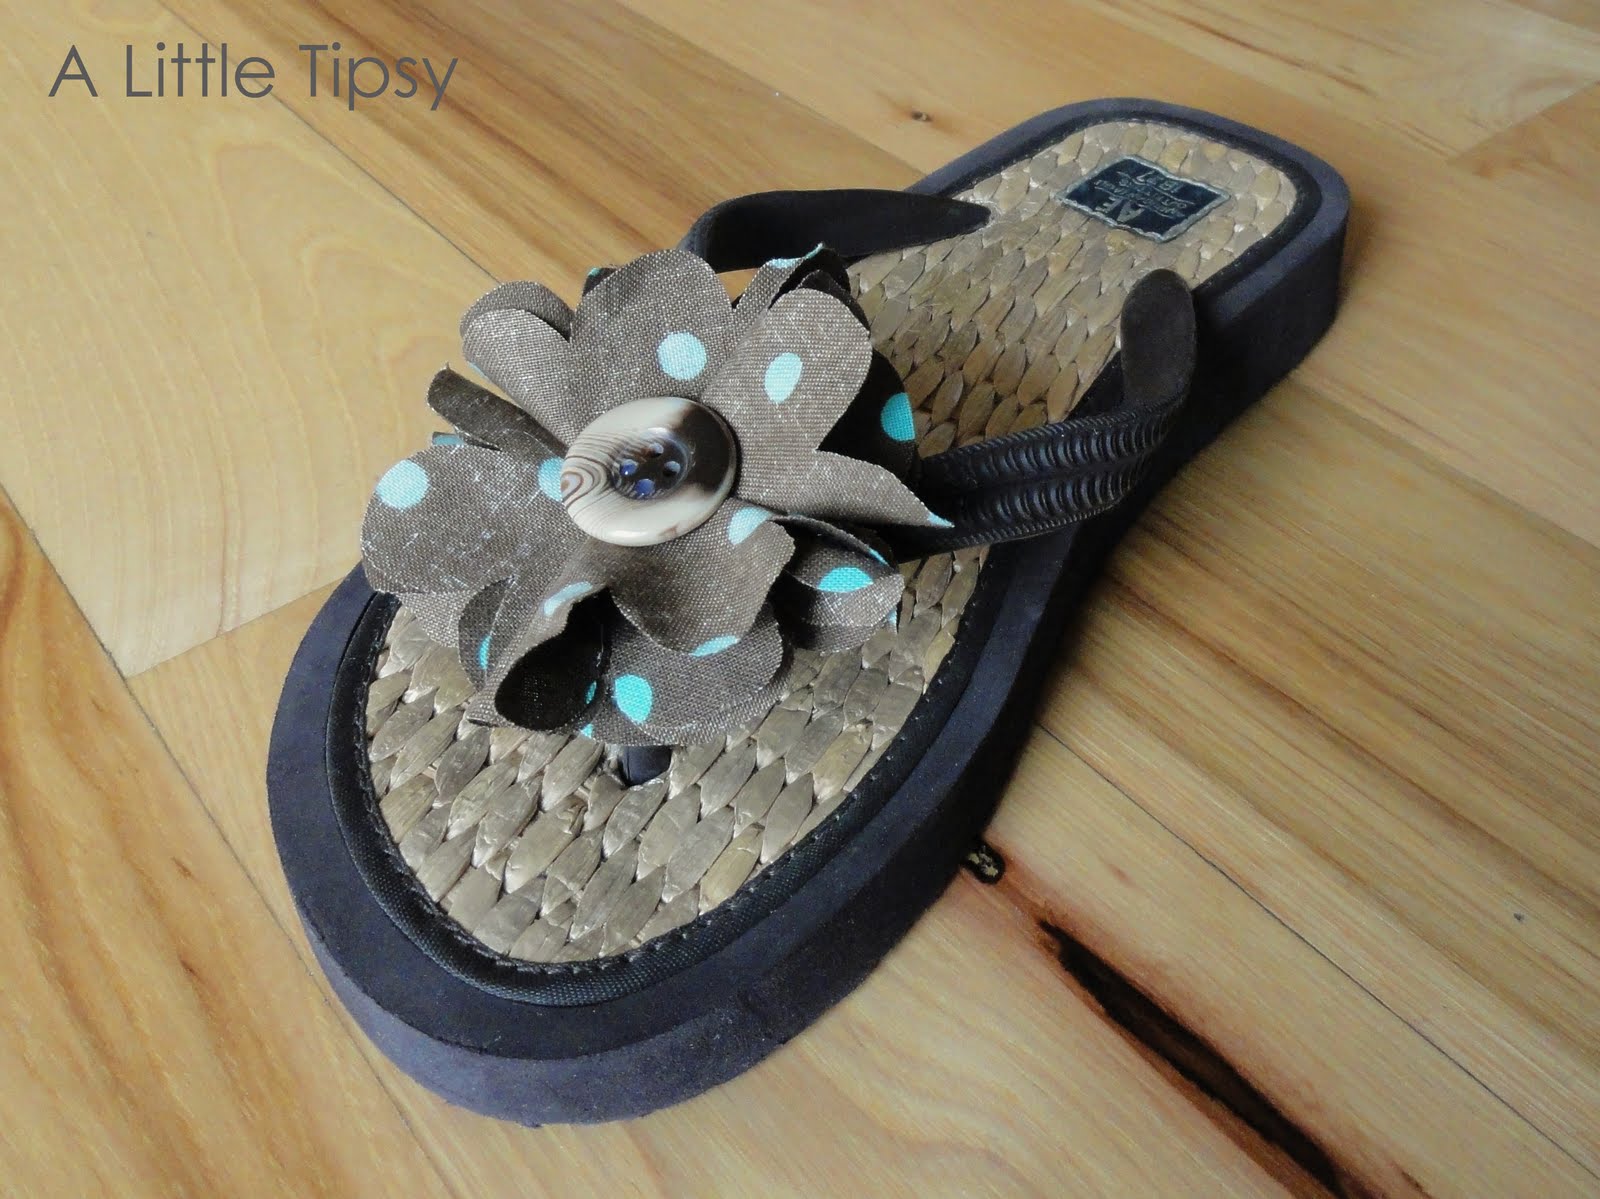
Wear them any way you like from head to toe!

In your hair…

On a cardi or necklace…

or bracelet…

{The grey knit bracelet is actually the top of a sock from my cute bean bags from worn out socks project. Shhh. Don’t tell. Does this make me a certified hoarder? I knew I could use it for something someday.}

or on your shoes!

OK, so now it’s time to link up!!

Please remember:

  • Only link to your own projects that cost you $5 or less (price does not have to include items you had on hand)
  • You can link past projects that fit the dollar limit
  • Please link back so others can join the party

DIY under $5

——————————————————————————-
Linking Up:

Look What I Made
Whatever Goes Wednesday
Sugar & Spice & Everything Nice

The winner of the $50 to GiftCardRescue is…
The Sims Family!
Congrats!!

P.S. Don’t forget to sign up for free Tipsy updates via RSS or email.

We have decided to truncate our feed to help protect against stolen content. I apologize for any inconvenience. Please love us anyway. 🙂

DIY Under $5: Flower Monogram Frame

March 16, 2011 By Michelle Barneck 15 Comments

I have a fun new series to introduce today!! We’ll be calling it
DIY Under $5.

Each week I will feature a project that was done for five dollars or less. I think this will be really fun and will showcase some super budget friendly projects! I am really excited about it and hope you will be too! I am also going to include a place for you to link up your $5 or less projects so we can all be inspired by each other! Get ready for some totally affordable fun! Now on to our first project!!

Flower Monogram Frame

Supplies:

  • Wood frame (50 cents thrift store, easily found for $1 at craft store)
  • Decorative packing tape ($1 Michael’s)
  • White & Black Craft Paint
  • Exacto knife
  • Cutting board
  • Scrap paper
  • Chalk
  • Buttons
  • 3-D adhesive squares
  • Glue dots

Total project cost: $1.50

1. Paint the frame. I used black on the edges and white on the front because the monograms on my tape were clear and I wanted them to be white.

2. Cover the frame with tape. I placed mine with the bottom of the B’s always facing the center.

3. Place the frame tape side down on a cutting board and using an exacto knife trim the excess.

4. To make a flower, cut three paper squares that gradually get smaller. I did the biggest and smallest in turquoise and the middle in white. Cut a flower with 8 petals (a petal from each side and a petal from each corner make it super easy to gauge where to place them) from each square.

5. I added chalk around the edge of each petal to add more depth. Teal on the turquoise and yellow on the white.

6. Curl each petal around a marker to make it stand out a bit.
7. Assemble the flower, attaching the flowers with 3-D adhesive squares and the buttons with glue dots. Stick the flower to the frame with glue dots so you can change it out if you so desire.

OK, so now it’s time to link up!!

Please remember:

  • Only link projects that cost you $5 or less (price does not have to include items you had on hand)
  • You can link past projects that fit the dollar limit
  • Please link back so others can join the party

DIY under $5

Linking Up:
Look What I Made
Whatever Goes Wednesday
Sugar & Spice & Everything Nice

P.S. Don’t forget to sign up for free Tipsy updates via RSS or email.

We have decided to truncate our feed to help protect against stolen content. I apologize for any inconvenience. Please love us anyway. 🙂

St Patrick Crafts

March 2, 2011 By Michelle Barneck 19 Comments

With so many cute St Patrick Crafts floating around, I was GREEN with envy. So, I got to work during nap time and made a green display of my own. I did not purchase anything new for this shelf. I was surprised how many green items and supplies I had on hand. This may look familiar to any facebook fans. 🙂

I made the “Oh so LUCKY to have you” sign and will have the printable posted for you soon! (I didn’t want this post to be monstrous!) I will also explain the vase if anyone is curious.

For now, let’s take a closer look at the Shamrock banner shall we.

Supplies:
  • cardboard
  • green fabric scraps
  • green scrapbook paper
  • green ribbon
  • hot glue
  • 3D shamrock stickers

For starters, make your shamrock. Cut out three hearts and a trianglish stem shape from some food boxes you have in the recycle bin (that ones for you Kim.) I used a muffin box and a cereal box.

Next, wrap with fabric scraps and secure with hot glue. If you need more detail, refer to my fabric heart tutorial.

I added a 5 inch lollie and a little bow with hot glue.


String that baby onto a ribbon with a few more lollies secured with paper clips and you’re good to go! There is a good lollie tutorial from Margie Aslett, so I won’t reinvent the wheel. The shamrocks in the middle are 3D stickers I left over from last year’s scrappy shamrock wreath.

Linking Up:
Visit thecsiproject.com
Kirstikoo Green Link-Up
Transformation Thursday
Strut Your Stuff
Show Off Your Stuff

P.S. Don’t forget to sign up for free Tipsy updates via RSS or email.

We have decided to truncate our feed to help protect against stolen content. I apologize for any inconvenience. Please love us anyway. 🙂

Shamrock Wreath & Lucky Blocks {from the archives}

February 28, 2011 By Michelle Barneck 11 Comments

For anyone who may have missed it last year, here is my Scrappy St. Patrick’s Day Shamrock Wreath. It is still one of my fave things I’ve made, so here we go…

——————————————————

I wanted to have a cute St. Patrick’s Shamrock wreath. I am part Irish for heaven’s sake. Did you know that my ancestor was the one who kidnapped St. Patrick?! Anyway, I saw Char’s great idea for using hearts to make a shamrock shape, but I decided I am way too lazy to cut out that many felt circles. So, I combined that idea with this fabric scrap wreath idea and we had a winner!

Here’s my adorable Scrappy St. Patrick’s Shamrock Wreath…

Why scrappy? Well for one thing it uses fabric scraps, but I also used a scrap of styrofoam packaging to make my hearts. So, ya wanna know how I did it? Here ya go!

Supplies needed: (lots of supplies but you probably have most of them at home)

  • Styrofoam packaging (or 4 hearts from a craft store)
  • Serrated knife
  • Piece of paper for heart template
  • Marker or pen
  • Measuring device
  • Scissors
  • Two colors Green Fabric (I think I used about 1/2 yard total)
  • White Glue
  • Pen or pencil
  • Hot glue
  • Ribbon
  • Embellishments

1. Measure 4 equal parts of foam and cut in to pieces. Use paper template and trace edges on foam with marker lid. I just dented the foam with the lid around the template so marker would not show.

2. Cut the foam with your knife. Cut your fabric in to 2 inch squares.

3. Put some glue in a bowl. Put a fabric square over the tip of your pen and dip in the glue. Then, stab the pen in to the styrofoam. This will make a little “flower” out of the fabric square. Repeat, alternating colors to give it more dimension.

4. Once all your hearts are covered hot glue the edges together. I thought it looked kind of like a blob at this point, so I added a little stem.

5. I did not like the white edges showing, so I hot glued some ribbon around the edges. Then, I tied a bow and hot glued it to the back to hang the wreath from.

6. I added an embellishment from the scrapbook section that says “Lucky you” to break up the green blob.

I couldn’t let the St. Patty’s Day decor stop at the door. I made these adorable Lucky wood blocks at Amanda’s craft night. I’m so lucky to have awesome friends!


Goodbye February…Hello March!

Linking up:
Kirstikoo Green Link-Up

P.S. Don’t forget to sign up for free Tipsy updates via RSS or email.

We have decided to truncate our feed to help protect against stolen content. I apologize for any inconvenience. Please love us anyway. 🙂
« Previous Page
Next Page »

  • Bloglovin
  • Facebook
  • Google+
  • Instagram
  • Pinterest
  • RSS
  • Twitter

Hi there! I'm Michelle. Mother of three little boys and one little princess. Welcome to A Little Tipsy, a place for exploring creativity and sharing inspiration.

Follow on Bloglovin


Visit Michelle Barneck {A Little Tipsy}'s profile on Pinterest.

Tutorials by Category


15 Family Reunion Games

Family Reunion Games Collage

15 Sprinkle Party Ideas

Sprinkle Birthday Party
Creative Commons License

© Copyright 2014 A Little Tipsy · Site Designed by The Fairy Blogmother · Web Hosting by RFE Hosting

This website uses cookies to improve your experience. We'll assume you're ok with this, but you can opt-out if you wish.Accept Read More
Privacy & Cookies Policy