A Little Tipsy

Creative Tips & Ideas

  • home
  • About Me
  • the tipsy top
  • press
  • projects
  • contact me
[print_thumbnail_slider]

Feature Friday-Blog Swap with Just Between Friends

December 31, 2010 By Michelle Barneck 3 Comments

I’m so excited to be here at A Little Tipsy, and I’m even more excited that Michelle is taking over my blog! I love Michelle’s fun dating ideas and her caramel apples look like something straight from the Rocky Mountain Chocolate Factory. YUMMY!!!

Now, if you don’t mind, Michelle, I am going to take over your blog.

Let’s get down to the nitty gritty…..

I’m Jonie from Just Between Friends. I am married to a man that loves to fish and we have a 17 month old little girl that seems to always keep us busy. I am pretty new to blogging. I started my blog just this last August, and I love it! It has been such a great motivator for me as well as a creative outlet.

Some of my favorite projects I’ve done are:

#1. Scrap Wood Shelves My daughter loves to read and I wanted a way that I could store her books without her needing to throw them off the shelf to see the cover. That is how I came up with this idea.

She still seems to need to throw her books everywhere, but at least she knows what book she is grabbing before she throws it.

#2. Fireplace Mantel When we moved into our house, there was no mantel above the fireplace. Talk about bor-ing! I decided to take a stab at it using just some 2X4s and some other various wood. I LOVE the way it turned out and I am having so much fun decorating it for the holidays.

Some day I am going to try putting up brick or stone or something like that in the space between the fireplace and the mantel. One thing at a time.

#3. Front Room Makeover I wanted to surprise my husband with a room makeover while he was out of town. I am pretty sure that when I told my husband I had a surprise for him he didn’t imagine this. He of course likes the way it looks. (I don’t think he would dare tell me otherwise)

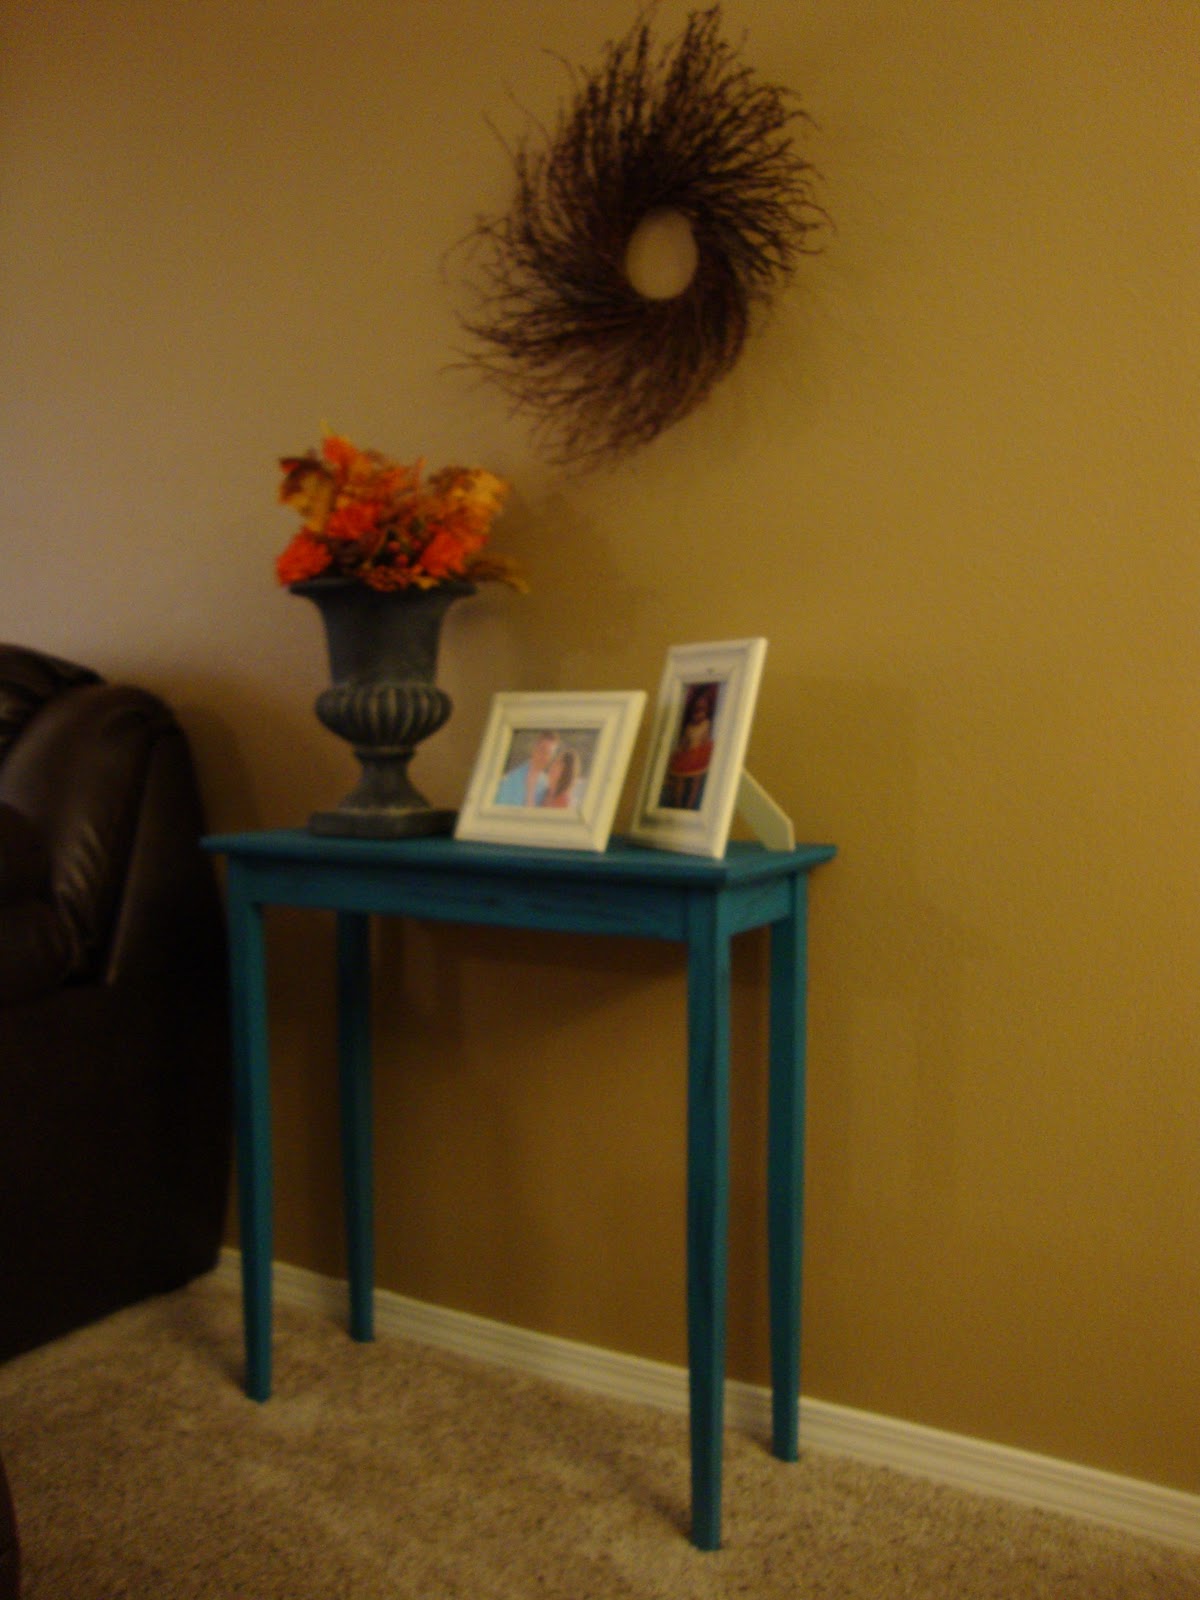
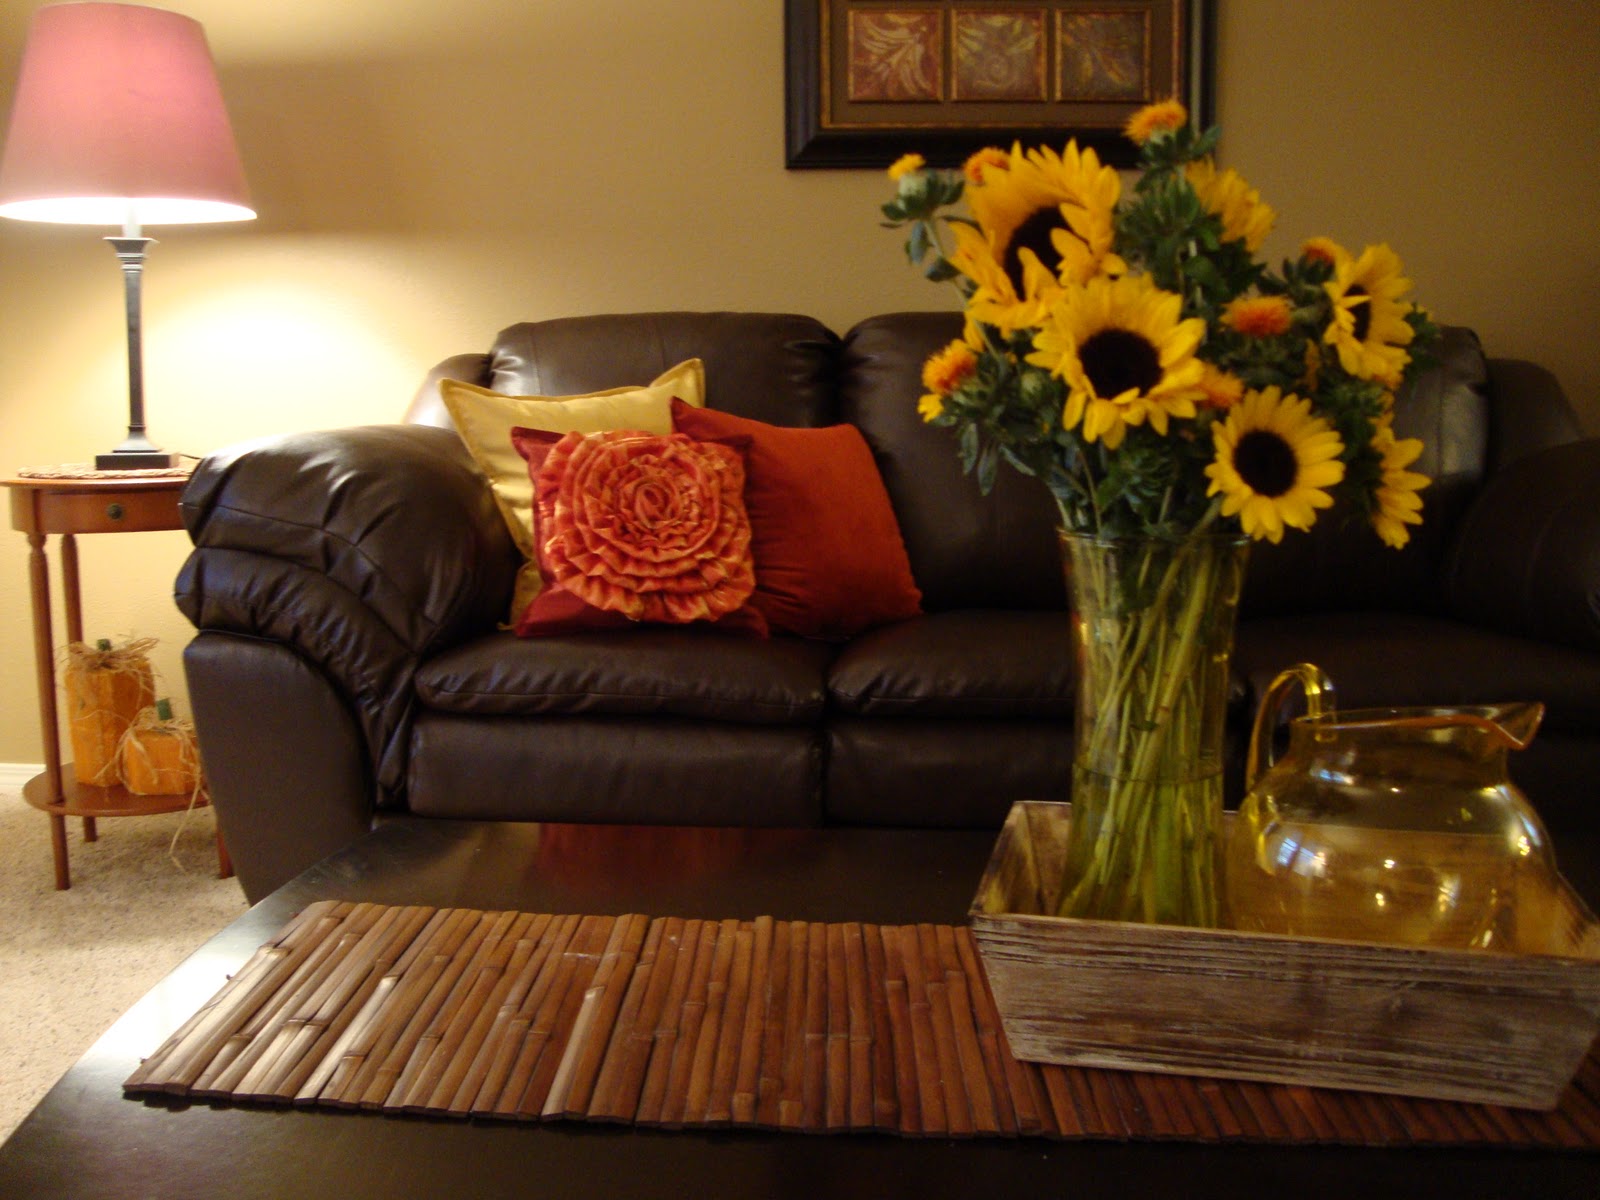
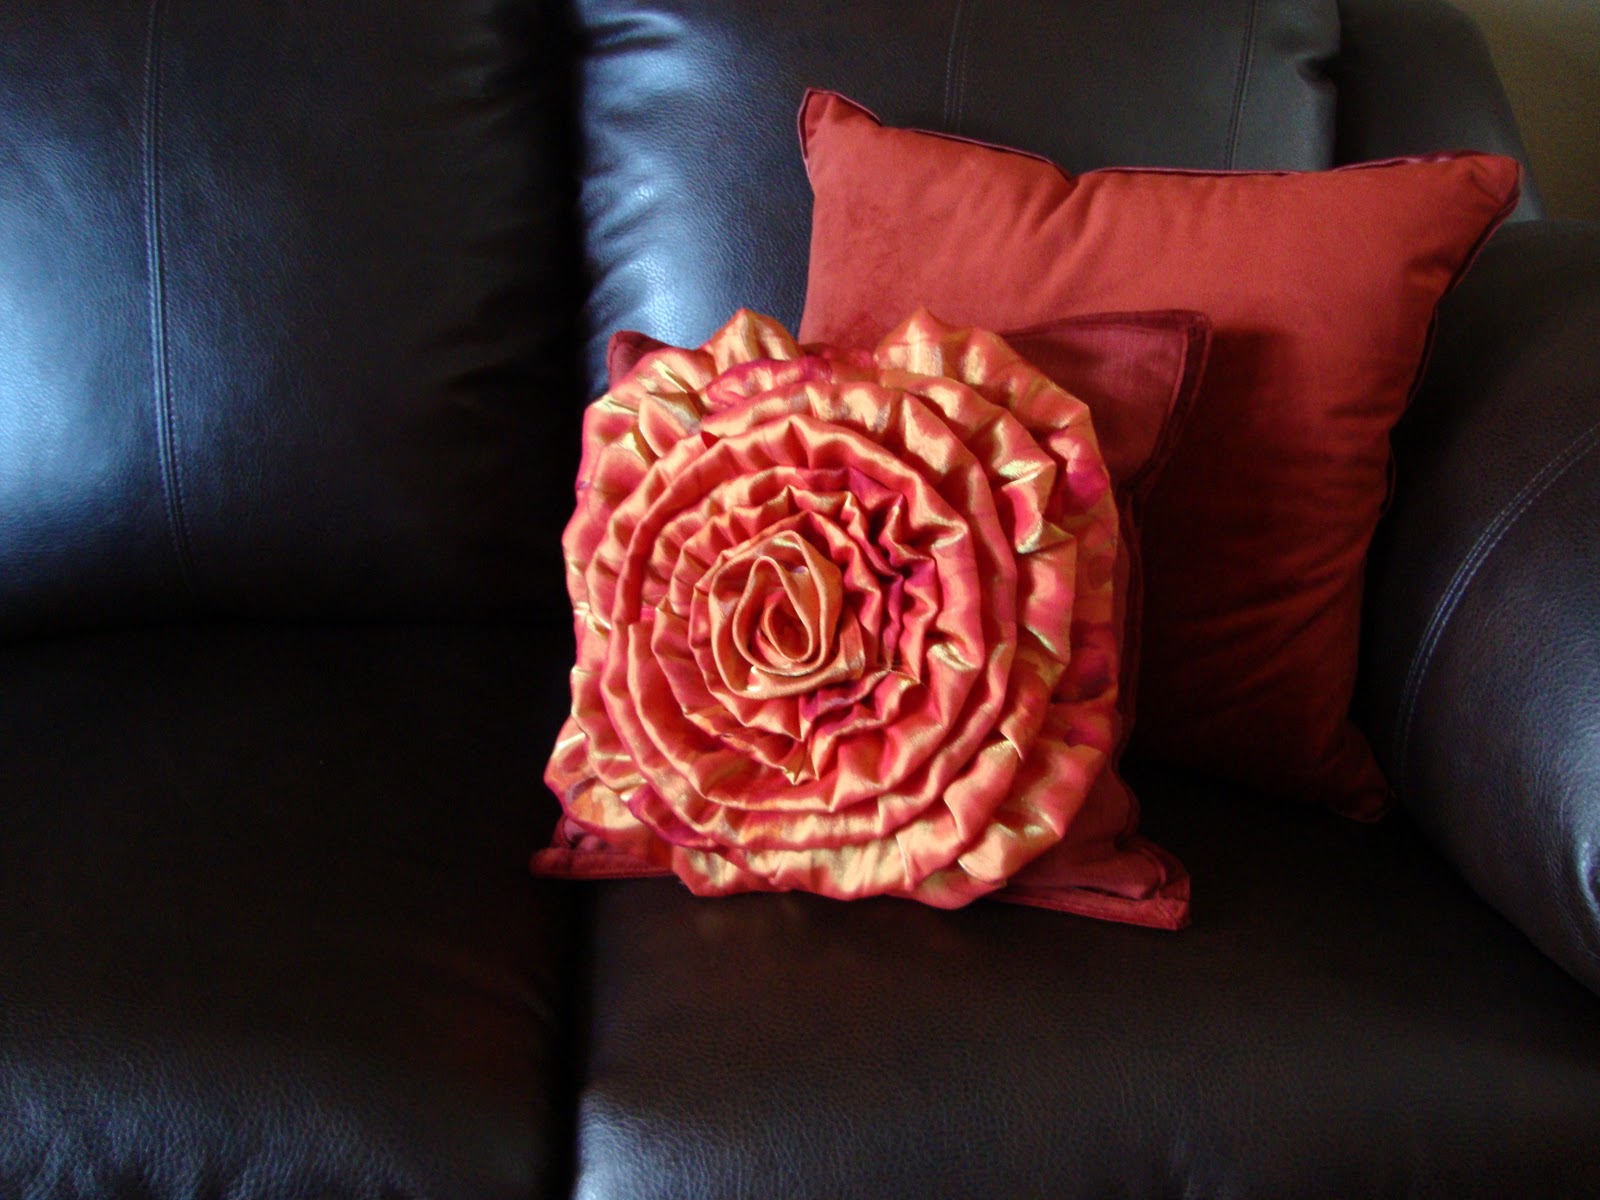
One of my favorite parts about this room is this pillow. I made it from the skirt my sister wore at my wedding. You can read all about how I made the pillows here.

I think that is enough to get you started in my blog. I really would love for you to stop by and follow along in my many crafting adventures.

Thanks so much Michelle for having me over! You can have your blog back now πŸ™‚

————————————————————————

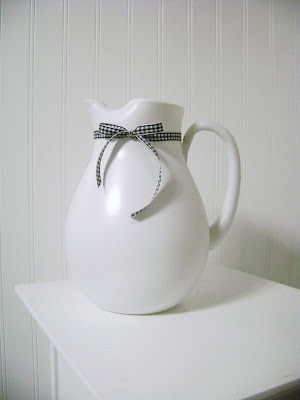
Be sure to check out her awesome ribbon holder too! Thanks for swappin’ it up Jonie!

P.S. Don’t forget to sign up for free Tipsy updates via RSS or email.

We have decided to truncate our feed to help protect against stolen content. I apologize for any inconvenience. Please love us anyway. πŸ™‚

Feature Friday-Blog Swap with Fingerprints on the Fridge

December 3, 2010 By Michelle Barneck 5 Comments

Hi lovelies! I’m Rachelle

from the blog, Fingerprints on the Fridge

Photobucket

Today I’m swappin’ with Miss Michelle, she graciously let me come over and wreck up her blog. Isn’t that sweet!? πŸ˜‰

If you’re not familiar with me let me introduce myself.

I’m a Mom & Wife with an obsession with decorating, crafting, and power tools. Along with a healthy dab of playing princess, putting together puzzles and listening to Hannah Montana.

When we aren’t rockin’ out I can be found somewhere around the house simply fluffing things like:

spray painting broken pitchers

Framing keys

Making Family Rules

Sometimes I’m adventurous and want to dive into something a little tougher than fluffing. Just last year the Husband and I recently gutted our kitchen & dining room.

Quite a change eh?

Then there’s my most recent mudroom transformation I took on!

I’d love for you to come over and say hello sometime! Or, come over and Feature Yourself on Fridays for my super Linky party! Can’t wait to meet some new faces!

Yes this post is gettin’ pretty lengthy but I thought I’d end it with a sweet little Christmas decoration that’s extremely easy to make.

When I saw this photo over at BHG I knew I had to have it. No doubt, it had to be mine. I do love the colors but they wouldn’t go with much in my house at the moment, so I had to improvise.


I made a ton of these Santa Jars last year to give Oreo truffles in so I just made another big ol’ one.


You can’t really mess this up, red body, white paint for fur, black belt and a silver buckle, last year the buckles were gold. This year, gold was not in my stash, which actually worked out because I used red and silver ornaments.

Fate I tell you. πŸ˜‰

Now take your foam ball and heat up your glue gun. Put a rim of glue around each neck of the ornaments then stick them in place. I used mini ornaments to fill in the gaps.

(Yes, I do my best work on the kitchen floor.)

Looking back on this project I would most definitely spray paint the ball first, you can still kind of see green, oh well live and learn.

Glue the top and bottom of the dowel and stick it in the foam ball and the foam blocks and stick it in your pot. Throw some left over fake snow from your mantel project in the pot to hide the the dusty devil green floral foam. Done and done! See how easy that was?


Thank you so much Michelle for letting me crash today! You’re the sweetest!

—————————————————-

Love that adorable topiary and when I grow up I totally want a mud room! Thanks for swappin’ it up Rachelle!

P.S. Don’t forget to sign up for free Tipsy updates via RSS or email.

We have decided to truncate our feed to help protect against stolen content. I apologize for any inconvenience. Please love us anyway. πŸ™‚

Boy Week: Fall Down Tree Print Giveaway

November 17, 2010 By Michelle Barneck 86 Comments

I am super excited about today’s giveaway. I ran across Fall Down Tree (a local Utah artist) while on etsy and immediately fell in love with his prints. They are so whimsical and fun! I had such a hard time deciding what print I wanted to review. First, I wanted this “Peter Pan” print which is my son’s current favorite movie, but quickly realized I had no where to put it.

Peter Pan - Print 8x10

Then, I wanted the “Dino Kids” or “Dino Sore” prints for my 3 year old’s new paleontology room, but quickly realized I already had items for each wall.

Dino Kids Print Set of 3-8x10Dino Sore - Print 8x10

I totally want “Hung Out to Dry” for my laundry room, but knew it did not fit with the theme of Boy Week, but alas I found the perfect print for my house.

Hung Out To Dry - Print

“The Truck Stops Here” print is just perfect for my transportation themed nursery. I have an empty wall looking lonely where it will fit perfectly. See that square frame in the first pic below? Ya, it now resides in my kitchen holding son’s artwork so that poor little piece of wall stands alone.

Not for long. I just need to find the perfect frame because a Fall Down Tree print can’t just go in any old thing. The prints are on a white linen textured cardstock with a matte finish so they would even look great without glass giving a canvas effect.

And did you see that I already have a vintage red truck sitting on the shelf? (Don’t ask why that random bank is in its bed) It was a gift from Grandma and Papa that I just adore.


The Truck Stop Here is going to be the perfect addition to renew the nursery for our new little one. Now with a new baby comes gifts, but you know by now that the gifts are not for me, they are for you!

Fall Down Tree is giving away a $15 Gift Certificate or 8×10 print of your choice!

To enter: Visit Fall Down Tree and tell me which print you would choose.

Extra entries: Leave a separate comment for each entry.

  • Follow A Little Tipsy
  • Like A Little Tipsy on Facebook
  • Follow me on twitter
  • Tweet, facebook or blog about this giveaway and leave the link

If you do not have an email on your profile and don’t leave one in the comment, I will just choose another winner.

Giveaway closes Tuesday, November 23rd. Good Luck!

P.S. Don’t forget to sign up for free Tipsy updates via RSS or email.

We have decided to truncate our feed to help protect against stolen content. I apologize for any inconvenience. Please love us anyway. πŸ™‚

Baby Week: Baby Clothing Art

November 12, 2010 By Michelle Barneck 3 Comments

Hi, I’m Danielle from A Few of My Favorite Things.


I’m a working mom with twin girls, Gabrielle and Alaina, who were born at 27 weeks and just turned two.

I blog about fun and unique finds for babies, kids and the people who love them and I also do some crafting now and then. Here’s one of my favorite projects.

I have a huge container in Gabrielle and Alaina’s closet full of clothes that they’ve outgrown. My husband looks at it and thinks “Hoarder!” and while I will admit that I can be a pack rat, I’ve been good about giving away most of the things that no longer fit them. But this container is filled with the pieces that have sentimental value, like the first outfits they wore in the NICU when they were barely 3 pounds.

And the onesies they wore on their first Valentine’s Day.

And the adorable tees they sported for their holiday photos this year.

I could go on and on. I’ve been holding onto them to make a quilt for the each of the girls but who am I kidding? A quilter I am not. Eventually, I’ll probably pay someone to make them for me (maybe a few years from now when I can include their outfits from the first day of school, etc.) but in the meantime, all of those clothes are collecting dust. Until now! My hubby was out of town so I decided to attempt a different type of craft project with them and I’m pretty proud of the results. In just a few simple steps, what started out as a collection of tees and onesies:

Was transformed into art!

They’re cute, right? The best part is that they’re so so easy to make. Here’s what you need:

1. Different sized wooden embroidery hoops. I happened to have these five from my cross-stitching days so that’s what I used.

2. Paints and brushes. I used samples we had lying around from when I was planning the girls’ nursery and foam brushes just because I like those.

3. Whatever clothing you want to work with. That’s it!

The how to is pretty straightforward. First, paint the outer rings of each hoop.

Then, let them dry for at least 30 minutes (I waited longer to be safe. Actually, I tuned into the Glee finale and forgot about them so it was about an hour). I laid the hoops out on wax paper and used the inner circle to prop the painted ones up and keep them from sticking while they were drying.

Time saving tip: You can actually skip the painting step altogether and leave the wood natural or buy the plastic embroidery hoops that come in fun colors like these:

Once the paint is fully dry, insert the smaller, unpainted hoop inside a piece of clothing and put the larger painted circle on top. (I played with the hoops and shirts before I painted to see which size circle worked best with each one.)

Position the design where you want it and then tighten the screw to hold the hoops in place.

Once you have all of your clothes positioned, they’ll look like this:

Then cut the excess fabric away and your art is done!

When I cut the fabric, I left enough excess so I can still use the swatches for a quilt someday and taped the extra back in the meantime. Ta da!

I really love the way they turned out. Not only are all of these fun appliques too adorable to toss but they all hold memories, if not for Gabrielle and Alaina, then for me. I’m going to hang their clothing art collection in their room and may try to frame the photos that coordinate with them to put up too. Once their “wall of fame” is complete, I’ll post photos of the whole shebang. And how fun would this project be for a nursery using the mommy and daddy-to-be’s baby clothes? The possibilities are endless! Oh, and did I mention the cost? Less than $10! I worked with items I already had, but you can get five embroidery hoops for about $5 and crafts paints and brushes for another $5. Not too shabby.

I hope this project inspires you to do something fun with the outfits your little ones have outgrown too. And because I know I’m going to get asked this, here’s where all of the girls’ fun shirts and onesies are from.

#1 & #6: Personalized embroidered baby onesies from Sheryl Sheehan (no longer available)

#2: Gingerbread girl tee (and the coordinating reindeer shirt in the holiday photo) from Bushel and a Peck Boutique

#3: Initial Valentine’s tee from Peanut and Pumpkin Design

#4: Three hearts onesie from The Nook

#5 & #7: Felt initial onesies from Savvy Sarah Designs

Come by and visit A Few of My Favorite Things for more goodies for you and your little ones!

Images: AFOMFT

————————————————

Thanks Danielle! What a great idea to make keepsake art form those adorable outfits you just can’t bear to get rid of. I so wish those onesies from Sheryl Sheehan were not discontinued.

P.S. Don’t forget to sign up for free Tipsy updates via RSS or email.

We have decided to truncate our feed to help protect against stolen content. I apologize for any inconvenience. Please love us anyway. πŸ™‚
« Previous Page
Next Page »

  • Bloglovin
  • Facebook
  • Google+
  • Instagram
  • Pinterest
  • RSS
  • Twitter

Hi there! I'm Michelle. Mother of three little boys and one little princess. Welcome to A Little Tipsy, a place for exploring creativity and sharing inspiration.

Follow on Bloglovin


Visit Michelle Barneck {A Little Tipsy}'s profile on Pinterest.

Tutorials by Category


15 Family Reunion Games

Family Reunion Games Collage

15 Sprinkle Party Ideas

Sprinkle Birthday Party
Creative Commons License

© Copyright 2014 A Little Tipsy · Site Designed by The Fairy Blogmother · Web Hosting by RFE Hosting

This website uses cookies to improve your experience. We'll assume you're ok with this, but you can opt-out if you wish.Accept Read More
Privacy & Cookies Policy